You spent hours designing the perfect flyer on your screen, sent it to print, and got back a reject notice. Or worse, you got a printed flyer with cut-off text, washed-out colours, and blurry images. Learning how to design a flyer for printing means understanding that what works on screen doesn’t always translate to paper. Print specifications like bleed, margins, CMYK colour mode, and proper resolution can make or break your final product.
The good news? You can avoid these costly mistakes by setting up your design correctly from the start. When you understand print-ready requirements and apply them to your layout, you’ll create flyers that look sharp, professional, and exactly as intended. No surprises, no reprints, no wasted budget.
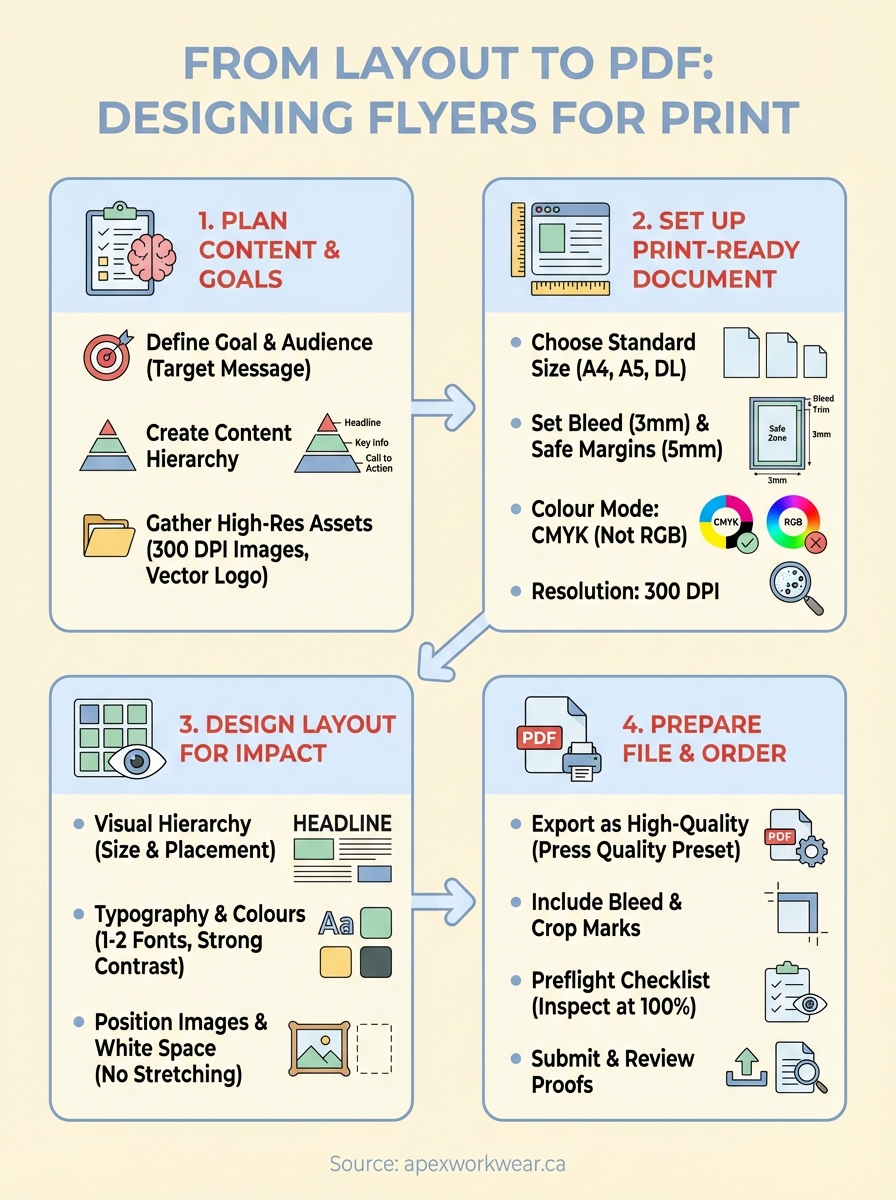
This guide walks you through the complete process, from planning your message and setting up a print-ready document with the right specifications, to designing an impactful layout and exporting a professional PDF. Whether you’re promoting an event, advertising a sale, or building brand awareness, you’ll learn exactly what printers need and how to deliver it.
What you need before you start
Before you learn how to design a flyer for printing, you need to gather the right tools and information. Having everything ready saves time and prevents last-minute scrambles when you’re working with print deadlines. You don’t need expensive software or professional design skills, but you do need clarity on your requirements and access to the right materials.
Design software or online tools
You’ll need design software that can create print-ready PDF files with proper specifications. Free options like Canva work well for basic flyers, while Adobe InDesign or Illustrator offer more control for complex layouts. Microsoft Word or PowerPoint can also produce simple flyers, though they require careful setup to meet print standards. Choose software that allows you to set custom dimensions, export to PDF, and adjust colour modes.
The key is choosing a tool that gives you control over bleed, margins, colour mode, and resolution settings.
Your content and specifications
Gather all the text, images, and design elements you plan to use before you start. Write your headline, body copy, and call to action in a document. Collect high-resolution images (at least 300 DPI) and your logo files. Know your printer’s requirements: standard flyer sizes (A4, A5, DL), whether they need bleed (typically 3mm), and what file format they accept (usually PDF). Having this information upfront prevents design errors:
- Final flyer size and orientation
- Required bleed dimensions
- Safe margin measurements
- Accepted colour mode (CMYK)
- Preferred file format and resolution
- Printing paper stock options
Step 1. Plan your flyer content and goals
The biggest mistake when learning how to design a flyer for printing is starting with the design before you’ve planned the content. Your flyer needs a clear purpose and a targeted message before you touch any design software. This planning stage determines what information you include, how you organize it, and what action you want readers to take. Spending 30 minutes on this step saves hours of redesign later.
Define your objective and audience
Start by answering two questions: what do you want to achieve and who needs to see this? Your flyer might promote an event, advertise a sale, announce a service, or build brand awareness. Each objective requires different content and design choices. A grand opening flyer needs location details and dates prominently displayed, while a product launch flyer focuses on benefits and features.
Your target audience shapes everything from your language to your visuals. You write differently for corporate clients than you do for students. Consider where your audience will encounter the flyer (handed out on the street, displayed on a bulletin board, mailed to homes) because this affects your font sizes and design complexity. Someone walking past a posted flyer needs larger text and bolder graphics than someone holding it in their hands.
Define your single most important message before you write anything else.
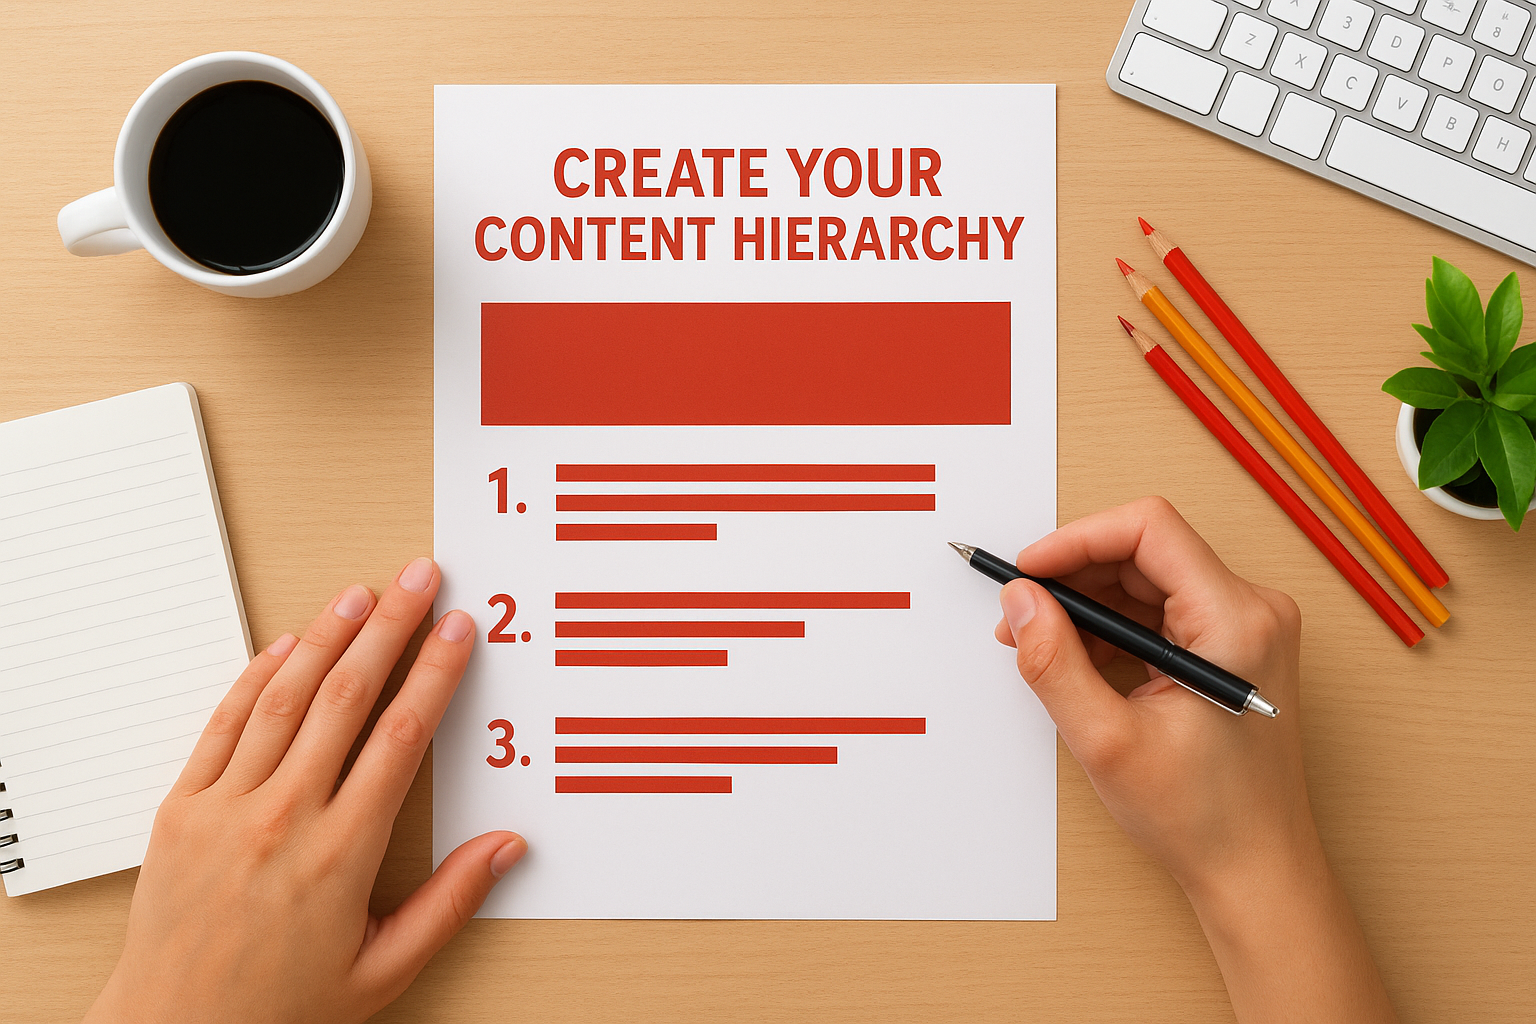
Create your content hierarchy
List every piece of information your flyer needs, then rank it by importance. Your headline delivers the main message in 5 to 10 words. Supporting text explains details in 50 to 100 words maximum. Your call to action tells readers exactly what to do next (visit a website, call a number, attend an event, scan a QR code).
Structure your content using this template:
Priority 1 (Largest, Most Visible):
- Headline or main offer
- Eye-catching visual
Priority 2 (Secondary Focus):
- Key benefits or details
- Date, time, location (if relevant)
Priority 3 (Supporting Information):
- Additional details
- Contact information
- Social proof or credentials
Priority 4 (Essential but Small):
- Logo and branding
- Fine print or terms
- Call to action
This hierarchy guides your design layout decisions in the next steps. You’ll know exactly which elements need prominence and space, and which can sit in smaller text areas.
Step 2. Set up a print ready document
Setting up your document correctly is the most critical technical step when you learn how to design a flyer for printing. You need to configure your canvas with exact print specifications before you add any design elements. Getting these settings wrong means your printer will reject your file or you’ll receive flyers with cut-off edges, incorrect colours, or pixelated images. Most design software lets you adjust these settings at the start, and changing them later can break your layout.
Choose your document size and orientation
Standard flyer sizes make printing more affordable because printers stock these paper dimensions. A4 (210mm x 297mm) works for detailed information flyers, A5 (148mm x 210mm) suits handouts and bulletin boards, and DL (99mm x 210mm) fits standard envelopes perfectly. You can also use custom sizes, but confirm your printer supports them before designing. Select portrait orientation for most text-heavy flyers and landscape orientation when you need wide visuals or multiple columns.
Create your document at the final printed size plus bleed (explained in the next section). A standard A5 flyer with 3mm bleed becomes 154mm x 216mm in your design file. Most design software has preset templates for common flyer sizes that include bleed automatically.
Set up bleed and safe margins
Printers cut stacks of paper after printing, and these cuts vary slightly with each sheet. Bleed prevents white edges by extending your design 3mm beyond the final trim size on all sides. Your background colours, images, and design elements must reach this bleed area. Professional printers require bleed on all full-colour flyers to guarantee edge-to-edge printing without gaps.
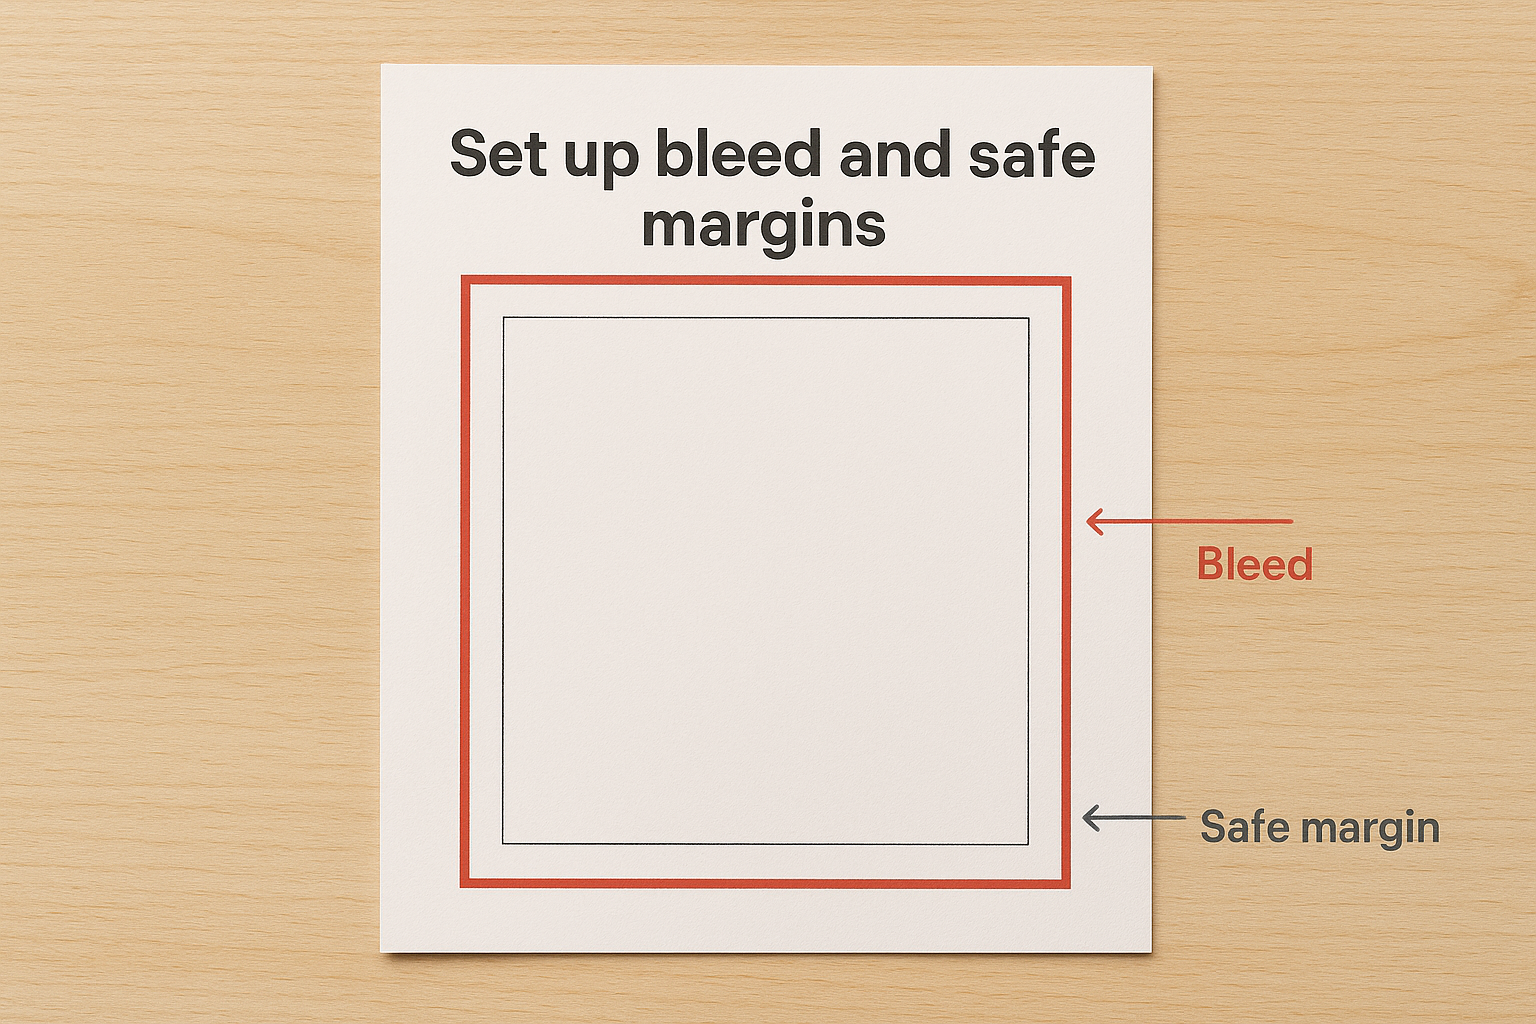
Safe margins (also called safe zones) protect your important content from being trimmed. Keep all text, logos, and critical elements at least 5mm inside the final trim line. This creates a 5mm buffer zone around your entire flyer where nothing important appears.
Your design area includes three zones: the bleed area (outermost), the trim line (where cutting happens), and the safe margin (innermost protection zone).
Set these specifications in your document:
| Setting | Measurement | Purpose |
|---|---|---|
| Bleed | 3mm all sides | Prevents white edges after cutting |
| Safe margin | 5mm from trim | Protects text from being cut off |
| Total design area | Final size + 6mm (width and height) | Accounts for bleed on all sides |
Configure colour mode and resolution
Computer screens display colours using RGB (Red, Green, Blue) light, but printers use CMYK (Cyan, Magenta, Yellow, Black) ink. You must design in CMYK mode from the start to see accurate colour representation. Converting RGB to CMYK later often shifts bright colours to duller tones, particularly vibrant blues and greens. Check your software’s colour settings and switch from RGB to CMYK before placing any images or choosing colours.
Set your document resolution to 300 DPI (dots per inch) for crisp text and sharp images. Lower resolutions like 72 DPI or 150 DPI work for screens but produce blurry, pixelated prints. Every image you import must also be 300 DPI or higher at its final printed size. You can check image resolution in your design software’s image properties panel.
Step 3. Design the layout for impact
Now that you have a print-ready document with correct specifications, you can focus on the visual design. This step transforms your content hierarchy into a compelling layout that catches attention and guides readers through your message. Your design choices directly affect whether someone stops to read your flyer or walks past it. You need to balance bold elements that grab attention with clean organisation that makes information easy to absorb.
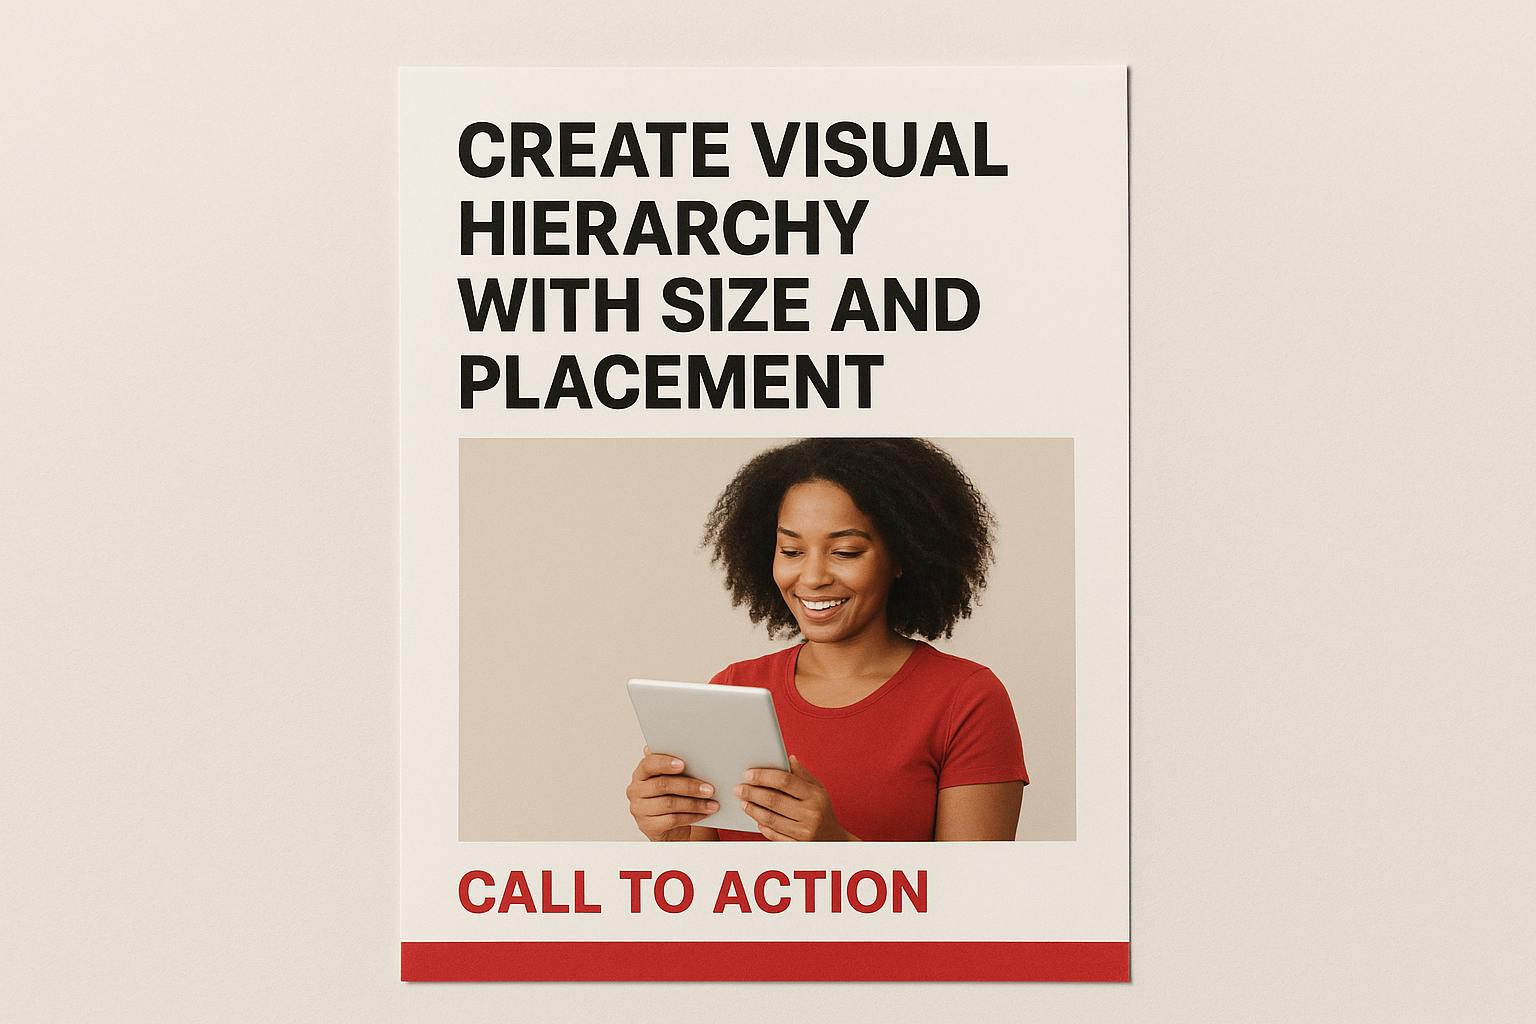
Create visual hierarchy with size and placement
Place your most important element (usually your headline) in the top third of your flyer where eyes naturally land first. Make this headline 2 to 3 times larger than your body text. Position your key visual (product photo, event image, or brand graphic) near the headline to create an immediate focal point. Your call to action belongs at the bottom right where readers finish scanning, or centre-bottom for maximum visibility.
Use size differences to show importance. Your headline might be 48pt, subheadings 24pt, body text 11-12pt, and contact details 9-10pt. This progressive sizing guides readers through your content naturally. Left-align text for easy reading, centre-align headlines for impact, and avoid full justification which creates awkward spacing in short text blocks.
Design your layout so someone can grasp the main message in 3 seconds while standing 2 metres away.
Structure your content in clear sections:
Top Section (Attention):
- Bold headline (48-72pt)
- Hero image or graphic
- Brief subheading if needed
Middle Section (Information):
- 3-5 bullet points or short paragraphs
- Supporting visuals or icons
- Benefits or key details (11-14pt)
Bottom Section (Action):
- Clear call to action
- Contact details (phone, website, QR code)
- Logo and branding
Select typography and colours
Choose one or two fonts maximum for your entire flyer. Pair a bold sans-serif font (Arial, Helvetica, Montserrat) for headlines with a readable serif or sans-serif (Georgia, Open Sans) for body text. Avoid decorative fonts that reduce legibility or look unprofessional. Your text must remain sharp at 300 DPI resolution, so test smaller font sizes before committing.
Pick a colour palette of 3 to 4 colours that work in CMYK mode. Use your brand colours if you have them, or select colours that match your message (red for urgency, blue for trust, green for health). Apply the 60-30-10 rule: 60% dominant colour (often white or light background), 30% secondary colour, 10% accent colour for highlights and calls to action. Check that your text has strong contrast against backgrounds (dark text on light backgrounds, light text on dark backgrounds).
Position images and branding elements
Place high-resolution images (300 DPI minimum) in areas that support your message without covering important text. Full-bleed background images work well but require careful text placement and contrast adjustments. Keep images within the safe margin unless they extend to the bleed area. Resize images within your design software rather than stretching them, which distorts quality and resolution.
Your logo should appear consistently in one location (typically top left, top centre, or bottom right) at a size that’s visible but not overwhelming. Include it once per flyer unless your brand recognition requires repetition. Add adequate white space around text blocks, images, and margins. This negative space prevents your flyer from looking cluttered and improves readability. You’ll achieve better results with fewer elements arranged cleanly than cramming every available space with content.
Step 4. Prepare your file and order printing
Your design is complete, but you still need to export it correctly and submit it to your printer. This final technical step when learning how to design a flyer for printing requires attention to detail. A properly prepared file ensures your printer accepts it immediately and produces exactly what you designed. Skipping these checks risks delays, rejection, or expensive reprints.
Export your design as a PDF
Save your flyer as a high-quality PDF with all fonts embedded and images at full resolution. In most design software, select "Export as PDF" or "Save as PDF" and choose the press quality or print production preset. This setting maintains 300 DPI resolution and includes your bleed and crop marks. Avoid using "smallest file size" or "web quality" presets, which compress images and reduce print quality.
Name your file clearly with the product type, size, and date (FlierA5_Bleed_2026-01-10.pdf). This helps your printer identify your order quickly and prevents confusion if you submit multiple versions.
Check your file before sending
Run through this preflight checklist before uploading your PDF to your printer:
Critical Checks:
- All text is within safe margins (5mm from trim)
- Background extends to bleed edges (3mm beyond trim)
- All images are 300 DPI minimum
- Colour mode is CMYK (not RGB)
- Fonts are embedded or converted to outlines
- PDF includes crop marks and bleed
Open your PDF in a PDF reader and zoom to 100% to inspect text sharpness and image quality. Check that no content appears cut off at the edges.
Submit your order and review proofs
Upload your PDF to your printer’s website or send it via email as requested. Specify your quantity, paper stock, and finish (glossy or matte) when ordering. Most Canadian printers like Apex Workwear provide a digital proof within 24 hours showing exactly how your flyer will print. Review this proof carefully for any colour shifts, alignment issues, or unexpected changes before approving production.
Bring your flyer to life
You now know how to design a flyer for printing with all the technical specifications that prevent costly mistakes. From setting up your document with proper bleed and margins to exporting a high-quality PDF, each step builds toward a professional result that matches your on-screen design.
The difference between a rejected file and a successful print run comes down to following these specifications exactly. Your printer needs CMYK colours, 300 DPI resolution, and properly positioned content within safe margins. When you deliver a print-ready file, you save time, avoid reprints, and get flyers that look exactly as you intended.
Ready to print your flyers? Apex Workwear offers expert guidance on print specifications, free design reviews, and fast turnaround on flyer orders. Get your custom flyers printed professionally with support every step of the way.