If you’ve ever sent a design file to a printer only to get back something that looks nothing like what you expected, you already know why learning how to prepare artwork for screen printing matters. Muddy colours, blurry edges, and unexpected colour shifts almost always trace back to file preparation issues, not the printing itself.
The good news: most of these problems are preventable. With the right file format, proper colour separations, and correctly sized artwork, your designs will translate cleanly from screen to fabric. Whether you’re a graphic designer preparing files for a client or a small business owner getting custom uniforms made, this checklist covers every step you need to get it right.
At Apex Workwear, we review artwork for custom apparel orders every day across the GTA and beyond. This guide is built from the exact feedback and fixes we walk customers through before production, so you can skip the back-and-forth and submit print-ready files from the start.
What your screen printer needs upfront
Before you open any design software, understand what your printer is actually looking for. Every screen printing shop runs a slightly different workflow, but the core file requirements stay consistent across the board. Getting these right before you submit means fewer revision rounds, faster approval, and a cleaner final print. Knowing what to prepare also helps you understand why each step in this artwork preparation process matters.
The files and formats your printer expects
Most screen printers want vector source files, not flattened exports or low-resolution JPEGs. The two formats you’ll see requested most often are .ai (Adobe Illustrator) and .eps. Both preserve scalable paths, editable text, and colour data that rasterised files destroy the moment you flatten or export them. If you’re working in Adobe Illustrator, save your working file as an .ai and include a high-resolution PDF export alongside it so the printer can open a preview without needing your software licence.
If you can only provide a raster file, supply a PNG or TIFF at a minimum of 300 DPI at the actual print size, not at a scaled-down version you plan to enlarge later.
A quick reference for accepted formats across most shops:
| File Type | Best Use | Minimum Requirement |
|---|---|---|
.ai / .eps | Vector artwork, logos, text | Preferred for all jobs |
.pdf | Proofing, presentation | Vector-based PDF only |
.png | Raster images, photos | 300 DPI at print size |
.tiff | High-detail raster | 300 DPI at print size |
.jpg | Not recommended | Avoid for print submissions |
Information your printer needs beyond the file
Your file alone does not tell the full story. Include a brief print spec sheet with every submission that covers the garment colour, the print location (chest, back, sleeve), the approximate print dimensions, and the number of ink colours you expect to use. This removes guesswork from the quoting and colour separation stage, which is where most miscommunications happen.
Also confirm whether your design uses Pantone Matching System (PMS) colours or if you’re happy with the printer matching by eye. Calling out specific PMS codes in your spec sheet gives the separator a fixed target and helps you to avoid colour drift between production runs.
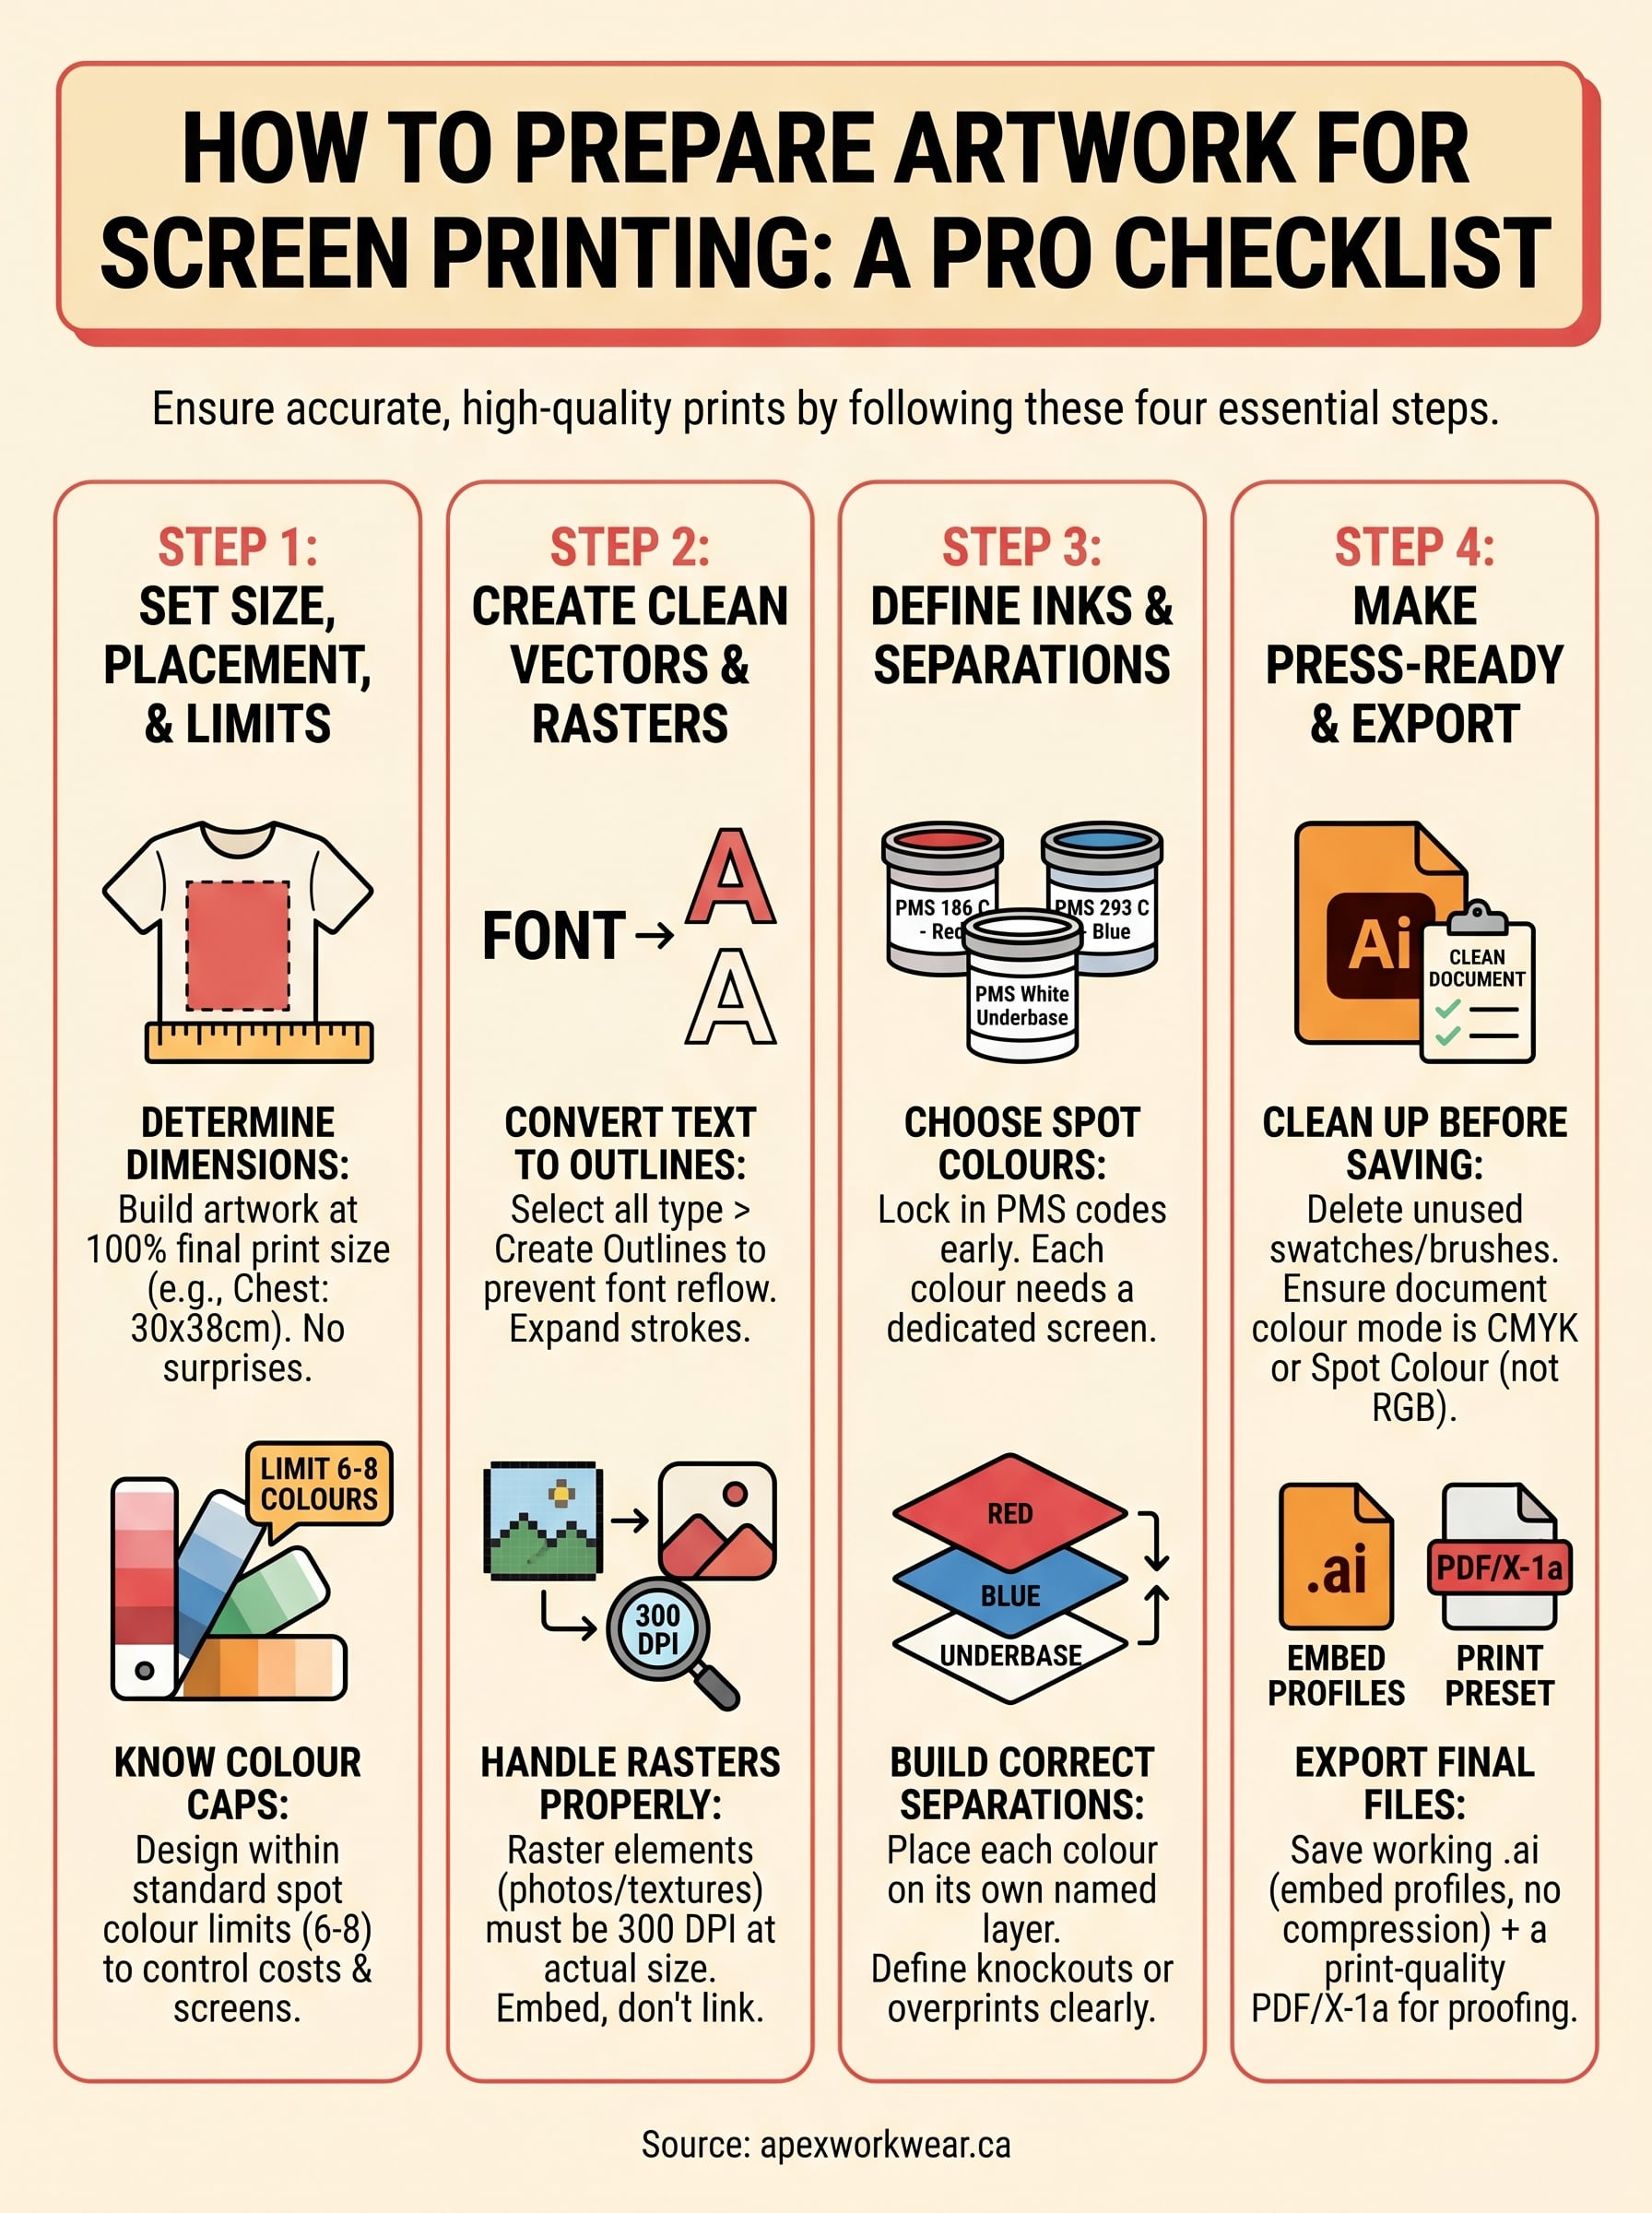
Step 1. Set size, placement, and limits
One of the most common mistakes people make when figuring out how to prepare artwork for screen printing is designing at the wrong scale. Setting your canvas to the exact print size before you start drawing means you can judge your design accurately and avoid resizing surprises later. Every measurement decision you make here feeds directly into the colour separation and film output stage.
Determine your print dimensions
Standard print areas vary by garment type and location. For a full front chest print, the usable area is typically 30 cm wide by 38 cm tall (roughly 12" x 15"). Sleeve prints run much smaller, around 8 cm x 8 cm. Set your artboard in Illustrator to match these dimensions exactly at the start of your project, not after you finish designing.
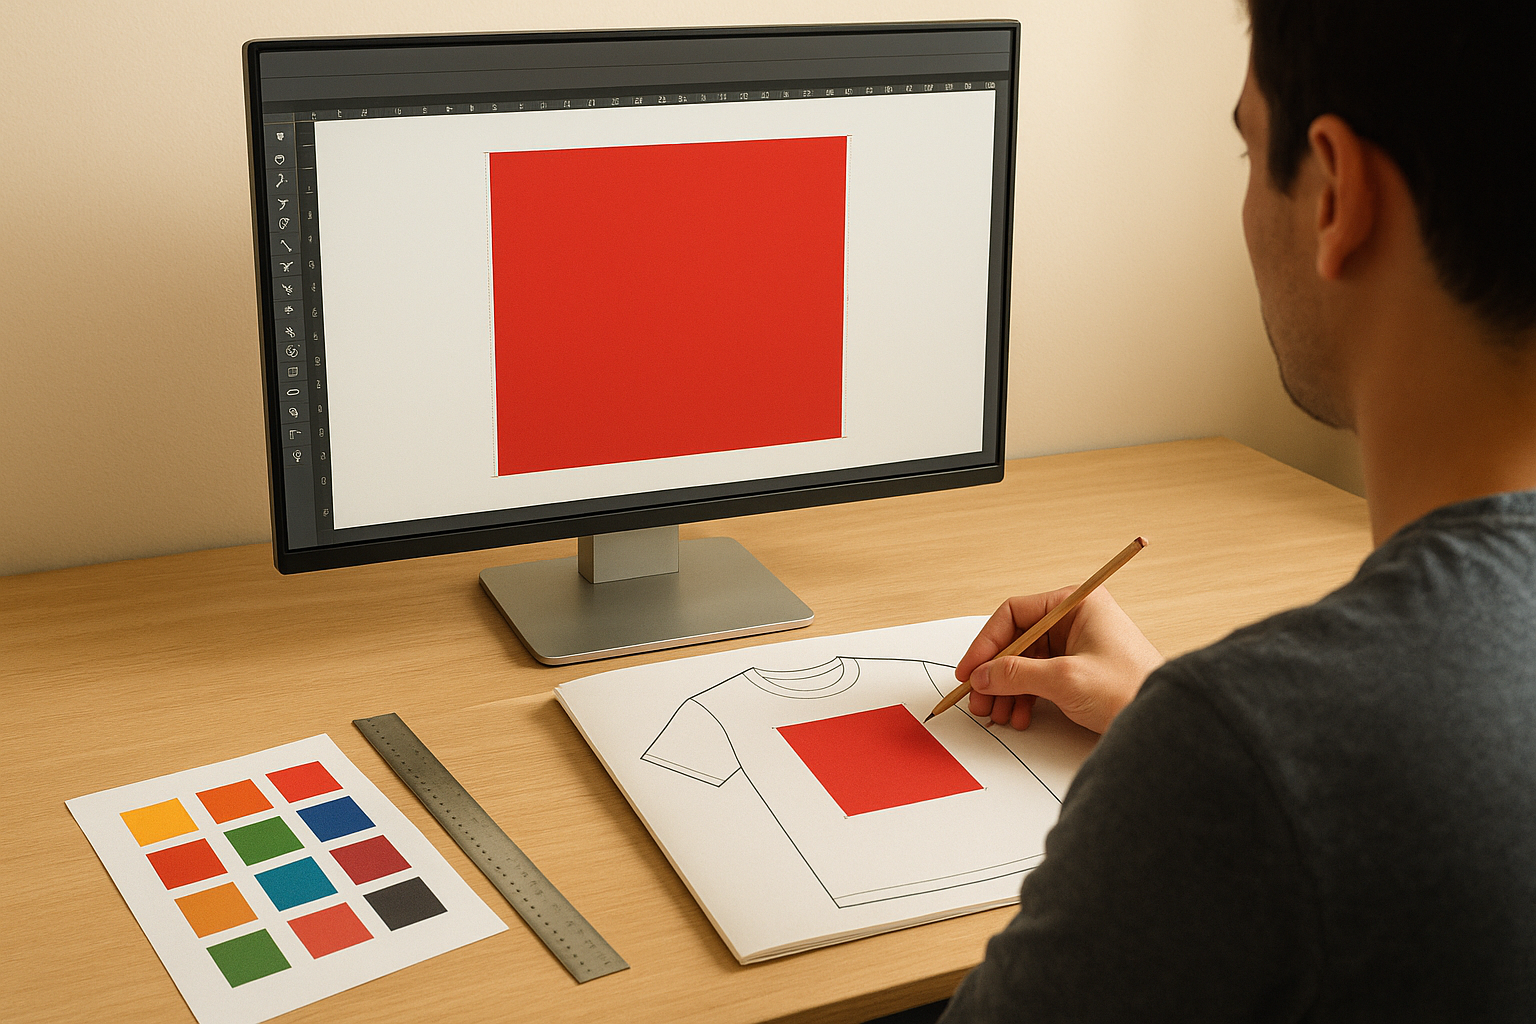
Build your artwork at 100% of the final print size so what you see on screen is exactly what lands on the garment.
Know your hard limits per colour count
Screen printing charges per colour, so your artwork dimensions also affect your overall budget. Most shops cap standard jobs at six to eight spot colours. Beyond that, you are looking at additional screens, higher setup fees, and longer production times.
Keep your design within a fixed colour limit from the outset rather than stripping colours out at the end, which often means rebuilding sections of the artwork from scratch. Check with your printer for their maximum print area per garment style before you finalise anything, since fitted cuts and performance tees often have smaller printable zones than standard cotton shirts.
Step 2. Create clean vector art and rasters
Clean artwork is the foundation of any successful screen print job. When you understand how to prepare artwork for screen printing correctly, vector paths and properly handled raster elements form the two pillars your entire file rests on. Sloppy anchor points, live text, and low-resolution placed images are the three things most likely to delay your job at the separator stage.
Convert all text to outlines
Live text is a silent problem in screen printing files. If your printer does not have the exact font you used installed on their system, your type will reflow, substitute, or disappear entirely. Fix this by selecting all type in Adobe Illustrator and going to Type > Create Outlines before you save your final file. Every letter becomes a locked vector shape with no font dependency.
Always keep a backup copy of your original file with live text intact before outlining, so you can return and edit if revisions come back.
Run Object > Expand on any applied strokes or effects immediately after outlining. This converts decorative elements into solid, predictable paths the separator can work with directly.
Handle raster elements correctly
Photographs and detailed textures that cannot be vectorised must meet a strict 300 DPI minimum at the actual final print size. Place your raster image in Illustrator via File > Place rather than copying and pasting, which can strip embedded colour profile data. Set the colour mode of your raster to Greyscale or Spot Colour before linking, and flatten all layers inside the raster file before placement to remove transparency conflicts that cause unexpected output at the film stage.
Step 3. Define inks, spot colours, and separations
Colour decisions made late in the design process cost you time and money. When you understand how to prepare artwork for screen printing correctly, you lock in your ink colours early and build your file around them from the start. Every change to your colour choices after separation means rebuilding screens and delaying your job.
Choose your ink colours before separating
Every colour in your design requires a dedicated screen, which means your colour count directly sets your production cost. Most standard jobs use Pantone Spot Colours (PMS), since each PMS code maps to a specific mixed ink your printer can match precisely across multiple runs. Confirm your final colour choices with your printer before you begin separating.
Lock in PMS codes before separation starts, not after, so there is no room for colour interpretation errors on press.
| Ink Type | Best For | Key Limitation |
|---|---|---|
| Spot (PMS) | Logos, flat colour designs | One screen per colour |
| Simulated process | Photo-realistic artwork | Requires halftone dots |
| Discharge | Soft hand feel on darks | Limited colour range |
Build your colour separations correctly
Each colour must sit on its own named layer in Illustrator, labelled with the ink colour it represents. Overlapping areas need a clear knockout or overprint decision before you finalise anything. Knockouts remove the colour underneath so inks do not stack; overprints let two inks mix on press.
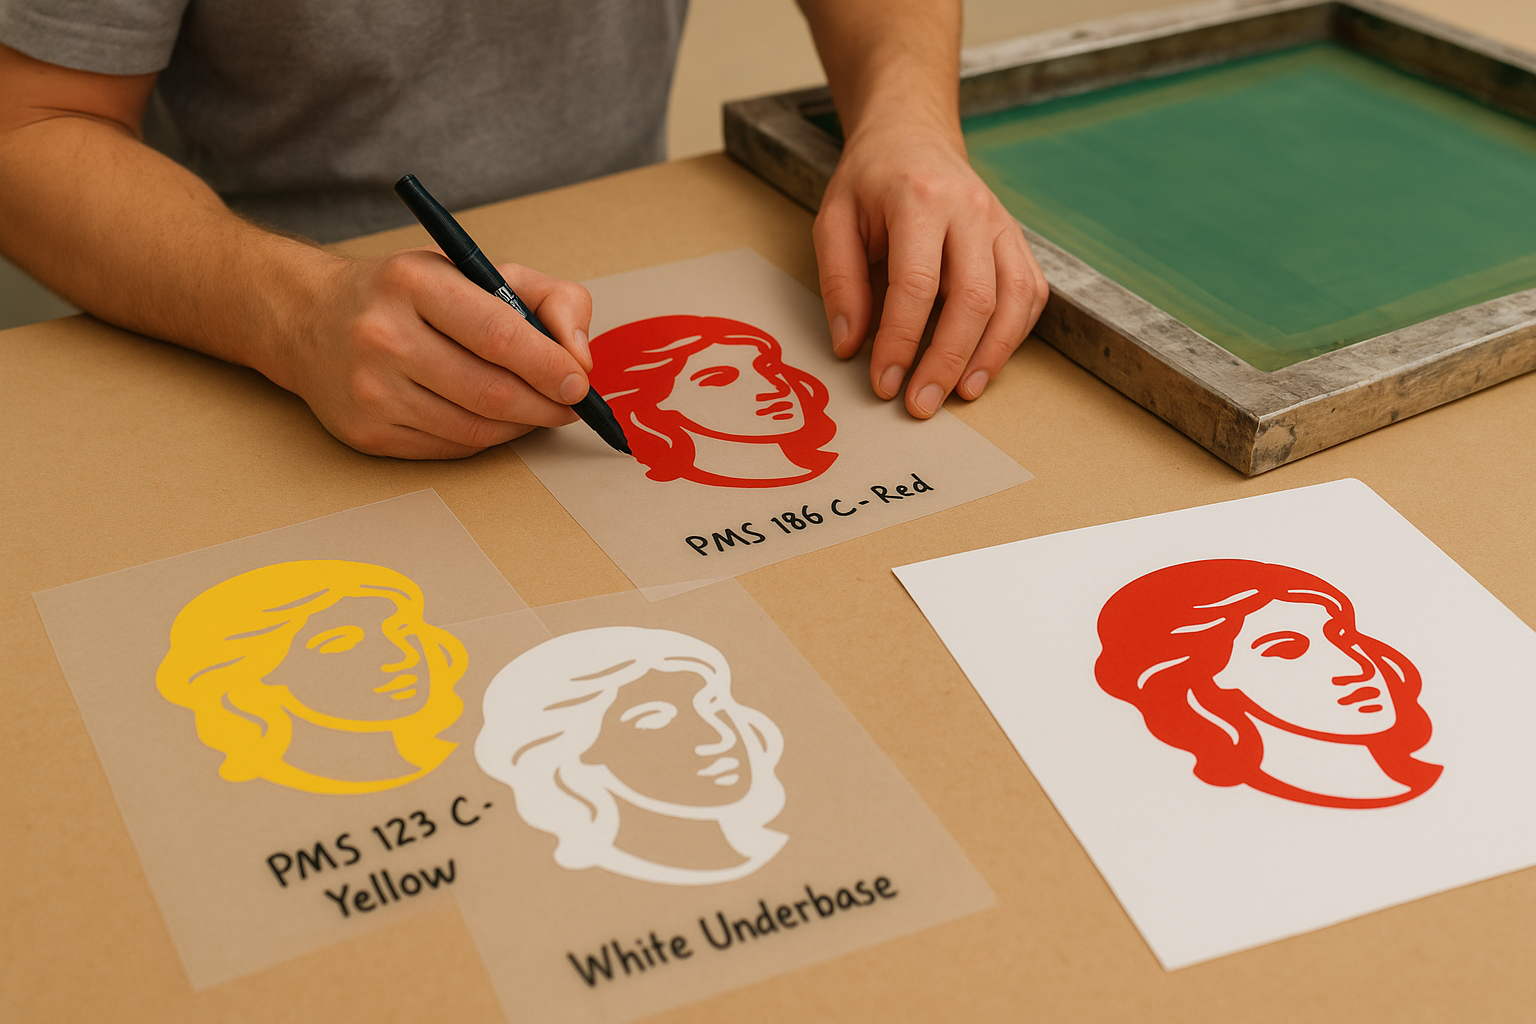
Name your layers using this pattern to keep your file readable by any separator:
- Layer name: [PMS code] + [colour description], for example "PMS 186 C – Red"
- Add a separate "White Underbase" layer for any design printing on a dark garment
Step 4. Make the file press-ready and export
The final stage of learning how to prepare artwork for screen printing is also the stage people rush most. A well-built file can still fail at export if you skip the cleanup and document settings checks that separate a clean submission from a problem file. Treating this step as its own discipline, rather than an afterthought, keeps your job moving without unexpected delays.
Clean up your document before saving
Before you export anything, run a final document audit in Adobe Illustrator. Delete all unused swatches, brushes, and symbols from their panels by selecting each panel’s menu and choosing "Delete Unused." This removes hidden colour data that can confuse a separator’s output software. Also confirm your document colour mode is set to Spot Colour or CMYK, not RGB, by checking File > Document Colour Mode.
Submitting an RGB file to a screen printer is one of the most common errors that delays production, since RGB values cannot map directly to physical ink.
Export your final files correctly
Save your layered working file as an .ai with "Embed ICC Profiles" checked and "Use Compression" unchecked. Then export a print-quality PDF using the "PDF/X-1a:2001" preset under File > Save a Copy, which flattens transparency and embeds all fonts and colour profiles your printer needs to output film accurately.
Use this checklist before every submission:
- Document colour mode: CMYK or Spot Colour
- All text converted to outlines
- All linked images embedded at 300 DPI at actual print size
- Unused swatches and brushes deleted
- Artboard sized to exact print dimensions
- Saved as
.aiplus a PDF/X-1a export
Ready to send it to print
You now have everything you need to know about how to prepare artwork for screen printing without sending your printer on a revision loop. Every step in this checklist builds on the last: correct dimensions feed clean separations, clean separations feed accurate film output, and accurate film output means your finished garments match what you designed.
Run through the final export checklist one more time before you hit send. Confirm your document colour mode, verify all text is outlined, check that every linked image is embedded at 300 DPI at actual print size, and make sure your layers are labelled clearly by PMS code and ink description.
If you want a team that reviews your artwork before production and flags any issues before they reach the press, get a free quote from Apex Workwear and let us handle the technical side alongside you.