A gate fold brochure opens like a gate. Two outer panels fold inward to meet at the centre, covering the middle panel. When someone opens it, they reveal a large central image or message. This folding style creates a dramatic reveal moment that captures attention. Businesses use gate fold brochures for product launches, real estate listings, event promotions, and premium presentations where they want to make an impact.
This guide walks you through everything you need to know about ordering gate fold brochure printing in Canada. You’ll learn how to plan your design for maximum effect, which sizes and layouts work best for different purposes, what pricing looks like based on quantity and paper choices, and what turnaround times you can expect. Whether you’re creating your first gate fold brochure or comparing printing options, you’ll find the details you need to make smart decisions about paper stock, finishes, quantities, and delivery. By the end, you’ll know exactly how to get professional gate fold brochures printed and shipped to your door.
Why gate fold brochure printing matters
Gate fold brochure printing gives you a marketing tool that stands out from standard tri-folds and bi-folds. The format creates a reveal moment that draws readers in and holds their attention longer than conventional brochures. When someone unfolds your gate fold brochure, they experience a sense of discovery that makes your message more memorable. This psychological effect works because the folding mechanism creates anticipation, and the large central panel delivers a satisfying payoff.
The impact of visual reveal
Your central panel becomes a canvas for impactful imagery or messaging that traditional brochures can’t match. Real estate agents use this space to showcase property photos at full width, creating an immersive view that helps potential buyers visualize themselves in the space. Event planners display venue layouts or speaker lineups across the entire centre spread, giving attendees a complete picture at a glance. The gate fold structure naturally guides the reader’s eye from the outer panels to the dramatic centre reveal, creating a controlled storytelling flow that you direct.

Gate fold brochures turn passive reading into an interactive experience that increases engagement and recall.
When gate fold makes sense
You should choose gate fold brochure printing when your message demands impact rather than quick scanning. Product launches benefit from the premium feel and visual drama. Corporate presentations gain credibility through the substantial, high-quality format. Fundraising campaigns use gate fold brochures to unfold a compelling story that connects donors to the cause. The format costs more than basic tri-folds, so reserve it for situations where you need to impress decision-makers, generate leads from qualified prospects, or create materials that recipients will keep and share.
How to plan your gate fold brochure
Planning your gate fold brochure starts with understanding how the fold structure shapes your reader’s experience. You need to think about what information goes where, how the reveal unfolds, and what paper choices support your message. Smart planning at this stage saves you from costly reprints and ensures your final product delivers the impact you want.
Define your core message first
Your central panel holds the most important message because it’s what readers see when they open the brochure completely. Decide what single image, headline, or call to action deserves that prime real estate. A real estate agent might place a stunning property photo there, while a corporate team might feature their main product with a bold tagline. The outer panels that fold inward serve as teasers or supporting information. Think of them as the setup for your central reveal. Your front cover (when the brochure is closed) needs to intrigue enough that people want to open it.
Map content to the fold structure
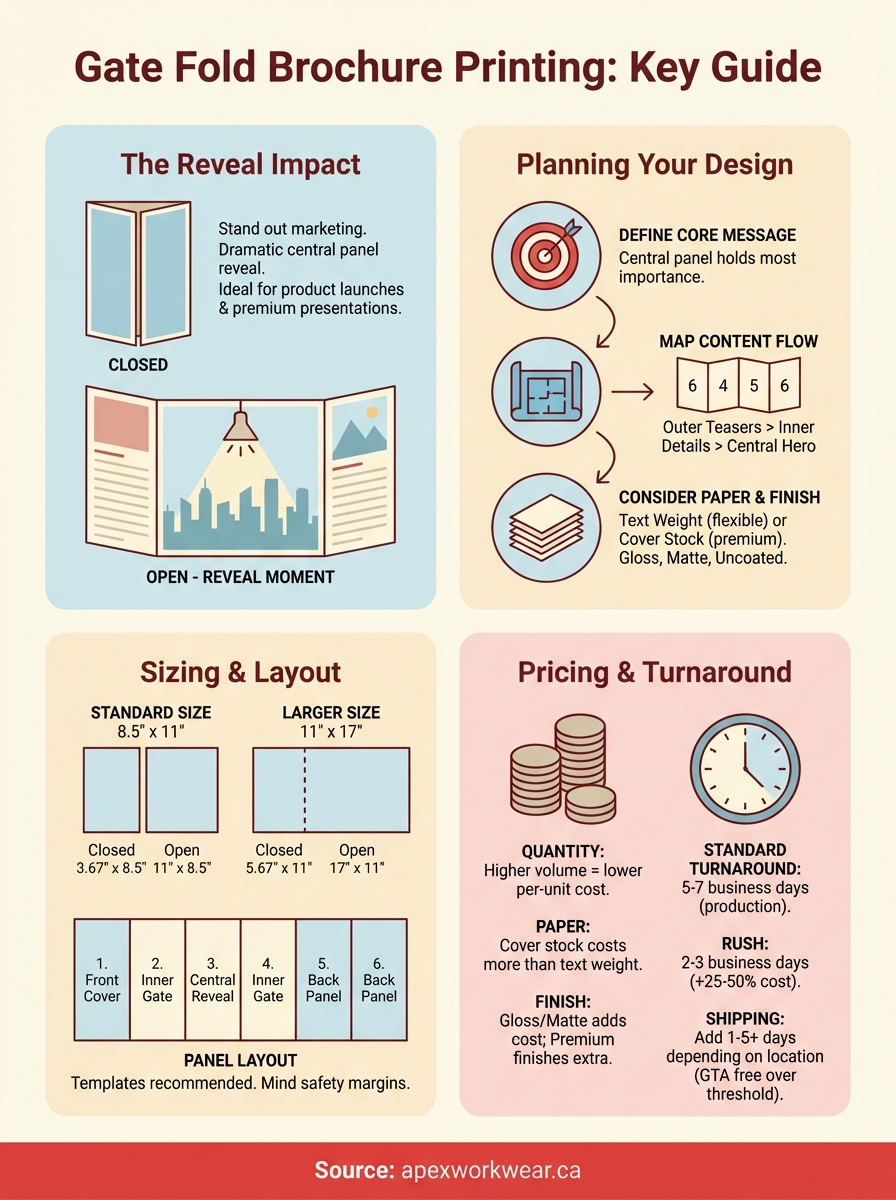
Gate fold brochures have six distinct panels when you count both sides of the paper. The front cover and back cover appear when closed. The two inner gate panels fold in to meet at the centre. The central panel becomes visible when opened. The inside back (opposite the central panel) provides additional space for details. You should sketch out your content flow before you start designing. Put testimonials or benefits on the inner gate panels. Reserve the central panel for your hero image or primary message. Use the inside back for contact information, pricing tables, or next steps.
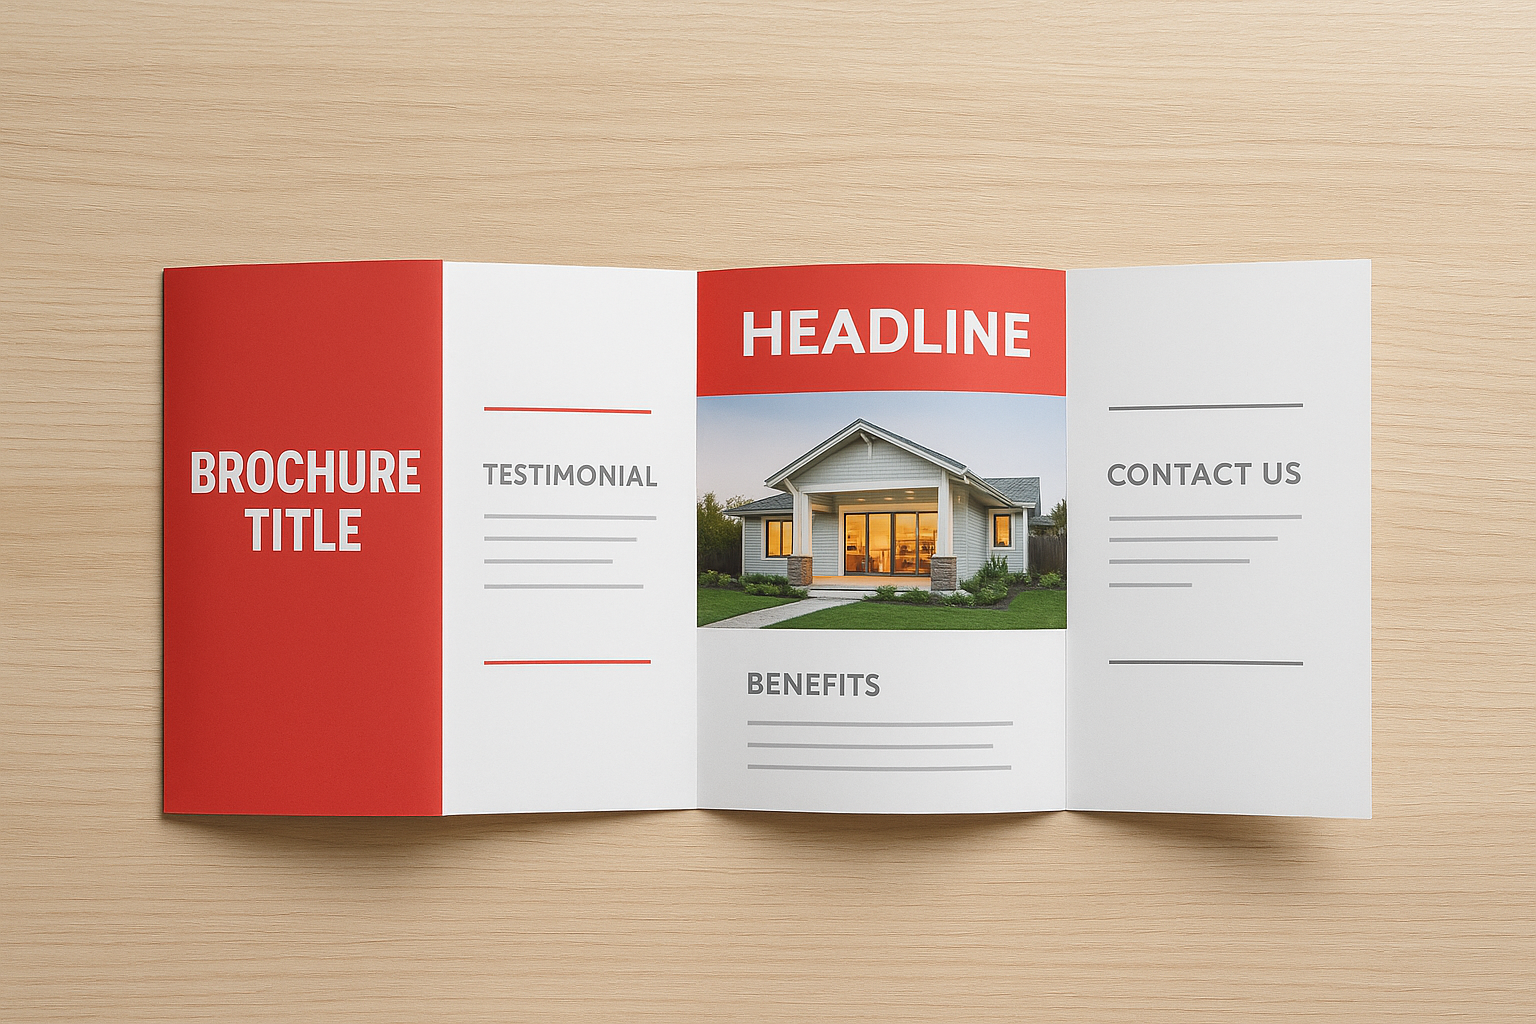
Map your strongest visual or message to the central panel where it creates maximum impact when revealed.
Professional designers recommend creating a content hierarchy that guides readers naturally through your message. Start with attention-grabbing elements on the outer panels, build interest as they unfold the gates, then deliver your compelling centre message. Your back panel should include clear contact details and a call to action since some readers flip brochures over before opening them.
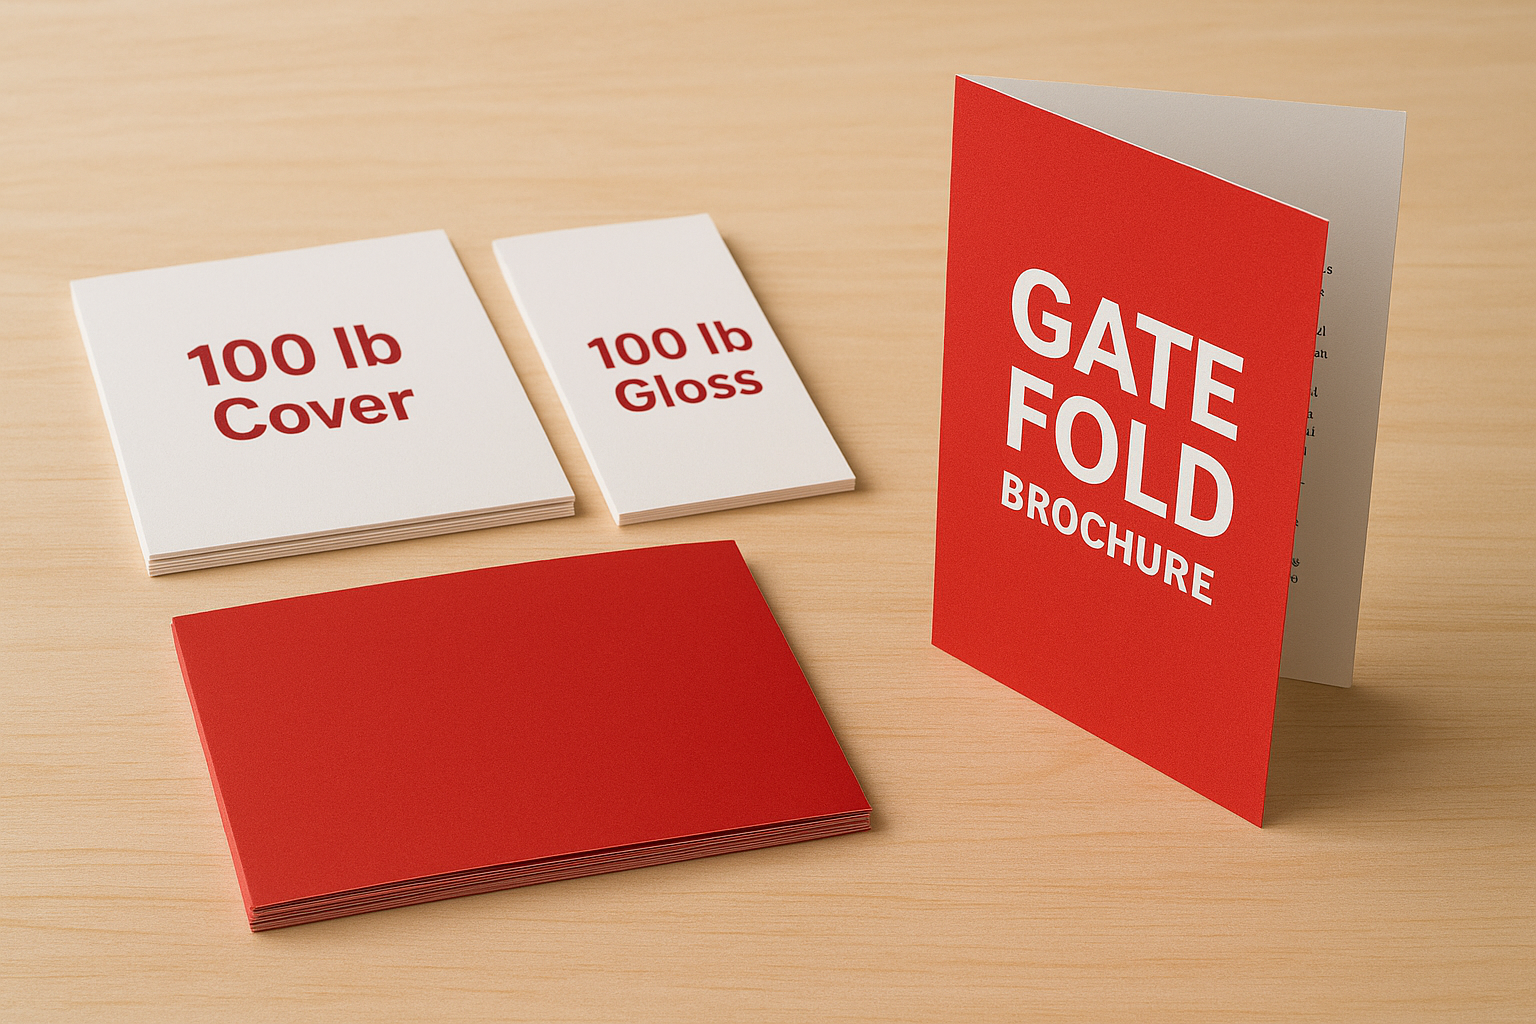
Consider paper and finish choices
Paper weight affects how your gate fold brochure printing project feels in someone’s hand. Text weight paper (60 lb to 80 lb) folds cleanly and works well for gate folds because it’s flexible enough to open and close repeatedly without cracking. Heavier cover stock creates a more premium feel but requires scoring to fold properly. The finish you choose changes how your images and text appear. Gloss coating makes colours pop and photographs look vibrant. Matte finishes reduce glare and feel more sophisticated for corporate materials. Uncoated stock gives a natural, organic feel that works for environmental or artisan brands.
Gate fold brochure sizes and layouts
Gate fold brochure sizes depend on how much space you need for your content and what fits your distribution method. Standard dimensions work for most projects because they’re cost-effective and fit into common envelopes or display racks. Custom sizes give you more creative freedom but typically cost more and may require special handling. You need to think about both the closed size (what people see before opening) and the open size (the full spread when unfolded).
Standard sizes for gate fold brochures
The most common gate fold brochure size starts with an 8.5" x 11" sheet that creates a closed dimension of approximately 3.67" x 8.5". This size fits perfectly in standard #10 business envelopes and works well for mailing or hand distribution. Your central panel measures about 5.5" wide, with each gate panel measuring roughly 2.75" wide. This configuration gives you enough space for impactful imagery without overwhelming readers with information.

Larger 11" x 17" gate fold brochures create a more substantial piece that closes to approximately 5.67" x 11". These work well for real estate listings, event programs, or product catalogues where you need more room for detailed information and multiple images. The central panel on this size measures about 8.5" wide, providing excellent space for dramatic photography or detailed diagrams. You’ll find this size in display racks at trade shows or property open houses.
Closed versus open dimensions
Understanding the relationship between closed and open dimensions helps you plan your layout effectively. When you fold a gate fold brochure, the two outer panels fold inward to meet at the centre, so your closed width equals roughly one-third of your open width. An 8.5" x 11" sheet opens to approximately 11" wide, but the closed brochure measures only 3.67" wide because the gates fold in from both sides.
Your closed dimension determines portability while your open dimension determines impact. A brochure that closes to 4" x 9" slips easily into a jacket pocket or purse, making it ideal for conferences or networking events. The same brochure opens to reveal a 12" wide spread that showcases your product or message at full scale. Calculate your dimensions carefully to ensure the closed size works for your distribution plans.
Panel layout considerations
Gate fold brochure printing requires you to think in terms of six distinct panels when you design for both sides of the paper. The front cover panel (far left when flat) becomes your closed front. The two inner gate panels fold in to meet at the centre. The central panel creates your big reveal. When readers flip the brochure over, they see three more panels on the back.
Design your panels with the fold sequence in mind so content flows naturally as readers open and close your brochure.
Professional printers typically provide templates that show exact panel dimensions including bleed areas and fold lines. These templates account for the slight overlap needed where panels meet and ensure your text stays clear of fold lines. Download templates from your printer before you start designing to avoid content getting cut off or landing awkwardly on a fold. Your safety margins should stay at least 0.125" inside each panel edge to prevent important text or images from disappearing into the fold.
Panel sequence matters for readability. Number your panels mentally from right to left when looking at the flat sheet, since that’s how readers experience the unfolding. Your strongest visual element belongs on the centre panel (panel 3), while supporting information works best on the gate panels (panels 2 and 4). The back panels provide space for detailed specifications, contact information, or calls to action that readers reference after experiencing your main message.
Pricing for gate fold brochure printing
Gate fold brochure printing costs vary based on quantity, paper stock, finishes, and customisation options you choose. Understanding these pricing factors helps you budget accurately and make smart decisions about where to invest your money. Most printers offer quantity discounts that significantly lower your per-unit cost as you order more, so planning your print run carefully saves money in the long term.
Cost factors that affect your quote
Your paper weight choice directly impacts your final price. Standard 60 lb to 80 lb text weight paper costs less than heavier cover stock because it requires less material and folds more easily. A typical 100 lb text paper falls in the mid-range for pricing, while 100 lb cover stock adds 20% to 40% to your base cost. The paper you select should match your distribution method and how long you need the brochures to last.
Finishing options create additional cost layers. Gloss or matte coating adds durability and visual appeal but increases your price by roughly 15% to 25% compared to uncoated stock. Premium finishes like soft-touch coating or spot UV can double your finishing costs but create a memorable tactile experience that justifies the investment for high-value campaigns. Calculate whether the added impact supports your marketing goals before upgrading finishes.
Quantity pricing breakdown
Ordering larger quantities reduces your per-piece cost dramatically because setup fees get distributed across more units. A run of 100 gate fold brochures might cost $3.50 to $5.00 each, while 500 units drop to $1.50 to $2.50 each. Your price continues falling as volume increases, with 1,000 units typically running $0.90 to $1.50 each and 2,500 units reaching $0.60 to $1.00 per brochure.
Order quantities that balance your immediate needs with volume discounts to maximise value without creating excess inventory.
Print what you’ll distribute within six months to avoid design changes making your brochures outdated. Many Canadian printers offer no minimum orders for digital printing, though you’ll pay premium per-unit pricing for very small runs under 50 pieces.
Paper and finish pricing differences
Basic uncoated 70 lb text stock represents your most economical option for gate fold brochure printing, suitable for internal communications or short-term promotions. Mid-range 80 lb gloss text balances cost and quality for most business applications, costing about 20% more than uncoated while delivering vibrant colour reproduction. Premium 100 lb text with matte coating sits at the high end for text weights, adding approximately 40% to your base cost but creating a substantial feel.
Cover stock options start where text weights end. A 100 lb cover with gloss coating costs roughly 50% more than 80 lb text but provides exceptional durability for brochures that get handled repeatedly. Your choice depends on whether you prioritise budget efficiency or premium presentation for your specific marketing objectives.
Turnaround, shipping, and ordering in Canada
Gate fold brochure printing in Canada typically requires 5 to 7 business days for standard production once your printer approves your files. This timeline covers printing, folding, quality checks, and packaging. You need to add shipping time on top of production time to calculate when brochures arrive at your door. Rush services reduce turnaround to 2 to 3 business days but cost 25% to 50% more than standard pricing, so reserve expedited production for urgent campaigns or last-minute events.
Standard production timelines
Most Canadian printers process your order through several production stages that each take specific time. File review and proof approval happen within 24 hours if you submit print-ready files during business hours. Production starts after you approve your proof, with printing taking 1 to 2 days depending on quantity and equipment availability. Folding, trimming, and quality inspection add another day. Your printer then packages your brochures for shipping, which takes a few hours.
Plan for at least one week from file submission to delivery when ordering standard turnaround gate fold brochure printing.
Delays occur when files need corrections or when you request changes after initial proof approval. Submit high-resolution PDFs with proper bleed and fold marks to avoid file issues that push back your timeline. Digital printing typically processes faster than offset printing for quantities under 500 units.
Shipping across Canada
Shipping within the Greater Toronto Area often qualifies for free delivery on orders above minimum thresholds, usually $100 to $200. Your brochures arrive within 1 to 2 business days through local courier services. Orders shipping to other provinces take 3 to 5 business days via standard ground shipping through Canada Post or private carriers. Remote locations add extra delivery time.
Express shipping options cut delivery time to 1 to 2 business days across major Canadian cities but double or triple your shipping costs. Calculate total project timeline by adding production days plus shipping days to ensure your brochures arrive before your distribution deadline.
Ordering process steps
You start by requesting a quote through your printer’s website or by phone, providing details about quantity, size, paper stock, and finishes. Most Canadian printers respond within 24 hours with pricing and turnaround estimates. After accepting the quote, you upload your design files and receive a digital proof showing how your brochure will print. Review this proof carefully for colours, text placement, and alignment before approving production.
Next steps
You now understand how gate fold brochure printing works in Canada, from choosing sizes and paper stocks to calculating costs and planning delivery timelines. Your next move depends on whether you have design files ready or need assistance creating your layout. Most printers provide templates and basic design support to ensure your content prints correctly and looks professional.
Start by determining your quantity requirements and distribution timeline, then request quotes from Canadian printers who offer the paper stocks and finishes you need. Compare turnaround times, shipping options, and total costs including delivery. Apex Workwear provides gate fold brochure printing with expert design guidance, fast turnaround within 5-7 business days, and free shipping on eligible orders in the Greater Toronto Area, making professional marketing materials accessible for your business.