Whether you’re ordering custom t-shirts for your team or promotional gear for an upcoming event, screen printing remains one of the most reliable methods for producing durable, vibrant designs on fabric. But how does the process actually work, and when does it make sense over alternatives like embroidery or direct-to-garment printing?
At Apex Workwear, we produce custom apparel for businesses across Canada, and screen printing is one of the techniques we use most often. Understanding how it works helps you make better decisions about your orders, from colour selection to quantity planning.
This guide breaks down everything you need to know: the step-by-step process, realistic costs, ideal use cases, and how to get started, whether you’re tackling a DIY project or partnering with a professional printer.
Why screen printing matters for custom products
Screen printing delivers consistent quality at a scale that other methods struggle to match. When you need dozens or hundreds of items with the same design, this technique produces uniform results across your entire order. The ink sits on top of the fabric rather than soaking into it, which creates bold, opaque colours that stand out, even on dark materials. For businesses building brand recognition, this consistency means every employee, customer, or event attendee receives gear that looks identical.
Durability that outlasts other printing methods
Your custom apparel needs to survive repeated washing, daily wear, and exposure to sunlight without losing its visual impact. Screen-printed designs bond with the fabric through a curing process that locks the ink in place, making them significantly more wash-resistant than many alternatives. You’ll find that a properly screen-printed t-shirt can endure 50+ wash cycles without noticeable cracking or fading, which matters when you’re investing in uniforms or promotional items meant to last.
Screen printing’s durability makes it the preferred choice for workwear and items that face frequent use.
This longevity directly affects your cost per wear. If you order 100 shirts that fade or peel after a few months, you’ll need to reorder sooner than expected. Screen-printed items maintain their appearance longer, which means you get more value from your initial investment.
Cost efficiency for bulk orders
The setup process for screen printing involves creating screens for each colour in your design, which requires upfront time and materials. However, once those screens are ready, printing additional items becomes remarkably fast and affordable. If you’re ordering 50 or more pieces, the per-unit cost drops significantly compared to digital printing methods that charge similar rates regardless of quantity.
Small businesses often find that screen printing offers the best price-to-quality ratio when ordering team uniforms, event giveaways, or merchandise for resale. The savings become more pronounced as your order size increases. For example, printing 100 shirts might cost you $8 per item, while 500 shirts could drop to $5 per item with the same design quality.
Vibrant colours that resist fading
Screen printing uses specialised inks formulated to maintain their intensity through years of use. Unlike some digital methods that create thin layers of colour, screen-printed designs build up substantial ink deposits on the fabric surface. This thickness produces colours that appear rich and saturated, particularly on cotton and cotton-blend materials.
You can choose from various ink types depending on your needs. Plastisol inks create a slightly raised texture and work well for bold graphics, while water-based inks absorb into the fabric for a softer feel. Both options deliver excellent colour retention that keeps your designs looking fresh. Canadian businesses operating in varied climates particularly appreciate how screen-printed items maintain their appearance through freeze-thaw cycles and humid summers without deteriorating.
The technique also handles Pantone colour matching with precision, which matters when you need your branded materials to align with your visual identity. If your logo uses specific corporate colours, screen printing can reproduce those shades accurately across all your custom products.
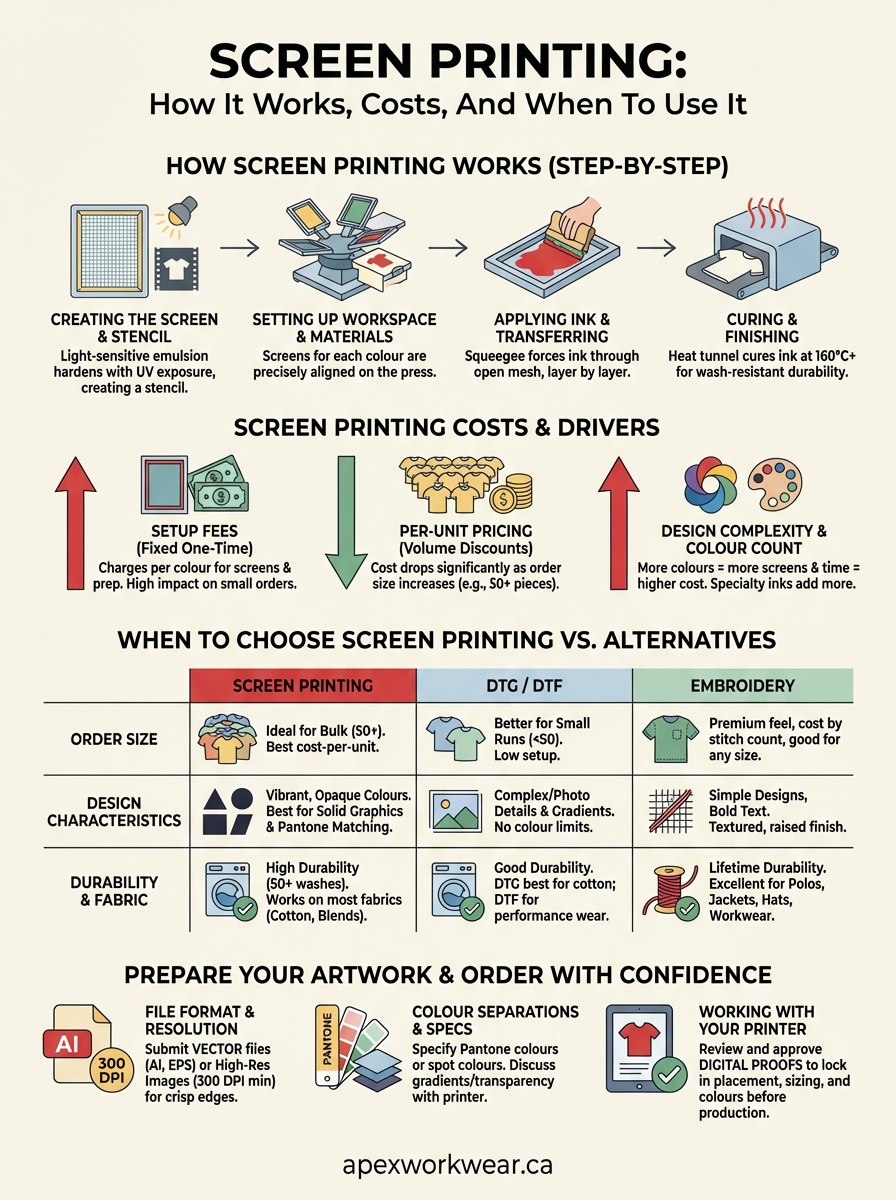
How screen printing works, step by step
Screen printing transforms your digital design into a physical product through a multi-stage process that combines preparation, application, and heat treatment. Understanding each phase helps you appreciate why certain factors, like colour count and order quantity, affect your pricing and timelines. The method relies on pushing ink through a mesh screen onto fabric, with blocked areas preventing ink from passing through to create your design.
Creating the screen and stencil
Your printer starts by coating a fine mesh screen with a light-sensitive emulsion that hardens when exposed to UV light. They then print your design onto a transparent film and place it on top of the coated screen. After exposing the screen to bright light, the emulsion hardens everywhere except where your design blocks the light. The unexposed areas wash away with water, leaving open mesh in the shape of your artwork. This process creates one screen for each colour in your design, which explains why multi-colour prints cost more than single-colour options.
Setting up your workspace and materials
Before printing begins, your printer secures the fabric item onto a flat platen that holds it in perfect position. They mount the prepared screen onto a printing press, which can be a manual setup or an automated machine for larger runs. Registration marks ensure that each colour aligns precisely with the others, particularly important when your design includes multiple colours that need to fit together seamlessly. The printer then loads the appropriate ink colour and positions a squeegee at the top of the screen, ready for application.
Applying ink and transferring the design
With the screen lowered onto your garment, the printer drags a rubber squeegee across the mesh, forcing ink through the open areas onto the fabric below. This motion requires consistent pressure and speed to achieve even coverage across your entire design. For multi-colour work, they lift the screen, allow the first colour to dry slightly, then repeat the process with the next screen and colour. Each pass adds another layer to your design until the complete image appears on your product.
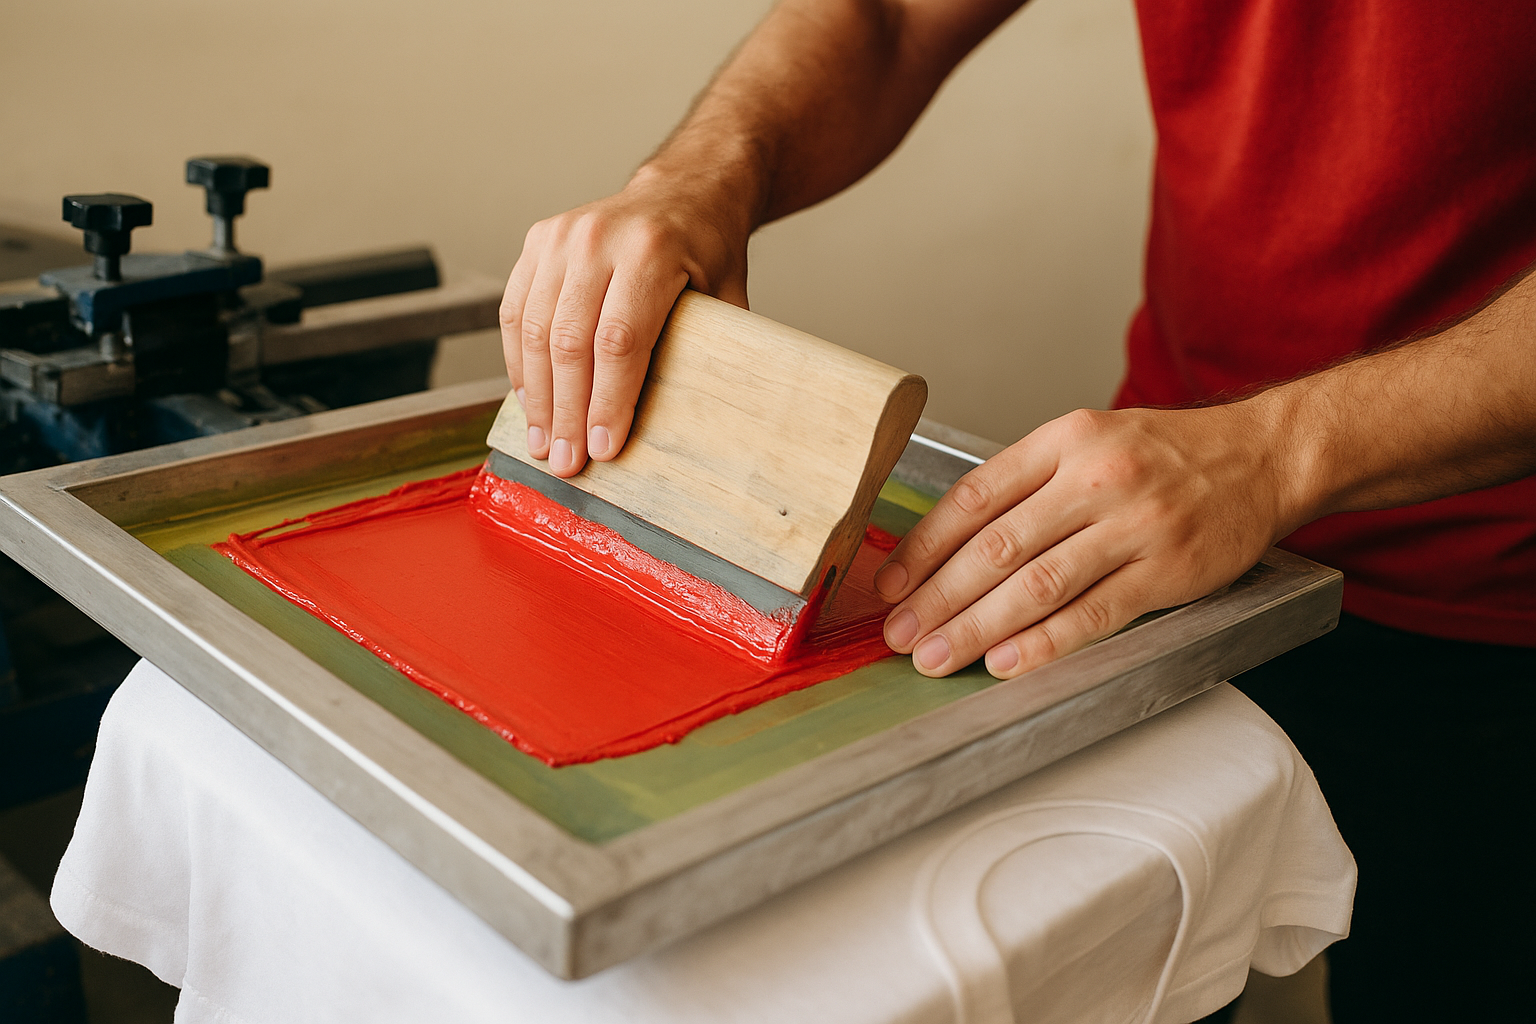
Proper squeegee technique determines whether your final print appears crisp or blurry, making operator skill essential.
Curing and finishing the print
After printing all colours, your items move through a heat tunnel or conveyor dryer that reaches temperatures between 160°C and 180°C. This curing process chemically bonds the ink to the fabric fibres, creating the long-lasting durability that screen printing is known for. Without proper curing, the ink would crack or wash away after a few laundry cycles. Once cooled, your finished products undergo quality checks before packaging and shipment.
Common screen printing methods and finishes
Screen printing offers multiple techniques and ink types that produce different visual and tactile results on your finished products. The method you choose affects how your designs feel, how they age, and which fabrics work best for your project. Understanding these options helps you select the right approach for your specific needs, whether you’re printing on cotton tees, polyester sportswear, or blended materials.
Plastisol ink printing
Plastisol remains the most widely used screen printing ink because it works reliably across various fabric types and doesn’t dry in the screen during production. This PVC-based ink sits on top of your fabric rather than absorbing into it, creating a slightly raised texture that you can feel when you run your hand over the design. You’ll find that plastisol prints deliver excellent opacity on dark garments, making it ideal when you need white or bright colours to pop against black or navy backgrounds.
The ink requires heat curing at approximately 165°C to fully set, but once cured, it withstands repeated washing without cracking or peeling. Plastisol works particularly well for bold graphics, text-heavy designs, and situations where you need consistent colour matching across large production runs.
Water-based and discharge printing
Water-based inks absorb into the fabric fibres instead of sitting on the surface, producing a softer hand feel that many customers prefer for everyday wear. Your design becomes part of the fabric itself, which eliminates the stiff or plasticky sensation that some plastisol prints create. These inks work exceptionally well on light-coloured cotton and cotton-blend materials, where they produce vibrant results with a vintage, worn-in appearance.
Water-based printing creates the softest possible finish, making it perfect for premium apparel where comfort matters as much as appearance.
Discharge printing takes this concept further by removing the fabric’s dye and replacing it with your desired colour. This technique produces ultra-soft prints on dark garments that feel identical to the base fabric, though it only works on 100% cotton items that have been dyed with reactive dyes.
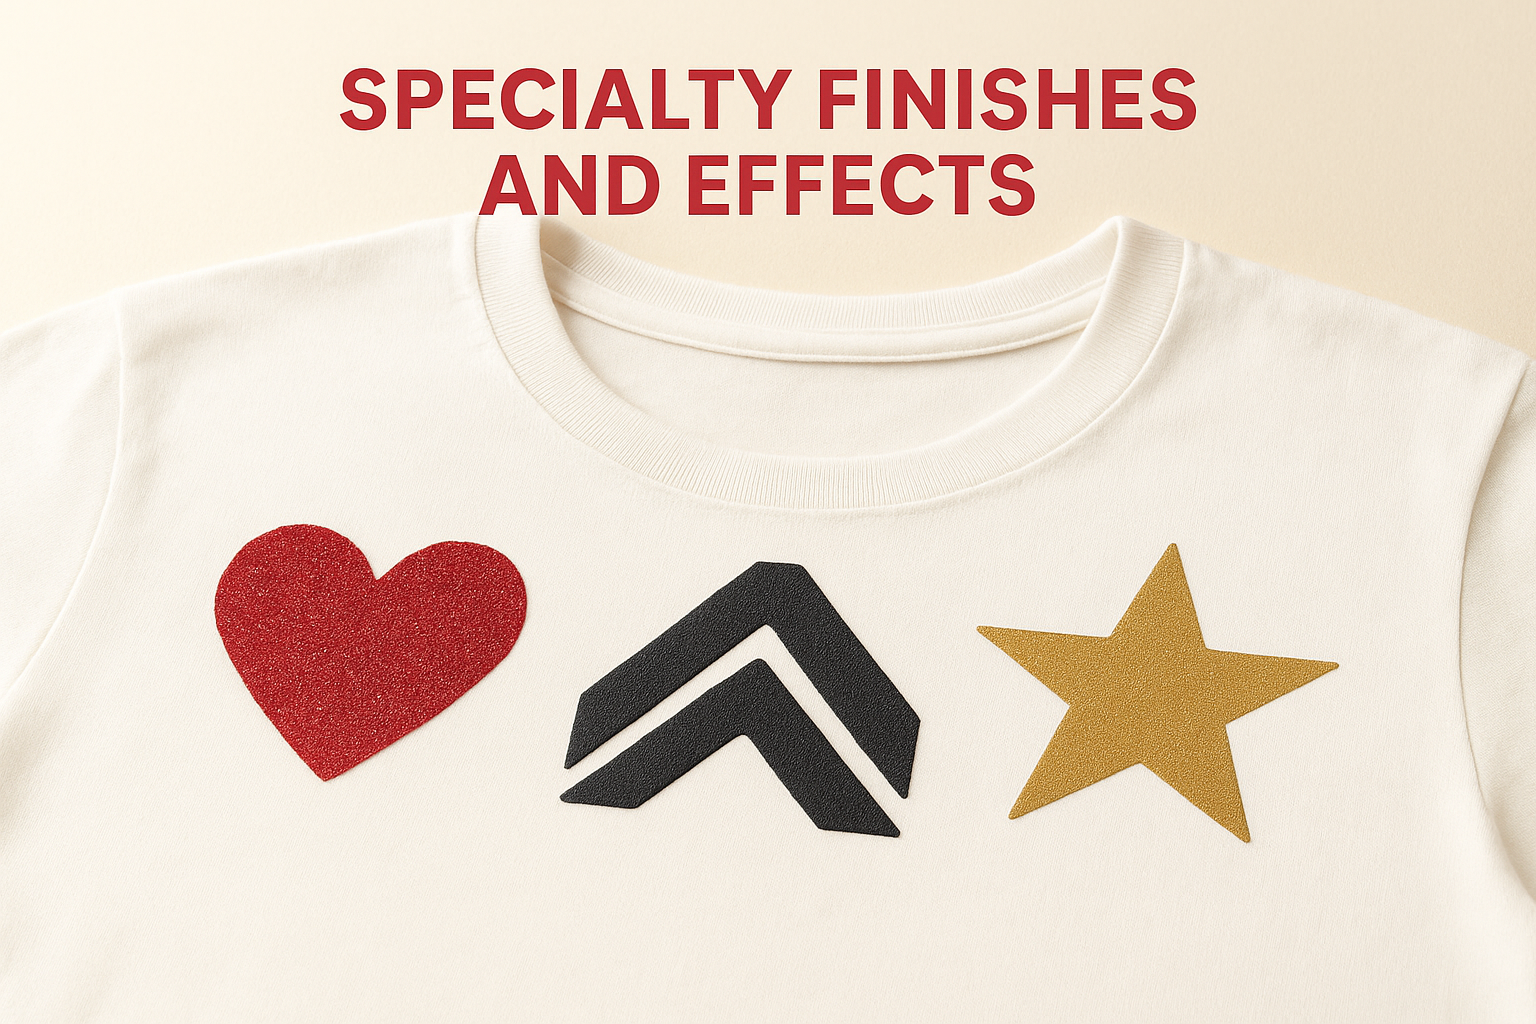
Specialty finishes and effects
Beyond standard inks, screen printing accommodates various specialty effects that add dimension and visual interest to your designs. Puff ink expands when heated to create a three-dimensional, raised surface that stands out both visually and texturally. Metallic and glitter inks catch light for eye-catching finishes that work well for event merchandise or fashion applications. You can also layer different ink types in a single design, combining plastisol for certain elements with water-based inks for others to achieve specific aesthetic goals.
Screen printing costs in Canada and what drives them
Screen printing costs in Canada vary widely based on your specific requirements and order details, with prices typically ranging from $5 to $15 per item for standard orders. The final price you pay depends on several interconnected factors, from the number of colours in your design to how many pieces you’re ordering. Understanding these cost drivers helps you budget accurately and make decisions that maximise value without compromising on quality. Canadian printers structure their pricing differently than direct-to-garment services, which means larger orders create substantial savings that smaller quantities can’t match.
Setup fees and their impact on small orders
Your printer charges a one-time setup fee for each colour in your design because they need to create screens, mix inks, and prepare the press before production begins. These fees typically range from $25 to $75 per colour, which means a three-colour design might cost $75 to $225 in setup alone before printing a single item. Setup costs create a higher per-unit price for small orders since you’re spreading that fixed expense across fewer items. If you order 25 shirts with a two-colour design at $100 setup cost, you’re adding $4 per shirt just for preparation, but ordering 200 shirts drops that setup cost to $0.50 per item.
Setup fees reward bulk ordering, making screen printing most cost-effective when you order 50 or more items at once.
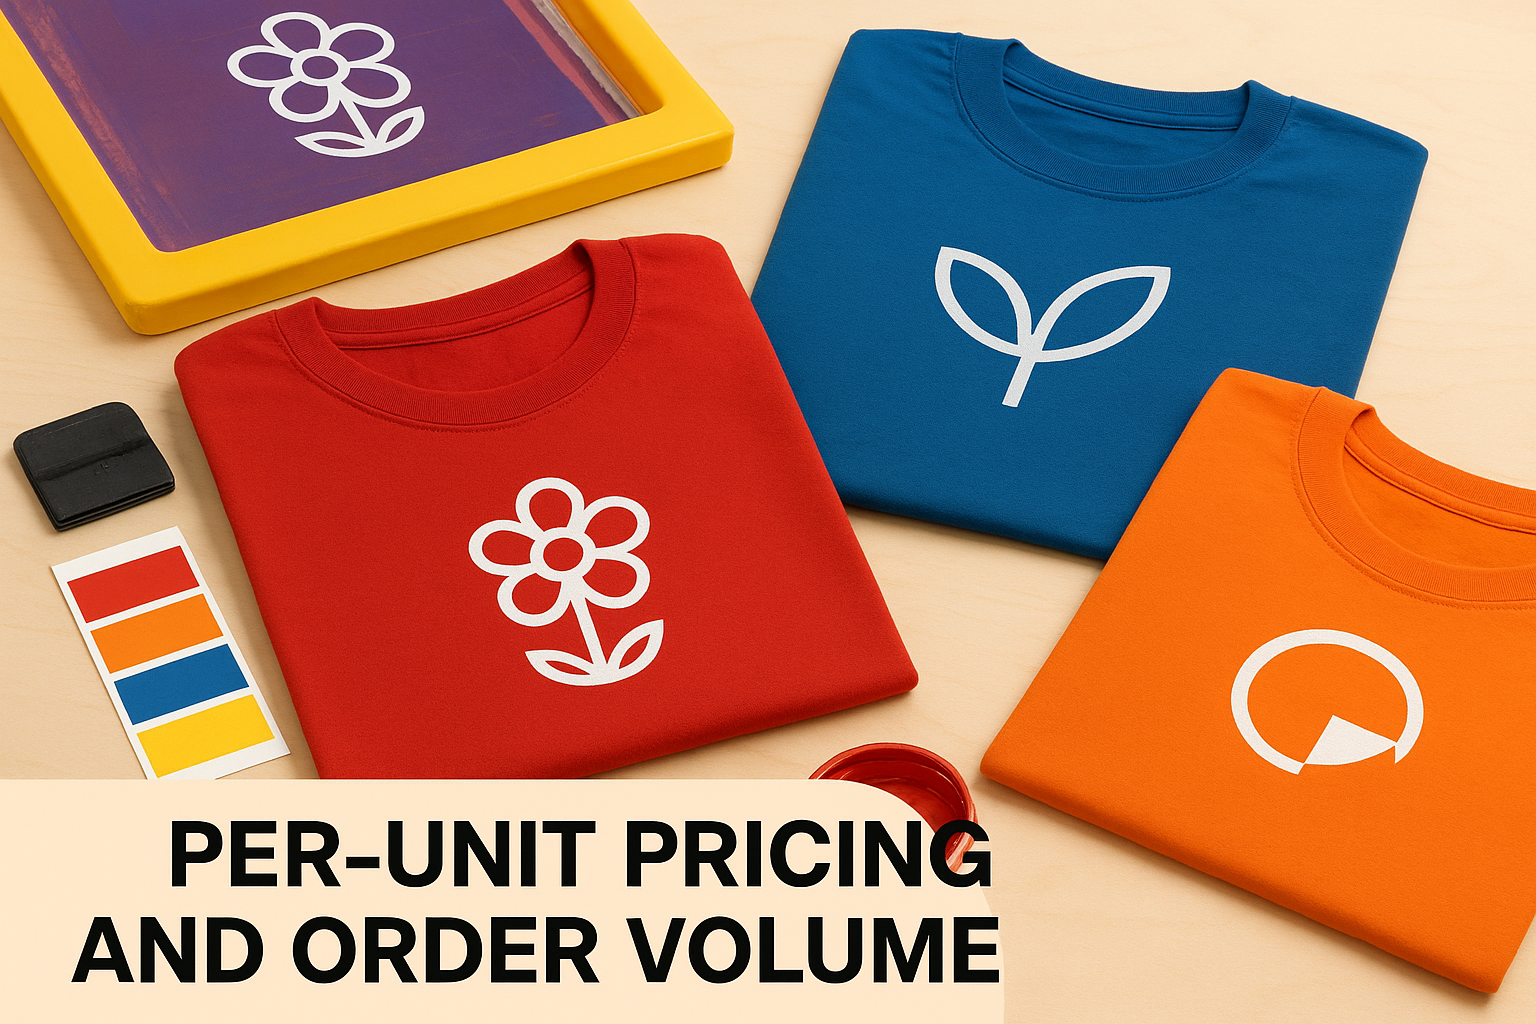
Per-unit pricing and order volume
After covering setup costs, you pay a per-item printing fee that decreases as your order size grows. Printers offer volume discounts because they achieve efficiency when running larger batches without stopping to change designs or materials. You might pay $10 per shirt for 25 pieces, $7 per shirt for 100 pieces, and $5 per shirt for 500 pieces, all with identical artwork. Canadian businesses ordering team uniforms or promotional items find that reaching the next pricing tier can justify ordering slightly more inventory than immediately needed.
Design complexity and colour count
Each additional colour in your design requires another screen, more setup time, and additional printing passes, which increases your total cost. Simple one-colour designs cost significantly less than four-colour designs because your printer completes the work faster with fewer materials. You’ll also pay more for specialty inks like metallics, glow-in-the-dark, or puff finishes compared to standard plastisol colours. Designs covering large areas of your garment consume more ink than small logos, which affects pricing on extremely large or complex artwork. Canadian printers typically charge $1 to $3 extra per colour after the first one, making colour count one of your most controllable cost factors.
When to choose screen printing vs DTG, DTF, embroidery
Screen printing excels in specific situations while other decorating methods offer advantages for different project requirements. Your order quantity, design characteristics, and intended use determine which technique delivers the best results for your budget and timeline. Comparing these methods side by side helps you identify which approach matches your specific needs, from small promotional runs to large uniform orders that require consistent branding across hundreds of items.
Order size determines your best method
You’ll find screen printing becomes most cost-effective at quantities of 50 or more items because the setup costs spread across more pieces. Below that threshold, direct-to-garment (DTG) printing often makes more financial sense since it requires no screen preparation and charges similar rates whether you order five shirts or fifty. Direct-to-film (DTF) sits between these options, working well for orders of 25 to 100 pieces where you need better durability than DTG without paying screen printing setup fees.
Embroidery follows a different pricing model entirely, with costs determined by stitch count rather than colour count. Small logos with under 10,000 stitches compete well with screen printing even on smaller orders, making embroidery ideal when you need that premium, textured appearance on polo shirts, jackets, or hats where screen printing doesn’t work as effectively.
Design complexity and colour considerations
Your design’s colour count dramatically affects which method saves you money. DTG printing handles photographic images and gradients without additional cost per colour, while screen printing charges setup fees for each colour separation. If your design includes six or more colours with fine detail, DTG typically costs less unless you’re ordering several hundred pieces. DTF printing works similarly to DTG for complex designs but produces more vibrant colours on dark fabrics.
Screen printing delivers unmatched colour accuracy for brand-specific Pantone matches, making it essential when your visual identity requires precise colour reproduction.
Embroidery limits you to simpler designs since intricate details don’t translate well into stitches. You’ll get better results with bold text and solid shapes rather than fine lines or small fonts under 6mm tall.
Fabric type and durability requirements
Cotton and cotton-blend materials work perfectly with all these methods, but performance fabrics and polyester require specific considerations. Screen printing uses plastisol inks that sit on any fabric surface, while DTG works best on 100% cotton or high-cotton blends. DTF prints adhere well to polyester athletic wear, making them popular for sports uniforms and performance apparel where screen printing might feel too heavy.
Embroidery creates the most durable decoration that never fades or cracks, lasting the entire lifetime of the garment. You’ll find embroidered items maintain their appearance through industrial washing, making them standard for hospitality uniforms, medical scrubs, and workwear that faces harsh cleaning requirements.
Prepare your artwork and order with confidence
Getting your design files ready for screen printing requires specific technical preparation that differs from what you might use for digital printing or home projects. Your printer needs vector files or high-resolution images that separate cleanly into individual colours, along with clear specifications about placement and sizing. Taking time to prepare your artwork correctly prevents delays, additional fees, and disappointing results when your finished products arrive.
File format and resolution requirements
You’ll get the best results by submitting your design as a vector file in Adobe Illustrator (.ai) or EPS format, which allows your printer to scale your artwork to any size without losing quality. These files use mathematical paths rather than pixels, ensuring crisp edges at any dimension. If you’re working with logos or text-based designs, vector formats eliminate the pixelation issues that plague low-resolution images. When vector files aren’t available, provide high-resolution raster images at 300 DPI (dots per inch) minimum, sized to your final print dimensions or larger.
Your printer can often convert PDF files if they contain embedded fonts and images, but confirming compatibility before submitting saves revision time. Most Canadian screen printers accept multiple file types but prefer working with vectors whenever possible because they simplify the colour separation process.
Colour specifications and separations
Screen printing requires your design separated into individual colour layers, with each colour printed separately through its own screen. Professional design software like Adobe Illustrator handles this separation automatically, but your printer needs to know exactly which Pantone colours you want or whether they should match your design as closely as possible with standard ink mixing. Specify whether you’re using spot colours (specific Pantone shades) or process colours (CMYK combinations) in your artwork notes.
Providing Pantone colour codes ensures your brand colours remain consistent across every order, no matter which printing facility produces your items.
Transparent elements or gradients complicate the screen printing process because they require additional screens or technique adjustments. If your design includes these features, discuss them with your printer before finalising your order to understand any cost or timeline implications.
Working with your printer
Canadian screen printing companies like Apex Workwear review your submitted files and provide digital proofs showing exactly how your design will appear on your chosen products. You’ll receive mockups that display colour placement, sizing, and positioning before production begins, giving you a chance to request adjustments. Ask questions about anything unclear in your proof, from colour accuracy to design placement, because approving your proof locks in those specifications for your entire order. Most printers include basic design assistance at no extra charge, helping you optimise artwork for the screen printing process or make minor adjustments that improve final results.
Next steps
You now understand how screen printing works, what it costs, and when it delivers the best value for your custom apparel projects. Whether you’re ordering team uniforms, promotional merchandise, or event giveaways, this knowledge helps you make informed decisions about quantities, colours, and timing that match your budget and quality expectations.
Starting your first order requires choosing a reliable Canadian printer who understands your requirements and delivers consistent quality. Apex Workwear produces custom screen-printed apparel for businesses across Canada, with free design review and quotes provided within 24 hours. Our team handles everything from artwork preparation to final production, ensuring your branded products meet professional standards. You can get started by requesting a quote for your custom apparel project or calling our team to discuss your specific needs.
Taking action now means your branded products arrive when you need them, whether that’s for an upcoming event, seasonal promotion, or ongoing uniform requirements.