You designed a beautiful postcard for your business. You printed hundreds. Then the post office rejected them because the address area was too small or the size was off by a fraction of an inch. Now you’re stuck with boxes of expensive mistakes.
Here’s what saves you from that headache: knowing USPS postcard requirements before you design anything. Your postcard needs specific dimensions, proper layout zones, and correct address placement to qualify for standard postcard rates and actually reach mailboxes. Get these wrong and you pay letter rates or face rejected mail.
This guide walks you through designing mail-ready postcards from scratch. You’ll learn what materials and information to gather first, how to define your message and audience, which USPS postcard sizes work for different campaigns, where to place your address and content zones, and how to prepare print-ready files. By the end, you’ll know exactly how to create postcards that meet postal standards, catch attention, and drive responses without wasting money on redesigns or rejected mailings.
What you need before you start
Gathering your materials before you design saves hours of frustration and prevents costly mistakes. You need specific assets and information ready so you can create a postcard that meets postal standards and delivers your message effectively. Missing pieces force you to stop mid-design, lose creative momentum, or make placeholder choices that weaken your final result.
Brand assets and content
Your postcard needs visual consistency with your brand, so collect your logo files (preferably vector formats like EPS or SVG), official colours (exact hex codes or RGB values), and approved fonts. You also need high-resolution images at 300 DPI minimum for sharp printing. Gather any photos, illustrations, or graphics you plan to feature. Write or outline your headline, body copy, and offer before you start designing, not during. Knowing your exact message helps you allocate space correctly when you learn how to design postcards for mailing.
Design specifications and tools
You need basic design software to create print-ready files. Free options like Canva or paid tools like Adobe InDesign both work, but your software must export PDFs with proper bleed and trim marks. Download USPS postcard templates if available through your design platform, or create your own using the dimensions you’ll learn in Step 2. Have your business contact details ready: phone number, website URL, physical address (if relevant), and any QR codes or tracking URLs you want to include.
Templates with pre-marked USPS zones prevent the most common rejection reasons.
Recipient and mailing details
Know who receives your postcards and how you’ll mail them. If you’re using a mailing list, have it formatted correctly with complete addresses. Decide whether you need a bulk mail permit number or will use standard stamps. Your return address must appear in the correct zone, so have that information formatted and ready before you start your layout.
Step 1. Define your goal and audience
Your postcard design succeeds or fails based on clarity of purpose and audience fit. Before you choose colours, sizes, or layouts, you need to answer two questions: what specific action do you want recipients to take, and who exactly receives this mail piece? These decisions shape every design choice that follows, from headline size to image selection. Skipping this step leads to generic postcards that look nice but drive zero responses.
Identify your postcard objective
Write down one primary action you want recipients to complete after reading your postcard. Common objectives include visiting a website, calling for a quote, redeeming a discount code, attending an event, or requesting more information. Your design will emphasize this action above everything else, so choose carefully. A postcard promoting a limited-time sale needs urgent language and a prominent coupon, while an event invitation needs date, time, and location details front and centre.

A single, clear objective increases response rates by making the next step obvious to recipients.
Track your objective with measurable elements like unique phone numbers, custom URLs, or QR codes. This data shows you which campaigns work and helps you refine future mailings. When you learn how to design postcards for mailing with measurement built in, you can calculate exact return on investment instead of guessing.
Profile your target recipient
Describe your ideal recipient in concrete terms: their industry, job title, location, age range, or buying behaviour. The more specific your profile, the better your design choices. Mailing to homeowners in a specific neighbourhood lets you reference local landmarks or community events. Targeting business owners means using professional imagery and focusing on ROI or time savings rather than emotional appeals.
Match your message and design style to what resonates with this audience. Retirees respond to larger text and straightforward layouts. Young professionals expect modern design and digital integration like QR codes. List the pain points your audience faces and how your offer solves them. This focus keeps your postcard relevant and increases the chance recipients act on your message.
Step 2. Choose the right USPS postcard size
The size you choose determines postage costs, design space, and whether your mail qualifies as a postcard. USPS defines strict size limits for postcards to receive standard postcard rates instead of letter rates. Understanding these dimensions before you start designing prevents expensive mistakes and helps you allocate your content effectively when you learn how to design postcards for mailing.
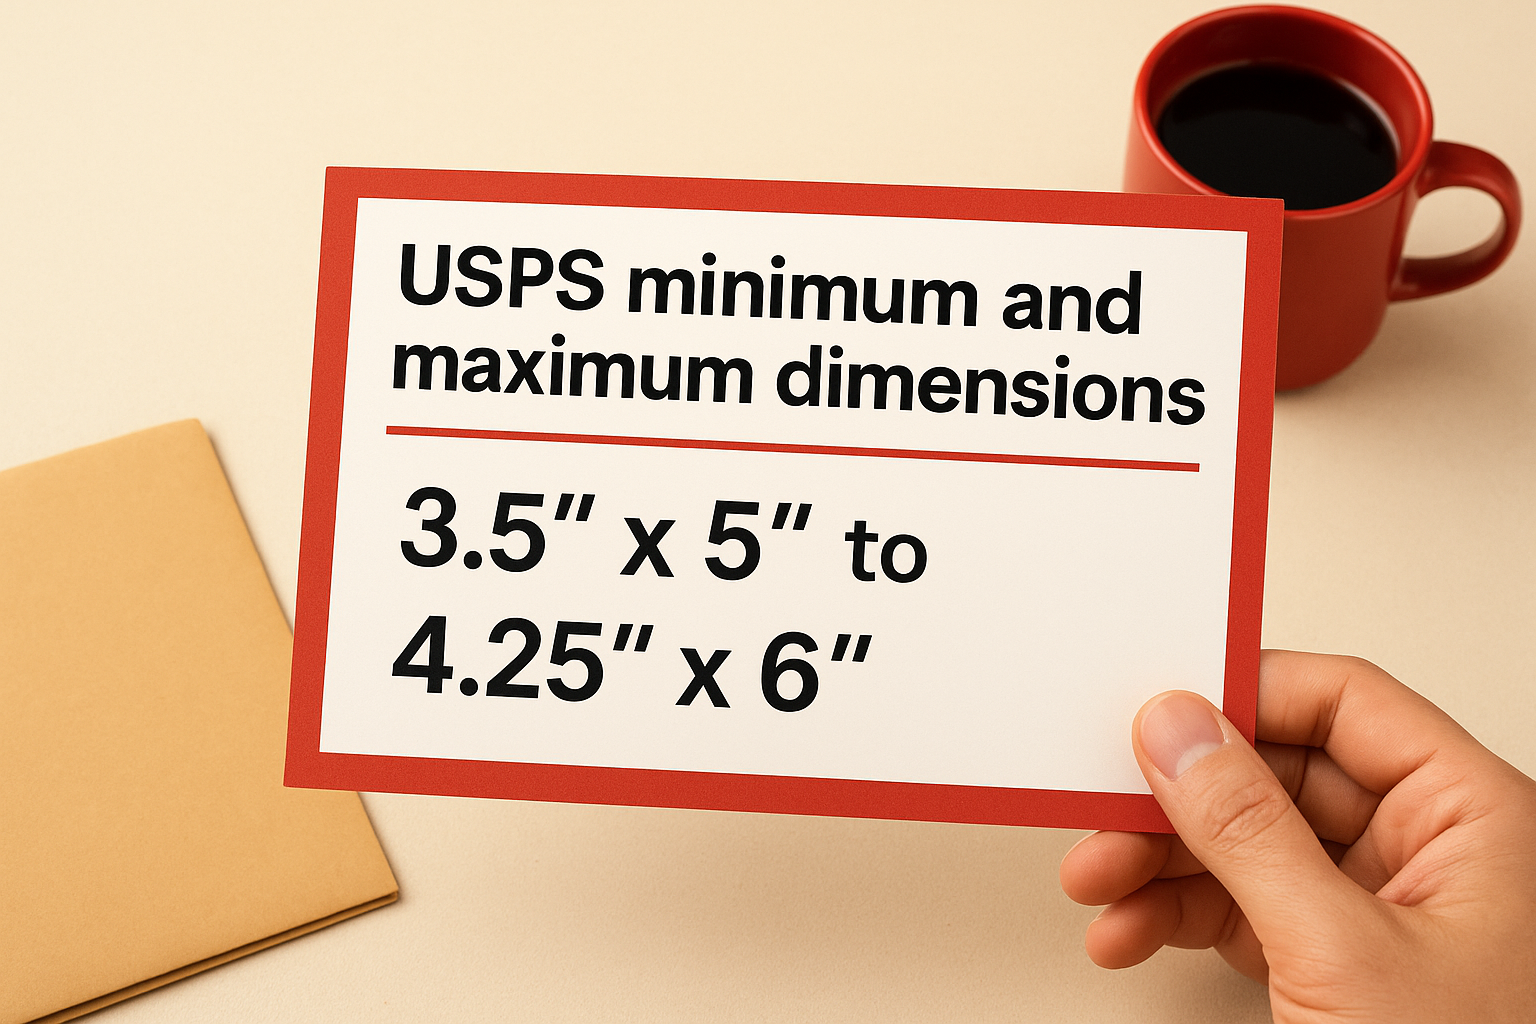
USPS minimum and maximum dimensions
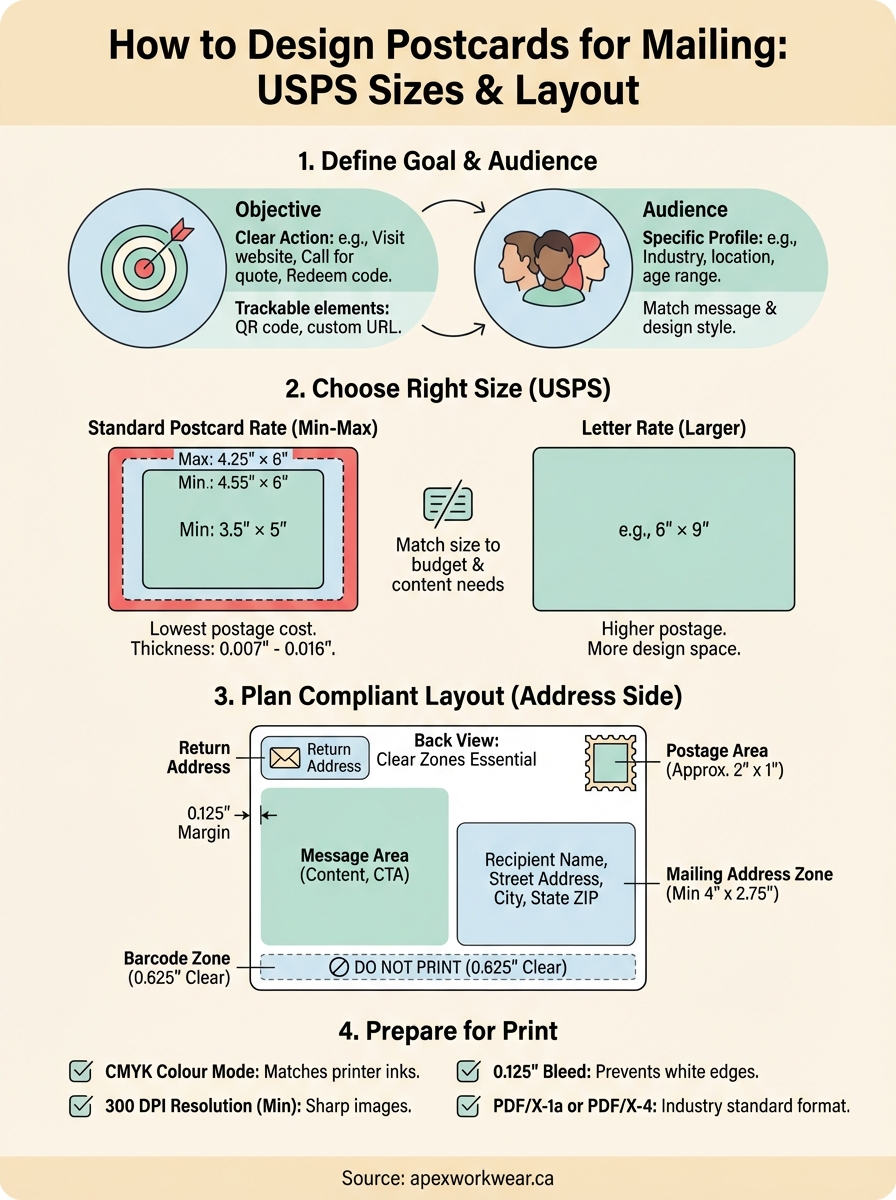
USPS requires postcards to measure between 3.5 inches by 5 inches (minimum) and 4.25 inches by 6 inches (maximum) to qualify for standard postcard rates. Mail pieces larger than 4.25 inches by 6 inches fall into the letter category, which costs more to send. Your postcard must also be between 0.007 inches and 0.016 inches thick (roughly the thickness of standard cardstock). Anything thinner bends too easily during processing, and thicker pieces get rejected or charged extra.
Standard postcard sizes used by most printers include:
| Size | Best For | Approximate Cost |
|---|---|---|
| 4" × 6" | Quick promos, coupons, appointment reminders | Lowest postage |
| 4.25" × 6" | Event invitations, thank-you notes | Low postage |
| 5" × 7" | Product launches, holiday greetings | Moderate postage |
| 6" × 9" | Detailed offers, real estate, bulk campaigns | Higher postage (letter rate) |
Staying within the 4.25 inch by 6 inch maximum saves money on every single piece you mail.
Match size to your campaign budget
Budget constraints often determine which postcard size makes financial sense for your mailing. Smaller postcards cost less to print and mail, making 4 inch by 6 inch pieces ideal for large-volume campaigns or tight budgets. These compact sizes work well when your message is simple: a discount code, a website URL, or a single product announcement. Printing 5,000 postcards at 4 inches by 6 inches typically costs 30 to 40 percent less than printing the same quantity at 6 inches by 9 inches.
Larger formats justify their higher costs when you need more design space or want to stand out in crowded mailboxes. A 6 inch by 9 inch postcard provides 135 square inches of surface area compared to 24 square inches on a 4 inch by 6 inch piece. This extra space lets you include multiple product images, detailed service descriptions, or larger contact information that seniors can read easily.
Select based on your message needs
Your content volume dictates minimum viable postcard dimensions. Count how many elements you need: headline, subheadline, body copy, images, logo, contact details, and call-to-action button or coupon. A 4 inch by 6 inch postcard handles a bold headline, one strong image, and a brief message. Anything more complex feels cramped and difficult to read.
Complex messages with multiple offers or detailed explanations require 5 inch by 7 inch or larger formats. Real estate agents showing property photos, restaurants displaying menu items, or service businesses explaining multi-step processes all benefit from extra room. Measure your longest text block and largest image to confirm they fit your chosen size with proper margins and breathing space around each element.
Step 3. Plan a USPS compliant mailing layout
USPS postal automation equipment scans specific zones on every postcard for addresses, barcodes, and postage. Your design must keep these areas clear of graphics, text, or colours that interfere with scanning. Planning your layout around these requirements prevents rejected mail and ensures your postcard qualifies for automation rates when you learn how to design postcards for mailing.
Understanding USPS address zones
The mailing address occupies the lower right portion of your postcard’s address side, typically the back of your design. USPS requires a clear rectangle measuring at least 4 inches wide by 2.75 inches tall for addresses on standard 4 inch by 6 inch postcards. Larger postcards need proportionally larger address zones. This area must remain free of background images, decorative elements, or dark colours that reduce contrast between the address text and the background.

Place your return address in the upper left corner of the address side, leaving at least a 0.125 inch margin from the top and left edges. The return address can be smaller than the mailing address but must remain legible. Your logo or branding can appear near the return address as long as it doesn’t crowd the text or extend into the barcode clear zone along the bottom edge.
USPS automation equipment rejects postcards when graphics or dark backgrounds interfere with address scanning.
Mark your front and back content areas
Your postcard’s front side (the side without addresses) holds your primary message, headline, and main image. This side offers maximum creative freedom because it doesn’t require clear zones for postal scanning. Plan your most eye-catching element to appear here, whether that’s a product photo, promotional headline, or attention-grabbing offer. Leave margins of at least 0.125 inches on all edges to prevent important content from getting trimmed during cutting.
The back side (address side) splits into three functional zones: your message area (upper portion), the address block (lower right), and the postage area (upper right). Your message area typically occupies the top two-thirds of the postcard, where you can place your call-to-action, body copy, QR codes, or secondary images. Keep all critical content at least 0.25 inches away from the address block boundaries.
Layout your zones using this template for a standard 4 inch by 6 inch postcard:
| Zone | Location | Dimensions | Content Allowed |
|---|---|---|---|
| Front | Entire front side | 4" × 6" minus margins | Headline, main image, logo |
| Message area | Back, top portion | 4" × 3" minus margins | Body copy, CTA, graphics |
| Return address | Back, upper left | 2" × 0.75" typical | Company name, address |
| Postage area | Back, upper right | 2" × 1" typical | Stamp, indicia, or permit |
| Mailing address | Back, lower right | 4" × 2.75" minimum | Recipient address only |
| Barcode zone | Back, bottom edge | Full width × 0.625" | Must remain clear |
Reserve space for postage and permits
Postage or mailing indicia appears in the upper right corner of the address side, occupying roughly 2 inches wide by 1 inch tall. If you use stamps, leave this area completely blank. Bulk mailers using permit imprints need to include specific text and formatting in this zone, which your mailing service provider supplies. Never place design elements or text in this corner that could be mistaken for postage.
The bottom 0.625 inches of your postcard’s address side must remain clear for the Intelligent Mail Barcode that USPS applies during processing. Avoid placing footer text, page numbers, or decorative borders in this zone. Violating this clear zone requirement forces manual processing and eliminates any automation discounts you might qualify for.
Step 4. Design, proof and prepare for print
Now you assemble all your planning into actual design files that printers can process. This step transforms your layout zones, brand assets, and message into print-ready artwork that meets both USPS standards and professional printing specifications. You need to work in proper resolution, set up correct bleeds, and export files in formats your printer accepts when you learn how to design postcards for mailing.
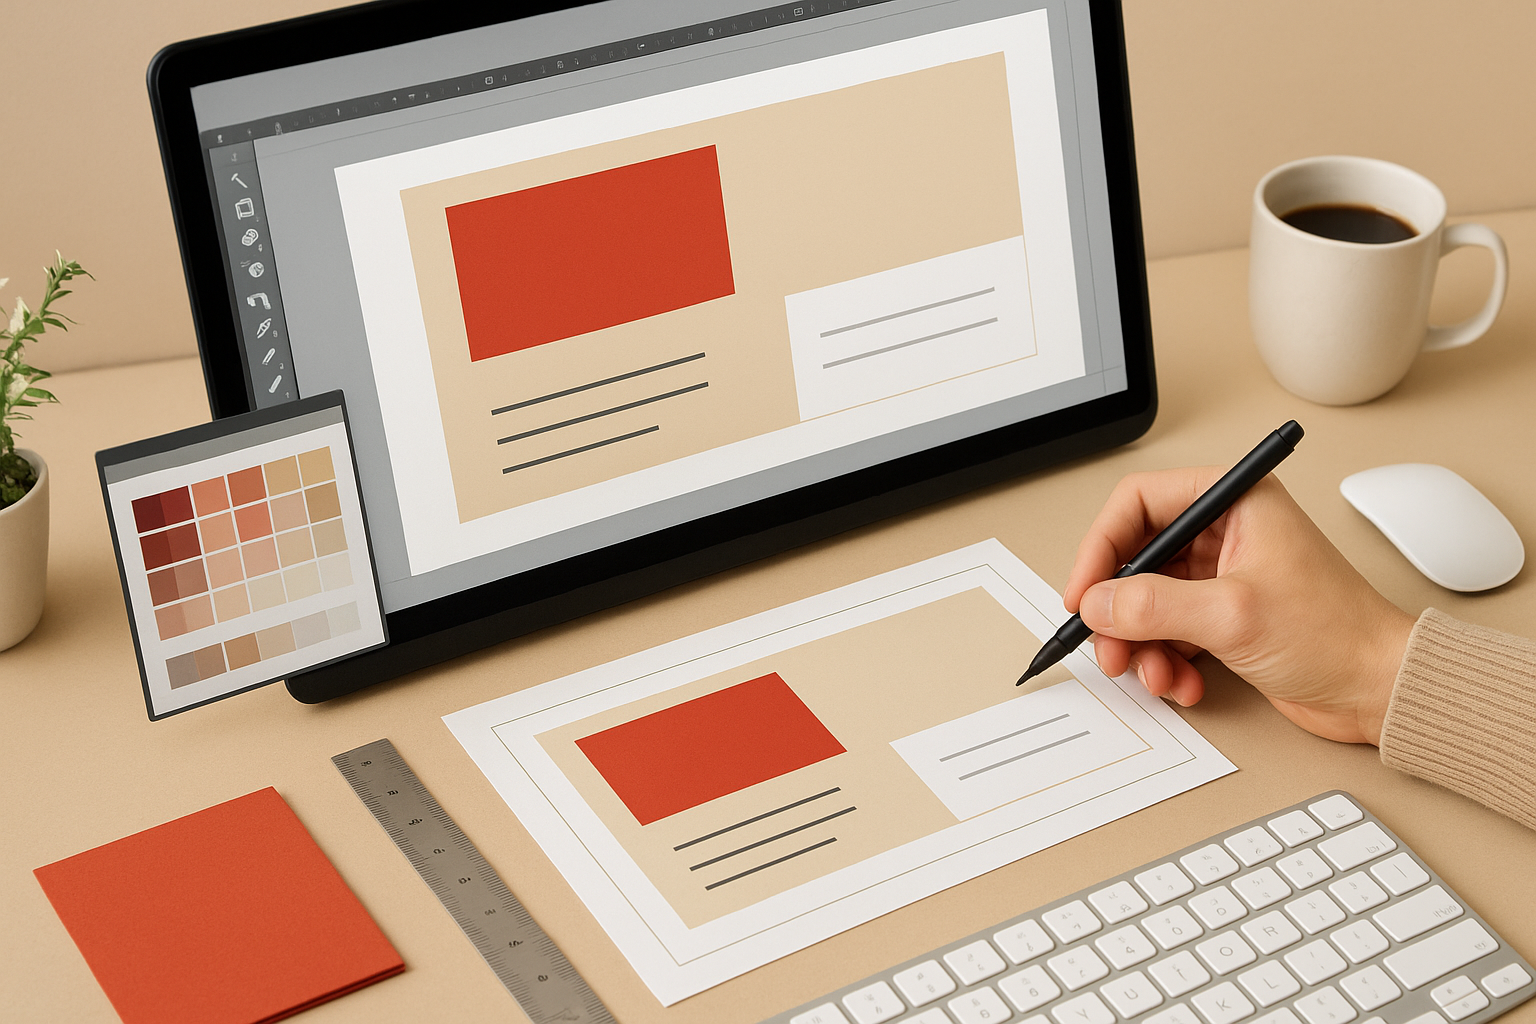
Create your design with print specifications
Open your design software and set up a new document using your chosen postcard dimensions plus bleed. Bleed refers to the extra 0.125 inches of background that extends beyond your trim line on all sides. This prevents white edges if cutting shifts slightly during production. A 4 inch by 6 inch postcard needs a document size of 4.25 inches by 6.25 inches total with trim marks indicating where the final cut happens.
Set your resolution to 300 DPI (dots per inch) minimum for all images and graphics. Lower resolutions look pixelated when printed. Use CMYK colour mode instead of RGB, since printers mix cyan, magenta, yellow, and black inks rather than red, green, and blue light. Convert all images to CMYK before placing them in your layout to ensure colours print as expected.
Your print-ready file needs these specifications:
| Setting | Requirement | Why It Matters |
|---|---|---|
| Colour mode | CMYK | Matches printer ink colours |
| Resolution | 300 DPI minimum | Prevents blurry images |
| Bleed | 0.125 inches all sides | Avoids white edges after cutting |
| Fonts | Outlined or embedded | Ensures text displays correctly |
| File format | PDF/X-1a or PDF/X-4 | Industry-standard print format |
Review and proof your artwork
Check every text element for spelling errors, incorrect phone numbers, and broken website URLs before you send files to print. Print a test copy on your home printer at actual size to spot layout problems like text touching the edges or images appearing darker than expected. Ask someone unfamiliar with your design to read the postcard and explain what action you want them to take. If they struggle, your message needs clarification.
Printing 10 test copies costs pennies compared to reprinting 5,000 flawed postcards.
Export print-ready files
Export your finished design as PDF/X-1a or PDF/X-4 format with all fonts outlined or embedded. These PDF standards include colour profiles and font data that prevent errors during printing. Enable crop marks and bleed in your export settings so the printer knows exactly where to trim. Save your file using a descriptive name like "ApexWorkwear_Postcard_4x6_Jan2026_FINAL.pdf" that identifies the project, size, and version.
Ready to mail your postcards
You now know how to design postcards for mailing that meet USPS requirements and deliver measurable results. You’ve learned the exact dimensions that qualify for postcard rates, where to place addresses and postage zones, and how to prepare print-ready files that won’t get rejected at the post office. These specifications protect your marketing budget and ensure your message reaches every single mailbox on your mailing list.
Your next step involves printing and mailing your finished design professionally. Choose cardstock between 0.007 and 0.016 inches thick, confirm your printer uses 300 DPI resolution minimum, and order a small test batch before committing to thousands of pieces. Review those test postcards carefully for colour accuracy, text readability, and proper placement of all required postal zones before approving the full production run.
Need professional printing support for your postcard campaign? Apex Workwear provides custom postcard printing with expert design guidance, fast turnaround times, and competitive bulk pricing that makes direct mail campaigns affordable for Canadian businesses of all sizes.