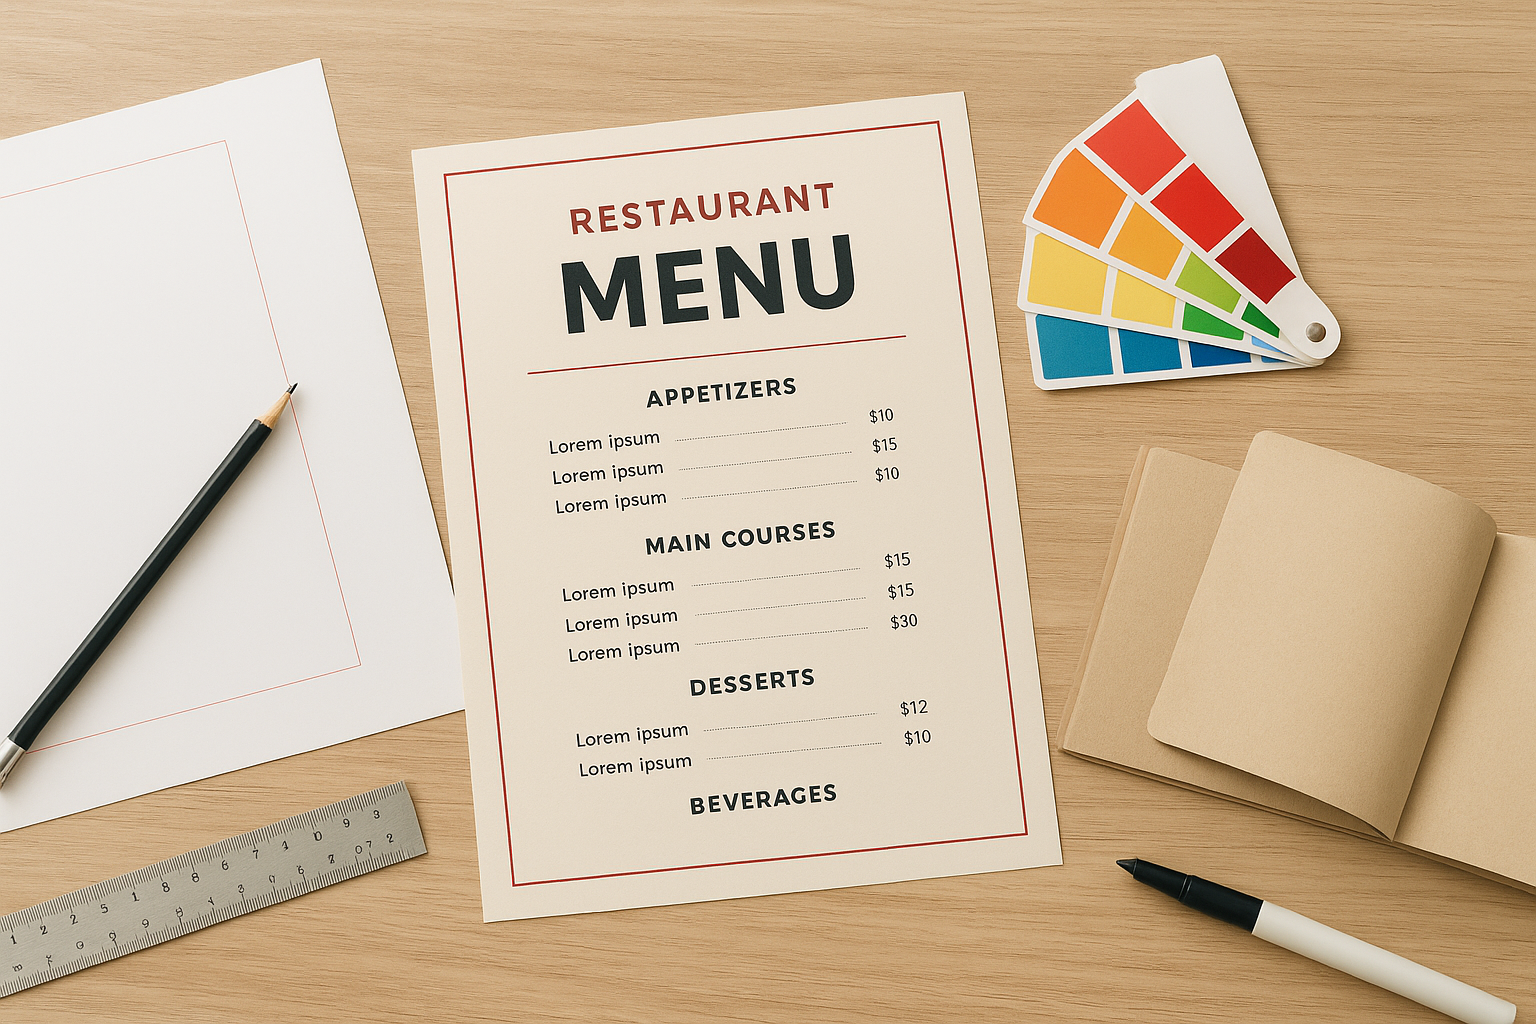
Your menu is often the first thing customers hold in their hands, and first impressions matter. Whether you’re opening a new spot or refreshing your brand, printing for restaurants (menus + flyers) can make or break how guests perceive your food before they’ve even tasted it.
A smudged menu or a flimsy flyer screams "budget operation," even if your dishes are anything but. On the flip side, crisp, professional print materials signal quality and attention to detail. The good news? Getting restaurant-grade menus and flyers printed doesn’t have to be complicated or slow. With the right approach, you can have polished materials in your hands within days, not weeks.
This guide walks you through everything you need to know, from choosing the right paper stock and finishes to working with a printer who actually understands tight timelines. At Apex Workwear, we print menus, flyers, and marketing materials for restaurants across Canada, so we’ve seen what works (and what doesn’t). Let’s get your print sorted.
What to decide before you print
Before you place an order, you need to answer a few practical questions that will save you money and prevent re-orders. Many restaurants rush straight to design without thinking through how they’ll actually use these materials, which often leads to wasting budget on the wrong paper type or ordering quantities that don’t match real needs.
What’s the purpose of each piece?
Your menu and flyer serve different jobs, so they need different specifications. A dine-in menu gets handled dozens of times daily and needs durability (laminated or heavy card stock). A takeaway menu might be single-use and works fine on lighter paper. Flyers for letterbox drops need to grab attention fast, so bold colours and larger formats often perform better than standard A5.
Matching your print specs to actual use cases prevents expensive do-overs and keeps your materials looking professional longer.
How many do you actually need?
Calculate your real volume based on customer flow, not guesswork. For dine-in menus, count your tables and add 20% for spares. Takeaway menus? Estimate weekly orders and multiply by four to six weeks (seasonal items change, so don’t over-order). Flyers depend on your distribution plan: a 5,000-home letterbox drop needs 5,000 flyers, plus extras for in-store handouts.
Printing for restaurants (menus + flyers) costs less per unit at higher quantities, but you don’t want 10,000 flyers sitting in storage when your January special ends in February. Strike a balance between bulk pricing and practical shelf life. Most printers offer quantity breaks at 250, 500, 1,000, and 2,500 units, so aim for those thresholds when possible.
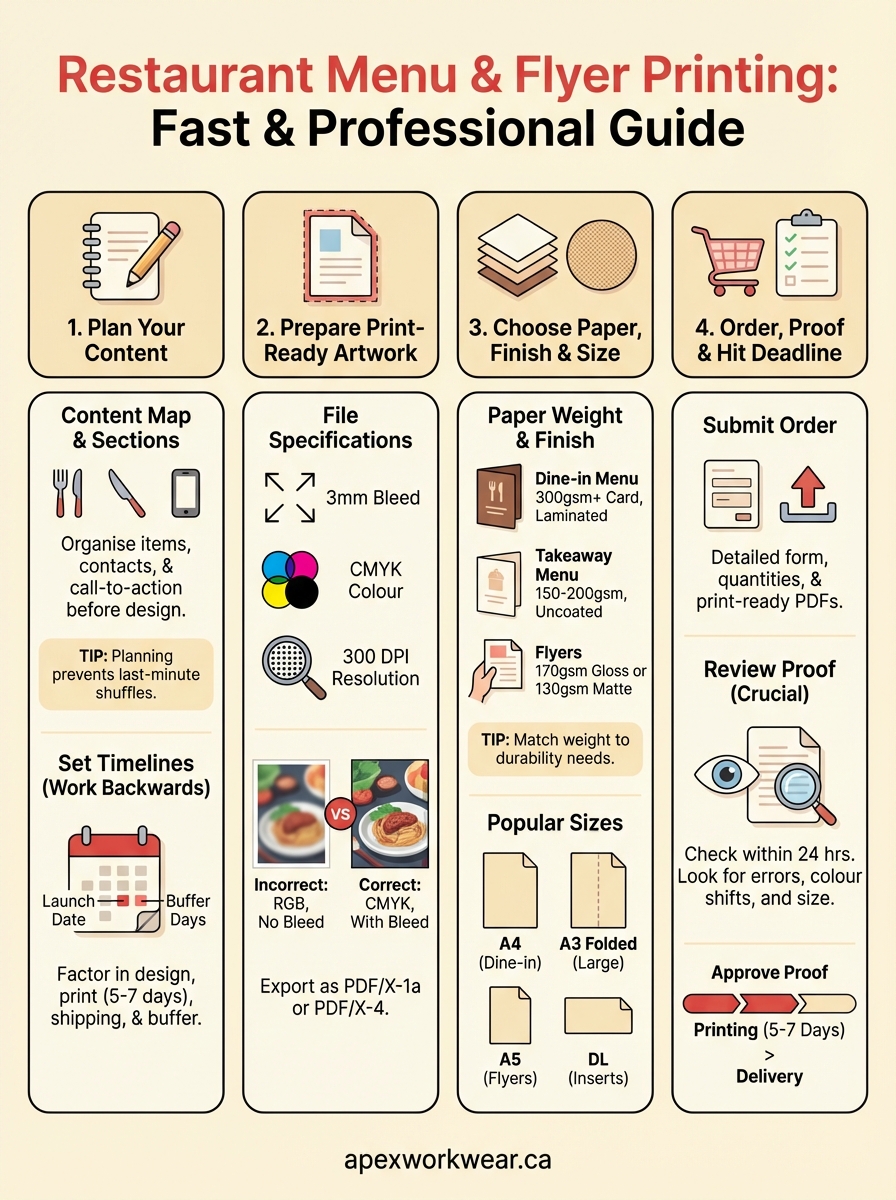
Step 1. Build a menu and flyer plan
Start with a content map before you touch any design software. Write down every section your menu needs: appetisers, mains, desserts, drinks, allergen notes. For flyers, outline your key message (new opening, special offer, seasonal menu), contact details, and any call-to-action. This planning stage prevents last-minute scrambles and ensures nothing gets forgotten in the final print file.
Map out your content sections
List every item that needs to appear on each piece. Your menu might need categories like starters, sides, and beverages, plus essential info such as your phone number and website. Flyers typically require a headline, body copy (keep it under 100 words), images or graphics, and a strong call-to-action ("Order now," "Visit us this week"). Write out this structure in a simple document or spreadsheet before designing anything.
Getting your content organised first means your designer (or you) won’t waste time shuffling sections around later.
Set your timelines
Work backwards from when you need the materials. If you’re opening on 1 March, your printing for restaurants (menus + flyers) should arrive by 22 February to allow buffer time. Factor in design (3-5 days), printer turnaround (5-7 business days standard), and shipping (2-3 days). Add an extra three days for unexpected delays or proof revisions.
Step 2. Prepare print-ready artwork
Your printer needs files that won’t cause production delays or quality issues. Print-ready artwork means your design file contains the correct dimensions, colour mode, resolution, and bleed settings before you submit it. Most printing for restaurants (menus + flyers) gets held up because files arrive in RGB instead of CMYK or lack proper bleed margins.
Set up your file specifications
Create your design at actual size plus 3mm bleed on all sides. A standard A4 menu should be 216mm x 303mm (including bleed), not 210mm x 297mm. Set your colour mode to CMYK, not RGB, because printers use CMYK ink and RGB colours will look different when printed. Use 300 DPI resolution for all images and graphics to ensure sharp text and clear photos.
Convert all fonts to outlines or embed them in your PDF so missing fonts don’t ruin your layout. Include crop marks if your printer requests them, though most modern printers add these automatically.
Files without proper bleed get rejected or print with white edges, forcing you to start over and miss your deadline.
Export your final files
Save your finished design as a PDF/X-1a or PDF/X-4 file, which are industry-standard formats that preserve colour accuracy and embed everything needed for printing. Name your files clearly: "RestaurantName_Menu_Feb2026.pdf" beats "final_FINAL_v3.pdf" when you need to reference them later.
Step 3. Choose paper, finishes, and sizes
Your material choices directly affect how long your menus last and whether customers actually read your flyers. Paper weight and finish aren’t just aesthetic decisions; they determine durability and readability under restaurant conditions (grease, moisture, constant handling).
Select your paper weight and finish
Dine-in menus need 300gsm card stock minimum to survive daily use. Go for gloss or matte lamination if you want them to last months without looking tatty. Takeaway menus work fine at 150-200gsm uncoated since they’re single-use. Flyers should be 170gsm gloss for vibrant food photos or 130gsm matte if you’re prioritising text readability.
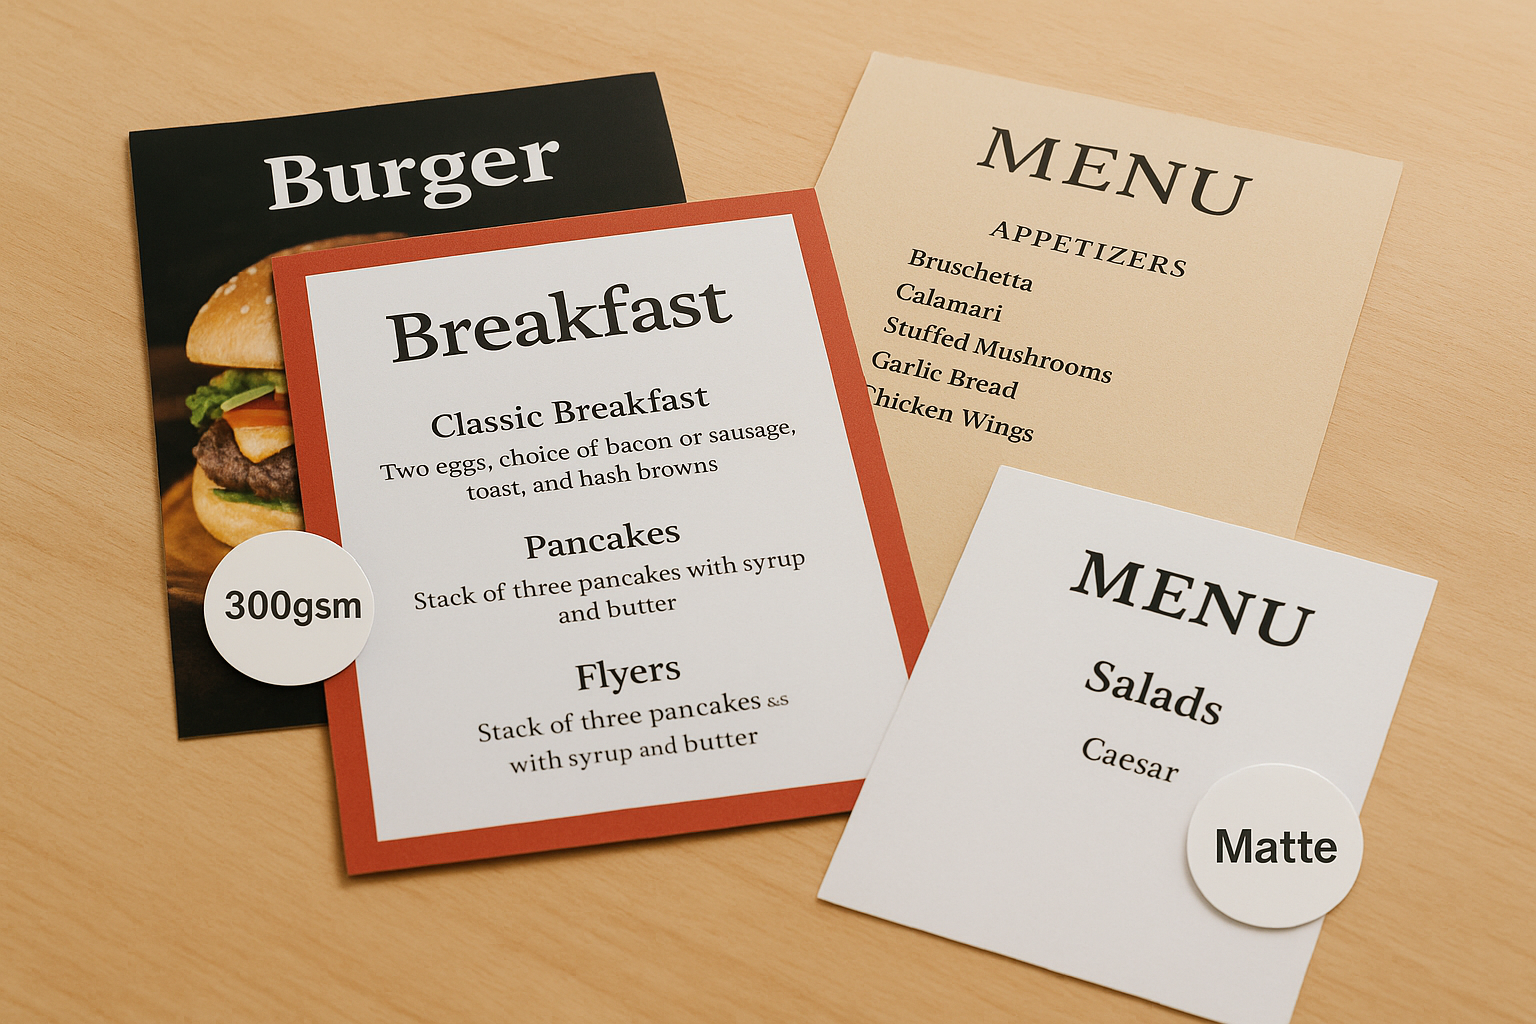
Heavier paper feels more premium, but it costs more to print and post, so match your weight to actual durability needs.
Pick the right sizes for each use case
Standard A4 (210mm x 297mm) works for most dine-in menus because it’s familiar and easy to hold. Folded A3 gives you more space for extensive wine lists or multi-page menus. Flyers perform best at A5 (148mm x 210mm) for letterbox drops since they’re large enough to read but fit through mail slots. DL size (99mm x 210mm) suits counter displays or bill inserts for printing for restaurants (menus + flyers) on tighter budgets.
Step 4. Order, proof, and hit your deadline
You’ve designed your materials and chosen your specifications; now comes the critical handoff to your printer. Ordering correctly and catching errors during proofing prevents costly reprints and missed launch dates. Most restaurant printing delays happen because proof revisions bounce back and forth, so getting this stage right matters.
Submit your order with complete specifications
Send your printer a detailed order form that includes quantities, paper stock (e.g., "300gsm gloss laminated card stock"), finished size, and any special finishes. Upload your print-ready PDF files with clear filenames. Include your delivery address and phone number so the printer can contact you about any file issues immediately rather than waiting days for email replies.
Request a digital proof for every print job, even if you’re certain your files are perfect, because errors show up differently on screen versus print.
Review your digital proof carefully
Check your proof within 24 hours of receiving it to keep your timeline on track. Look for cut-off text near edges, colour shifts (especially in food photos), and typos in prices or phone numbers. Print the PDF at 100% scale and hold it up to confirm the actual size matches your expectations. Approve the proof only after you’ve verified every detail for your printing for restaurants (menus + flyers).
Next steps for your restaurant printing
You now have a complete roadmap for printing for restaurants (menus + flyers) that actually arrive on time and look professional. The difference between amateur materials and restaurant-grade print comes down to planning your content first, preparing proper files, choosing durable specifications, and working with a printer who understands tight deadlines.
Start by mapping your immediate needs: do you need menus for an opening, seasonal flyers for a promotion, or both? Set your timeline backwards from your launch date and add buffer days for proof revisions. Get your artwork files ready with proper bleed, CMYK colour mode, and 300 DPI resolution.
Ready to order? Apex Workwear prints menus, flyers, and marketing materials for restaurants across Canada with 5-7 day turnaround and free digital proofs. We handle everything from business cards to large-format banners, all produced in Canada. Get your quote within 24 hours and have professional materials in your hands before your next service.