If you’ve ever picked up a paperback novel, a product catalogue, or a company lookbook, you’ve held a perfect bound book printing product in your hands. That clean, flat spine with a wraparound cover isn’t just a design choice, it’s a specific binding method that gives printed materials a polished, professional finish without the cost of hardcover production.
For small businesses, contractors, and creative agencies, perfect binding opens up real possibilities. Think branded training manuals, client-facing portfolios, event programmes, or wholesale catalogues that actually look the part. But before you place an order, it helps to understand what the process involves, how pricing works, what paper stocks and cover options are available, and where common mistakes tend to trip people up. Those details can be the difference between a product you’re proud to hand out and one that falls short of your brand standards.
At Apex Workwear, we handle custom print production right here in Canada, from business cards and flyers to large-format signage and, yes, bound book printing. Whether you need a short run with no minimums or a bulk order with volume pricing, our team reviews every project, provides a digital proof, and ships most orders within 5–7 business days. This guide breaks down everything you need to know about perfect bound books: costs, specifications, and practical tips to get your order right the first time.
What perfect bound book printing is
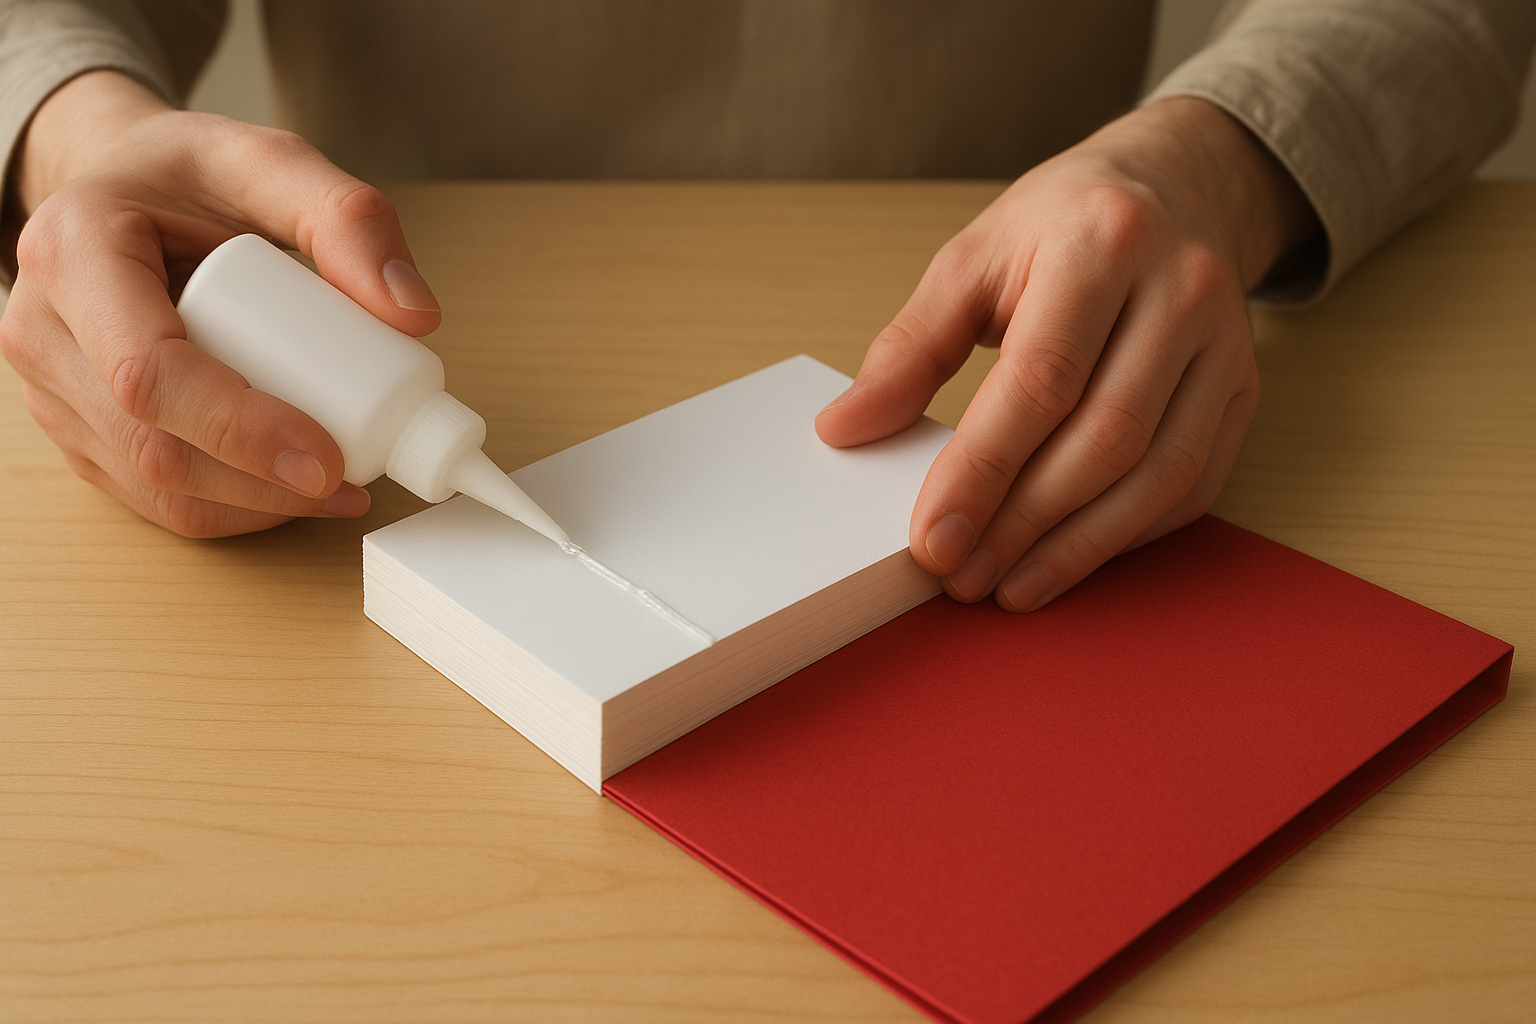
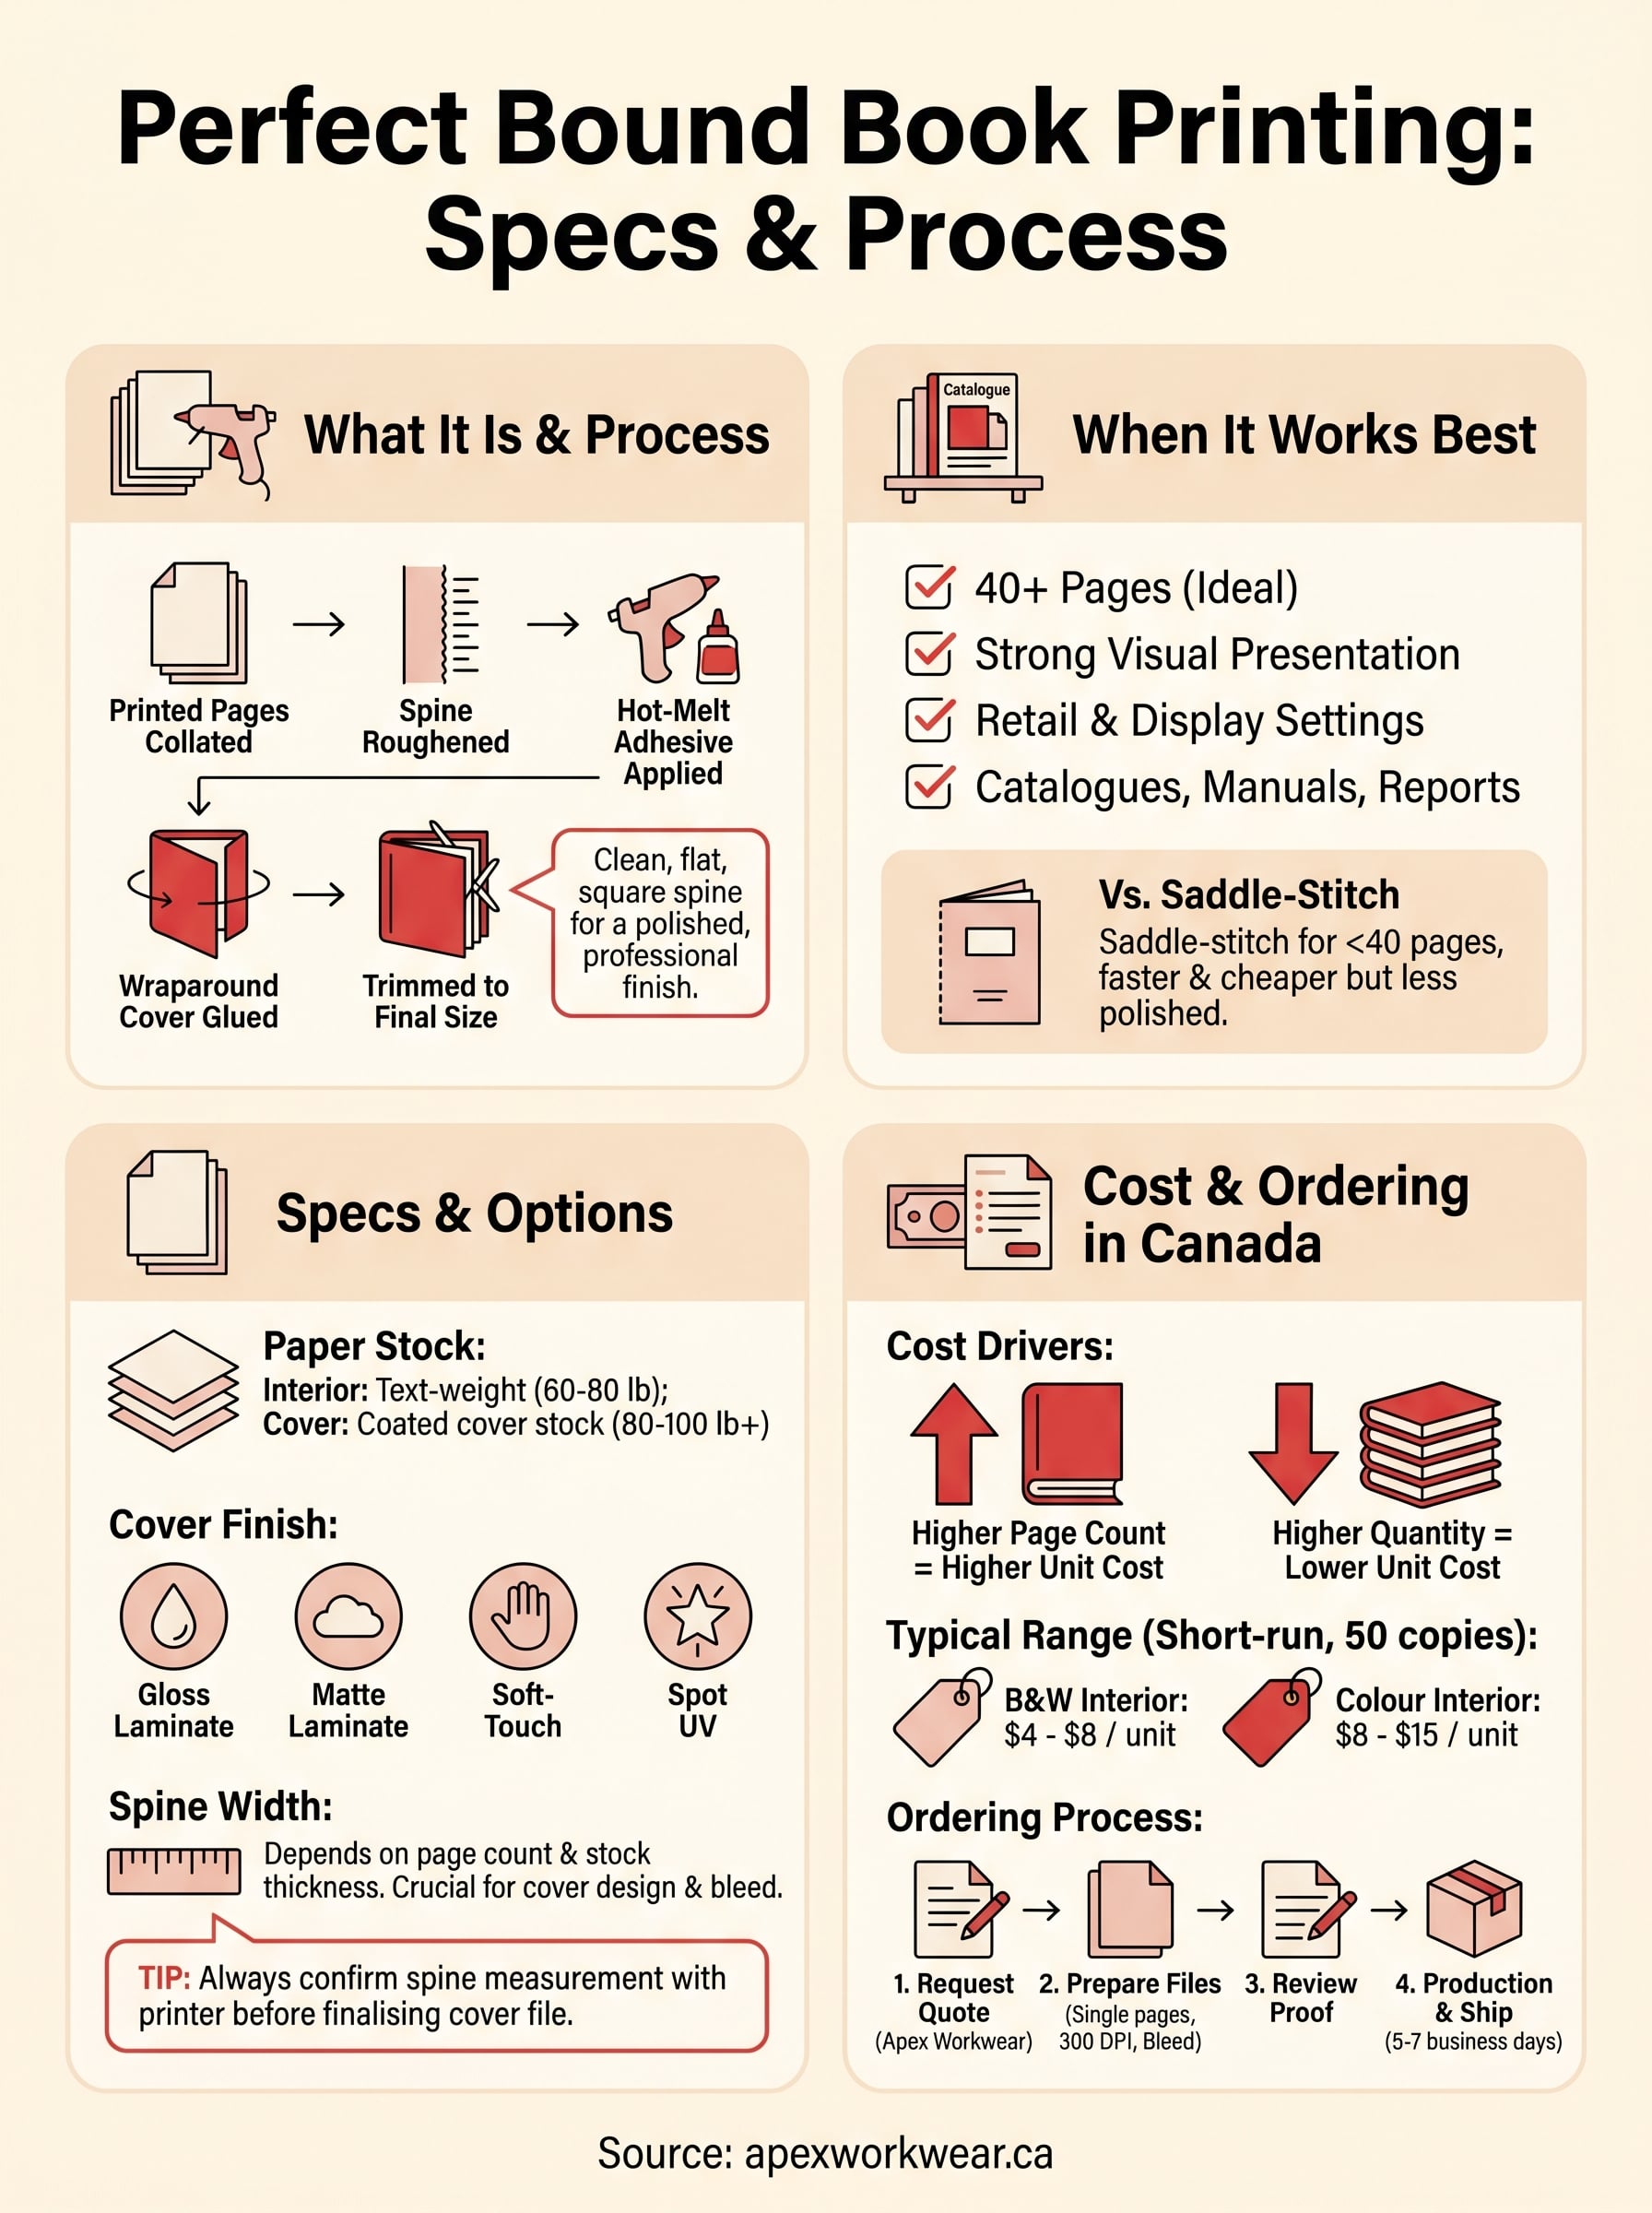
Perfect binding is a bookbinding technique where individual pages are gathered, their spines are roughened, and a strong hot-melt adhesive is applied to hold them together. A wraparound cover is then glued directly to that spine, creating a flat, square edge that gives the finished product its signature look. You’ll recognise this format from trade catalogues, corporate reports, training manuals, and retail paperbacks found anywhere books are sold.
The binding process itself
The production sequence for perfect bound book printing follows a specific set of steps, and understanding them helps you prepare better files and set realistic expectations. First, your interior pages are printed and collated in order, then stacked into a unit called a book block. The spine edge of that block is ground or roughened to create tiny fibres the adhesive can grip. Hot glue is applied, the cover is wrapped around and pressed into place, and the whole unit is trimmed on three sides to produce clean, uniform edges.
The trimming step is what gives perfect bound books their finished look, so your file setup needs to account for bleed on all sides, including the spine.
Because the cover wraps around and includes a spine panel, the width of that spine depends directly on page count and the thickness of your chosen paper stock. A 60-page booklet on standard 80 lb text stock will produce a noticeably thinner spine than a 200-page manual on heavier stock. Your printer should calculate this for you, but it is worth understanding so you can plan your cover design accordingly.
How it differs from other binding types
Perfect binding is one of several common binding methods, and choosing the right one matters for both function and appearance. Saddle-stitching, where folded pages are stapled through the spine, works well for thinner booklets of roughly 8 to 64 pages but produces no flat spine. Coil or spiral binding uses a plastic or metal coil threaded through punched holes, which lets pages lie flat when open but lacks the clean presentation of a perfect bound book. Hardcover case binding glues the book block into a rigid board cover, which is more durable and considerably more expensive.
For most professional print projects, perfect binding hits a practical middle ground: it handles higher page counts than saddle-stitching, looks more polished than coil binding, and costs far less than hardcover production. That combination makes it the standard choice for publications that need to look serious without carrying a premium production budget.
Why choose perfect binding
Perfect binding earns its place in professional print production because it delivers a finished, retail-quality appearance at a price point that suits small businesses and large organisations alike. When you hand a client a catalogue or leave a branded manual on a conference table, the binding format sends a signal. Coil-bound or saddle-stitched materials serve fine for internal use, but perfect binding tells the reader that the project received real attention.
When perfect binding works best
This binding method is the right call when your project combines a meaningful page count with a need for strong visual presentation. Anything from about 40 pages upward starts to look awkward in saddle-stitch format, and that is where perfect binding takes over. The flat spine gives you a usable branding surface, which matters for items stored on shelves or displayed in retail settings, such as product catalogues, training guides, and annual reports.
A flat spine with your company name or product title printed on it turns a bound document into a display piece rather than just a handout.
Common uses that benefit from perfect bound book printing include:
- Product and wholesale catalogues
- Employee handbooks and training manuals
- Event programmes and conference materials
- Client-facing portfolios and lookbooks
- Self-published books and creative zines
When another format fits better
For projects running fewer than 40 pages, saddle-stitching is faster and cheaper without sacrificing much in terms of appearance. Coil binding works better when readers need to lay the material completely flat, such as with a step-by-step instruction guide or a reference book that gets opened repeatedly to the same page. Matching the binding method to how your audience actually uses the finished piece saves budget and produces a better-suited result.
Your project’s page count, presentation goals, and how readers will handle the material are the three factors that should drive your binding decision. Perfect binding wins on all three counts for most professional print projects running 40 pages or more.
Specs and options that affect the result
The choices you make about paper stock, cover finish, and page count directly shape how your finished book looks, feels, and holds up over time. Getting these specs right before you submit files saves you from costly reprints and ensures the final product matches your vision.
Paper stock and page weight
Your interior pages typically print on text-weight paper, with 60 lb and 80 lb being the most common options for perfect bound book printing. Heavier stock feels more substantial in hand and reduces show-through on double-sided pages, but it also adds to the overall spine width and slightly increases cost. Cover stock is a separate specification, and most printers use 80 lb to 100 lb coated cover stock as a standard baseline, though thicker options like 14 pt card stock are available for more rigid covers.
Choosing a heavier interior stock without recalculating your spine width can push your cover artwork out of alignment, so always confirm the spine measurement with your printer before finalising your cover file.
Page count also works alongside stock weight as a key variable. Most perfect bound books require a minimum of 28 to 40 pages to create enough spine surface for the binding adhesive to grip properly. Your printer will specify the exact minimum for the stock you select, so confirm this early in the planning stage.
Cover finish and coating options
Your cover finish affects both appearance and durability in meaningful ways. Gloss laminate gives colours a vivid, saturated look and resists minor scuffs, making it a popular choice for catalogues and lookbooks. Matte laminate produces a softer, more refined appearance and works well for books where an understated feel suits the brand.

Soft-touch laminate adds a velvety texture that feels noticeably different in the reader’s hands. UV spot coating is another option that applies a high-shine layer to specific areas of the cover, letting you highlight a logo or title against a matte background for visual contrast.
How pricing works and what it costs in Canada
Perfect bound book printing costs in Canada vary based on several variables working together. Your page count, quantity, paper stock selection, and cover finish all feed into the final price, so a quote for 50 copies of a 48-page catalogue will look very different from one for 500 copies of a 200-page manual.
What drives the cost
The two biggest pricing levers are page count and print quantity. Higher page counts mean more paper, more ink, and longer press time, all of which add to the per-unit cost. Quantity works in the opposite direction: the more copies you order, the lower your cost per unit becomes, because setup and prepress costs spread across a larger run.
Other variables that affect your total include:
- Interior paper weight: heavier stock costs more per page
- Cover finish: matte or gloss laminate adds a modest fee; soft-touch or spot UV coating costs more
- Colour vs. black and white interior: full-colour pages carry a higher print cost than black and white
- Turnaround time: rush production typically adds a premium
Ordering even a modest increase in quantity, say moving from 50 to 100 copies, often drops your per-unit cost enough to offset the higher total spend.
Typical price ranges in Canada
For a short-run order of 50 copies with a full-colour cover, black and white interior, and standard gloss laminate, you can expect to pay roughly $4 to $8 per unit depending on page count. Full-colour interiors push that range higher, typically $8 to $15 per unit at similar quantities. Larger runs of 250 or more copies bring costs down considerably, with per-unit prices often falling below $3 to $5 for standard specifications.
Apex Workwear provides free quotes within 24 hours, seven days a week, so you get accurate, project-specific pricing rather than a rough estimate pulled from a pricing table.
How to prepare files and place an order
Getting your files right before you submit is the single most important step in a perfect bound book printing project. Poorly prepared files are the leading cause of delays, reprints, and results that fall short of what you expected. A few straightforward checks before you upload will save you time and prevent unnecessary revisions after your proof comes back.
Setting up your files correctly
Your interior pages should be set up as individual single pages, not as spreads, unless your printer specifically asks for spreads. Export your file as a high-resolution PDF at 300 DPI, with bleed on all four sides and crop marks included. Most printers require a minimum of 3mm bleed. Keep critical text and logos well inside the safe zone, at least 5mm from the trim edge, so nothing gets cut off during the final trim.
Your cover file is a separate document from your interior, and it must include an accurate spine width calculated from your confirmed page count and paper stock before you finalise the design.
Build your cover as a single flat file that includes the front panel, spine, and back panel in one layout. Designing the cover before confirming the spine width risks submitting a file where spine artwork shifts out of alignment after binding and trimming.
Placing your order with Apex Workwear
Once your files are ready, request a free quote through the Apex Workwear website and include your page count, quantity, paper stock preference, and cover finish. You will receive a response within 24 hours, seven days a week. After you approve the quote, upload your files and our team will review them, then send a digital proof before anything goes to press. Basic layout adjustments are handled at no extra cost. Most orders ship within 5 to 7 business days, with rush options available if your deadline is tight.
Ready to print your book?
Perfect bound book printing gives your project a finished, professional look that saddle-stitching and coil binding simply cannot match. Whether you are producing a client catalogue, a training manual, or a branded lookbook, you now have a clear picture of what the process involves, which specs matter, and how to prepare your files so nothing goes wrong at the press stage.
The next step is straightforward. Confirm your page count, choose your paper stock and cover finish, and get your files set up at 300 DPI with proper bleed before you submit. If you have questions about specs or need a hand with basic layout adjustments, our team is here to help.
Request a free quote from Apex Workwear and receive a response within 24 hours, seven days a week. Most orders ship within 5 to 7 business days, with rush options available when your deadline is tight.