Custom labels and stickers are one of those small details that make a big difference for your brand. Whether you need mailing labels, product stickers, or return address labels, getting them right matters, and VistaPrint label printing is one of the most commonly searched options for businesses looking to order custom labels online. It makes sense; they’ve been around for years and offer a wide product catalogue.
This guide walks you through the full process of designing and ordering labels through VistaPrint, from choosing the right product type to uploading your artwork and placing your order. We’ll cover the available label options, customisation tools, and a few things to watch out for so you get exactly what you need without wasting time or money.
That said, VistaPrint isn’t your only option, and depending on your priorities, it may not be the best one. At Apex Workwear, we offer custom label and sticker printing with no minimums, free design support, and Canada-based production with fast turnaround. If you’re a small business in the GTA or anywhere in Canada, it’s worth knowing what else is out there. But first, let’s break down how VistaPrint’s label printing works so you can make an informed decision.
What you need before you design and order labels
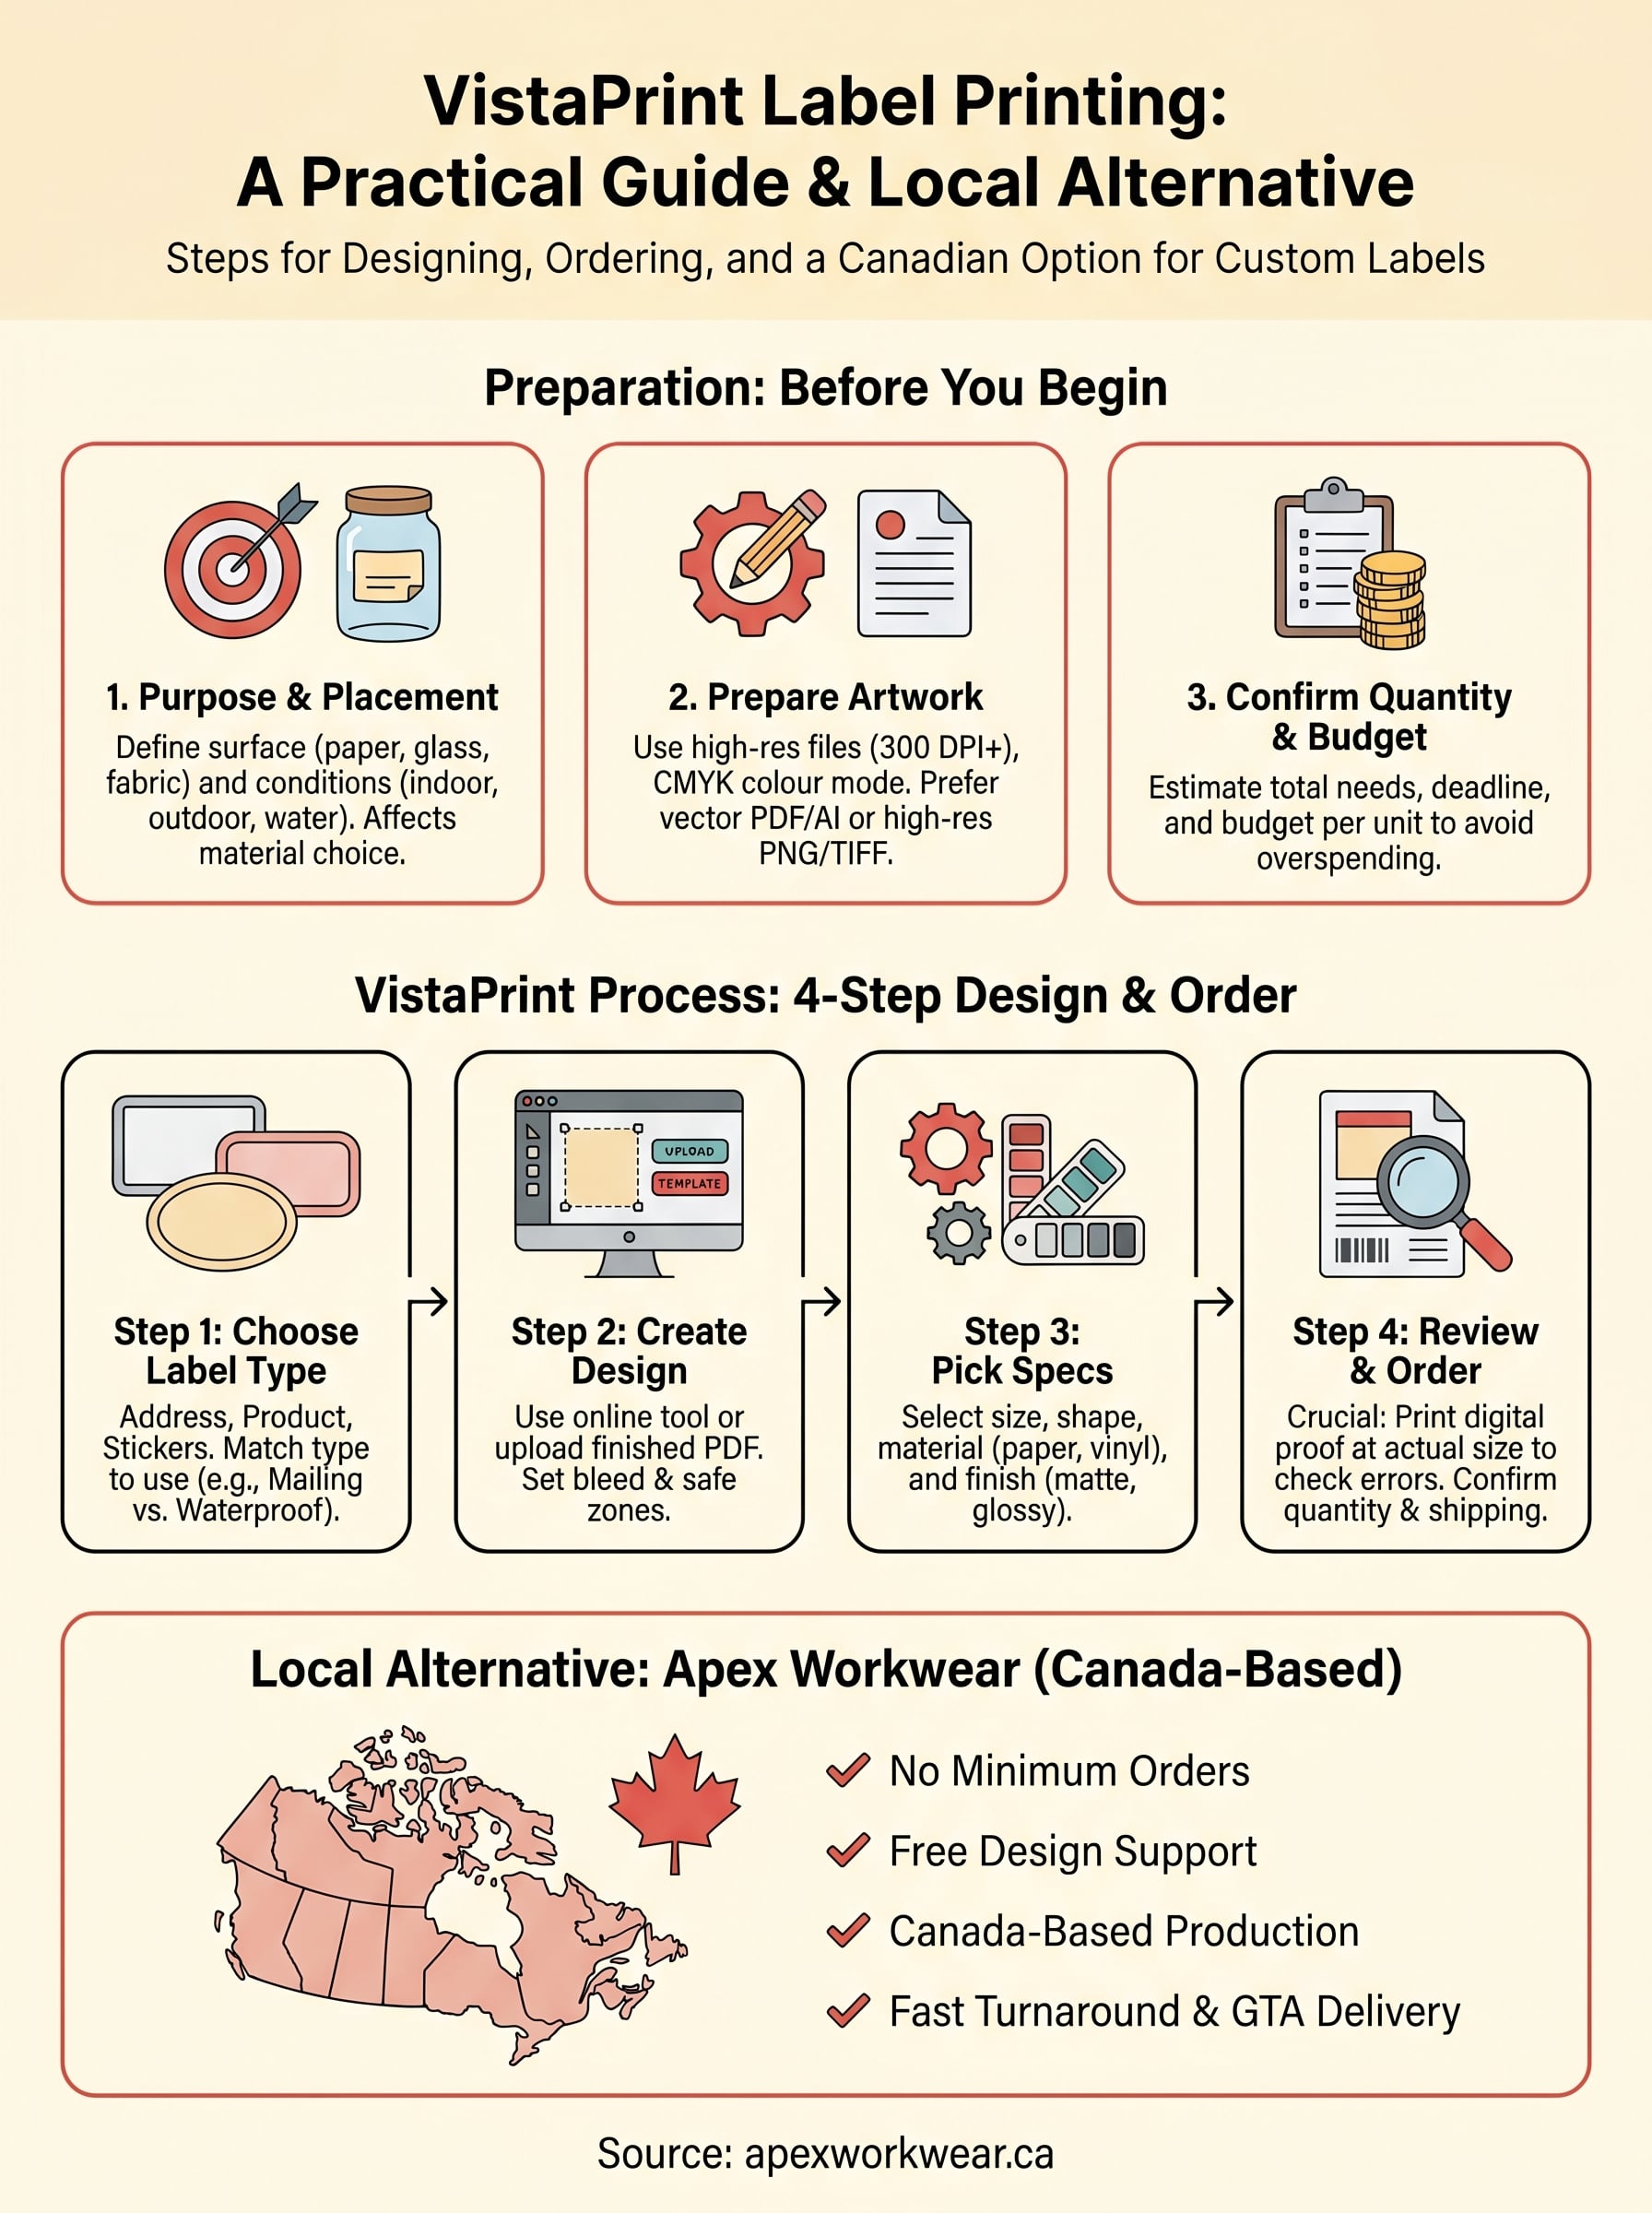
Getting organised before you start will save you from ordering the wrong thing or uploading a file that prints poorly. VistaPrint label printing works best when you arrive prepared, with a clear idea of what you need, artwork that meets print specifications, and a realistic sense of your quantity and budget. Skipping this step is where most ordering mistakes begin.
Know your label’s purpose and placement
The first thing to nail down is what the label will actually do and where it will end up. A return address label that sits on a plain envelope has very different requirements from a product label that sticks to a glass bottle, or a shipping label that gets handled roughly during transit. Surface type, indoor or outdoor use, and how long the label needs to last all affect the material and finish you should choose.
Think through these questions before you open any design tool:
- Will the label be exposed to water, heat, or sunlight?
- What surface will it adhere to: paper, plastic, glass, or fabric?
- Does it need to be removed cleanly, or is it a permanent application?
- What size fits the space where it will go?
If you skip the placement question, you risk ordering a finish or adhesive that fails in real conditions, which means reordering from scratch.
Prepare your artwork files
File quality is the single biggest reason labels come back looking worse than expected. Most professional printers require artwork at 300 DPI (dots per inch) or higher to avoid blurry or pixelated results. If you’re working with a logo or wordmark, make sure you have a vector file (such as AI, EPS, or PDF format) or a high-resolution raster file (PNG or TIFF).
Here is a quick reference for what to prepare:
| File Type | Best For | Notes |
|---|---|---|
| PDF (vector) | Logos, text-heavy designs | Preferred format for sharp output |
| AI / EPS | Logos and illustrations | Requires design software to create |
| PNG (300 DPI+) | Photos, detailed graphics | Check resolution before uploading |
| TIFF | High-res photos | Large file size but high quality |
| JPEG | Photos | Compression can reduce quality |
Colour mode matters too. If your label design uses specific brand colours, set your file to CMYK rather than RGB. Screen colours and print colours behave differently, and what looks correct on your monitor can shift noticeably when printed on physical material.
Confirm your quantity and budget
Knowing your quantity upfront helps you avoid paying more per unit than necessary. Label printing typically gets cheaper as volume increases, so if you’re printing for a product launch or a mailing campaign, it pays to estimate your actual needs rather than ordering a small test batch at a higher cost per label.
Write down your answers to these before placing any order:
- How many labels do you need for this project, and do you expect to reorder regularly?
- Is there a hard deadline, and do you need rush production or expedited shipping?
- What is your total budget per label or per sheet?
Having these details ready means you can compare product options and pricing accurately, rather than guessing at checkout and ending up with something that doesn’t fit your actual requirements.
Step 1. Choose the right VistaPrint label type
VistaPrint offers several label categories, and picking the wrong one means ordering something that looks right on screen but doesn’t perform in your actual situation. Before you open the design tool, spend two minutes confirming which label type fits your project, because each product category comes with different sizing, material, and adhesive defaults.
Standard labels, stickers, and address labels
VistaPrint groups its label products into a few main families: standard labels, stickers, and address labels (which cover mailing labels, return address labels, and shipping labels). Standard labels and stickers are functionally similar, but they differ in sheet format and typical use. Stickers are often sold as individually cut shapes, while standard labels come on sheets better suited for batch application.
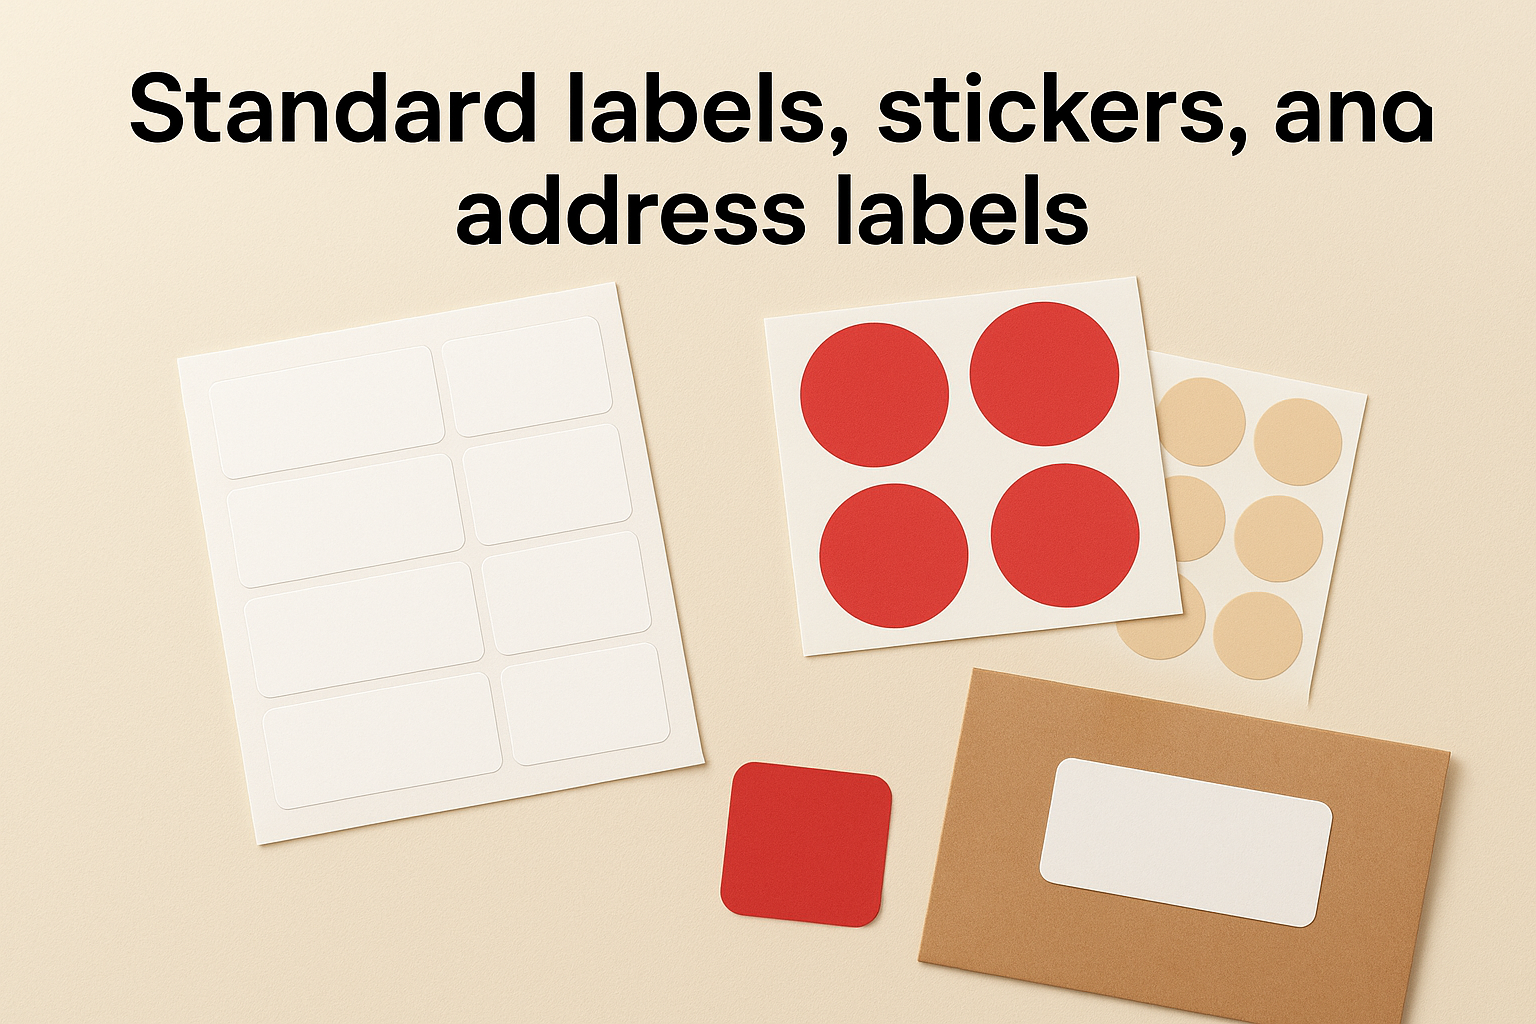
Address labels are the most straightforward pick if your goal is mailing or shipping. VistaPrint’s mailing labels are pre-sized to fit common label sheet formats, which means they load directly into most office printers if you need to reprint extras. Return address labels are smaller and sit in the upper-left corner of an envelope, so confirm the dimensions match your envelope size before ordering.
If you’re ordering shipping labels, check that the material is rated for carrier handling conditions, not just standard indoor use.
Product labels and promotional stickers
Product labels belong in their own category because they often need to hold up under real-world stress: refrigeration, moisture, or repeated handling on a retail shelf. VistaPrint’s product label options include a choice of material types, which directly affects durability and adhesive strength. For branded packaging or anything sold in a retail setting, a glossy or matte finish on water-resistant stock is usually the right starting point.
Promotional stickers work better for handouts, event giveaways, or packaging inserts. They’re printed on lighter stock and aren’t built for long-term adhesion on surfaces with heavy use. With VistaPrint label printing, you can filter by use case directly on their product pages, which helps you land on the correct product family quickly before you invest time in the design step.
Step 2. Create a print-ready label design
The design step is where most people lose time, especially if they start inside VistaPrint’s online editor without a plan. You have two main paths: build a design from scratch using their browser-based tool, or upload a finished file you’ve already prepared. If your brand has established colours, fonts, or logo files, uploading your own artwork almost always produces a more consistent result than relying on stock templates.
Use the design tool or upload your own artwork
VistaPrint’s editor gives you access to pre-built label templates that you can modify with your own text, colours, and images. This works well for a simple address label or a basic promotional sticker. For anything more complex, such as product labels with precise brand colours or detailed illustrations, upload a print-ready PDF or high-resolution PNG instead. The upload route skips the editor entirely and takes your file straight to the proofing stage.
Always download and review the digital proof before you approve your order. Errors that look minor on screen become obvious at actual label size, and catching them at proof stage costs you nothing.
Approving a proof without printing it at actual size is one of the most common and avoidable mistakes in the entire vistaprint label printing process.
Set up your file with the correct bleed and safe zones
Bleed refers to the extra artwork that extends beyond the trim edge of your label, and most printers require 1.5 mm to 3 mm of bleed to avoid white borders after cutting. Your safe zone is the inner margin where all critical content, including text and logos, must sit so nothing gets clipped during production. VistaPrint provides downloadable templates for each label size that show you exactly where these boundaries fall.
Run through this checklist before you upload your file:
- Extend background colours and patterns to the bleed edge
- Keep all text and logos at least 3 mm inside the trim line
- Embed all fonts, or convert text to outlines, before exporting
- Export in CMYK colour mode at 300 DPI or higher
- Save as a PDF with no crop marks, unless the printer specifies otherwise
Step 3. Pick size, shape, material, and finish
Once your design file is ready, VistaPrint label printing requires you to lock in your physical specifications before adding to cart. Size, shape, material, and finish are not just aesthetic choices; they directly affect how your label performs in the real world and whether it survives the conditions it will actually face.
Size and shape options
Standard rectangular and oval labels cover most everyday use cases, including mailing labels, product tags, and address labels. VistaPrint also offers circle, square, and custom-cut shapes depending on the product category you select. Picking the wrong size is a common and frustrating mistake, so measure your surface or envelope before you commit.
Use this reference table to match common label applications to typical sizes:
| Label Use | Common Size | Shape |
|---|---|---|
| Return address | 1" x 2.625" | Rectangle |
| Mailing / shipping | 2" x 4" or 4" x 6" | Rectangle |
| Product label (small jar) | 2" x 3.5" | Rectangle or oval |
| Promotional sticker | 2" or 3" diameter | Circle |
| Name badge | 2.33" x 3.375" | Rectangle |
Measure the exact space where your label will sit before selecting a size, because resizing after you have built your design adds extra layout work.
Material and finish
Matte and glossy finishes are the two most common options, and the right choice depends on your context. Glossy works well for product labels where you want colours to pop and images to look vivid. Matte is better for labels where people write on them, such as address or name labels, or where you want a clean, minimal look.
Material type matters just as much as finish. For waterproof or outdoor use, select a vinyl or polypropylene stock rather than standard paper. Standard paper labels are fine for envelopes and indoor packaging, but they break down quickly with moisture or direct handling. Check VistaPrint’s product page for each label type to confirm which material options are available for the size and shape you have already selected, since not every combination is offered across the full catalogue.
Step 4. Order, proof, and avoid common mistakes
You’ve picked your label type, built your design, and locked in your specifications. Now comes the step most people rush through: reviewing your proof and completing the order without errors. Moving too fast here is what turns a straightforward job into a costly reprint.
Review your proof at actual size
Before you approve anything, download the digital proof and print it on a standard sheet of paper at the exact label size. Viewing it on screen at a scaled-down thumbnail will not show you how text weight, colour contrast, or fine details actually look at full size. Hold the printed test next to the surface it will stick to: an envelope, a product jar, or a shipping box. If something looks off at this stage, go back and fix it before you confirm.
Approving your proof on a monitor without printing a physical test copy is the most common reason vistaprint label printing orders come back with preventable errors.
Check each of these before clicking approve:
- All text is spelled correctly and sits inside the safe zone
- Brand colours look accurate compared to your reference files
- No important content is cut off at the trim line
- The bleed area is filled with background colour, not white
Avoid these common ordering mistakes
Quantity and shipping errors catch people off guard at checkout. Confirm your label count again before you add to cart, particularly if you changed sizes or shapes during the design step, since some products recalculate quantity in sheets rather than individual labels. Double-check that your shipping address and expected delivery date are realistic for your deadline, and factor in production time separately from transit time.
Pay attention to reorder settings if you plan to use these labels regularly. VistaPrint allows you to save designs to your account, which makes reordering straightforward, but only if your design was uploaded rather than built inside a template that could be altered between orders. Save a copy of your final approved file locally so you always have a clean master to return to.
A simple way to get it done locally
VistaPrint label printing works well if you have time to navigate their product catalogue, prepare your own files, and manage the back-and-forth of online proofing. For many Canadian small businesses, though, the process adds more steps than it saves, especially when you factor in shipping times from outside Canada and the lack of direct support when something goes wrong.
If you want a faster, simpler path, Apex Workwear handles custom label and sticker printing with no minimum order requirements, built-in design support, and production based entirely in Canada. You get a digital proof before anything goes to print, free basic design edits, and most orders ship within five to seven business days, with rush options available. Free local delivery is available across the GTA.
Get a quote within 24 hours by visiting Apex Workwear for custom label and sticker printing and telling us exactly what you need.