Speedball kits are one of the most popular entry points into DIY screen printing, and for good reason. They’re affordable, widely available, and come with nearly everything you need to start pulling prints at home. But if you’ve ever opened the box and felt a bit lost staring at the emulsion, squeegee, and ink bottles, you’re not alone. Clear Speedball screen printing instructions can make the difference between a clean first pull and a frustrating mess of smeared ink.
This guide walks you through the full process step by step, from preparing your screen and exposing your design to printing your first shirt and heat-setting the ink so it lasts. Whether you’re experimenting with a new hobby or producing small-batch custom tees, you’ll have a solid foundation by the end.
At Apex Workwear, we handle custom apparel printing for businesses, teams, and individuals across Canada every day, from single pieces to large orders. We know screen printing inside and out because it’s what we do. So while this guide is built to help you get results on your own with a Speedball kit, know that our team is here whenever you need professional-quality prints without the trial and error.
What you need before you start
Before you follow any Speedball screen printing instructions, gather everything you’ll use upfront. Stopping mid-process to hunt for supplies is one of the fastest ways to ruin a print. Missing a single item at the wrong moment, like not having your heat gun ready after pulling ink, can cause the ink to cure incorrectly or the screen to dry blocked with residue.
The Speedball kit essentials
The Speedball Fabric Screen Printing Kit typically includes most of what you need to get started. Depending on the kit version you purchase, your box should contain:
- A pre-stretched mesh screen (typically 10×14 inches for starter kits)
- Diazo Photo Emulsion and sensitiser bottle
- Screen printing ink in your chosen colours
- A squeegee for pushing ink through the mesh
- Screen printing medium for mixing and adjusting ink consistency
- A transparency film sheet for your artwork
If your kit doesn’t include a light source, you’ll need to source one separately. A 150-watt incandescent bulb or a dedicated UV exposure unit both work well with Speedball emulsion.
Check the contents against the product listing before you open anything. Emulsion and sensitiser must be stored in a cool, dark place until you’re ready to use them, or they’ll degrade before you even coat the screen.
Additional supplies worth having on hand
Your Speedball kit covers the basics, but a few extra items will make the whole process much smoother. Masking tape is essential for sealing the edges of your screen frame and preventing ink from bleeding underneath the mesh. You’ll also need a dark, dust-free space for coating and drying your emulsion, since any accidental light exposure before printing will ruin the screen entirely.
Stock up on these before your first session:
- Cardboard or foam board to insert inside garments during printing
- A heat gun or household iron for curing ink after printing
- Mild dish soap and a soft brush for cleaning your screen after each use
- Scrap fabric or old t-shirts for test pulls
- Paper towels and a dedicated workspace covering to protect surfaces
Having everything ready before your first print means you can move through each stage without interruption, which directly affects print quality and consistency across your run.
Step 1. Choose your method and prep artwork
Speedball gives you two practical approaches to creating a stencil, and your choice here shapes everything that follows. The photo emulsion method uses a light-sensitive coating to burn your design onto the screen from a printed transparency. The drawing fluid and screen filler method is entirely hand-drawn, making it better suited to loose, painterly designs. Before you follow the rest of these speedball screen printing instructions, decide which approach fits your artwork and skill level.
The photo emulsion (Diazo) method
This is the most reliable route for sharp, repeatable prints from a digital design. Print your artwork in solid black onto a transparency sheet, sized to fit within your screen. Your design needs 100% opacity to block UV light during exposure. Thin grey areas in your artwork will cause weak spots in the stencil, so check your image carefully before printing.
Use these artwork specs as a checklist before you print your transparency:
- Image must be solid black with no gradients or grey fills
- Mirror your design horizontally if your artwork contains text
- Leave at least a 1-inch border between your design and the screen frame
- Maximum image area for a 10×14 screen is roughly 7×10 inches
Print at 1200 DPI or higher for the cleanest edges on fine lines and small text.
Drawing fluid and screen filler method
Handcrafted designs benefit most from this approach, particularly if you want to skip the darkroom setup entirely. Paint your design directly onto the mesh with drawing fluid, let it dry, coat the screen with screen filler, then wash out the drawing fluid to reveal open mesh. Your brush control and patience directly determine the quality of your printed lines, so practise the shapes on paper first before committing to the screen.
Step 2. Make the stencil and prep the screen
Now that your artwork is ready, it’s time to coat the screen and create the stencil that holds your design. This step is where most beginners make mistakes, so follow these Speedball screen printing instructions carefully to avoid wasting emulsion or ruining a screen.
Coat and expose the screen
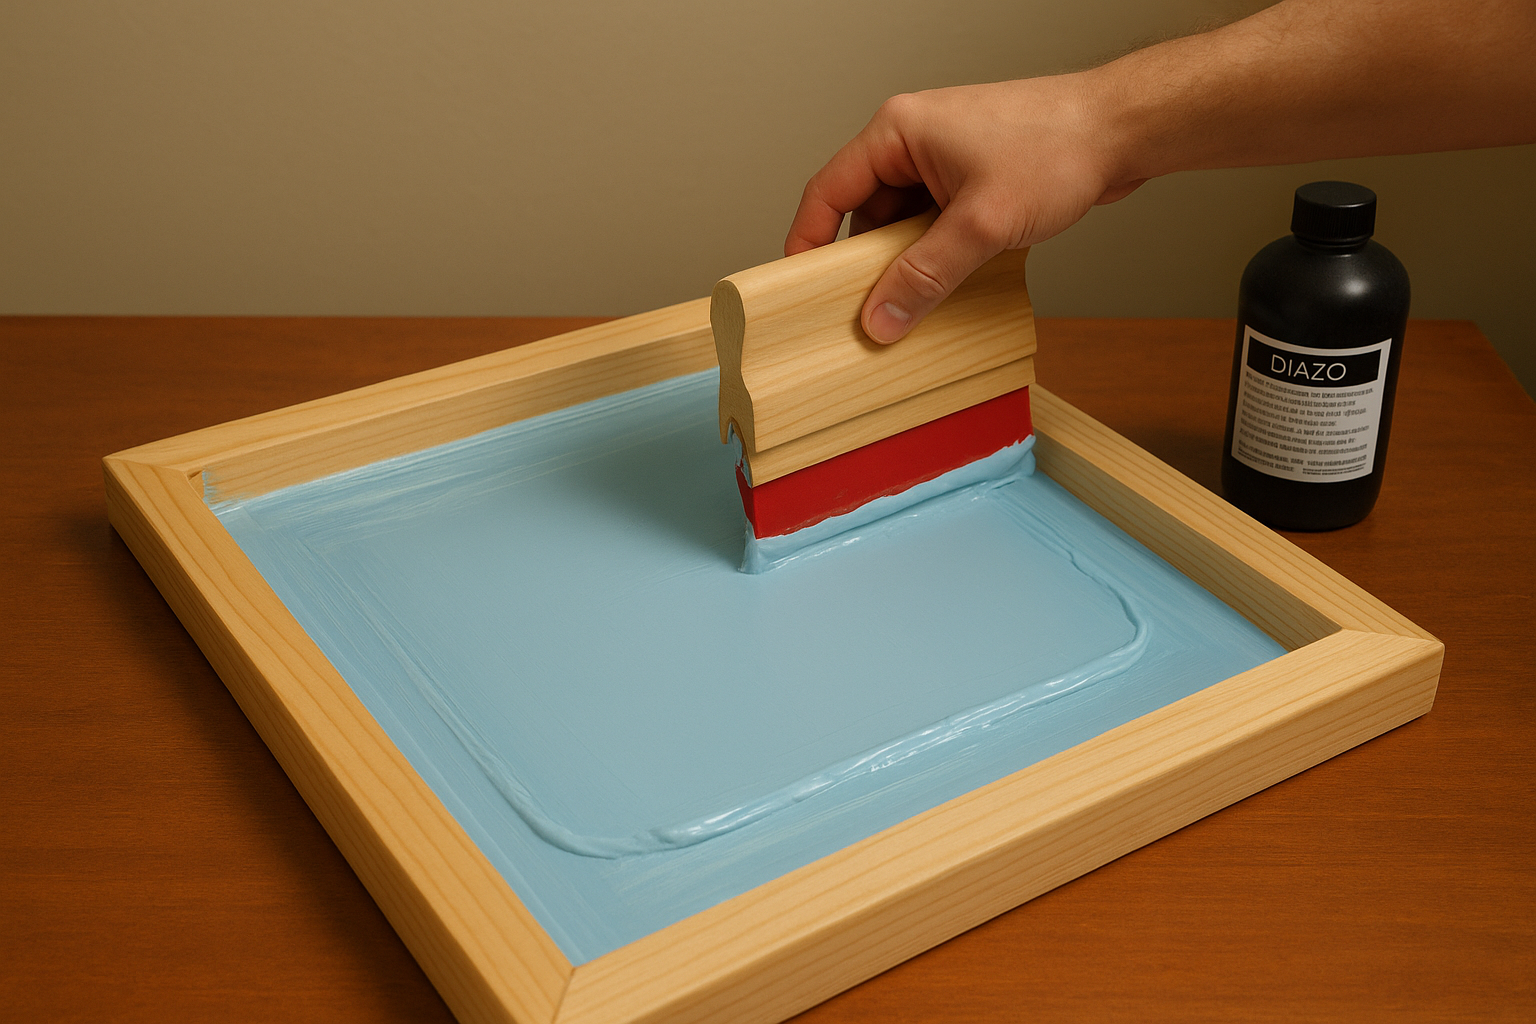
Mix your Diazo sensitiser into the emulsion bottle according to the ratio on the label, then shake thoroughly and let it sit for five minutes to settle. Pour a line of emulsion along one edge of the screen and use the squeegee to pull it evenly across the mesh in one smooth stroke on both the front and back. Work in a dim room with no direct sunlight. Let the screen dry completely in the dark, flat and horizontal, for at least two hours.
A slightly warm room speeds drying without damaging the emulsion, but avoid heat above 40°C or you risk pre-curing it before exposure.
Place your printed transparency ink-side down onto the dried screen, then hold it firmly with a piece of glass or a heavy book. Expose the screen under your light source for the time listed in your kit instructions, typically eight to twelve minutes with a 150-watt bulb at 30 cm distance.
Rinse, inspect, and tape the screen
Once exposed, rinse both sides of the screen immediately with cool water. The unexposed emulsion covering your design area will wash away, leaving open mesh where ink will pass through. Hold the screen up to light and check for pinholes or thin spots. Patch any unwanted gaps with a small amount of emulsion, let it dry fully, then tape the inside frame edges with masking tape to prevent ink from pooling under the frame during printing.
Step 3. Print clean, even pulls with Speedball ink
With your stencil ready and taped, you’re set to pull your first print. This is the step most people rush, and rushing here causes streaky coverage and uneven colour. Follow these Speedball screen printing instructions carefully to get a clean result on every pull and avoid wasting garments on fixable mistakes.
Set up your print surface
Lay your garment flat on a firm, non-slip surface and slide a piece of cardboard or foam board inside it to prevent ink bleeding through to the back layer. The board keeps the fabric completely taut and flat, which directly affects how cleanly the ink transfers through the mesh. Smooth out any wrinkles by hand before you position the screen over the print area.
Load and pull the ink
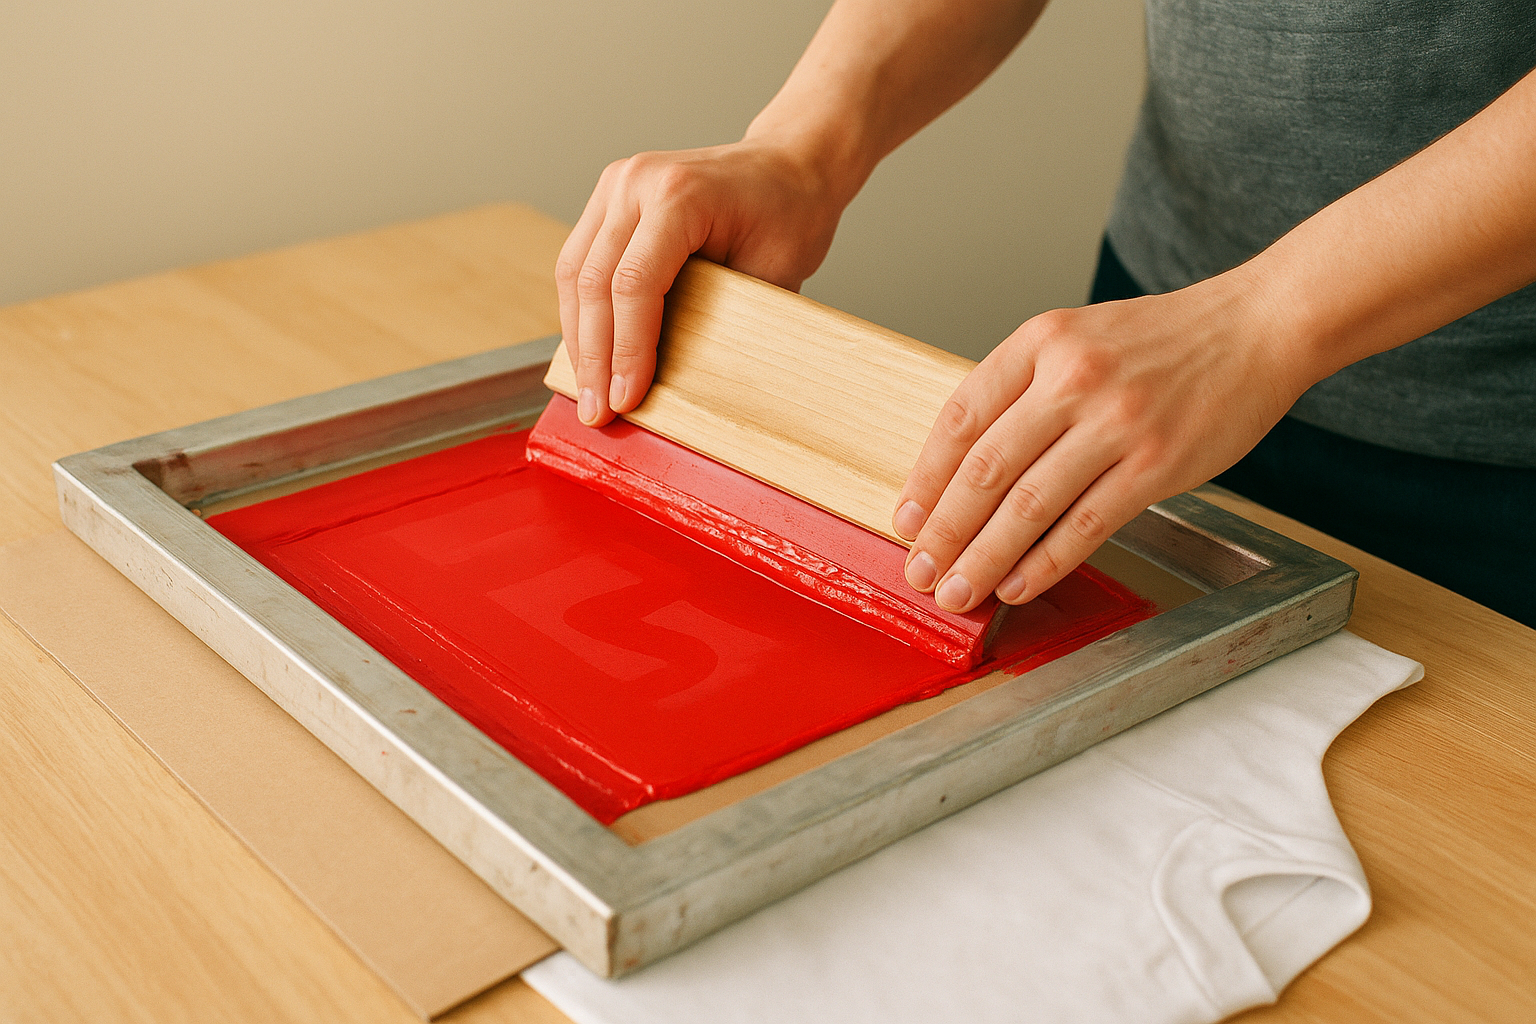
Place your screen onto the garment and apply a generous line of Speedball ink along the top edge of the design, above the open mesh. Hold the screen steady with one hand, then pull the ink firmly from top to bottom in one or two smooth strokes using your squeegee. Keep the squeegee angle between 45 and 75 degrees throughout the stroke to push ink through the mesh rather than skim across it.
Two firm pulls at a consistent angle produce better coverage than five light ones, which tend to blur edges and build up excess ink on the surface.
Lift the screen straight up after each pull to avoid dragging wet ink across the garment. Always run your first pull on scrap fabric to confirm coverage and ink consistency before printing your actual stock.
Step 4. Dry, heat set, clean up, and store
After your final pull, the print isn’t finished yet. Wet Speedball ink needs to dry and then cure before the garment goes near water or heavy handling. Skipping the heat-setting step is the most common reason prints wash out after just a few cycles in the machine.
Heat set the ink properly
Let the printed garment air dry for at least 15 minutes before applying any heat. Once dry to the touch, you have two reliable curing options depending on your equipment:
- Heat gun: Hold 5 to 8 cm above the print and move in steady circles for 60 to 90 seconds
- Household iron: Set to medium-high, place a thin cloth over the print, and press firmly for 3 to 5 minutes
- Heat press: Set to 160°C at medium pressure for 45 to 60 seconds for the most consistent result
Speedball fabric inks are fully cured when the print reaches approximately 160°C, so consistent heat coverage across the entire design matters.
Clean your screen and store it
Following the rest of these speedball screen printing instructions, clean your screen immediately after printing while the ink is still wet. Rinse both sides under cold water using a soft brush and mild dish soap, working gently to avoid damaging the emulsion. Dried ink blocks the mesh permanently, making the screen unusable for future sessions.
Store your clean, dry screen flat in a dark, dust-free location away from direct sunlight. Direct UV exposure will degrade the emulsion and reduce the number of reprints you can get from the same stencil over time.
Quick wrap-up
These Speedball screen printing instructions cover the full process from artwork prep and emulsion coating to ink pulling and heat setting. Each step builds on the last, so skipping ahead or rushing through drying and curing stages is what typically causes washed-out prints and blocked screens. Follow the sequence, test on scrap fabric first, and you’ll get consistent results from your kit.
Screen printing at home gives you genuine creative control over small runs and one-off pieces. But when you need professional-quality custom apparel without the setup, mess, or trial and error, working with an experienced print shop is the faster and more reliable path. Whether you need a dozen branded tees or a full team kit, Apex Workwear’s custom apparel printing gives you expert production, honest pricing, and fast turnaround across Canada, with no minimums on select products.