
Putting up a set of illuminated channel letters looks straightforward until you’re standing on a ladder with a raceway in one hand and a bundle of low-voltage wiring in the other. Learning how to install channel letters properly means getting the mounting, wiring, and safety steps right the first time, because a botched install can mean flickering letters, water damage, or a sign that falls off the wall within a year.
This guide walks you through the entire process, from measuring and layout to securing the letters and connecting the power supply. You’ll get the practical, trade-tested steps that installers actually use, not just a vague overview, so you can finish the job with a sign that stays lit and level for years.
We’ll cover choosing the right mounting method for your wall type, running wiring safely through a raceway or flush mount, and the electrical and safety checks you need before flipping the switch. Whether you’re a contractor tackling your first channel letter job or a business owner overseeing an installer, this step-by-step guide gives you the confidence to get it done properly.
Before you start: mounting methods, tools and permits
Getting your channel letters ready to shine starts long before you touch a drill. Planning the mounting method and gathering the right gear saves you a second trip up the ladder and keeps the whole job code-compliant.
Choosing a mounting method
Most channel letters go up one of two ways: flush-mounted directly to the wall with wiring fed through a small hole behind each letter, or mounted on a raceway, a metal box that houses the wiring and sits between the letters and the wall. Flush mounting looks cleaner on brick or stucco, while a raceway is faster to install and easier to service later.
| Method | Best for | Install time | Maintenance access |
|---|---|---|---|
| Flush mount | Smooth walls, permanent installs | Longer | Requires removing letters |
| Raceway mount | Uneven walls, rentals, quick swaps | Shorter | Easy, panel opens on raceway |
Choose your mounting method based on your wall surface first, not what looks fastest to install.
Tools and materials you’ll need
Have everything staged before you climb the ladder:
- Cordless drill with masonry or wood bits (matched to your wall type)
- Stainless steel screws or wall anchors rated for the letter weight
- Low-voltage wiring, wire nuts, and waterproof connectors
- Silicone sealant and a caulking gun
- Level, tape measure, and chalk line
- Voltage tester and a transformer (if not pre-wired into the letters)
Permits and electrical requirements
Most Canadian municipalities require a sign permit before installation, and illuminated signs almost always need an electrical permit too, since a licensed electrician has to inspect the final hookup under your provincial code. Check with your local building department before you schedule the install, and confirm the work follows the Canadian Electrical Code standards set by the CSA Group. Skipping this step can mean a stop-work order after the letters are already on the wall, which costs far more time than a phone call upfront.
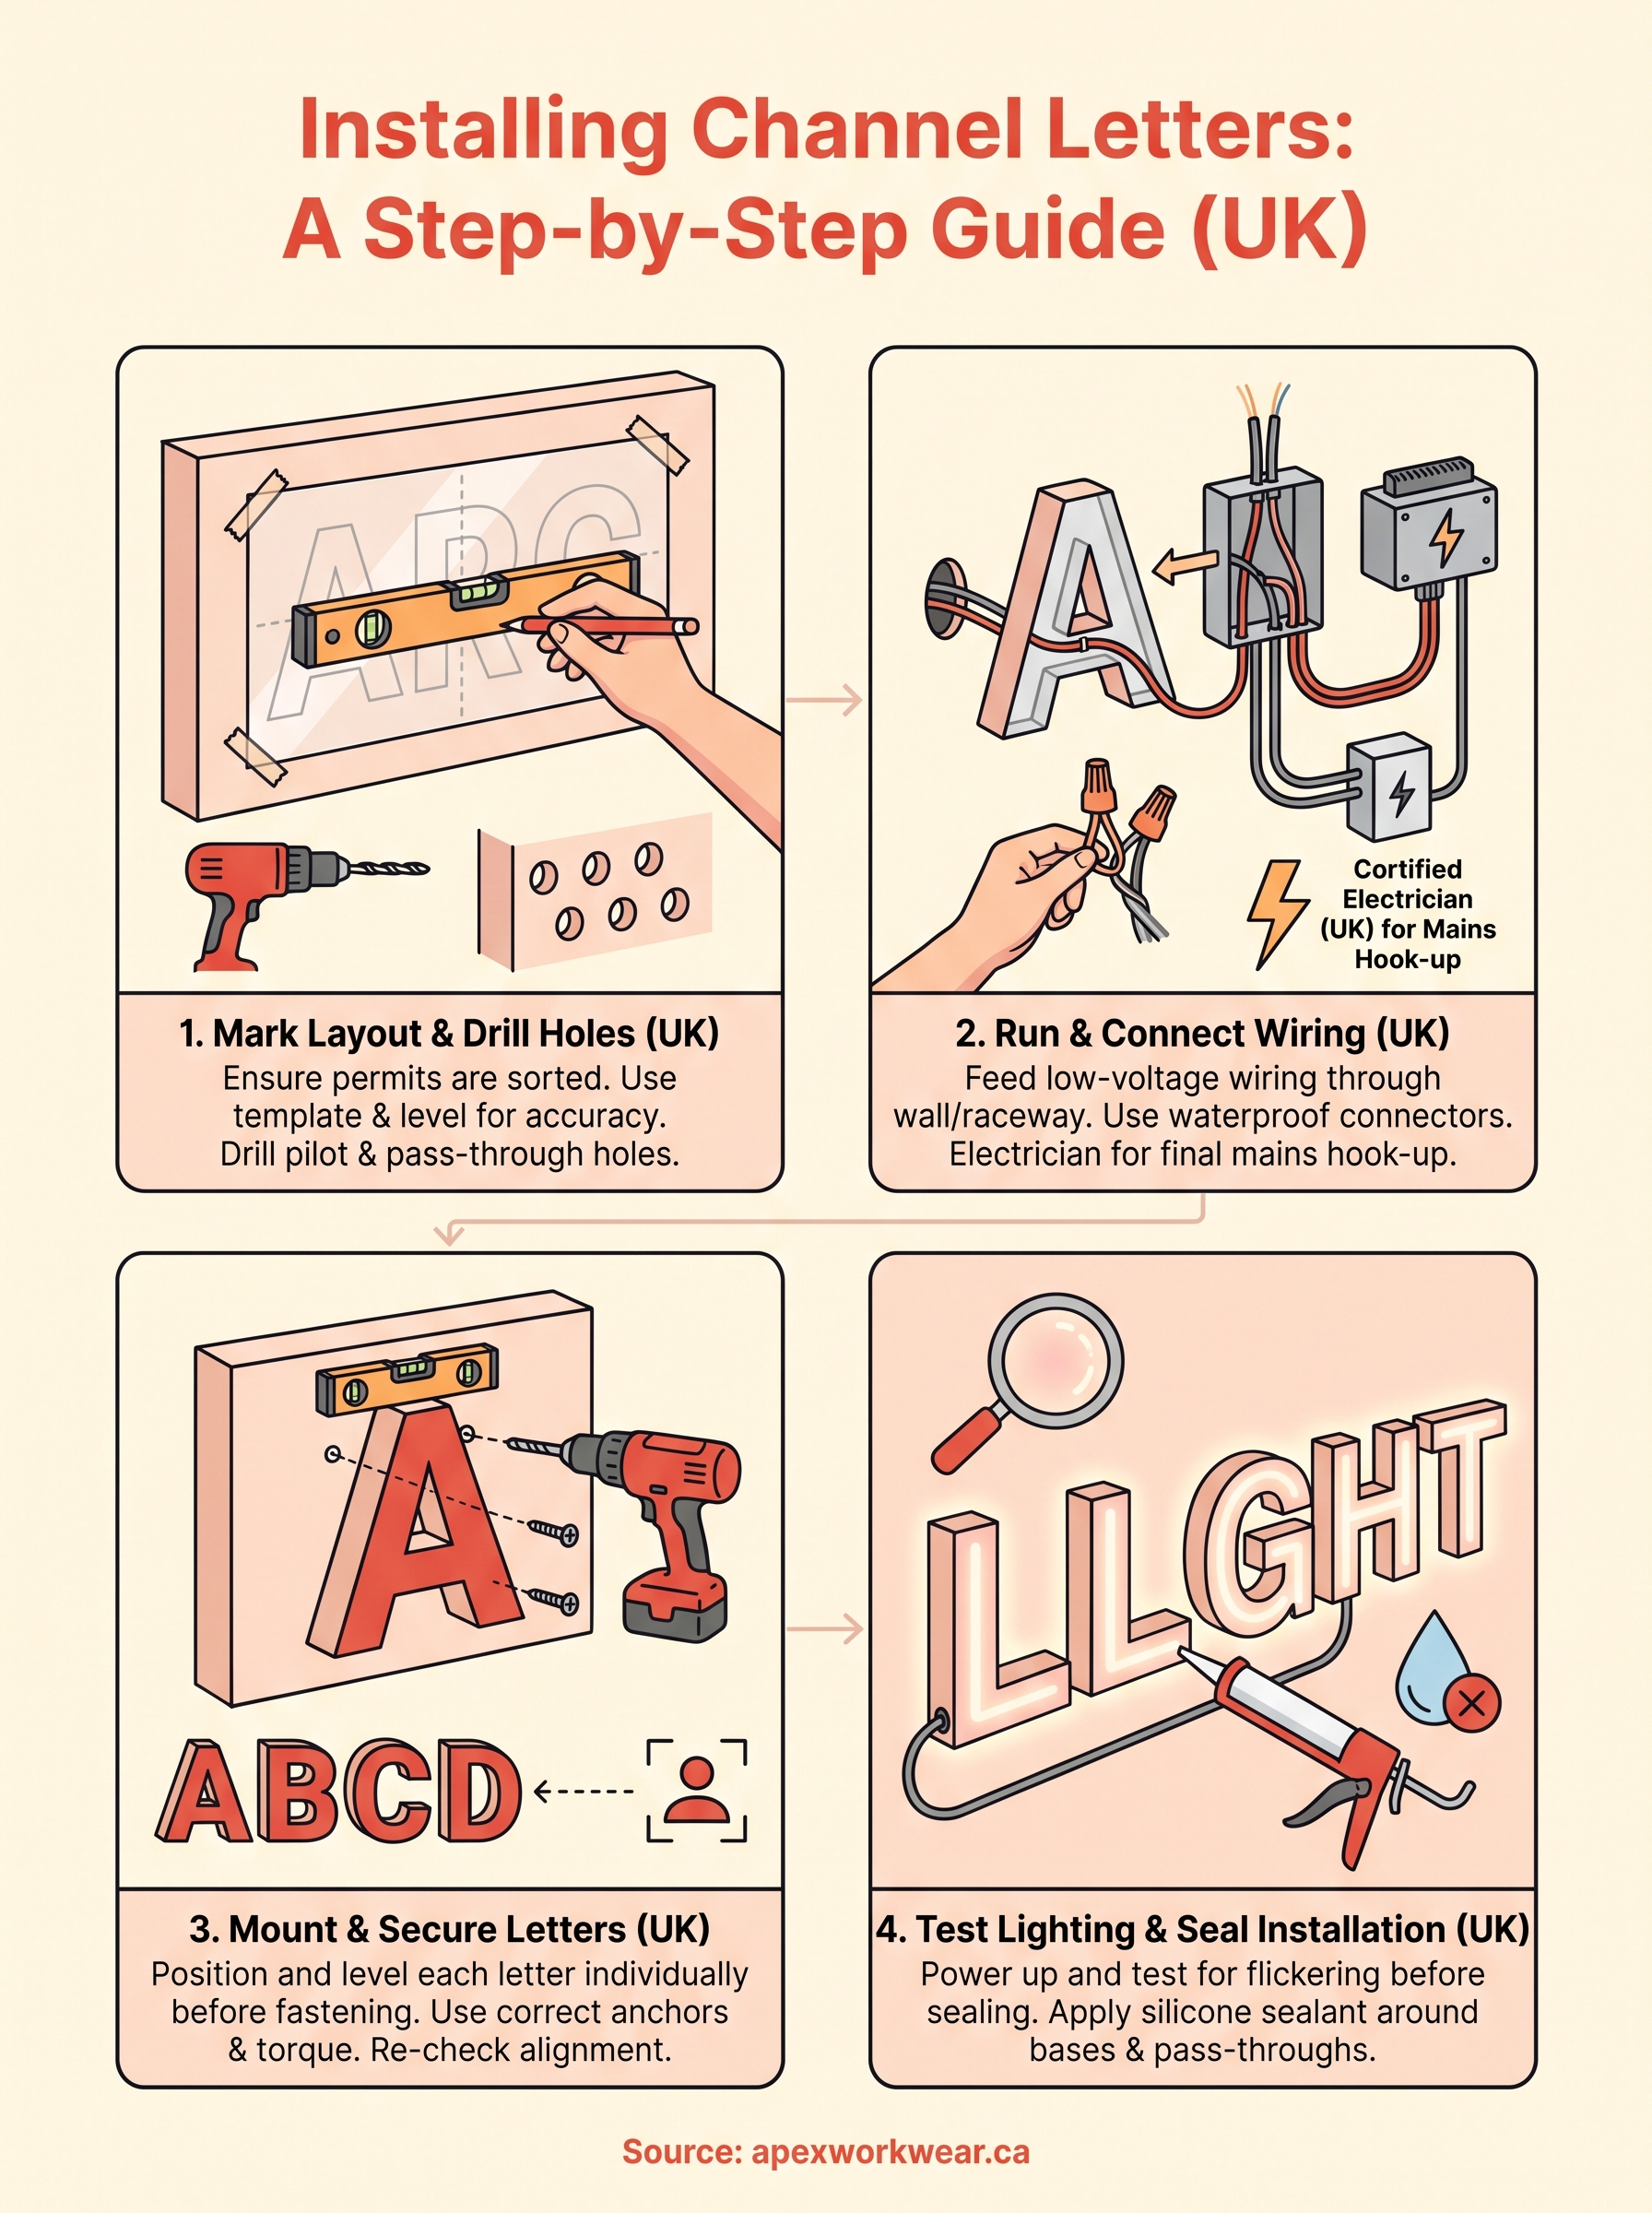
Step 1. Mark the layout and drill mounting holes
Once your permits are sorted and your tools are staged, the next job is getting the layout marked accurately before any drilling starts. A crooked sign is the fastest way to undo a good design, so this step deserves more patience than speed.
Transfer the design to the wall
Most sign shops supply a paper or vinyl template showing the exact position of each letter and mounting hole. Tape the template to the wall using a level and chalk line to keep it straight, checking both horizontal and vertical lines before you commit to any marks.
A sign is only as straight as the template you levelled before drilling.
Drill and prep the holes
With the template secured, mark each hole location through the paper with a pencil or awl, then drill:
- Drill pilot holes at every marked point, matching your bit to the wall material (masonry, stucco, or wood siding).
- Insert wall anchors rated for the total letter weight, not just the individual letter.
- Drill a slightly larger wiring pass-through hole behind each letter or at the raceway location.
- Vacuum out dust and debris so anchors seat properly.
Double-check hole depth against your anchor length. Shallow holes are the top cause of letters working loose within the first year.
Step 2. Run and connect the electrical wiring
With the holes drilled, it’s time to get power to each letter before anything goes on the wall. Running the wiring first means you’re not fishing cable through a mounted letter later, which is awkward and risks damaging the housing.
Feed the wiring through the wall
Push the low-voltage wiring from each letter’s built-in power lead through the wiring pass-through hole and back to the transformer location. If you’re using a raceway, run the wiring inside the raceway channel instead, keeping every splice accessible behind the removable panel.
Never bury a wire splice behind a mounted letter where you can’t reach it again.
Wire the connections
Follow this order for a clean, code-compliant hookup:
- Strip each wire lead to the manufacturer’s specified length.
- Match polarity and connect leads using waterproof wire nuts.
- Wrap every connection with electrical tape or a heat-shrink sleeve.
- Route wiring to the transformer, keeping it clear of sharp metal edges.
- Confirm the transformer matches the letters’ voltage and wattage rating.
Have a licensed electrician handle the final connection to the building’s power supply, since this is the point where a code inspection typically happens under Canadian Electrical Code rules from the CSA Group.
Step 3. Mount and secure the channel letters
With the wiring fed through and staged, you’re ready to lift each letter into place. Getting this step right means checking fit before fastening, since a letter that’s slightly off its mark is much easier to nudge now than after the screws are tight.
Position each letter
Starting from one end of the layout, hang the first letter loosely on its anchors and feed the wiring lead through without kinking it. Line the letter up against your chalk marks, then check it with a level before tightening anything down. Work letter by letter across the sign rather than mounting them all loosely first, since spacing errors compound quickly if you leave adjustment for the end.
Level and fasten one letter at a time, not the whole sign at once.
Fasten securely
Once a letter sits level and flush, drive the screws home in this order:
- Snug the top fasteners first to hold the letter’s position.
- Add the bottom fasteners, checking level again before final tightening.
- Torque every screw to seat firmly without cracking the letter housing.
- Confirm the wiring lead still moves freely behind the letter.
Repeat across the full run, stepping back every few letters to eyeball the overall alignment from ground level, since small errors are far more visible from a distance than up close on the ladder.
Step 4. Test the lighting and seal the installation
Before you pack up the tools, power up every letter and check the finish work that keeps water and pests out of your wiring for good. This is the step that separates a professional install from one that needs a callback in six months.
Test each connection
Have your electrician switch on the transformer and walk the full run, checking that every letter lights evenly with no flickering or dim spots. A flickering letter usually means a loose wire nut or a bad splice, so trace it back before you seal anything.
Test the lighting before you seal a single joint, because sealant hides problems you still need to fix.
Seal against weather
Once every letter checks out, run a bead of silicone sealant around the base of each letter and over every wiring pass-through hole:
- Apply sealant around the letter’s back edge where it meets the wall.
- Seal the wiring pass-through hole completely.
- Caulk the raceway panel seams if you used one.
- Wipe excess sealant before it skins over.
Let the sealant cure fully before the first rain. A gap the size of a pencil lead is enough to let moisture in and corrode a connection within a season.
Your channel letters, ready to shine
Get the layout marked straight, the wiring run clean, and every letter fastened tight, and you’ve done the hard part. Installing channel letters isn’t complicated once you break it into these four steps, but each one punishes shortcuts. A rushed hole, a skipped sealant bead, or a splice buried where nobody can reach it will cost you a service call within the year, and that call always lands at the worst possible time.
Treat the permit, the electrician, and the final test as non-negotiable, and your sign will do its job for a decade or more without a single flicker. That’s the difference between a sign that advertises your business and one that quietly advertises a maintenance problem.
If your channel letters need fresh vinyl overlays, matching decals, or branded banners to round out your storefront, Apex Workwear handles the custom printing side so your whole sign package looks sharp from the street.