Ordering custom embroidery patches for the first time feels more complicated than it should. You’re stuck comparing backing types, stitch counts, and vague pricing pages, all while trying to figure out if a supplier can actually deliver before your season starts or your team event kicks off. Most guides skip the practical stuff and leave you guessing.
This guide walks you through the entire process, from choosing between a custom iron on embroidery patch and sew-on backing, to sizing your artwork correctly and understanding how thread colours and stitch density affect your final price. Whether you need patches for uniforms, sports teams, or promotional giveaways, you’ll know exactly what to ask a supplier before placing your order.
We’ll also cover what makes custom embroidery patches iron on or otherwise turn out well versus poorly, based on common mistakes we see with first-time orders. By the end, you’ll be ready to submit a design, get a fast quote, and order with confidence, whether you’re working with Apex Workwear or comparing us against other Canadian patch producers.
What to know before ordering custom embroidery patches
Before you send anyone your artwork, understand that custom embroidery patches are built, not printed. A digitizer converts your logo into a stitch file that a machine reads, laying down thread in a specific order, density, and direction. This matters because fine text, thin lines, and gradients that look crisp on screen often turn into blobs once stitched. Knowing this upfront saves you a round of revisions later.
Size and complexity drive most of your cost, more than the actual patch count in many cases. A 2-inch round patch with three thread colours costs far less than a 4-inch patch with eight colours and fine detail, because stitch count climbs with both size and colour changes. Stitch density (how tightly the thread is packed) also affects durability and price, since a denser patch holds up better on jackets and bags that see daily wear.
A patch is only as good as the artwork it’s built from, so simplify your design before you simplify your search for a supplier.
What drives your price up or down
Here’s a quick breakdown of the factors that actually move your quote, so you know what to negotiate on and what’s non-negotiable.
| Factor | Low cost | Higher cost |
|---|---|---|
| Size | Under 3 inches | Over 4 inches |
| Thread colours | 1 to 4 colours | 6+ colours |
| Backing | Iron-on or sew-on | Velcro (hook and loop) |
| Border | Merrowed edge | Die-cut or laser-cut |
| Order quantity | 100+ units | Under 25 units |
Quantity matters because setup work (digitizing, thread changes, machine calibration) gets spread across your run. Ordering 200 patches instead of 50 rarely doubles your invoice, since the per-unit cost drops sharply once you clear common thresholds like 50, 100, and 250 units.
Turnaround times and minimums
Production time for embroidered patches typically runs 7 to 12 business days once your proof is approved, though rush service is often available for an added fee if you’re working against a tight deadline. Ask your supplier for their standard lead time in writing, not a verbal estimate, since "a couple weeks" means different things to different production shops. At Apex Workwear, we build our custom apparel and patch services around clear timelines specifically because vague delivery windows cause the most frustration for teams ordering ahead of a season or event.
Minimums vary a lot between suppliers, and this catches a lot of first-time buyers off guard. Some shops won’t touch an order under 50 or 100 units because the digitizing setup isn’t worth their time at low volume. Others, including many Canadian badge and crest suppliers geared toward small business, will run smaller batches at a slightly higher per-unit rate. If you only need 20 or 30 patches for a small crew, confirm minimums before you invest time designing artwork.
Common mistakes with first-time orders
Skipping a digital proof is the single most avoidable mistake we see. A proof shows you the stitch layout, colour matching, and final size before production starts, and catching an error here costs nothing, while catching it after 200 patches ship costs you the whole run. Reviewing thread colour charts against your actual brand colours (not just eyeballing it on a monitor) also prevents disappointment, since screens render colour differently than thread ever will.
Overlooking backing type until the last minute causes headaches too, especially when patches arrive iron-on but the fabric they’re meant for can’t handle heat, like certain technical jackets or leather goods. Working through backing options early, which we’ll cover in detail shortly, keeps your order matched to how the patches will actually get used.
Step 1. Define your purpose and sketch your design
Start by naming exactly where these patches will live, because purpose shapes every decision that follows. A custom embroidery patch for a fire department jacket needs different thread and backing than one destined for a promotional tote bag or a scout uniform sleeve. Think about the fabric it’ll sit on, how often that item gets washed, and whether it’ll face rain, sun, or heavy friction. Answering these questions before you touch a design file keeps you from reworking artwork later because the backing or thread type doesn’t suit the end use.
Purpose comes before pixels: decide where the patch lives before you decide what it looks like.
Sketch before you digitize
Once you know the use case, sketch your design, even roughly, before sending anything to a digitizer. Embroidery reads best with bold shapes, clear outlines, and limited fine detail, so a rough pencil sketch or a simple vector mockup helps you spot problems early. Text under a quarter inch tall tends to blur into thread once stitched, and gradients simply don’t translate, since thread lays down in solid blocks of colour rather than blended tones. If your logo already exists as a print file, don’t assume it’ll embroider the same way; screen-ready art and stitch-ready art are two different things, which is worth understanding before you decide whether printing or stitching suits your logo.
Questions to answer before you brief a supplier
Running through a short checklist here saves you back-and-forth emails once production starts:
- Where will the patch attach (jacket, cap, bag, uniform)?
- How many thread colours does your logo actually need?
- Does your design include fine text or thin lines under 3mm?
- Do you need a border, and if so, merrowed or die-cut?
- Is this a one-time order or something you’ll reorder seasonally?
Having these answers ready when you request a quote speeds up the whole process, since a supplier can price and digitize accurately on the first pass instead of guessing.
Simplify wherever you can
Finally, resist the urge to cram every detail from your logo into the patch. Simplified versions of a brand mark almost always embroider better than the full, detailed original, particularly at smaller sizes. If your logo has a tagline, drop shadow, or intricate icon work, consider a stripped-down variant just for embroidery. Suppliers who offer design guidance, including free basic edits, will usually flag this for you, but it helps to arrive with that mindset already, especially if you’re ordering a custom iron on embroidery patch for a smaller item like a backpack strap or a cap, where stitching on a cap front leaves very little space to work with.
Step 2. Choose your patch size, shape and colours
Size and shape decisions come next, and they matter more than most first-time buyers expect. Custom embroidery patches typically range from 2 to 5 inches across, with anything smaller struggling to hold fine detail and anything larger driving up thread cost fast. Match the size to where the patch will sit: a chest patch on a work shirt usually runs 3 to 4 inches wide, while a cap patch stays closer to 2 to 2.5 inches so it doesn’t overwhelm the front panel. Getting this right the first time avoids a costly resize once your digitized file is already built.
Pick a size that fits the garment, not just the logo, because oversized patches look amateur and undersized ones lose all their detail.
Common sizes and shapes
Shape affects both price and how clean your border looks once stitched. Round and oval patches embroider cleanly and suit most logos, while custom die-cut shapes (following the exact outline of your logo) cost more but give a sharper, more branded look, and chenille patches add a thicker, fuzzy texture if you want a varsity-style crest.
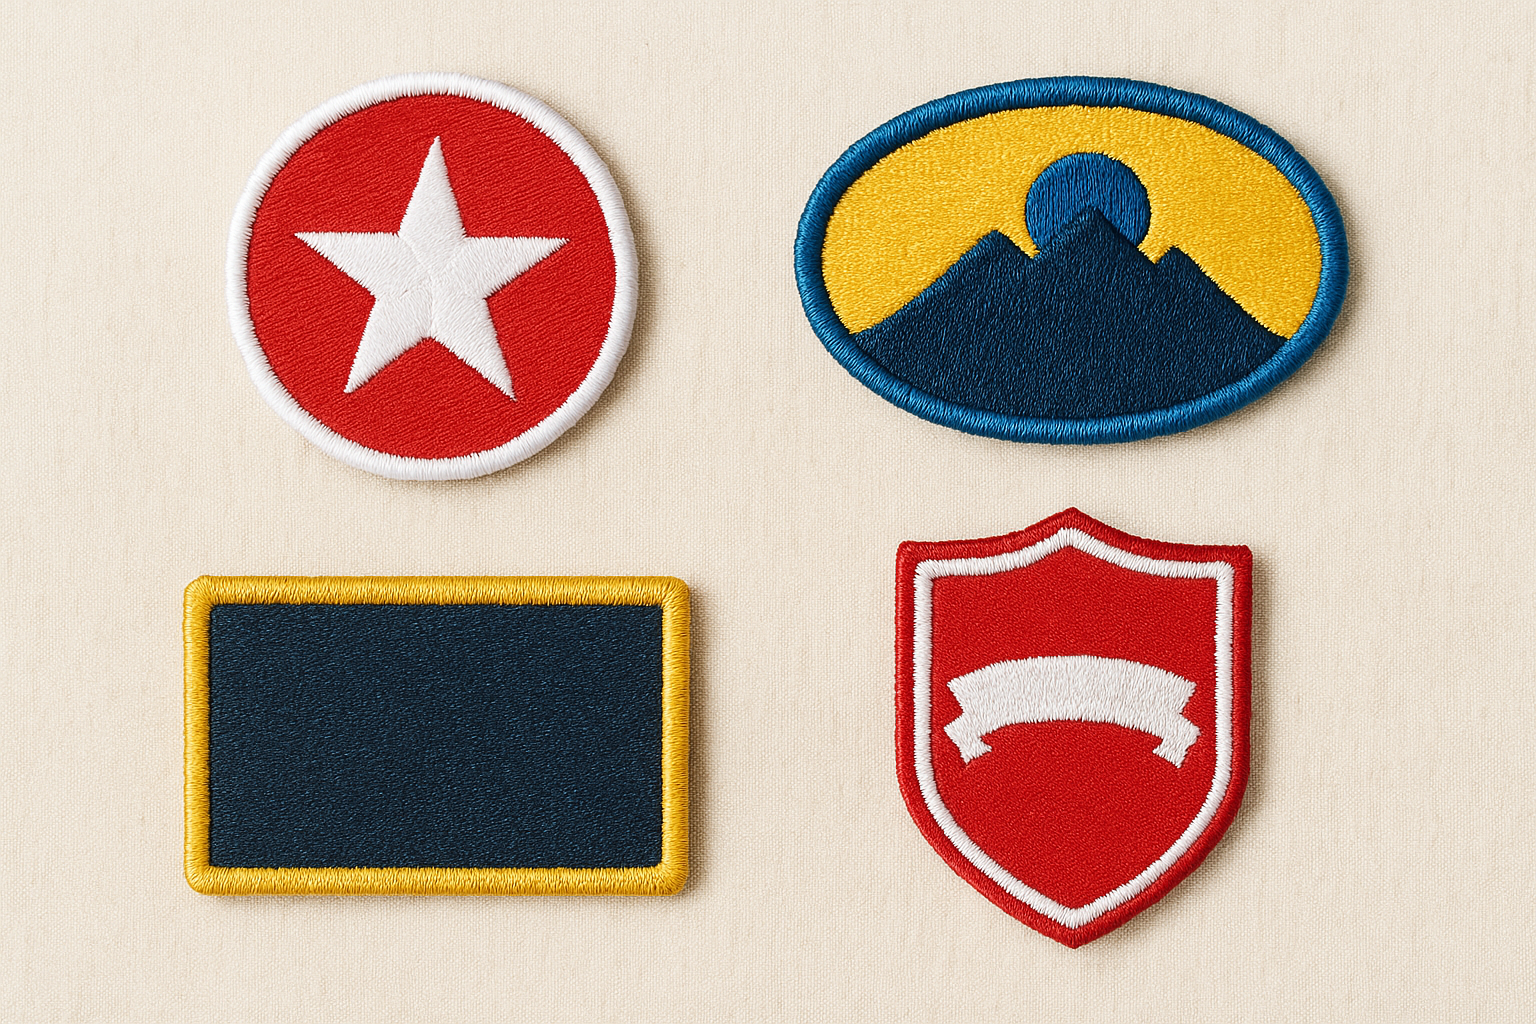
| Shape | Best for | Typical cost impact |
|---|---|---|
| Round or oval | Simple logos, badges | Lowest cost |
| Rectangle or shield | Name tags, team crests | Low to moderate |
| Custom die-cut | Unique logo outlines | Highest cost |
| Square with rounded corners | Sports and event patches | Moderate |
Running your logo through this shape comparison before you finalize artwork keeps your quote predictable instead of surprising you after the fact.
Choosing colours that translate to thread
Thread colour works differently than screen or print colour, so bring your brand colours to this step rather than guessing. Suppliers usually work from a standardized thread chart, similar to Pantone but specific to embroidery floss, so ask for that chart early and match your logo colours against it directly instead of relying on a monitor. Vivid neons and subtle pastel gradients rarely translate well, since thread comes in fixed shades rather than infinite blends, so pick the closest solid match and adjust your expectations accordingly.
Limiting your palette also controls cost. Sticking to three or four thread colours keeps pricing reasonable and keeps your patch looking clean at smaller sizes, while six or more colours adds both digitizing time and machine changeovers. If your logo uses a lot of colour, ask your supplier whether a simplified version would embroider better, particularly for a custom embroidery patches iron on order destined for something small like a cap or lapel, where every extra colour eats into the limited stitching space available.
Step 3. Select a backing: iron-on, sew-on or Velcro
Backing type decides how your patch attaches and how long it stays put, so treat this as seriously as size or colour. A custom iron on embroidery patch works well on cotton and polyester blends, but heat-sensitive fabrics like technical shells, leather, or waterproof jackets can warp or melt under an iron, so match backing to the garment you named back in Step 1. Getting this wrong means patches that peel off within a season, which costs you more than the patch itself once you factor in reprints and reapplication.
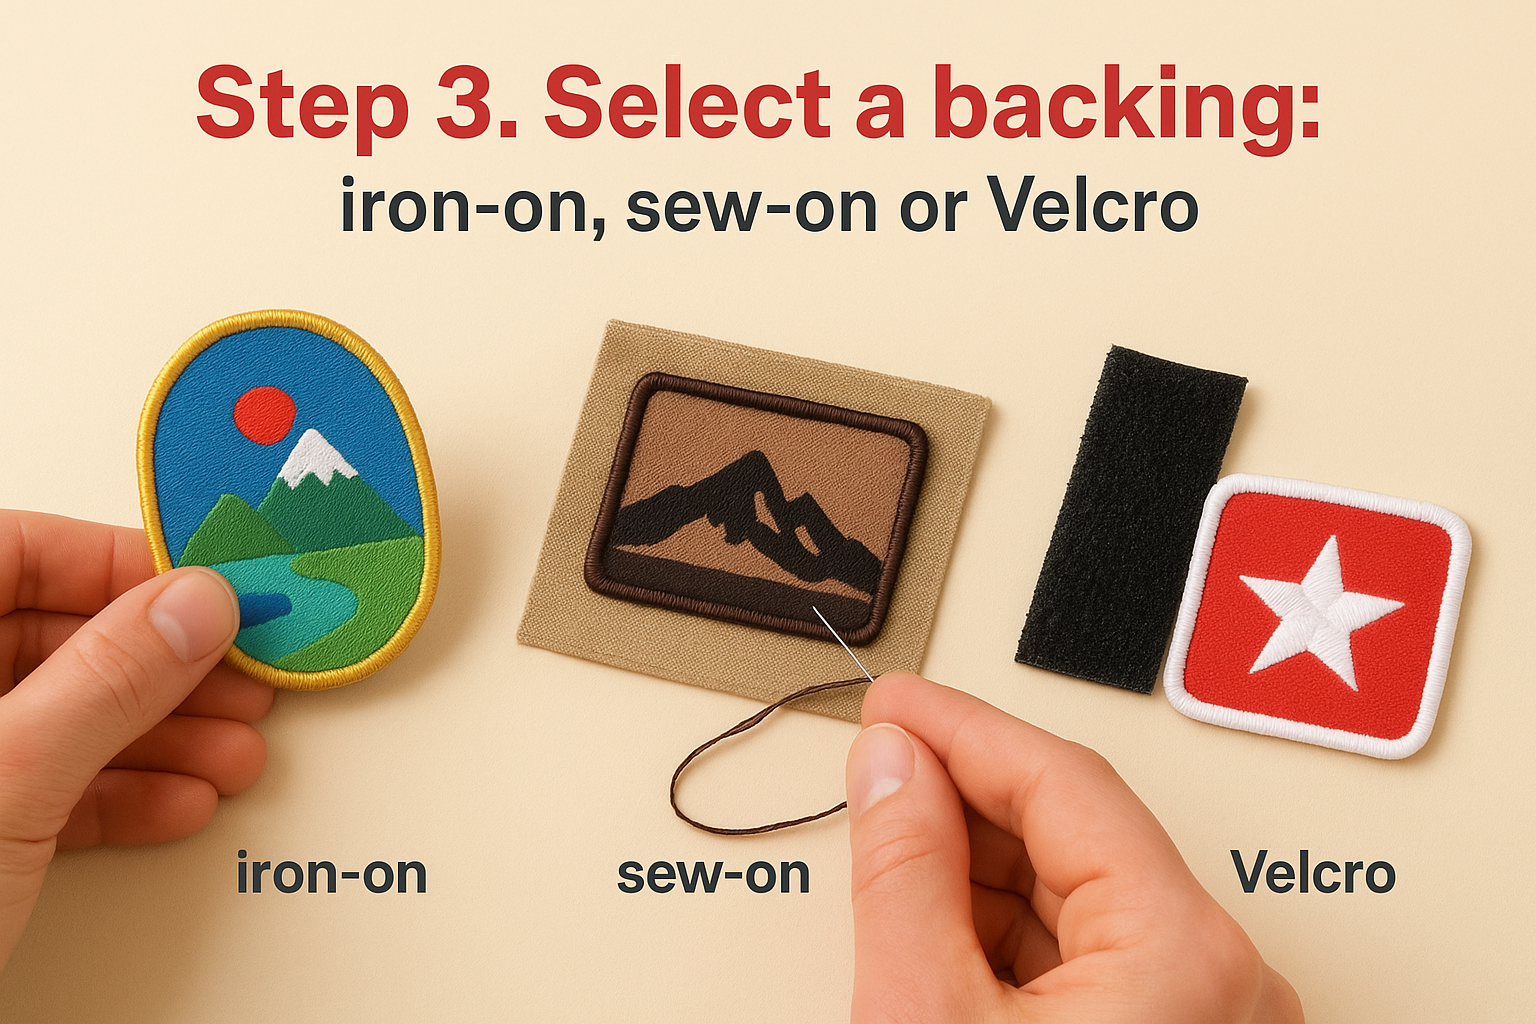
Match the backing to the fabric, not the other way round, or you’ll be reordering patches before the season ends.
Iron-on backing: fast and simple
Iron-on backing uses a heat-activated adhesive fused to the back of the patch, applied with a household iron or a heat press in under a minute. It suits cotton t-shirts, hoodies, and canvas bags well, and it’s the fastest option for teams applying dozens of patches themselves without sewing equipment. Durability drops on items that get washed constantly or exposed to friction, like backpacks or work pants, since the adhesive weakens over repeated heat and wash cycles.
Sew-on backing: built to last
Sew-on patches attach with thread around the merrowed edge, either by machine or by hand, and they outlast iron-on backing on almost every fabric type. Uniforms, workwear, and jackets that see daily wear and frequent washing hold up best with this option, since there’s no adhesive to break down over time. The trade-off is labour: someone needs to stitch each patch on, which adds time if you’re outfitting a large crew.
Velcro backing: swap and reuse
Hook and loop backing lets you move patches between garments, which suits tactical wear, name tags that change often, or teams that swap logos seasonally. It costs more per unit since it requires both a hook piece sewn to the patch and a loop piece sewn to the garment, but the flexibility often justifies the extra cost for uniforms that rotate.
| Backing | Best for | Durability | Application effort |
|---|---|---|---|
| Iron-on | Cotton apparel, quick DIY jobs | Moderate | Low |
| Sew-on | Uniforms, workwear, heavy wash cycles | High | Moderate |
| Velcro | Rotating logos, tactical gear | High | Higher upfront cost |
Some suppliers offer a combined iron-on plus sew-on backing for extra hold, worth asking about if your patches need to survive both heat exposure and rough handling. Talk through your fabric and wash frequency with your patch and apparel supplier before you commit, since backing is one of the few choices that’s genuinely difficult to reverse once patches are produced.
Step 4. Get a quote, approve your proof and apply your patches
Once your design, size, and backing are locked in, request a quote with all those details included rather than a vague description of your logo. Suppliers price based on stitch count, size, colour count, and backing type, so giving them everything upfront means you get an accurate number on the first pass instead of a revised quote three emails later. Most Canadian producers, including Apex Workwear, turn quotes around within 24 hours when you submit complete specs, and it helps to know what custom embroidery costs across Canada before you compare numbers.
A fast quote only helps you if the proof behind it is accurate, so never skip the visual sign-off before production starts.
Reviewing your digital proof properly
Before anything gets stitched, you should receive a digital proof showing exact placement of colours, size, and border style. Check this against your original artwork carefully, not just at a glance, since this is your last chance to catch a mismatched thread colour or an incorrect size before the run starts. Ask specifically whether the proof reflects actual thread shades from the supplier’s colour chart, because some proofs only show approximate on-screen colour rather than the true thread match.
Use this short checklist before you sign off on any proof:
- Does the size match what you specified in inches, not just visually?
- Are all thread colours matched against the actual chart, not a screen render?
- Is the border style (merrowed, die-cut) correct?
- Is the backing type noted and correct?
- Is text, if any, still legible at the final size?
Applying your patches once they arrive
When your custom embroidery patches arrive, application depends entirely on the backing you chose earlier. Iron-on patches need a hot, dry iron pressed firmly for 20 to 30 seconds per side, with a thin cloth between the iron and the patch to protect both, and the same press time, temperature and pressure rules used for heat transfers apply here. Sew-on patches take longer but hold better long-term, especially on garments that see regular washing. Velcro pieces need the loop half sewn onto the garment before the hook-backed patch can attach.
Finally, test one finished patch on the actual garment before running through your whole batch, particularly with a custom iron on embroidery patch going onto a blend fabric you haven’t used before. A quick test catches heat sensitivity or poor adhesion before you’ve committed an entire order of jackets or bags to the process.
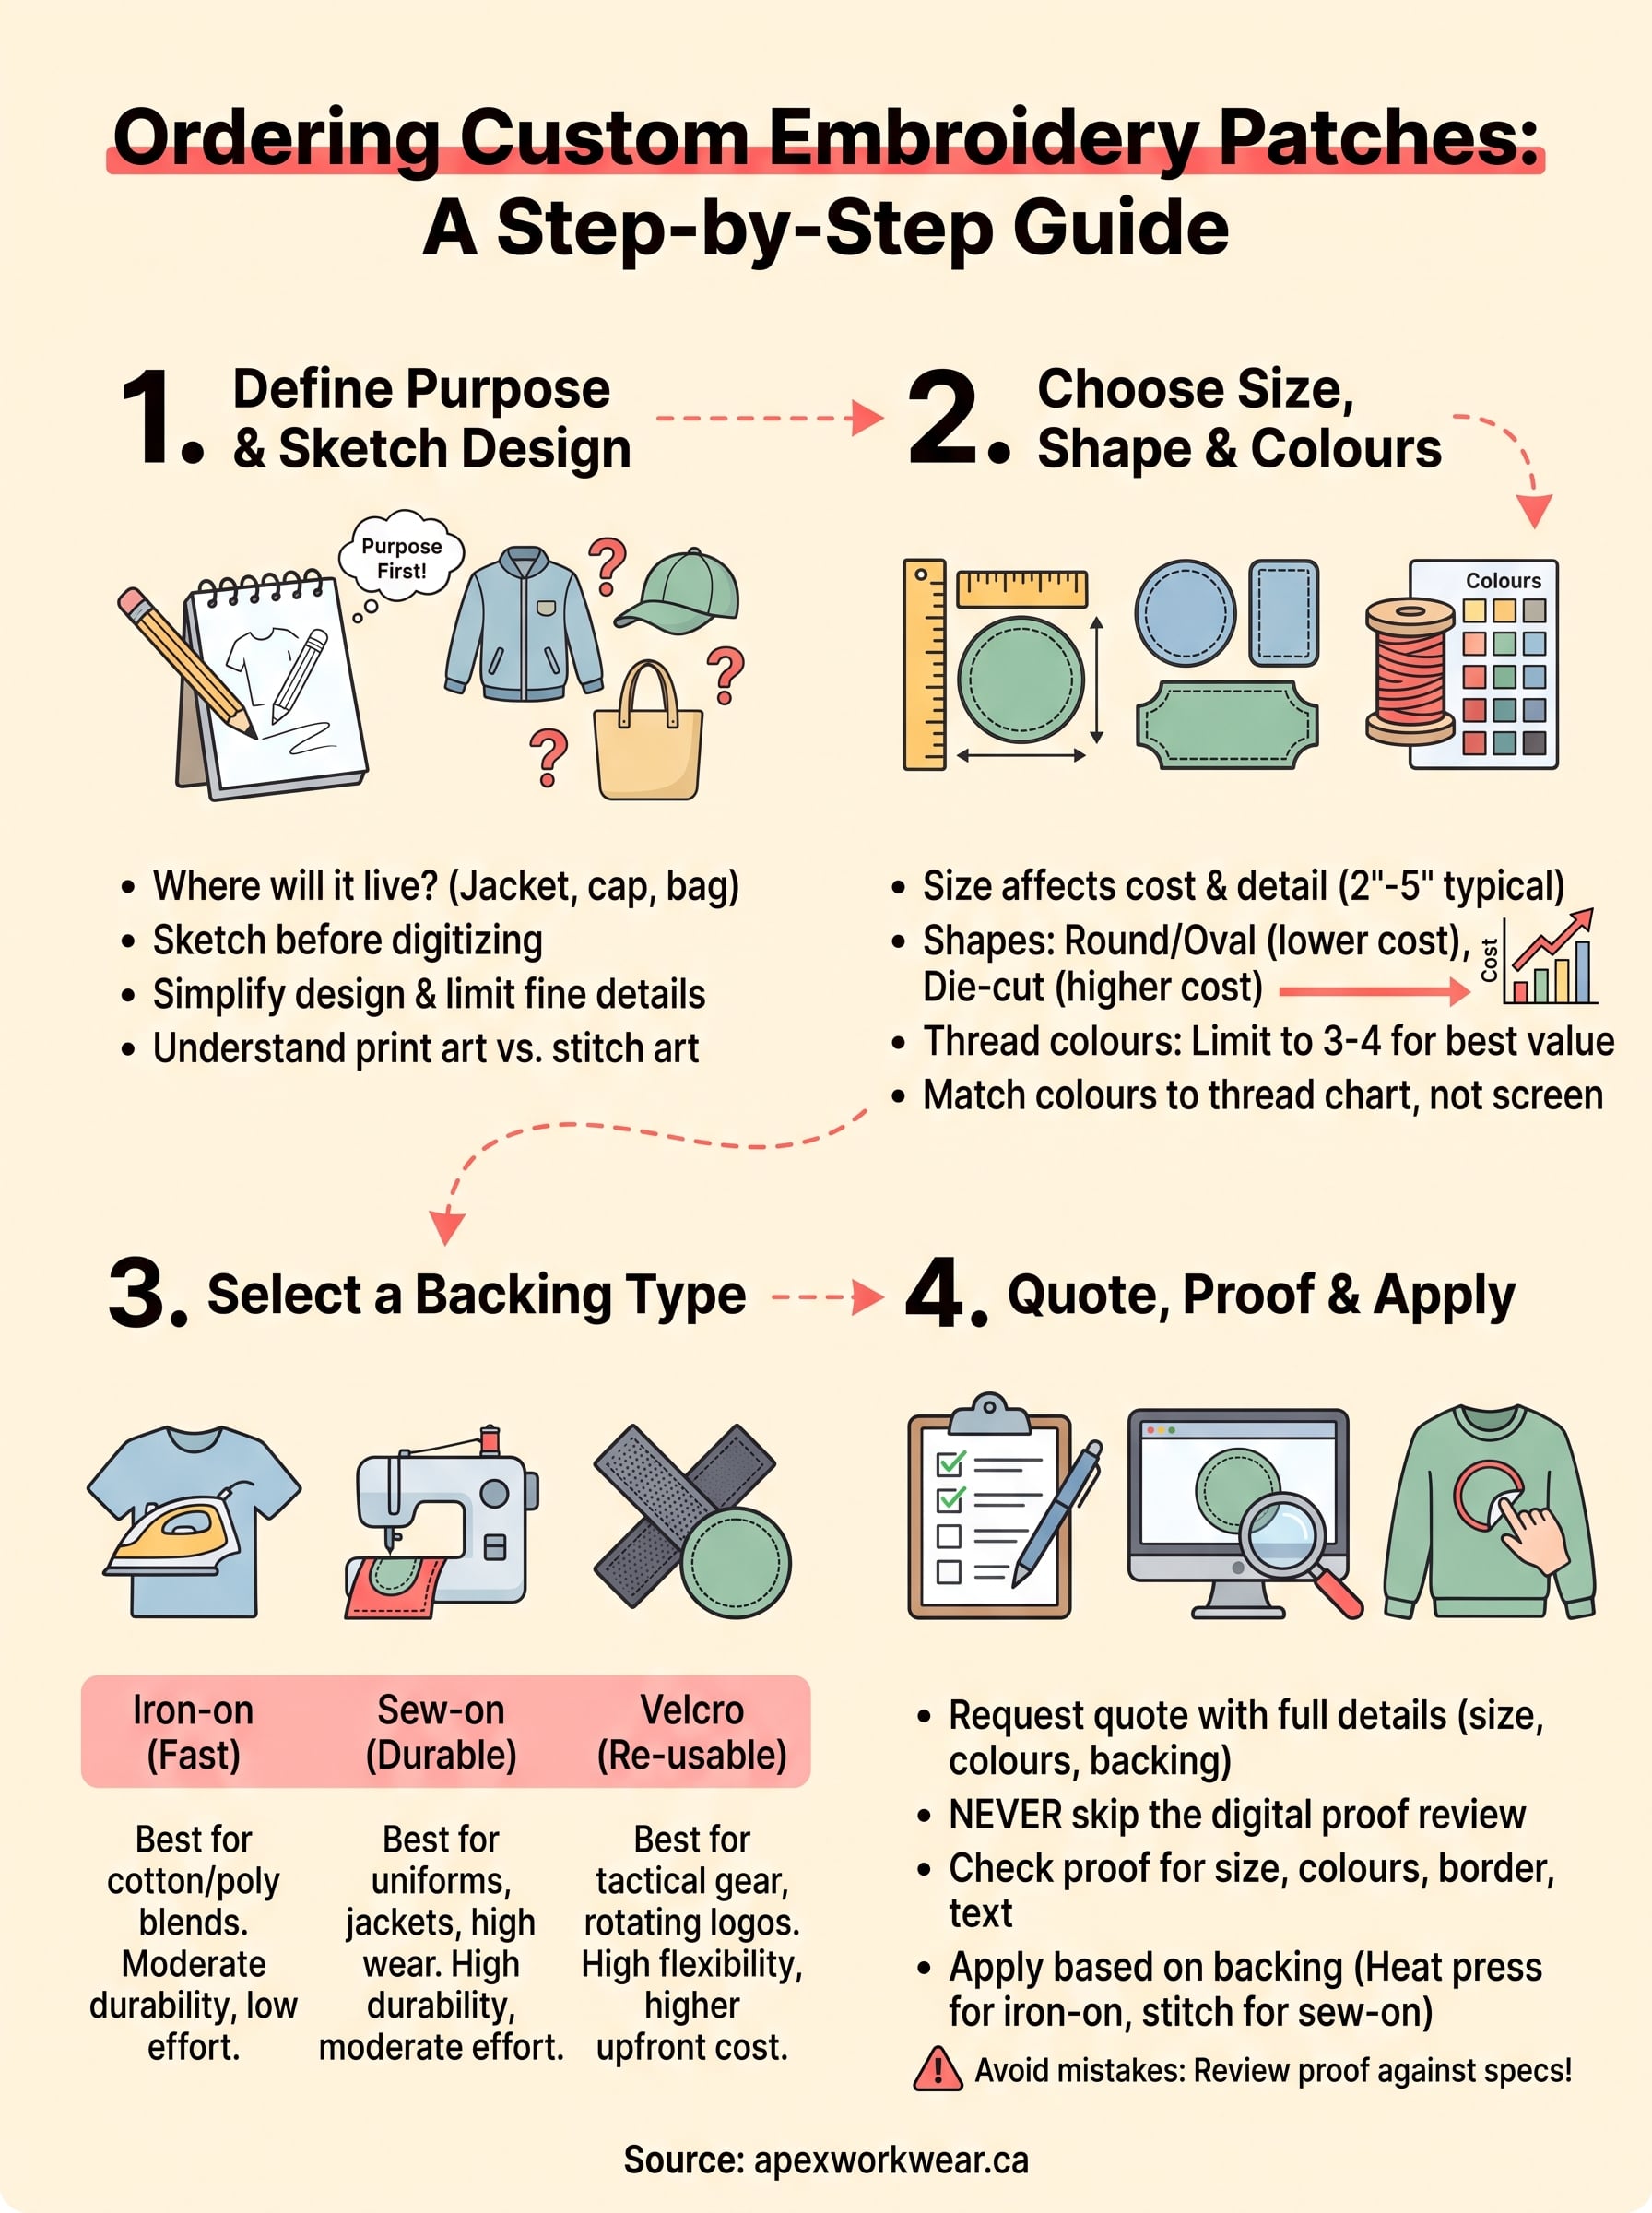
Bringing your patch design to life
Getting custom embroidery patches right comes down to a handful of decisions made early: purpose, size, thread colours, and backing. Skip any one of these and you risk reordering a whole batch after the first wash cycle or the first hot iron. Work through them in order, ask for a proof before anything gets stitched, and you’ll avoid the mistakes that trip up most first-time buyers.
Apex Workwear builds every quote around the specifics you provide, not guesswork, and turns most requests around within 24 hours so you’re not stuck waiting to plan a season or an event. Whether you need a simple custom iron on embroidery patch for a small crew or a full run of sew-on crests for uniforms, our team reviews your artwork before production starts, not after. Still deciding what kind of patch your artwork calls for? Compare woven and embroidered patch options before you send your design over for a quote.