You want a hat that actually looks like it belongs to your business, not a flat, faded logo that peels after two washes. A custom embroidery hat solves that problem: your design gets stitched directly into the fabric, so it holds its shape and colour through wear, weather, and years of washing. If you’ve been comparing options and aren’t sure why embroidery keeps coming up over screen printing, that’s exactly what this article sorts out.
In plain terms, custom embroidery means your logo or text is sewn onto the cap using thread, not printed on top of it. It gives you a raised, textured finish that reads as premium the moment someone sees it, whether that’s a client, a crew member, or a customer at an event. It’s the standard choice for uniforms, corporate gifts, and team gear because it’s durable and it photographs well.
Below, we break down how the process actually works: what makes embroidery different from other printing methods, what to expect for turnaround and pricing, and the steps for getting your own design onto a hat, from artwork approval through to your finished order.
Why custom embroidery hats matter for your brand
A hat sits at eye level, right on someone’s head, making it one of the most visible pieces of branded apparel you can hand out. When a customer, staff member, or contractor wears your embroidered cap, they’re carrying your name into rooms you’ll never enter yourself. That kind of passive marketing works because embroidery looks intentional and permanent, not like an afterthought slapped on a cheap blank. If you’re weighing whether to invest in headwear at all, the return usually comes from that repeated, everyday visibility rather than a single event.
First impressions form fast
People judge a business by the materials it puts in front of them, and a hat is no exception. Embroidered stitching catches light differently than a flat print, giving your logo a dimensional quality that customers associate with established, trustworthy companies, and foam-backed puff stitching pushes that effect even further. Contractors handing out branded caps at a job site, or a café owner kitting out staff for a weekend market, both benefit from that same instant credibility. A screen-printed logo can look sharp on day one, but it rarely carries the same weight once it’s actually in someone’s hands.
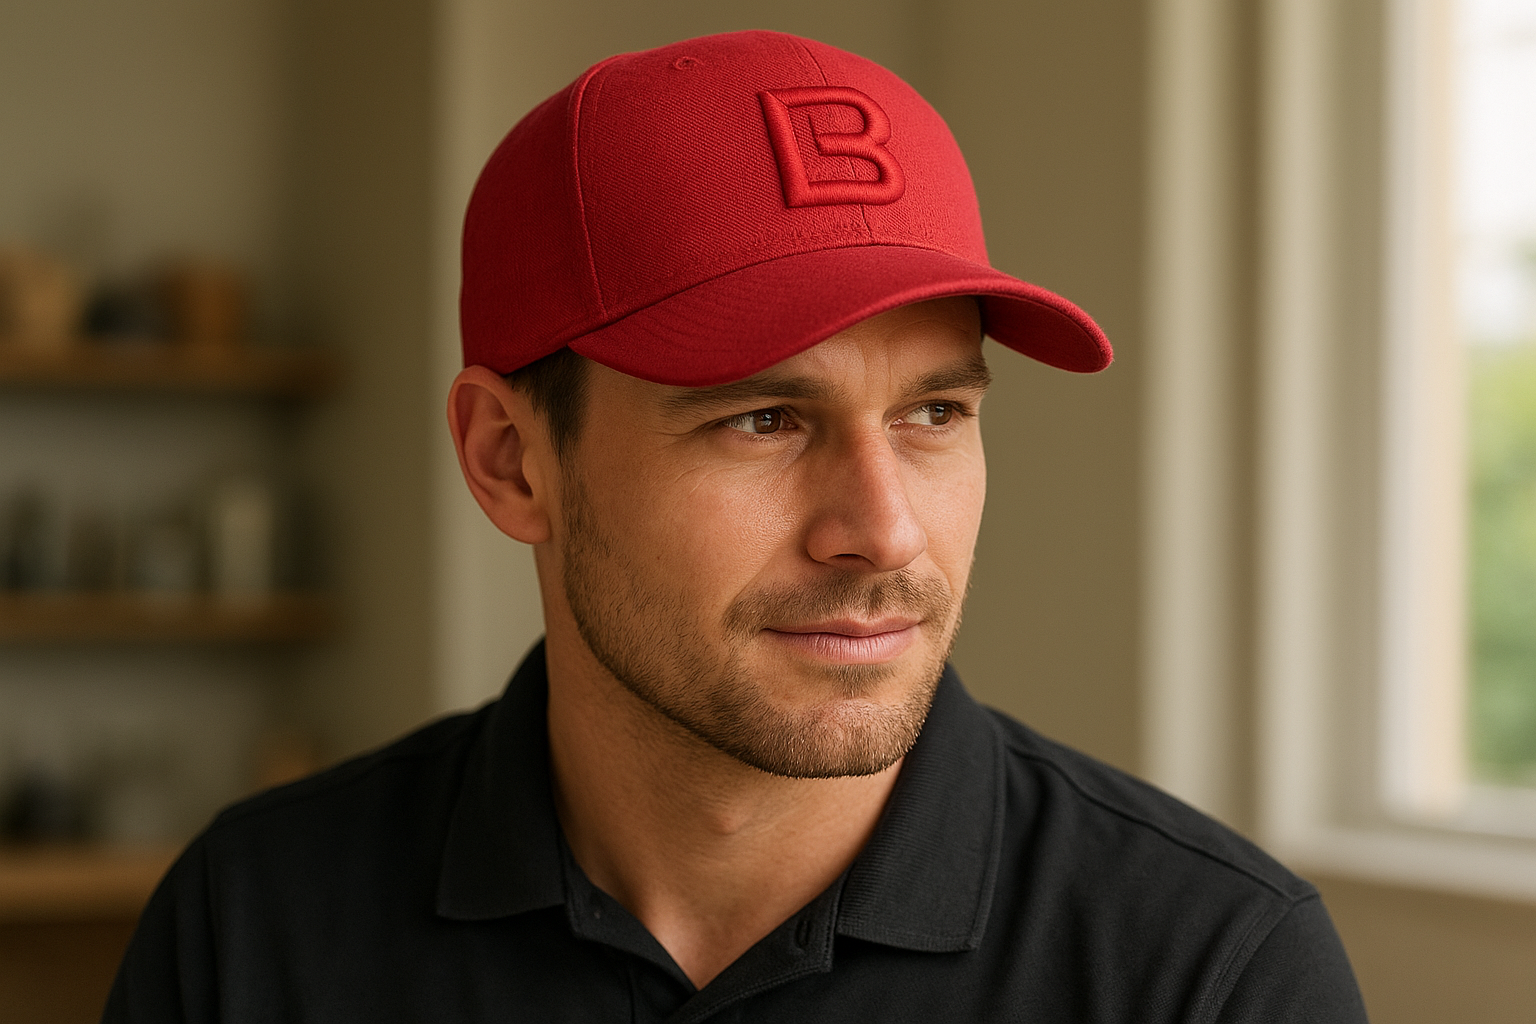
A stitched logo tells a customer you’ve invested in your brand; a faded print tells them you didn’t.
Durability that protects your investment
Thread doesn’t crack, fade, or peel the way plastisol ink does after repeated washing and sun exposure, which sets a real limit on how long screen printed ink lasts. That matters most for teams working outdoors, landscapers, delivery drivers, tradespeople, who put their gear through real wear week after week. Because the design is woven into the fabric rather than sitting on its surface, an embroidered logo typically outlasts the rest of the hat, giving you years of clean branding instead of months. This is one of the main reasons custom embroidered caps show up so often in uniform programs handled by embroidery shops around Toronto: businesses order once and don’t think about reordering for a long stretch.
Versatility across every part of your business
Custom embroidery hats aren’t limited to one use case, which is part of why they show up everywhere from construction sites to corporate lobbies. Because embroidery works cleanly on structured caps, unstructured dad hats, custom embroidered beanies, and even performance mesh backs, you’re not stuck choosing one style to fit every need across departments or seasons.
- Staff uniforms: consistent branding across every shift, every location.
- Client and customer gifts: a low-cost branded giveaway that still feels premium.
- Event merchandise: trade shows, sponsorships, community fundraisers.
- Team and league gear: sports clubs, staff outings, volunteer groups.
Building a consistent identity
Teams that wear matching embroidered headwear read as more organized, whether that’s a crew arriving at a client’s home or staff working a booth at a trade show. Uniform branding gives customers a quick, reliable way to identify who’s in charge and who to approach with questions, which matters more than most owners expect until they see it in action. Small businesses in particular use this to punch above their size: a two-person landscaping outfit in matching embroidered headwear looks like a real operation, not a side hustle. Over time, that consistency compounds into the kind of brand recognition that’s hard to buy through advertising alone.
How to order a custom embroidery hat
Ordering a custom embroidery hat is far simpler than most first-time buyers expect, especially once you know how cap embroidery actually works and what a supplier needs from you upfront. Apex Workwear handles the technical side, digitizing your artwork, choosing thread colours, mapping stitch placement, so you don’t need any design software or embroidery knowledge to get a professional result. Getting a free quote is the fastest way to see real pricing for your quantity and hat style before committing to anything.
Getting your design ready
Start with the clearest version of your logo you have, ideally a vector file (AI, EPS, or high-resolution PDF) rather than a compressed JPEG pulled off your website. Embroidery translates artwork into stitches, so fine detail, thin script fonts, and gradients don’t always survive the conversion the way they would in print. If you’re not sure your file will work, send it anyway. Apex Workwear reviews every design and flags issues before production, along with offering basic layout adjustments at no extra cost so you’re not paying a designer just to resize a logo.
The ordering process step by step
Most orders follow the same basic path from first enquiry to finished product:
- Submit your logo and quantity through a quote request, usually answered within 24 hours.
- Review your digital proof, which shows exact stitch placement, thread colours, and hat style before anything is sewn.
- Approve or request changes, adjusting size, position, or colour matching until it looks right.
- Confirm your order and hat style, choosing from structured, unstructured, or performance options.
- Production begins, with most orders shipping in 5 to 7 business days, faster if you need a rush turnaround.
- Delivery, including free local shipping across the GTA and surrounding areas.
Approve the proof carefully. It’s the only chance to catch a placement or colour issue before the needles start.
What to expect after you submit
Once you’ve approved a proof, there’s very little left for you to manage. Production runs on the timeline confirmed at quoting, and because everything is made in Canada, you’re not waiting on overseas shipping or customs delays that can stretch smaller print jobs by weeks. Rush options exist for teams working against an event date or a new hire’s start day, so a tight deadline doesn’t automatically mean settling for a lower-quality method. Whether you’re ordering five hats for a small crew or five hundred for a company-wide rollout, the same proof-and-approve process applies, which keeps pricing transparent and removes the guesswork that usually comes with custom apparel. No minimum order size means a two-person team can get the same stitched, professional finish as a fifty-person company, without paying inflated per-unit costs just because the run is small.
Embroidery versus other decoration methods
Once you know embroidery is an option, the next question is why choose stitching over screen printing, DTG, or heat transfer vinyl, all of which show up on hats at some point. Each method has a place, but they behave very differently once a hat leaves the shelf and goes to work. Understanding those differences upfront saves you from ordering the wrong decoration for the job and being disappointed six months later.
How the methods actually compare
Screen printing pushes ink through a mesh stencil onto the fabric surface, which works well on flat cotton but struggles on curved, structured caps. Heat transfer vinyl compared with screen printing shows the trade-off clearly: vinyl bonds a cut design to the fabric using heat and pressure, giving crisp colour but a stiffer feel that can crack with repeated folding. How DTG printing works explains why: it sprays ink directly into the fibres, fine for detailed, full-colour art on T-shirts, but it’s rarely used on hats because the print head can’t work around a curved crown. Embroidery, by contrast, stitches thread through the material itself, which is why it holds up so well on structured and unstructured caps alike.
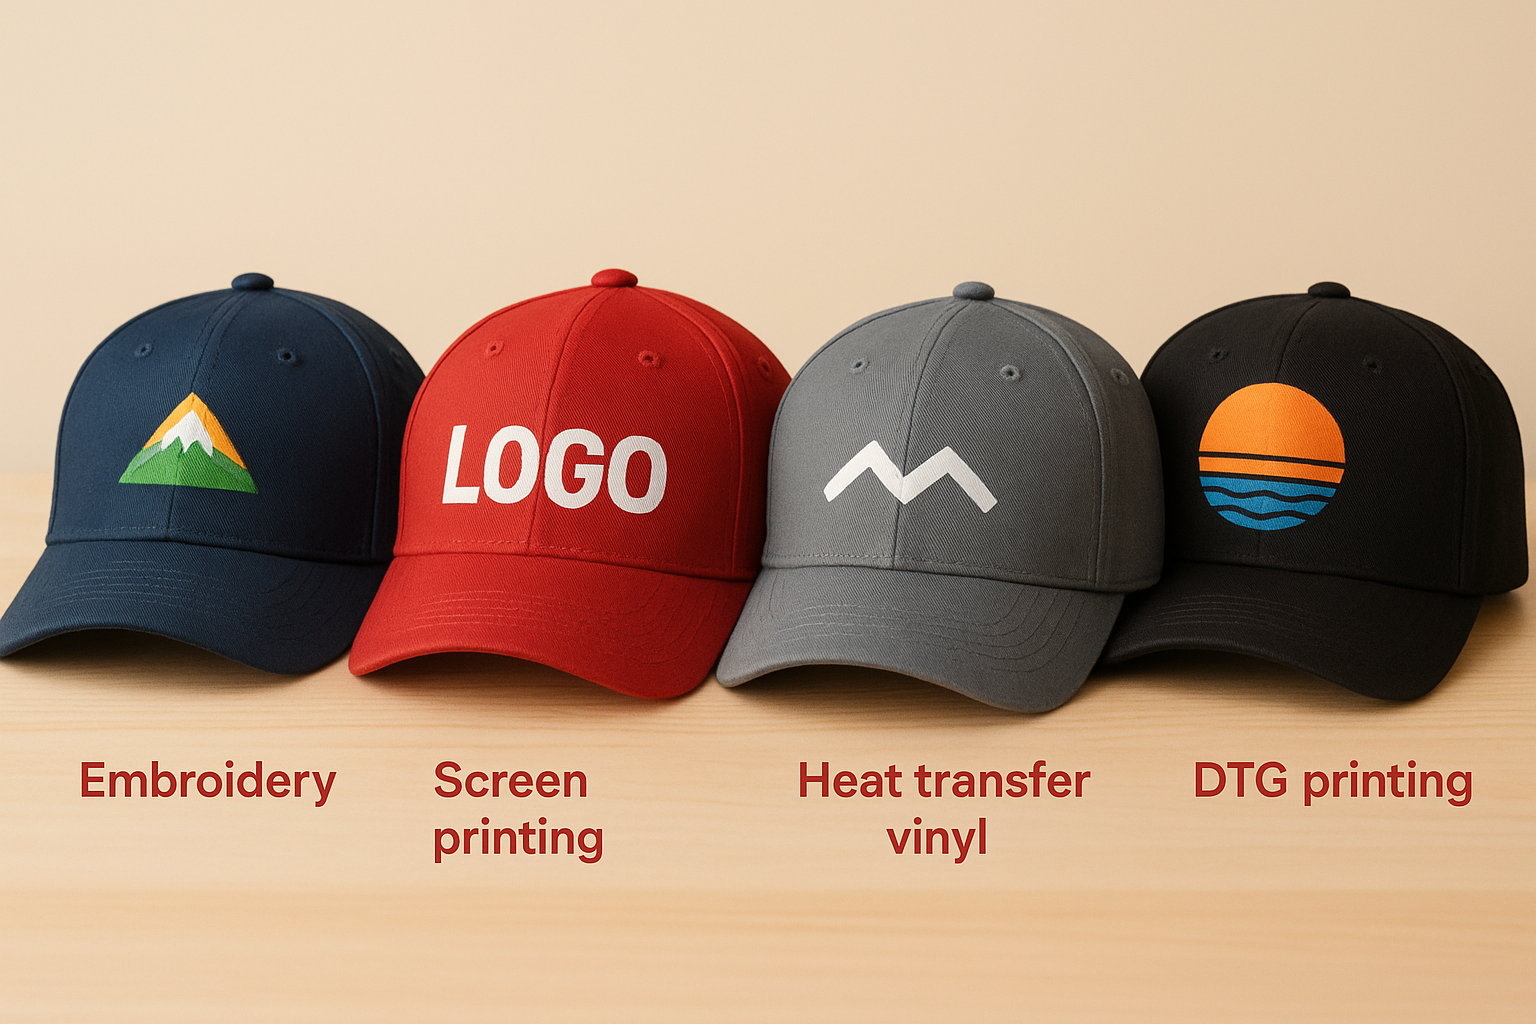
| Method | Best for | Durability | Feel on a hat |
|---|---|---|---|
| Embroidery | Logos, text, simple shapes | Very high, resists fading and cracking | Raised, textured, premium |
| Screen printing | Flat apparel, large runs | Moderate, cracks over time | Smooth, can feel stiff on curves |
| Heat transfer vinyl | Small runs, single colours | Moderate, can peel at edges | Slightly raised, rigid |
| DTG printing | Detailed, multicolour art | Low to moderate on curved surfaces | Soft, but impractical on caps |
Where embroidery clearly wins
Because thread sits woven into the fabric rather than layered on top, embroidery shrugs off the friction, sun, and repeated washing that headwear takes on. That toughness is exactly why it dominates the custom hat embroidery market for uniforms and outdoor work gear rather than screen printing or vinyl. It also handles the curved geometry of a cap far better than any print method, since the needle follows the shape instead of fighting it.
If a decoration method can’t survive a wash cycle and a curved crown, it doesn’t belong on a hat.
When another method still makes sense
That said, embroidery isn’t automatic for everything. Extremely fine detail, photographic imagery, or gradients translate poorly into stitches and are better suited to print methods on flatter garments like T-shirts. If your design leans on intricate shading rather than clean lines and solid colour, weigh the trade-offs of DTG printing for apparel elsewhere in your order, while embroidery still handles the hat.
Choosing the right hat style for embroidery
Not every hat takes embroidery the same way, and picking the wrong shape can leave you with a logo that puckers, sits crooked, or just doesn’t suit the setting you’ll wear it in. The hat style you choose affects how much detail you can fit, how the stitching sits on the fabric, and how the finished cap holds up over time. Before you lock in artwork, it’s worth matching the blank itself to the job it needs to do.
Structured versus unstructured caps
Structured caps use a buckram lining in the front panels, giving you a firm, rounded surface that holds embroidery flat and even, which is why most corporate logo caps use this build. Unstructured dad hats have a softer, low-profile front that creases naturally with wear, giving a more relaxed look but slightly less predictable stitch placement on larger designs. Neither is better outright; a construction crew wanting a sharp, uniform look usually leans structured, while a café or creative studio going for a casual brand feel often prefers the unstructured shape.
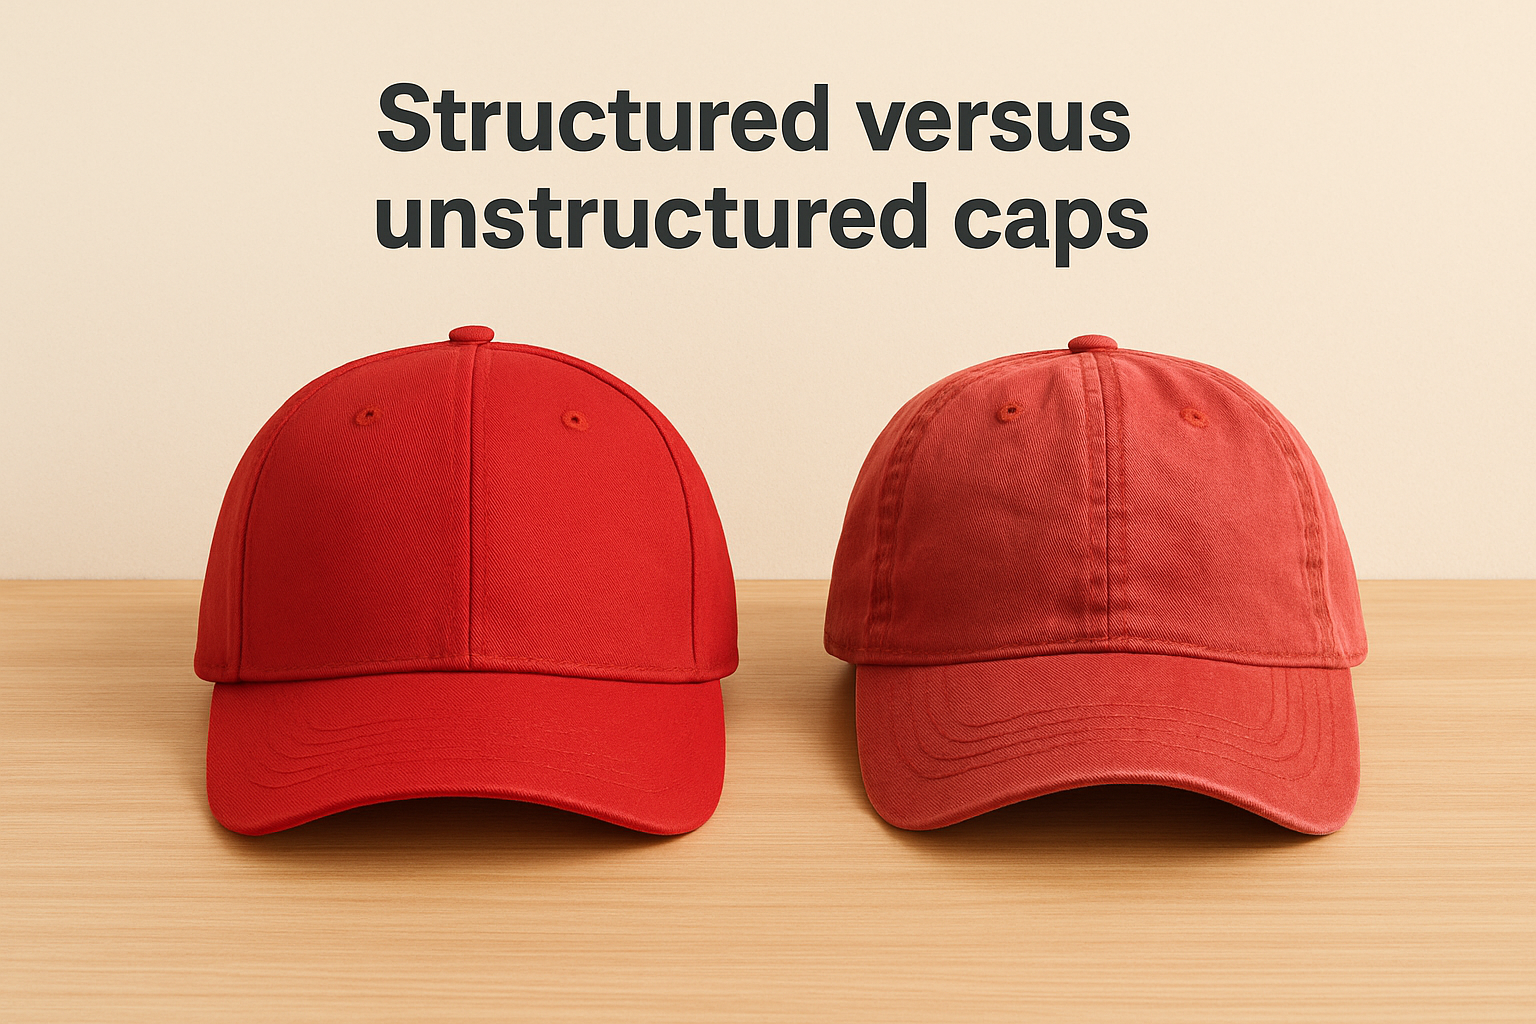
Match the cap’s structure to the impression you want your team to make, not just the lowest price on the blank.
Panel count and crown height affect your design
A six-panel cap gives you the widest, flattest front area for embroidery, which suits most logos and text without cramming detail into a tight space. Five-panel caps, common on trucker and dad-hat styles, offer a slightly smaller front panel, so simple, bold logos work better there than fine text or busy artwork. Crown height matters too. Higher crowns give a fuller look and more room for a larger design, while low-profile crowns suit smaller, subtler branding, useful if you want the hat to read as apparel first and marketing second.
Matching style to your use case
Beyond structure and panel count, the material and back closure decide how the hat performs day to day, especially outdoors.
| Style | Best suited for | Embroidery notes |
|---|---|---|
| Structured 6-panel | Uniforms, corporate branding | Flat, even surface, ideal for full logos |
| Unstructured dad hat | Casual retail, creative teams | Slightly softer stitch line, relaxed look |
| Trucker (mesh back) | Outdoor trades, summer events | Front panel only, breathable mesh back |
| Performance/athletic | Sports teams, active staff | Moisture-wicking fabric, holds stitching well |
| Beanie | Cold-weather crews, winter gifts | Small embroidered patch or text works best |
Whichever direction you lean, Apex Workwear’s custom embroidery hat options cover structured, unstructured, and performance styles from the same quote and proofing process, so switching styles mid-decision doesn’t mean starting over. If you’re outfitting a mixed team, outdoor crew in trucker caps, office staff in structured caps, it’s entirely possible to run both styles under one order and keep the branding consistent across every hat.
Design tips for sharp, professional results
Good embroidery starts with good artwork, and most mistakes happen before a needle ever touches the hat. A design that looks great on a business card or website doesn’t automatically translate into clean stitches, because thread has physical limits that ink doesn’t. Getting these basics right the first time saves you a second round of proofs and keeps your custom embroidery hat looking sharp for years, not just in the first photo you take of it.
Keep it simple
Simple, bold shapes embroider far more reliably than intricate artwork, so a logo built from clean lines and solid fills will always outperform one packed with fine detail. Small text, thin script fonts, and delicate line art tend to blur together once stitched, especially at the smaller sizes most hats allow. If your logo has a lot going on, consider a simplified version for headwear, keeping the main icon or initials and dropping secondary taglines that won’t read clearly at cap size.
A logo that’s readable from ten feet away on a hat will always beat one that only looks good on a screen.
Text and font considerations
Fonts behave differently once they’re stitched rather than printed, and thin, condensed, or heavily italicised styles are the first to suffer. Stick to bold, sans-serif lettering wherever possible, since thicker strokes hold their shape and stay legible even at a small scale. Anything under roughly a quarter-inch in height risks becoming an illegible blob of thread, so if your business name is long, it’s often better to lead with initials or an icon instead.
Colour limits and thread matching
Every colour in your design adds a thread change during production, so keeping your palette to two or three colours keeps both cost and complexity down without hurting the finished look. Apex Workwear matches thread to your existing brand colours as closely as possible, though exact digital shades don’t always have a perfect thread equivalent, so small variations are normal and expected. Gradients and colour blends, which look smooth on screen, get converted into solid thread bands, meaning designs relying on shading should be simplified before they go into production.
Stitch count and size minimums
Placement and size work together, and a design that’s too small for its detail level tends to pucker or lose definition once it’s sewn. Most suppliers set a practical minimum height for text and fine lines, generally around a quarter-inch, below which stitches start overlapping and blurring into each other. Requesting a digital proof before production, which Apex Workwear provides on every custom embroidered cap order, is the easiest way to catch these issues before they become a finished hat you’re stuck with.
What custom embroidery hats cost and how long they take
Price is usually the first question and the hardest to answer with a single number, because a custom embroidery hat quote depends on quantity, stitch count, and hat style all at once, as any comparison of Canadian embroidery services and their prices shows. Getting a real number takes minutes, not days, since Apex Workwear turns quote requests around within 24 hours, seven days a week, once you’ve sent your logo and target quantity. Nobody buying five hats for a small crew should have to guess at pricing meant for a five-hundred-unit corporate order, and the quoting process is built to reflect that.
What actually drives the price
Quantity is the biggest lever. Larger runs spread the setup cost, digitizing your logo into a stitch file, across more units, which is why per-hat pricing drops noticeably once you clear common break points like 25, 50, or 100 pieces. Stitch count matters almost as much: a simple two-colour logo with clean lines costs less to produce than a dense, multicolour design packed with detail, because more stitches mean more machine time. Hat style plays a role too, since structured caps and performance blanks generally cost a little more than basic unstructured styles before embroidery is even added.
More stitches and lower quantities both push the price up, so a simplified logo on a larger order is usually your best value.
Typical cost ranges
Exact pricing always comes from a quote, but the table below gives a realistic sense of where most orders land.
| Order size | Typical per-hat range | Notes |
|---|---|---|
| 1 to 24 hats | Higher end | No minimums, but setup cost spread across fewer units |
| 25 to 99 hats | Mid range | Sweet spot for most small businesses |
| 100+ hats | Lower end | Setup cost spread thin, best value per hat |
Because there’s no minimum order requirement, a two-hat order and a two-hundred-hat order both get the same proof-and-approve process, just at different price points per unit.
How long it actually takes
Standard production runs 5 to 7 business days from proof approval to shipping, which covers digitizing, thread setup, sewing, and quality checks on every hat before it leaves the shop. That timeline holds whether you’re ordering a handful of caps for a job site or outfitting an entire office, since the process doesn’t change, only the run length does. Rush production is available for tighter deadlines, useful when a new hire starts Monday or a trade show is closing in fast, though it’s worth flagging the date at quoting rather than after you’ve already approved artwork.
Getting an accurate number for your order
Sending a clear logo file and your target quantity upfront is the fastest way to skip back-and-forth and get real pricing, not a rough estimate. Turnaround and cost both firm up once Apex Workwear sees your actual design, since a simple one-colour logo and a dense five-colour crest genuinely cost different amounts to stitch. Requesting a free quote costs nothing and gives you a concrete number to work with before you commit to a hat style or quantity.
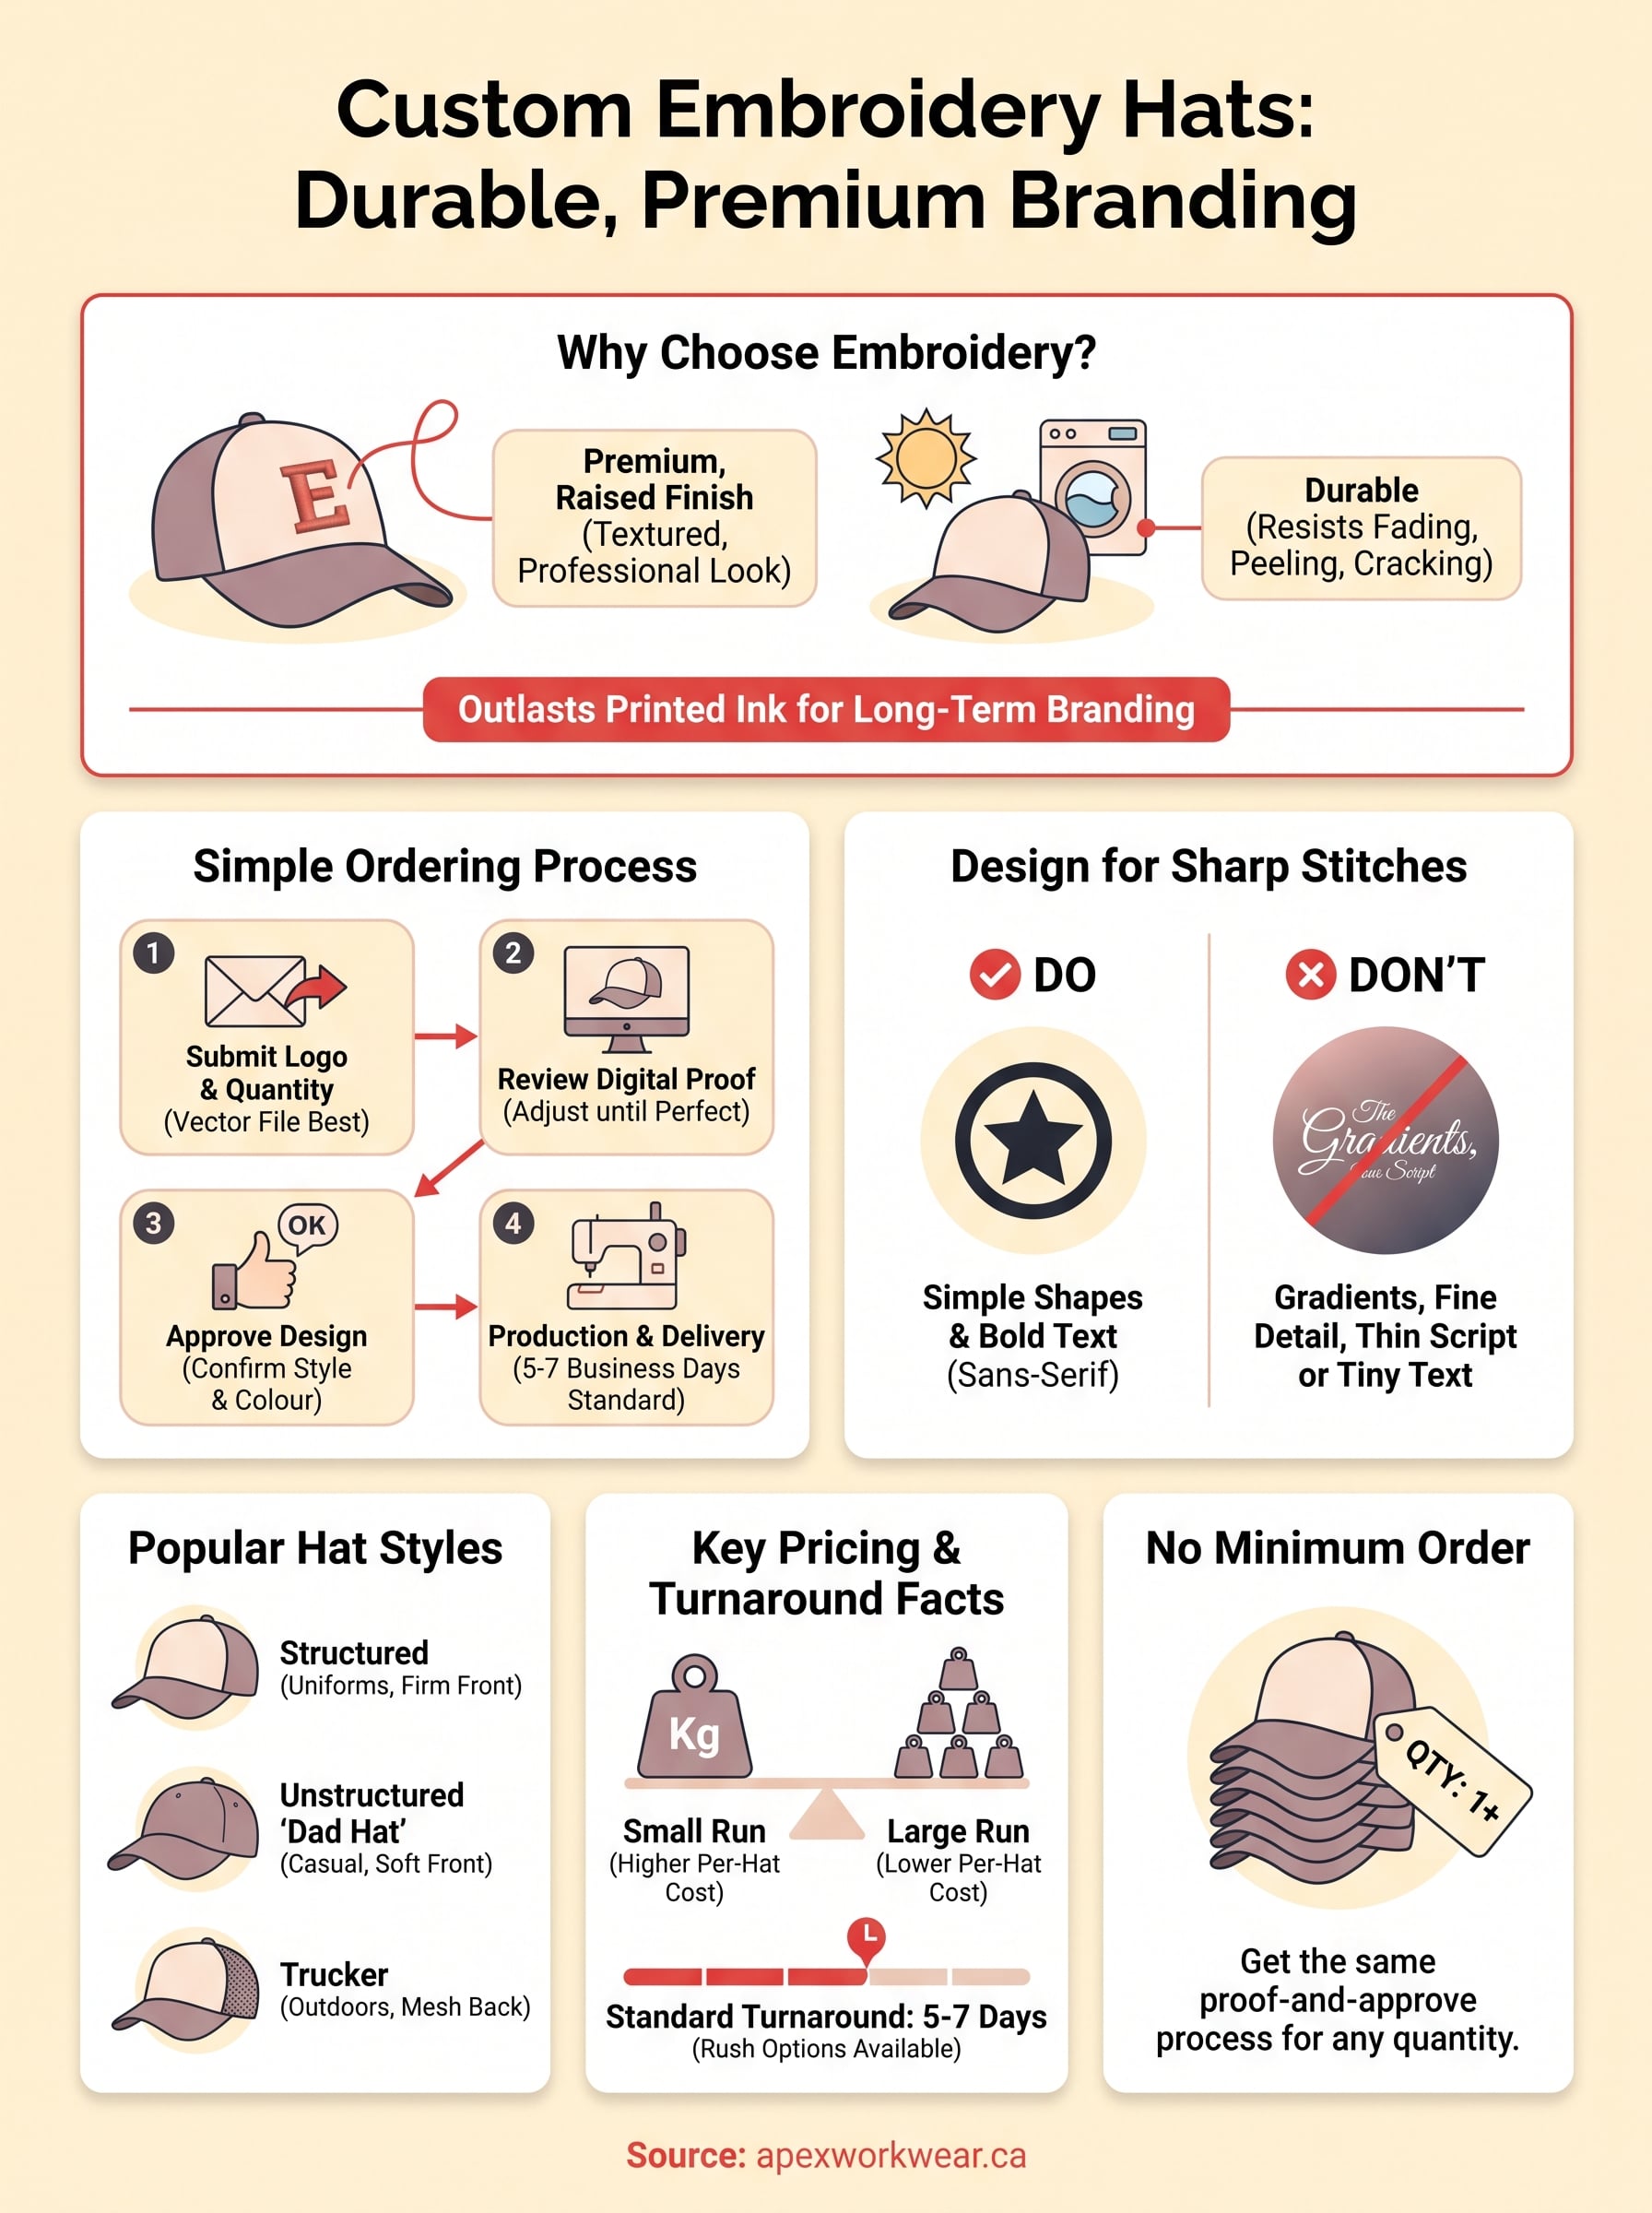
Putting it all together
A custom embroidery hat isn’t just merchandise, it’s a small, durable piece of branding that works every time someone wears it. Stitched thread outlasts printed ink, handles curved caps better than any print method, and gives your logo a premium finish that customers notice without you saying a word. Getting there just takes clean artwork, the right hat style for your team, and a supplier who walks you through proofing before anything goes under the needle.
Once you’ve picked a style and simplified your logo where needed, the rest is straightforward: send your file, review the proof, approve it, and let production handle the finished result. There’s no minimum order size, no guesswork on pricing, and no long wait for a quote. If you’re ready to see real numbers for your own design, browse the custom embroidery hats at Apex Workwear and request a free quote, with pricing in your inbox within 24 hours.