You’ve invested time picking the right design, chosen a quality material, and waited for your custom stickers to arrive. Then one careless application leaves you staring at a trapped air bubble dead centre. Knowing how to apply stickers without bubbles matters whether you’re branding product packaging, marking company vehicles, or adding labels to tools and equipment. A clean application looks professional; a bubbled one looks rushed, and first impressions stick (literally).
The good news? Bubble-free results don’t require special skills. They require the right method and a bit of patience. This guide walks you through two proven techniques, the wet method and the hinge method, along with the tools you’ll need and the mistakes to avoid. At Apex Workwear, we print custom stickers, labels, and decals right here in Canada, so we’ve seen what works and what doesn’t. We’ll share what we know so your finished application looks as sharp as the print itself.
What you need before you start
Gathering your supplies before you begin saves you from scrambling mid-application. Having everything within reach means you can work smoothly from start to finish without lifting a corner to grab a forgotten tool. Most of what you need is affordable, and a few items you likely already own.
Tools and materials
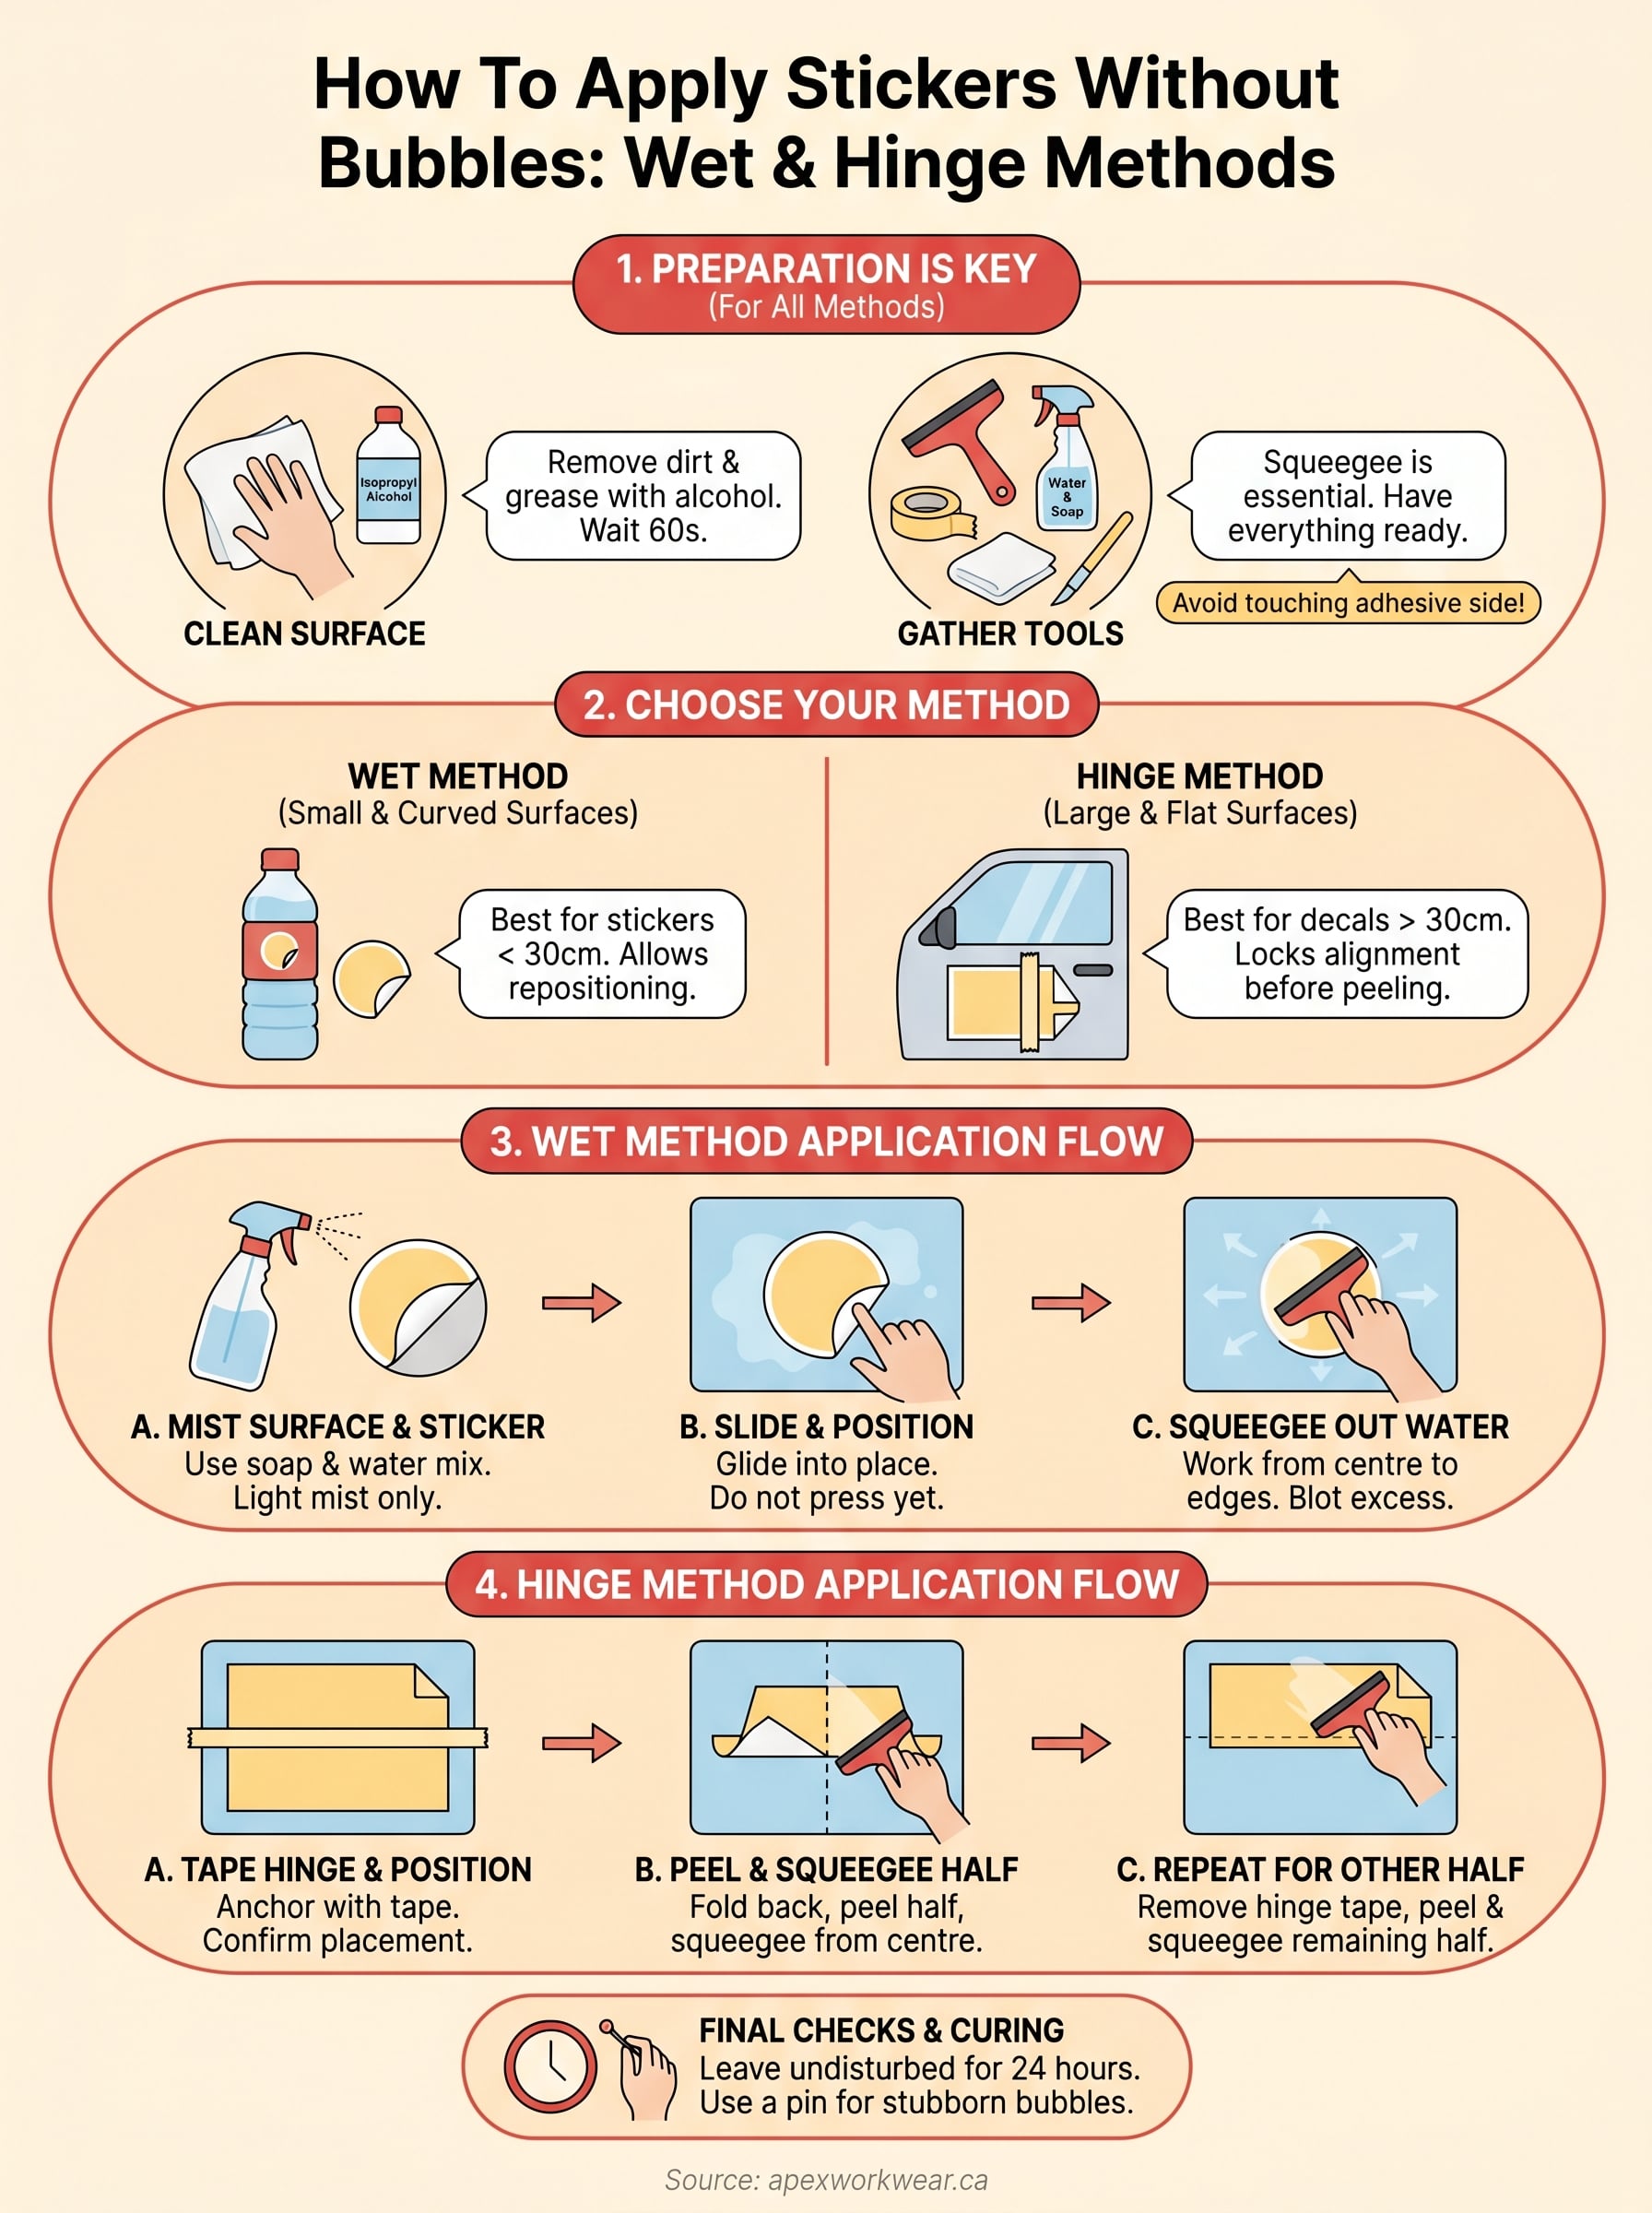
Knowing how to apply stickers without bubbles starts well before the sticker touches any surface. The right tools make a real difference in whether you finish with a clean, flat result or spend the next ten minutes chasing bubbles into a corner. Here is what to gather before you start:
| Tool or material | Purpose | Notes |
|---|---|---|
| Squeegee or credit card | Smooths the sticker during application | A plastic squeegee is best; a card works fine |
| Spray bottle with water and dish soap | Enables the wet method | Mix roughly 95% water and 5% soap |
| Masking tape or painter’s tape | Creates the hinge for large decals | Low-tack tape avoids surface damage |
| Lint-free cloth or microfibre towel | Cleans the surface before you apply | Avoid paper towels, which leave fibres |
| Isopropyl alcohol (70% or higher) | Removes grease, wax, and residue | Available at most pharmacies |
| Craft knife or pin | Releases stubborn bubbles after application | Use this sparingly |
A squeegee is the single most useful tool in this entire process. If you only buy one thing, buy that.
Choosing the right workspace
Temperature and lighting affect your results more than most people expect. Apply stickers in a warm room, ideally above 10°C, because cold surfaces cause adhesive to stiffen, which makes air much easier to trap underneath. Avoid working in direct sunlight since heat causes vinyl to stretch slightly as you handle it, then contract once it settles, and that movement creates wrinkles.
Good overhead lighting lets you spot bubbles and misalignments as they form, not after the adhesive has fully bonded and correction becomes difficult. A clean, flat surface gives you room to manoeuvre larger decals without accidentally creasing them. Clear a table, position a bright light directly overhead, and you are ready to move into the application steps.
Step 1. Prep the sticker and the surface
Preparation is where bubble-free results begin. Skipping this step is the most common reason stickers fail, regardless of the method you use. Dirt, grease, or moisture trapped beneath the adhesive creates weak spots and air pockets that no amount of squeegee pressure will fix later.
Clean the surface first
Wipe the surface down with a lint-free cloth dampened with isopropyl alcohol. Work in one direction rather than scrubbing in circles, which pushes debris back rather than removing it. Wait at least 60 seconds after wiping before you place anything down, because any remaining alcohol needs to fully evaporate or it will interfere with adhesion.
Never apply stickers over a surface that feels even slightly damp. Residual moisture is enough to trap air along the entire adhesive line.
For painted walls, glass, or vehicle panels, run your fingertip across the cleaned area. If it squeaks against your skin, the surface is ready. If it still feels waxy or greasy, wipe again with a fresh section of cloth before moving on.
Handle the sticker correctly
Avoid touching the adhesive side at all costs. Natural oils from your skin reduce tack and create invisible low-bond spots where air collects during application. Hold the sticker by its edges only, or keep the backing paper in place until the moment you’re ready to apply.
Knowing how to apply stickers without bubbles comes down to this: a clean surface and an untouched adhesive give you the strongest possible foundation before any technique even enters the picture.
Step 2. Pick the right method for your sticker
Not every sticker suits the same technique, and picking the wrong method is almost as damaging as skipping preparation entirely. The two approaches covered in this guide each solve a specific problem. Your sticker size, material, and surface determine which one gives you the cleanest result.
Wet method: best for small to medium stickers
The wet method works well for stickers under roughly 30 cm in any direction. A light soap-and-water mist delays the bond so you can reposition as you go, which is ideal for curved surfaces like water bottles or laptop lids. Vinyl and paper-backed stickers both respond well here, as long as the material is not porous.
This method suits you when:
- You need time to reposition during application
- The surface curves or has an uneven contour
- The sticker is small enough to handle comfortably in one hand
Hinge method: best for large decals and flat surfaces
Large decals and vehicle graphics over 30 cm benefit most from the hinge method. Anchoring one edge with tape locks alignment before you peel a single centimetre of backing, so the decal cannot drift as you work across it.
If your sticker is large and also needs repositioning, apply the hinge first, then lightly mist the surface before peeling the backing away.
Knowing how to apply stickers without bubbles on a large, flat surface comes down to this method every time. Windows, walls, and vehicle panels all give you the rigid base the hinge technique requires to work properly.
Step 3. Apply with the wet method for repositioning
The wet method gives you time to reposition the sticker before the adhesive locks in. That extra window is what makes it the right choice for smaller stickers on curved or tricky surfaces. Follow each step in order and avoid rushing the dry time at the end.
Mix your solution and mist the surface
Your soap-and-water mix needs to be mostly water, with only a few drops of dish soap per 500 ml. Too much soap weakens the adhesive permanently rather than just delaying it. Lightly mist the surface so it looks wet but not pooling, then peel the sticker backing completely and mist the adhesive side with the same quick spray.
Less solution is always better. A heavy soak extends drying time significantly and can cause paper-backed stickers to warp at the edges.
Slide, position, then squeegee
Lay the sticker down onto the misted surface and slide it into position with your fingertips. The thin film of water lets it glide without bonding. Once alignment looks correct, press the centre down gently with your squeegee and work outward in firm, overlapping strokes toward each edge. This is how to apply stickers without bubbles using the wet method: you push the water out, not the sticker around.
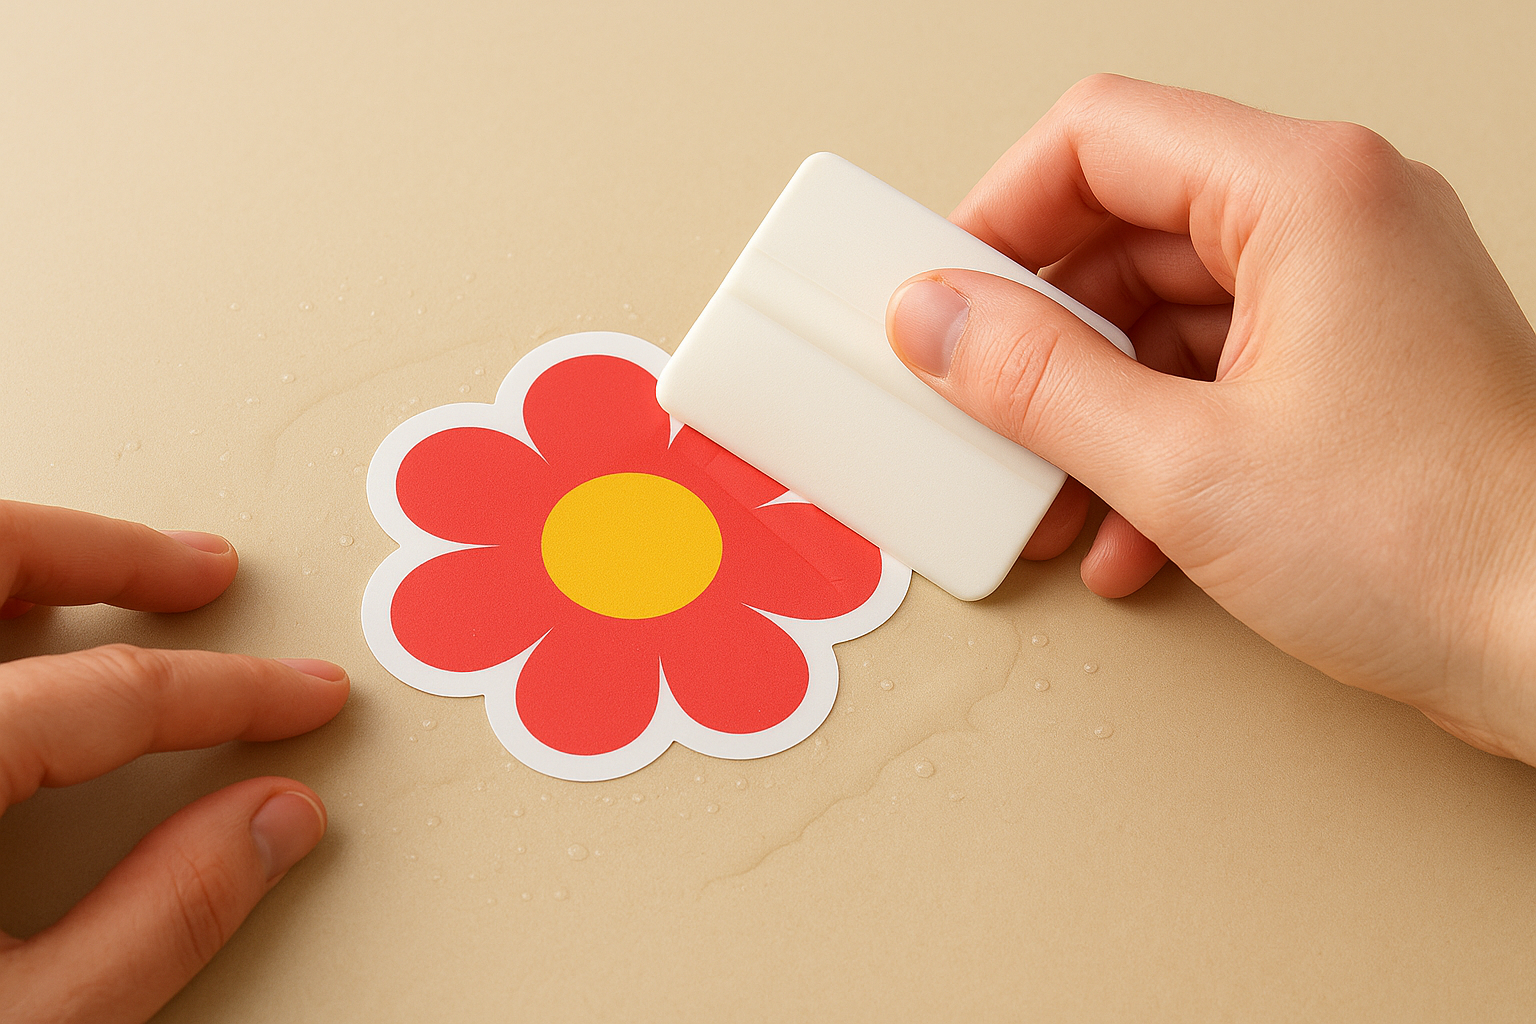
After squeegee, use a lint-free cloth to blot any excess moisture around the edges. Leave the sticker undisturbed for at least 24 hours before exposing it to water or direct sunlight so the adhesive can fully cure.
Step 4. Apply with the hinge method for large decals
The hinge method keeps large decals anchored while you peel, so the vinyl cannot shift before it bonds. This is the best approach for vehicle panels, windows, and full-wall graphics where even a few millimetres of drift ruin the whole application. Work slowly and deliberately, and the result will be clean and flat from edge to edge.
Tape the hinge and position the decal
Position the full decal on your clean surface first, backing still on, exactly where you want it to land. Run a long strip of masking or painter’s tape straight across the centre to create the hinge line. This tape anchors the top half while you work on the bottom.
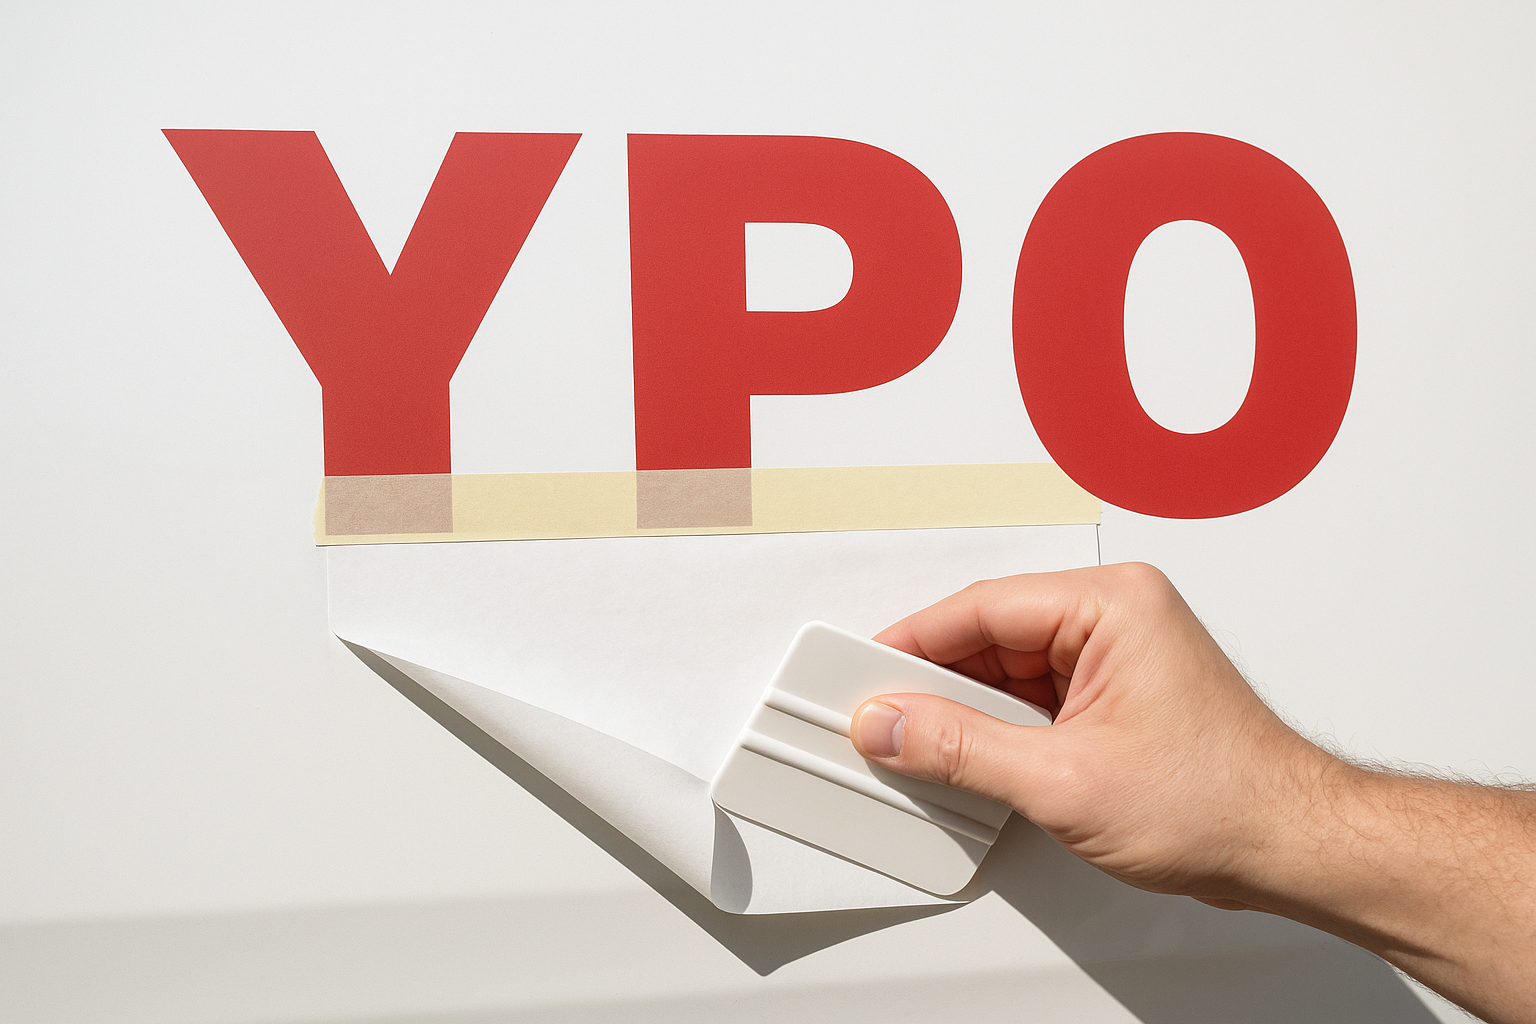
The hinge line does not need to be perfectly centred. Place it wherever gives you the most control over the larger or more complex portion of the design.
Peel, squeegee, then release the hinge
Fold the bottom half of the decal upward over the tape line, then peel away only the bottom half of the backing paper. Discard that section. Fold the exposed adhesive side back down gently onto the surface and squeegee from the centre outward in firm strokes toward the bottom edge. Once the bottom half is fully bonded, lift the tape hinge, peel the remaining backing away, and squeegee the top half using the same centre-out motion. This is how to apply stickers without bubbles on large-format decals: one controlled half at a time.
Final checks and next steps
Once the adhesive has fully cured, run your fingertip across the entire surface and feel for any raised edges or soft spots. Press any lifting corners down firmly with your squeegee before they have a chance to curl further. If a small bubble remains after drying, pierce it at a shallow angle with a pin, press the air out toward the hole, and smooth it flat immediately with your thumb.
Knowing how to apply stickers without bubbles is a skill that compounds with every application. The wet and hinge methods covered in this guide handle most situations you will encounter, from small product labels to large vehicle decals. Preparation always determines the result more than technique does, so clean surfaces and unrushed handling give you the strongest foundation every time.
Ready to order stickers worth applying carefully? Browse custom stickers, labels, and decals at Apex Workwear and get a free quote within 24 hours.