Every school year brings a stack of communication needs, report booklets, monthly newsletters, event programmes, student magazines, and more. Printing for schools doesn’t have to be complicated or expensive, but it does need to look polished and arrive on time. Parents, staff, and students all form impressions based on the quality of what lands in their hands, so cutting corners rarely pays off.
The challenge most school administrators and coordinators face isn’t a lack of ideas, it’s figuring out how to go from a rough concept to a finished, professionally printed product without burning through the budget. That means understanding your options for layout, paper stock, binding, and print quantities before you place an order. It also means working with a printer who actually reviews your files and flags issues ahead of production, not after.
At Apex Workwear, we handle booklet and newsletter printing for schools across the GTA and beyond, with no minimum order requirements on many products and free local shipping. This guide walks you through everything you need to produce sharp, professional school publications, from planning your content and choosing the right format, to preparing print-ready files and getting the best value on your order.
What to decide before you print anything
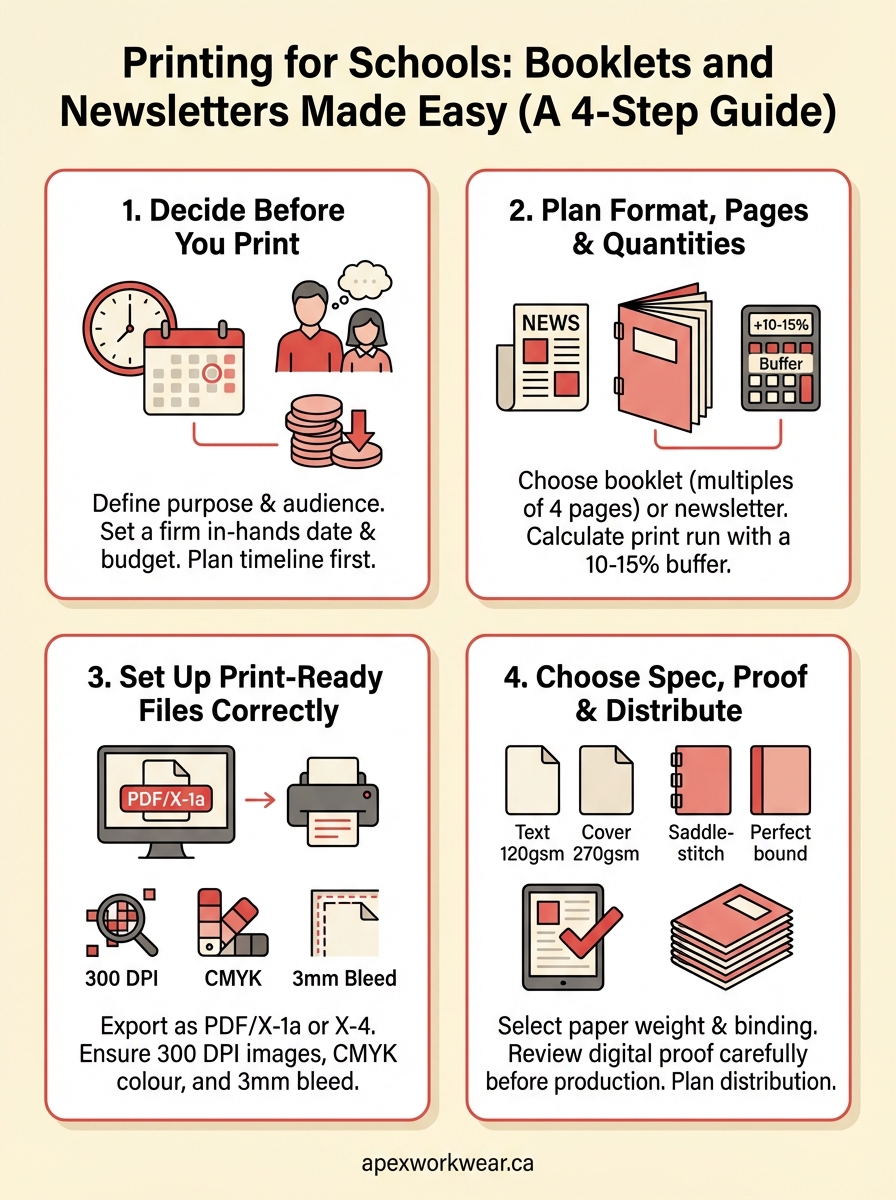
Before you open a design programme or request a quote, you need to nail down a few core decisions. Rushing into production without answering these questions is one of the most common reasons school publications end up reprinted, over budget, or sitting in a box unused. Printing for schools (booklets and newsletters) rewards people who plan first and order second.
Purpose and audience
Knowing who will read your publication and what you want them to do with it shapes nearly every other decision you make. A monthly newsletter sent home to parents has different design, tone, and format requirements than a student achievement booklet handed out at an awards evening.
Ask yourself whether the piece will be read once and recycled, or kept as a reference throughout the term. That single question affects paper weight, binding type, and how much you spend per unit. A takeaway newsletter can use a lighter stock; a student handbook needs something durable enough to survive a school bag.
If the publication needs to last the school year, invest in heavier paper stock and a bound finish rather than a simple staple.
Timeline and budget
Set a firm in-hands date before you do anything else, then work backwards to determine your submission deadline for print-ready files. Factor in time for design work, file review, production, and delivery. Schools that skip this step frequently request rush production, which adds cost that could have been avoided with two extra weeks of lead time.
Your per-unit budget also shapes the print spec you can realistically choose. Full-colour printing on both sides costs more than a black-and-white interior with a colour cover. Deciding on that split early lets you allocate your budget where it has the most visual impact, typically the cover and any photography-heavy pages, without overspending on the whole run.
Step 1. Plan format, pages, and quantities
Getting your format and quantities right from the start prevents costly reprints and wasted stock. Printing for schools (booklets + newsletters) works best when you treat this step as non-negotiable, not something to sort out after you’ve started designing.
Choose your format
Your publication format shapes the entire production process. A folded newsletter is typically a single sheet printed on both sides and folded to A5 or half-letter size. A saddle-stitched booklet uses multiple sheets folded and stapled at the spine, so your total page count must be a multiple of four. An 8-page booklet uses two sheets; a 12-page booklet uses three.
Confirm your page count is a multiple of four before finalising your layout, otherwise your printer will need to add blank pages.
Calculate your print run
Always order slightly more than you need. For school newsletters and booklets, add 10-15% to your confirmed distribution count to cover late additions and office copies. Bulk pricing often kicks in at set quantity thresholds, so printing a few extra copies may cost almost nothing more per unit.
| Distribution | Buffer (10-15%) | Recommended print run |
|---|---|---|
| 100 | +15 | 115 |
| 250 | +30 | 280 |
| 500 | +60 | 560 |
Step 2. Set up print-ready files the right way
A poorly set up file is the single most common cause of production delays in printing for schools (booklets + newsletters). Your print-ready files must meet specific technical requirements before a printer can run them, so getting this right upfront saves you revision rounds and protects your timeline.
File format and resolution
PDF is the standard submission format for school booklets and newsletters. Export your file as a PDF/X-1a or PDF/X-4 from your design programme, with all fonts embedded and images at a minimum of 300 DPI. Lower-resolution images print blurry, which is especially noticeable on photo-heavy pages.
Always embed your fonts when exporting to PDF, so your printer sees exactly the typeface you intended.
Use this checklist before you submit:
- File format: PDF/X-1a or PDF/X-4
- Image resolution: 300 DPI minimum
- Fonts: embedded, not outlined
- Page count: multiple of four for booklets
Colour mode and bleed
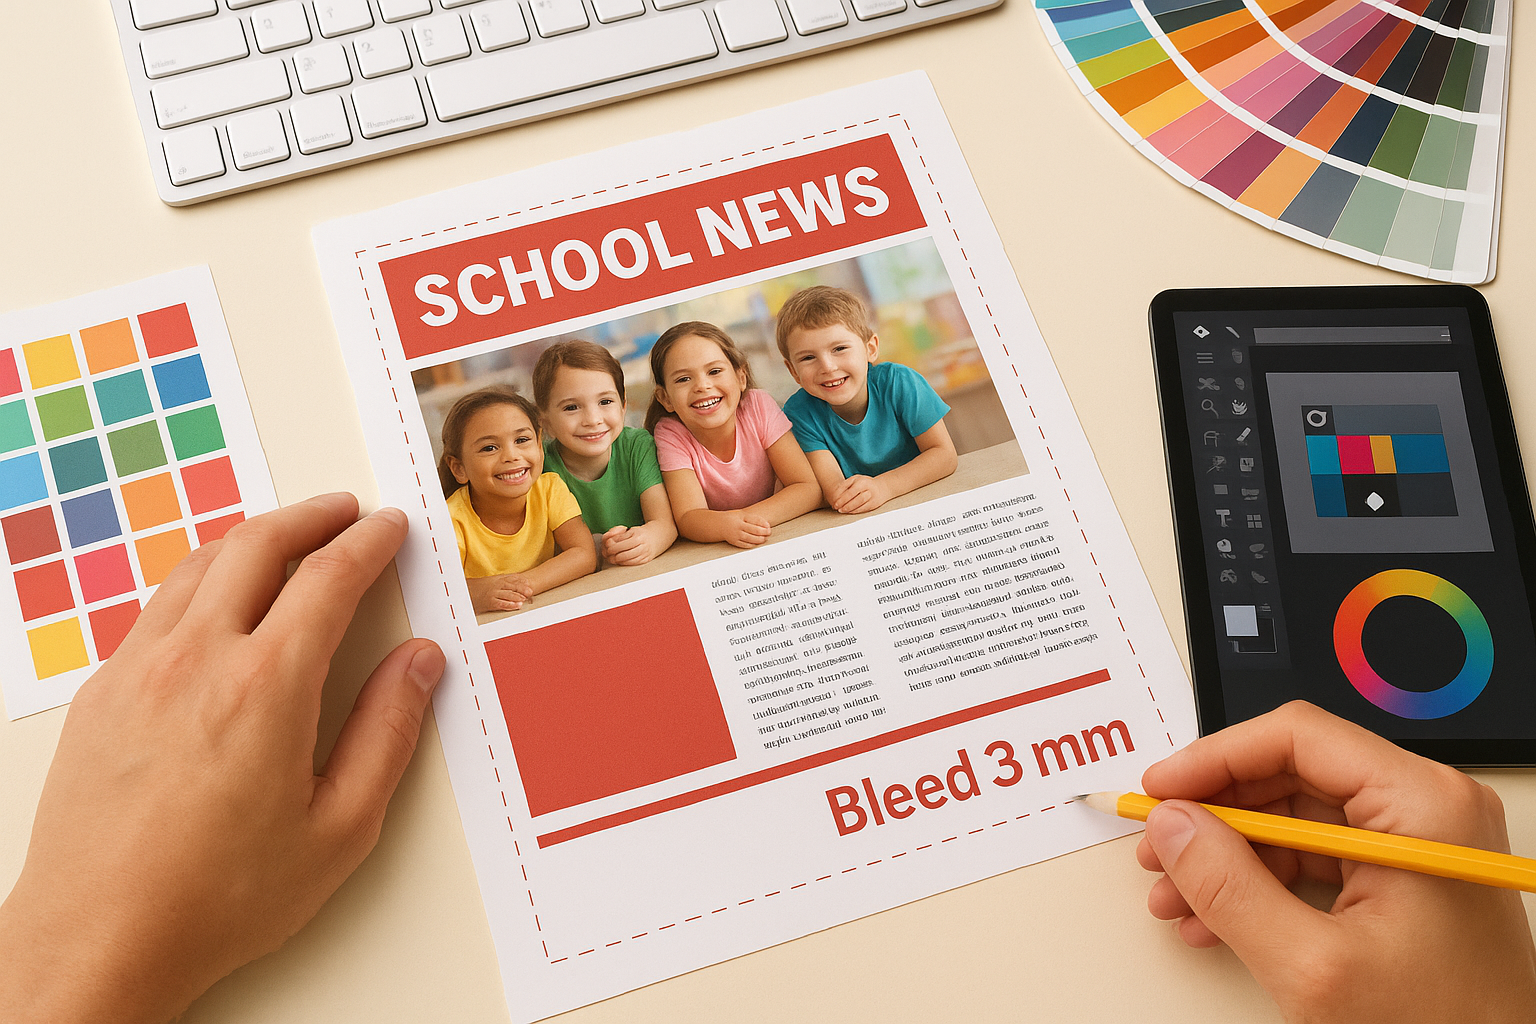
Your file must use CMYK colour mode, not RGB. RGB is built for screens; CMYK is what commercial presses use. Set your bleed to 3mm on all sides beyond the trim line so background colours and edge images do not leave a white strip after cutting.
Step 3. Choose paper, size, folds, and binding
The physical spec of your publication affects both print quality and how readers interact with it. For printing for schools (booklets + newsletters), your choices here carry more weight than most people expect, so treat this step as seriously as you treat your layout.
Paper weight and size
80 lb text stock (120 gsm) suits standard newsletter pages well. For booklet covers, step up to 100 lb cover stock (270 gsm) to give the piece a more substantial feel. Standard sizes are letter (8.5×11 inches) or half-letter (5.5×8.5 inches), with half-letter being the most common for saddle-stitched booklets distributed at school events.
A heavier cover stock makes a booklet feel more professional without significantly increasing your print cost.
Folds and binding options
Saddle-stitching (two staples at the spine) works well for publications up to 48 pages. For thicker student handbooks or programme guides, perfect binding gives a clean flat spine and a more formal finish. A simple half-fold suits a one-sheet newsletter and keeps production costs low.
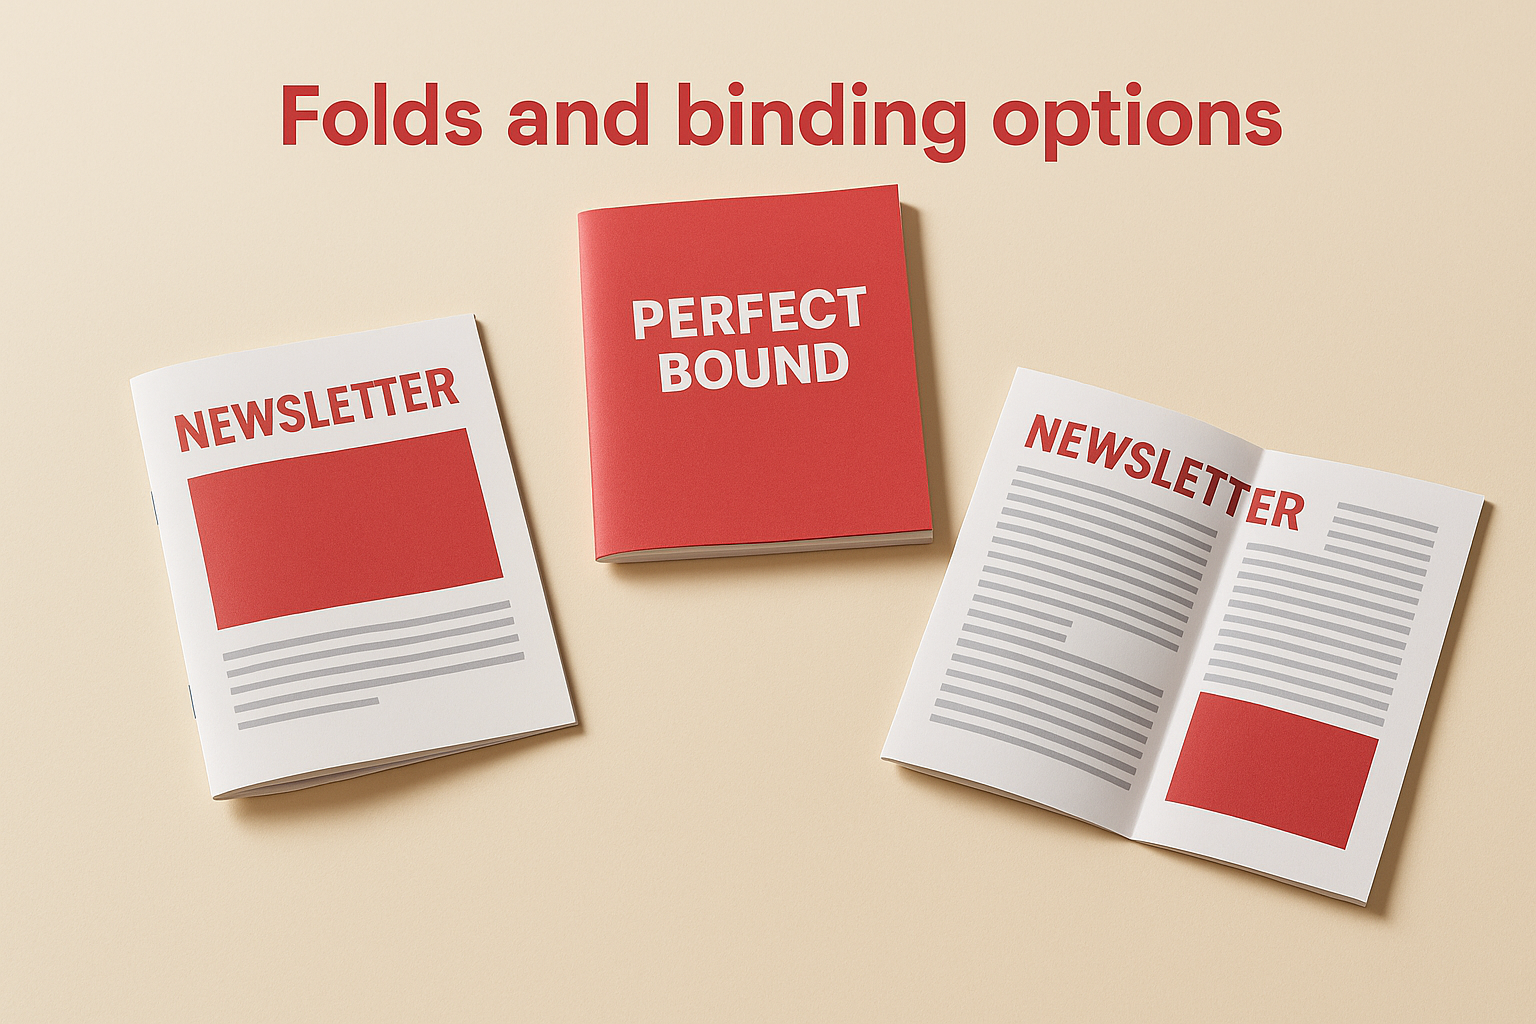
Your fold and binding choice should match both your page count and your distribution context. A saddle-stitched booklet fits easily in a school bag; a perfect-bound guide sits better on a desk.
Step 4. Proof, print, and distribute with confidence
Once your files are submitted, your printer should send you a digital proof before production begins. Review it thoroughly on a calibrated monitor. This is your last opportunity to catch layout errors, colour shifts, or font issues before ink hits paper, so do not rush through it.
Review your proof carefully
Check your proof against the original file page by page, not just the cover. Confirm that bleed areas look correct, text sits within safe margins, and no images appear pixelated. For printing for schools (booklets + newsletters), small errors on high-distribution runs are costly to fix after the fact.
Approve your proof only when you are fully satisfied. A quick approval that misses a cropped logo or wrong date means reprinting at your expense.
Use this final proof checklist before you sign off:
- All text reads correctly with no typos
- Images are sharp and positioned as intended
- Page numbers are correct and sequential
- Bleed and margins look clean on every page
Plan your distribution
Build your distribution list before your order arrives so you can move immediately once it does. For newsletters, sort by class or department to speed up hand-off. For booklets, keep a small reserve stock in the school office for late requests or parent meetings.
Next steps
You now have everything you need to take a school publication from idea to finished print. Printing for schools (booklets + newsletters) follows a clear path when you plan your format and quantities early, set up your files correctly, and choose paper and binding that suits your distribution context. Every decision you make before production saves time and money once the press runs.
The steps in this guide apply whether you are producing a one-sheet monthly newsletter or a full saddle-stitched student booklet. Start with your in-hands date, work backwards through your timeline, and confirm your print spec before you open a design programme. A little planning upfront keeps your project on schedule and your budget intact. That order of operations matters more than most people expect.
When you are ready to get started, request a free quote from Apex Workwear for fast turnaround, no minimum orders on select products, and free local delivery across the GTA.