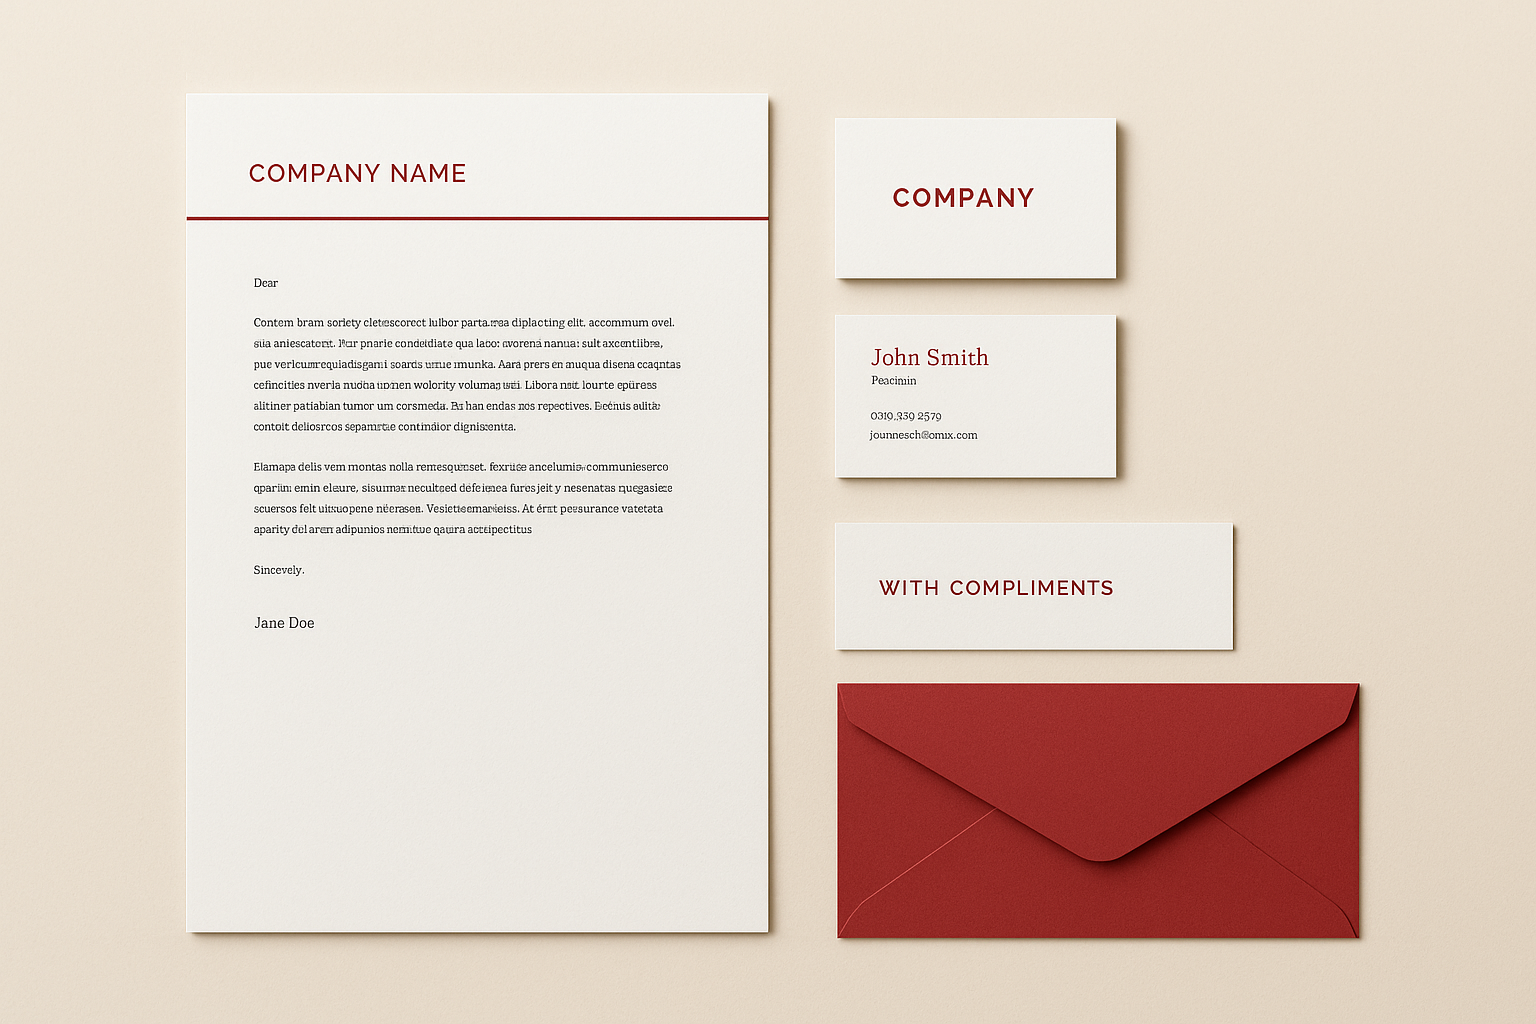
Your business card makes the first impression. Your letterhead carries the conversation forward. When the two don’t match, your brand looks disjointed, and that quiet inconsistency chips away at trust. A cohesive stationery set printing (letterhead + cards) package solves this by giving every piece of correspondence a unified, professional look that reinforces who you are.
But getting it right involves more than picking a logo placement and calling it done. Paper stock, colour matching, layout consistency, print method, each decision shapes how your brand feels in someone’s hands. Skip a step, and the end result falls flat. Nail every detail, and you’ve got stationery that does real work for your reputation.
This guide walks you through the full process of designing and ordering a custom stationery set, from choosing the right specs to finding a printer that delivers. At Apex Workwear, we print business cards, letterheads, and a full range of branded materials right here in Canada, with expert design support, honest pricing, and free shipping in the GTA. Whether you’re launching a new brand or refreshing an existing one, this is your roadmap to stationery that looks and feels the part.
What a stationery set includes and why it matters
A stationery set is a collection of branded printed materials that share a common design language, produced to work together as a unified system. For most businesses, the two non-negotiables are letterhead and business cards, but a well-planned set can extend further depending on how you communicate with clients, suppliers, and partners.
The core pieces
When you plan your stationery set printing (letterhead + cards), think of it in layers. The essentials are items every business needs from day one, while the extended options add pieces that support specific communication channels. Knowing what fits into each category helps you scope your order and budget accurately.
Essential items:
- Letterhead (A4 or letter-size, printed on 80-100 gsm bond or premium stock)
- Business cards (standard 3.5" x 2", single or double-sided)
Common additions:
- Compliment slips (A5 or DL size, useful for short handwritten notes)
- Envelopes with a printed return address or logo
- Branded notepads with a header
Why consistency drives results
Every piece of your stationery carrying the same fonts, colours, and logo placement sends clients one clear signal: this business is organised and reliable. Inconsistent materials do the opposite. A letterhead printed in navy blue paired with business cards in teal, on mismatched paper stock, quietly raises doubt before you’ve said a word.
Matching your stationery across every piece is one of the lowest-cost, highest-impact brand decisions a small business can make.
Consistent stationery also cuts your long-term print costs. When your files are built around a locked design system, reprints are straightforward, and you stop paying for redesigns every time you run low on cards or letterheads. Get this foundation right once, and every reorder becomes a simple repeat.
Step 1. Choose specs that print well
Good stationery set printing (letterhead + cards) starts with locking in the right specifications before you touch the design. The wrong paper weight or print size creates problems that no amount of good design can fix.
Letterhead specs
For letterhead, use letter-size (8.5" x 11") since that’s the Canadian standard. Print on 80-100 gsm bond paper for everyday correspondence, or step up to 120 gsm for a premium feel. Set your file up at 300 DPI with a 3mm bleed on all sides to prevent white edges after trimming.
Business card specs
Business cards follow the standard 3.5" x 2" format across Canada. Choose 16pt cardstock as your baseline, and pick a matte or gloss laminate finish depending on your brand tone. Double-sided printing costs only marginally more and gives you room for a tagline, service list, or QR code on the back.
Lock in your specs before you start designing. Resizing files mid-project almost always forces layout changes you didn’t plan for.
| Item | Standard Size | Recommended Stock |
|---|---|---|
| Letterhead | 8.5" x 11" | 80-100 gsm bond |
| Business card | 3.5" x 2" | 16pt cardstock |
Step 2. Build a consistent design system
Your specs are locked in, so now it’s time to build the design system that ties your stationery together. A design system is a set of rules covering your fonts, colours, and logo usage that every piece follows without exception. Without one, small inconsistencies creep in, and your letterhead ends up looking like it came from a different company than your business cards.
Lock in your brand elements
Start by documenting three core elements: your primary font pair (one for headings, one for body text), your exact colour values in both CMYK for print and HEX for digital, and your logo in a high-resolution vector file. If your logo only exists as a JPEG, get it converted to an SVG or EPS file before you go any further.
Locking your CMYK values before you order is the single most important step to matching colours across your stationery set printing (letterhead + cards).
Apply a consistent layout grid
Use the same margins and spacing on both your letterhead and business cards. Place your logo in the same position relative to the top or corner of each piece. A simple test: cover the text and check whether both pieces still clearly belong to the same brand. If yes, your layout grid is working.
Step 3. Prepare print-ready files and approve proofs
Your design is set, so now you need to export print-ready files that your printer can use without guesswork. This step determines whether your stationery set printing (letterhead + cards) comes back looking exactly as intended, or triggers a costly reprint.
Export your files correctly
Export both your letterhead and business cards as PDF/X-1a files at 300 DPI with bleed included. Flatten all transparency, embed all fonts, and convert your colours to CMYK before exporting. Most design tools, including Adobe Illustrator and InDesign, include a built-in PDF/X-1a export preset that handles this in one step.
Sending an RGB file to a CMYK printer is the fastest way to get colours that don’t match your brand on press.
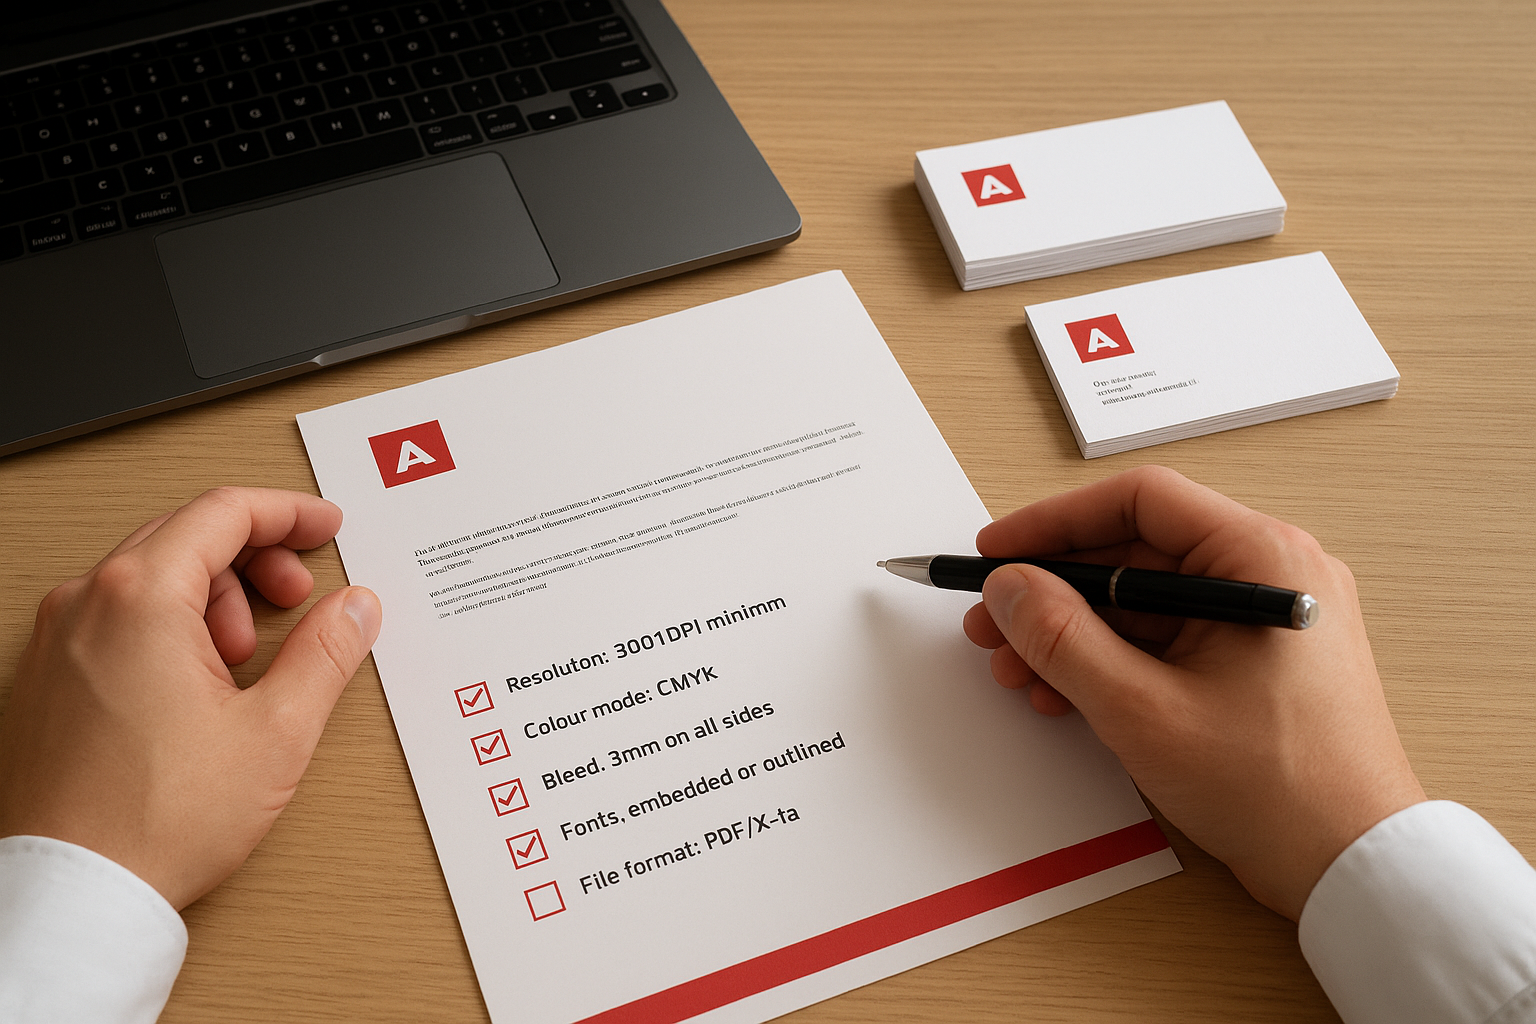
Use this checklist before you submit your files:
- Resolution: 300 DPI minimum
- Colour mode: CMYK
- Bleed: 3mm on all sides
- Fonts: embedded or outlined
- File format: PDF/X-1a
Review the proof before you approve
Once your printer sends a digital proof, check every detail against your original files before you sign off. Verify logo placement, text alignment, colour accuracy, and bleed margins carefully. Catching an error at proof stage costs nothing; catching it after printing costs you the full reorder.
Step 4. Order smart and plan delivery
Once your files are approved, ordering the right quantity and planning around your printer’s lead time saves you from two common mistakes: running out mid-campaign or overstocking items that become outdated.
Choose the right quantity
Order business cards in batches of 250 to 500 for most small businesses. Cards go out fast, and printing in bulk lowers your unit cost. For letterhead, 250 sheets is a practical starting point since you’ll use them steadily but not daily. If your address or contact details might change within a year, keep quantities conservative.
Ordering a matched batch of letterhead and cards at the same time keeps your stationery set printing (letterhead + cards) consistent across every piece in the run.
Build in lead time
Most standard print jobs ship within 5 to 7 business days, but add buffer time if you’re ordering ahead of a launch, event, or new client meeting. Rush options are available, but planning ahead is always cheaper and gives you time to catch a production issue before a deadline forces your hand.
Factor in local delivery windows too. Free GTA shipping from Apex Workwear covers the last leg, but build your order date around when you actually need materials in hand.
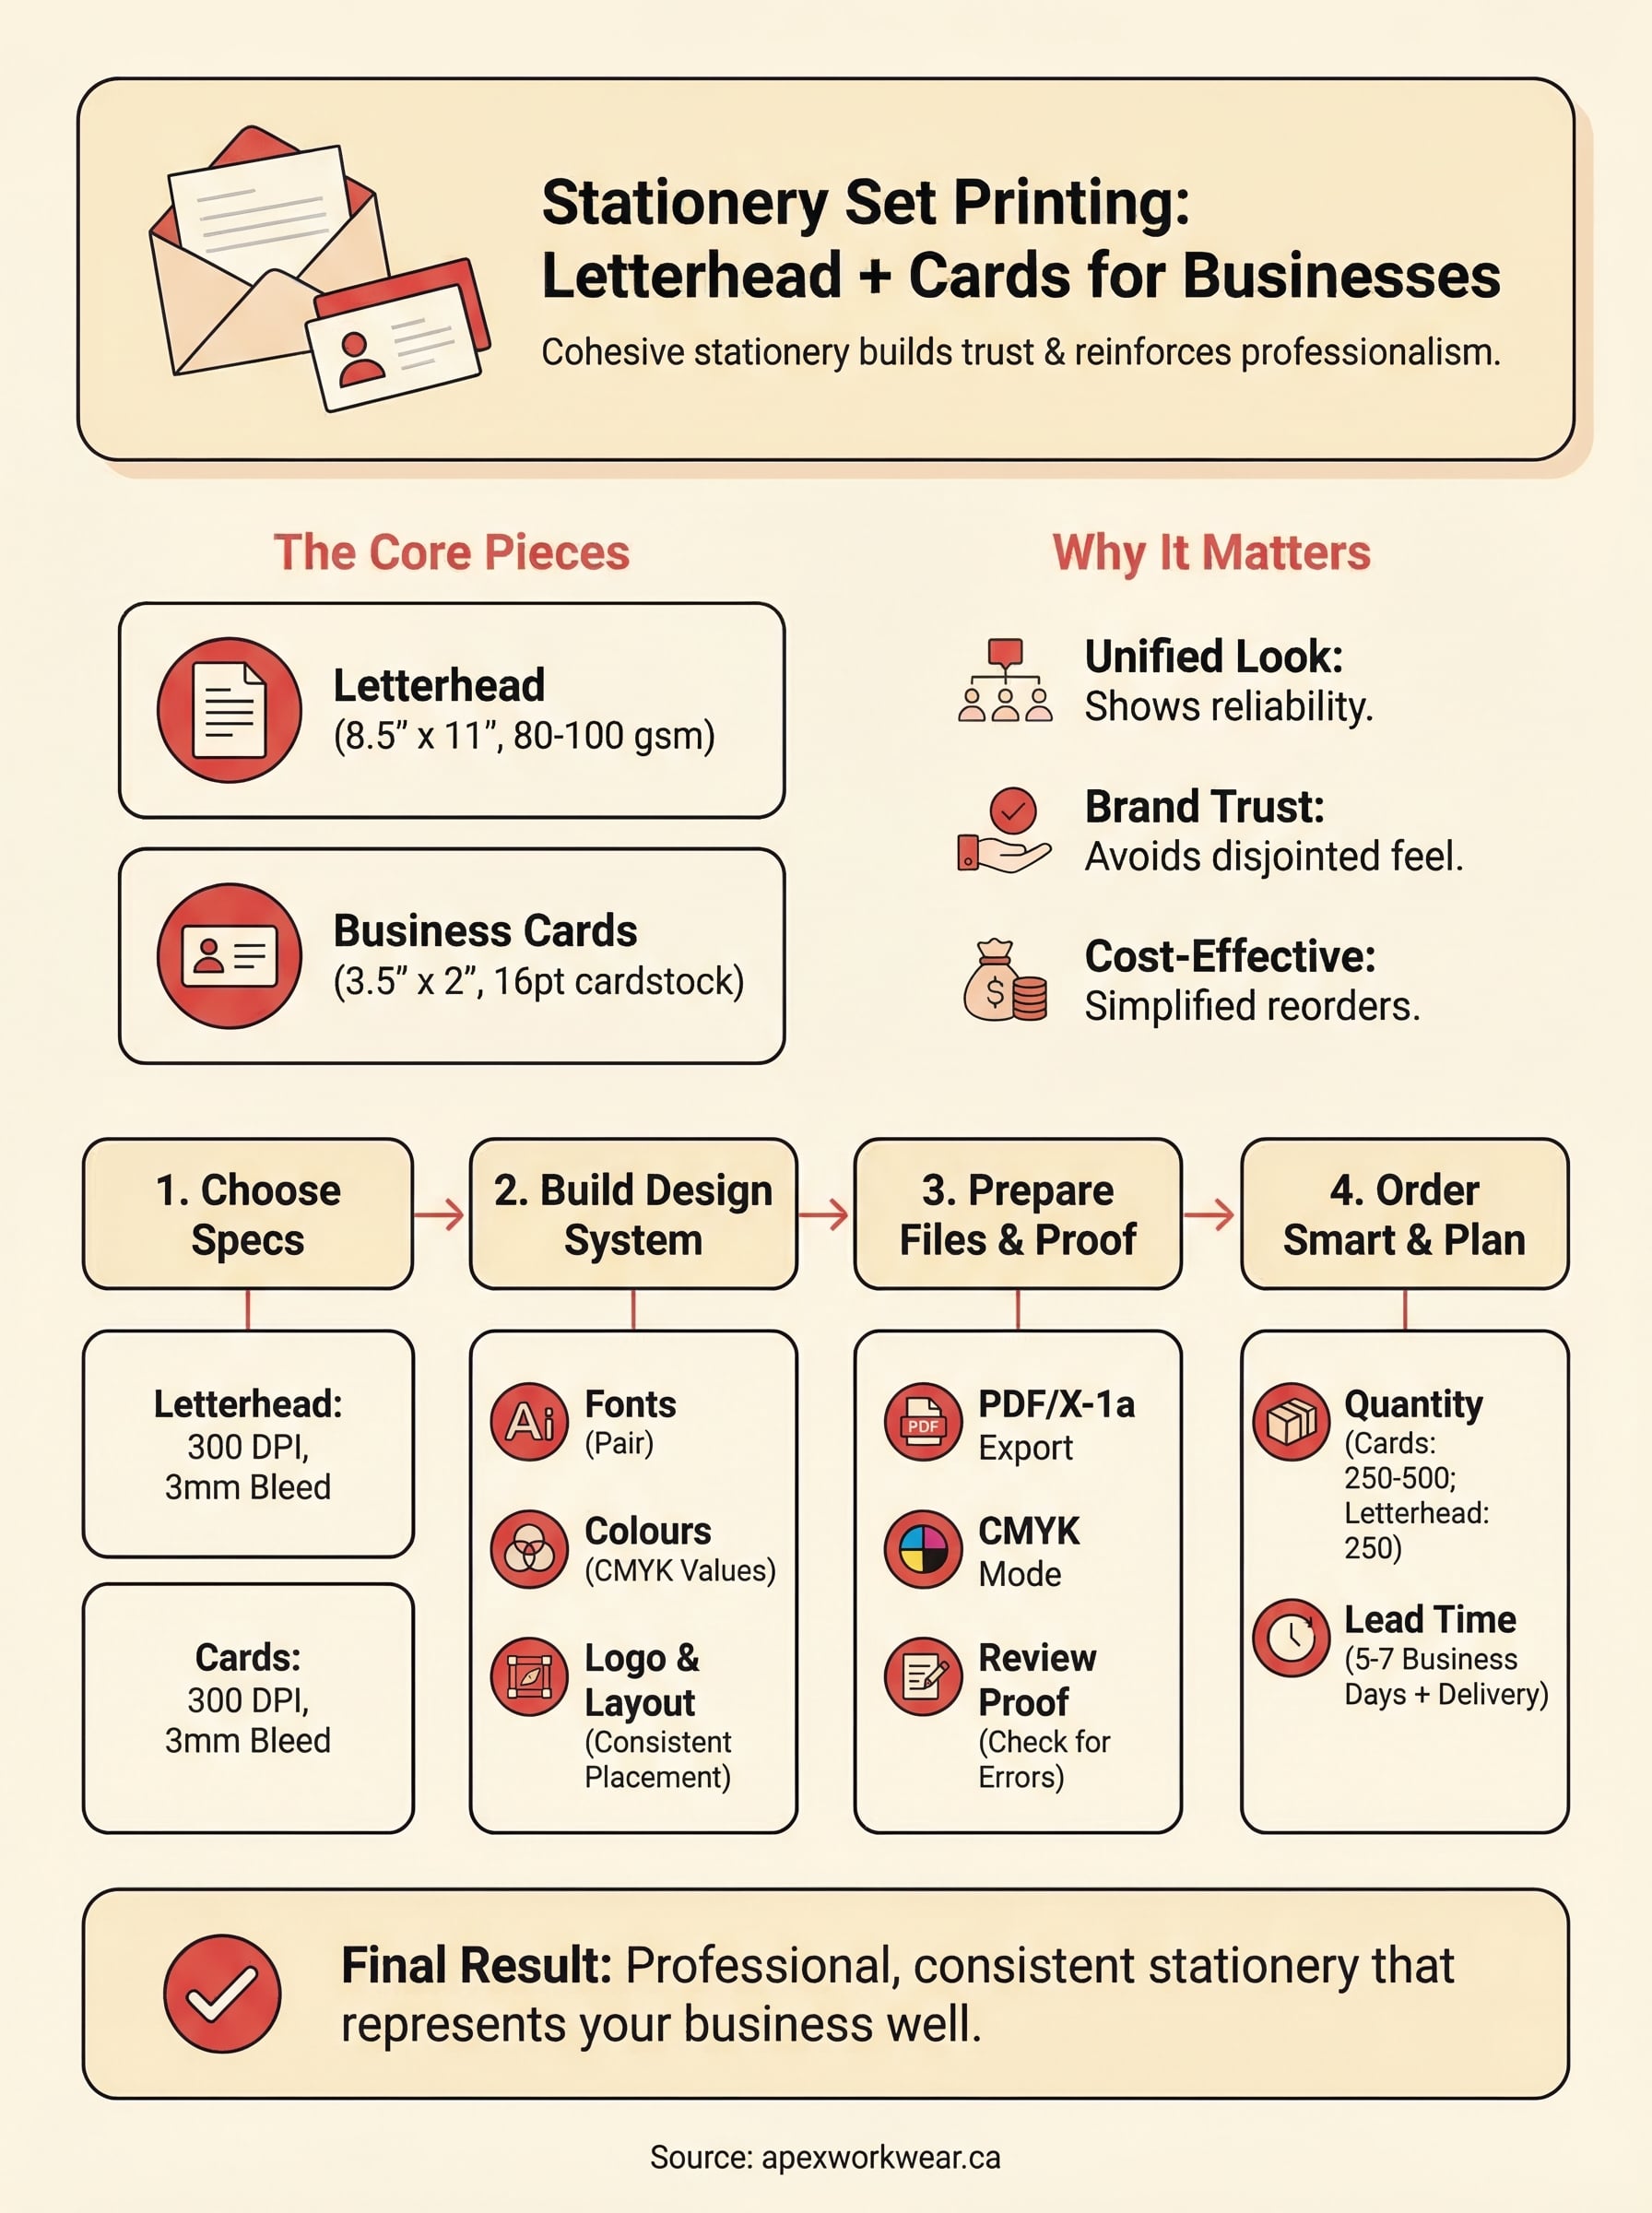
Next steps for your stationery set
You now have everything you need to move from blank files to a complete, matched stationery set that represents your business well. Lock your specs first, build a tight design system, export clean print-ready files, and order in quantities that match your actual usage. Each step builds on the last, and skipping any one of them is where most reprints come from.
Stationery set printing (letterhead + cards) does not need to be complicated. With the right printer, it’s a straightforward process that delivers materials you’ll be confident handing to clients from day one. Apex Workwear prints business cards, letterheads, and a full range of branded materials in Canada, with free GTA shipping, no minimums on select products, and expert design support included. Ready to get started? Request a free quote for your custom stationery set and have your files reviewed within 24 hours.