You’ve spent hours perfecting a design for your business cards, banner, or custom hoodie. The colours pop on screen. The layout looks sharp. Then the print arrives, and everything looks soft, blurry, or pixelated. Nine times out of ten, the culprit is DPI for printing, specifically, your file didn’t have enough of it. It’s one of the most common (and most preventable) issues we see at Apex Workwear when customers submit artwork for custom apparel, signage, and business print products.
DPI stands for dots per inch, and it directly controls how crisp or muddy your printed output looks. You’ve probably heard that 300 DPI is the gold standard for print. That’s true, but it’s not the full picture. Depending on what you’re printing, where it’ll be viewed, and how large the final piece is, you might need more resolution or you might get away with less. Understanding the "why" behind the number helps you make smarter decisions before you ever hit upload.
This guide breaks down exactly what DPI means in practical terms, explains why 300 DPI earned its reputation, and walks you through when to adjust that number up or down. Whether you’re preparing files for custom t-shirts, NCR forms, posters, or yard signs, you’ll leave with the knowledge to send print-ready artwork every time, no guesswork, no reprints.
What DPI means for print quality
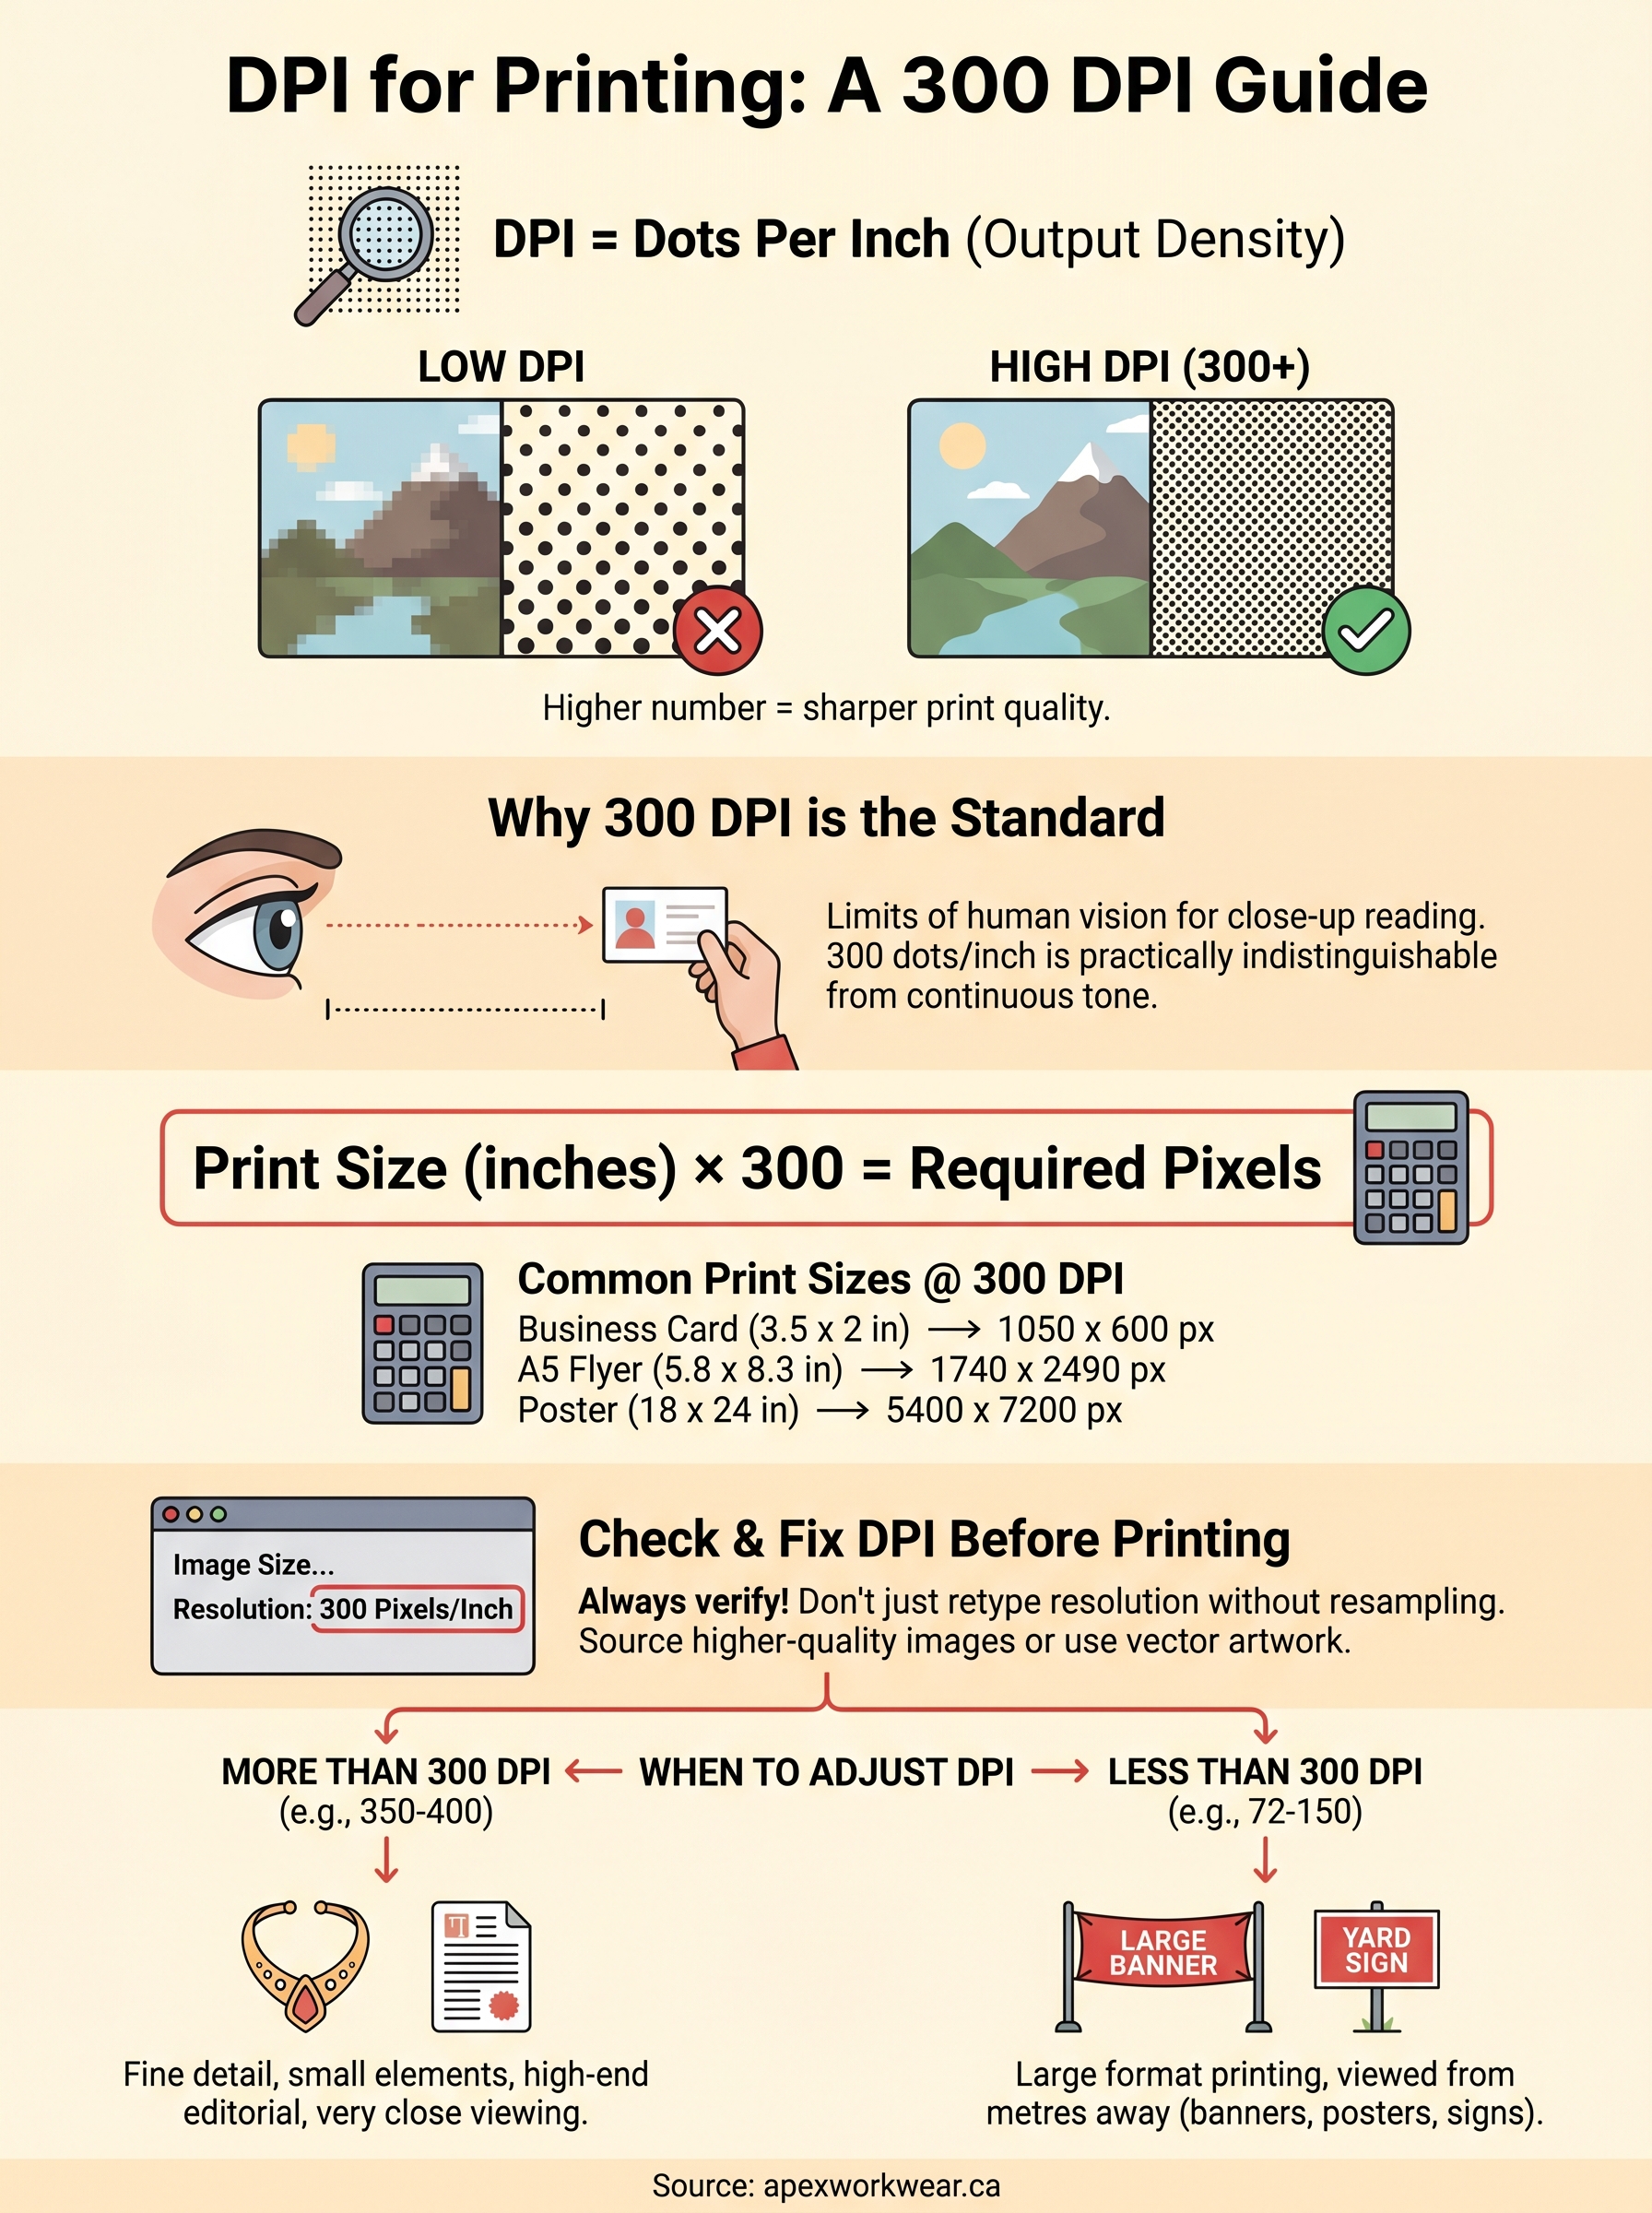
DPI stands for dots per inch, and it measures how many individual ink dots a printer places within a single inch of printed output. The higher that number, the more dots packed into each inch, and the sharper and more detailed your printed result looks. Lower DPI values produce fewer dots per inch, which means more visible space between them and a result that appears rough or pixelated, especially when viewed up close.
How dots build an image
When a printer receives your file, it translates every pixel of your digital image into a pattern of tiny ink dots on paper, fabric, or substrate. Each dot sits in a precise position, and thousands of them together form the gradients, edges, and fine details you see in the finished print. Think of it like a mosaic: the smaller and more densely packed the tiles, the smoother the overall image appears to the eye.
The quality of your print is locked into the resolution of the file you submit, long before it reaches the printer.
Your image resolution and the printer’s DPI work together. A file with too few pixels spread across a large area forces the printer to stretch that information, making each dot cover more space and exposing the gaps between them. That’s exactly where blur and pixelation come from.
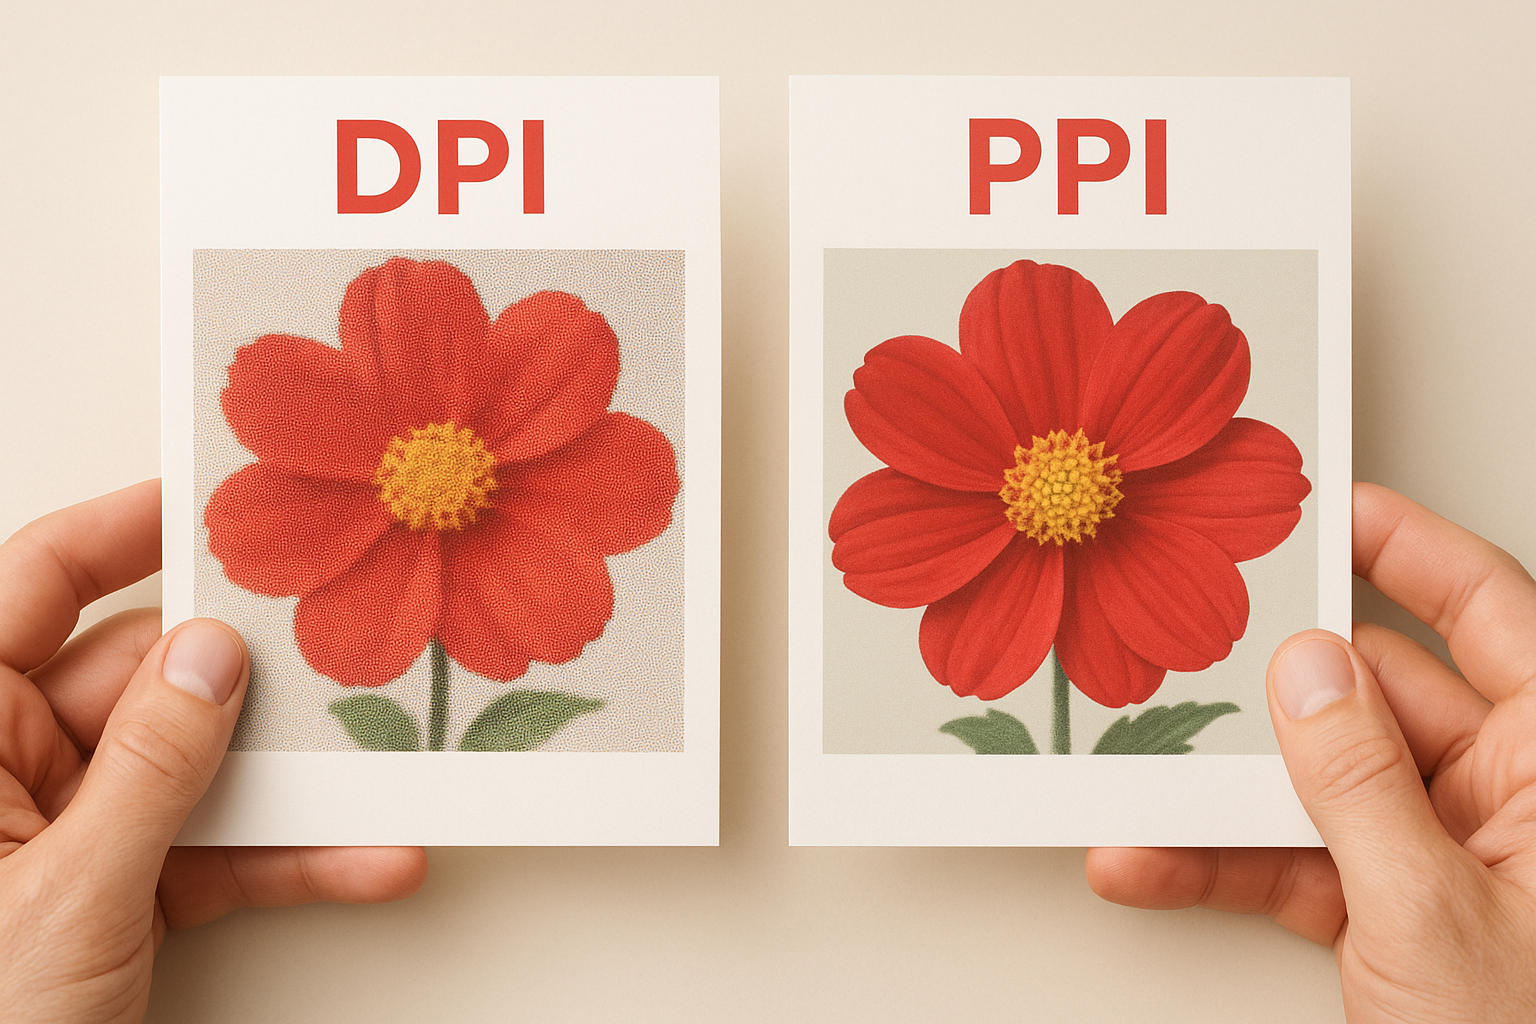
DPI vs. PPI: the distinction that matters
You’ll often see the terms DPI and PPI used interchangeably, but they describe two different things. PPI (pixels per inch) refers to the resolution of your digital image file, while DPI refers to the output density of the physical printer. When print professionals discuss DPI for printing (300 DPI explained as a standard), they usually mean the PPI of the source file rather than the hardware dots the printer produces, because that’s the value you can actually control before submitting your artwork.
Your printer handles its own output DPI settings internally. Your job is to submit a file with sufficient pixel density so the printer has enough information to reproduce every detail accurately, without having to guess or interpolate missing data.
Why 300 DPI is the usual standard
The 300 DPI figure isn’t arbitrary. It comes directly from the limits of human vision at a normal viewing distance. When you hold a printed page, business card, or branded leaflet roughly 30 to 40 centimetres from your eyes, 300 dots per inch produces a result that your eyes cannot distinguish from a continuous, unbroken image. Pack in more dots and you gain very little visually. Use fewer, and the gaps become apparent.
300 DPI is the point where print resolution and human perception align for standard close-up reading distances.
The role of viewing distance
Viewing distance is the key variable that makes 300 DPI work. At arm’s length or closer, your eyes can detect imperfections that would be invisible from further away. For materials like business cards, flyers, brochures, and custom apparel labels, people view them up close, which is exactly why the print industry settled on 300 DPI as the baseline for dpi for printing (300 dpi explained throughout professional workflows). It gives your artwork enough density to look intentional and clean at close range.
Why the print industry adopted it as a baseline
Professional print shops, including offset and digital print operations, calibrated their entire file submission and proofing workflows around 300 DPI because it represents the practical ceiling for perceived quality in most commercial applications. Submitting files at this resolution means your printer has enough pixel data to faithfully reproduce fine type, sharp edges, and smooth gradients without inventing detail that isn’t there. It became the standard because it reliably works across a wide range of substrates and print methods.
How to work out pixels for your print size
The calculation behind dpi for printing (300 dpi explained across most professional print workflows) is straightforward: multiply your intended print dimensions in inches by 300. The result tells you the minimum pixel dimensions your image file needs before you submit it for print. Getting this right upfront saves you from discovering a resolution problem after you’ve already placed your order.
The formula you need
Use this formula: print size in inches × DPI = required pixels. Apply it to both the width and height of your image separately, and you’ll have the exact pixel dimensions needed for a clean, sharp result.
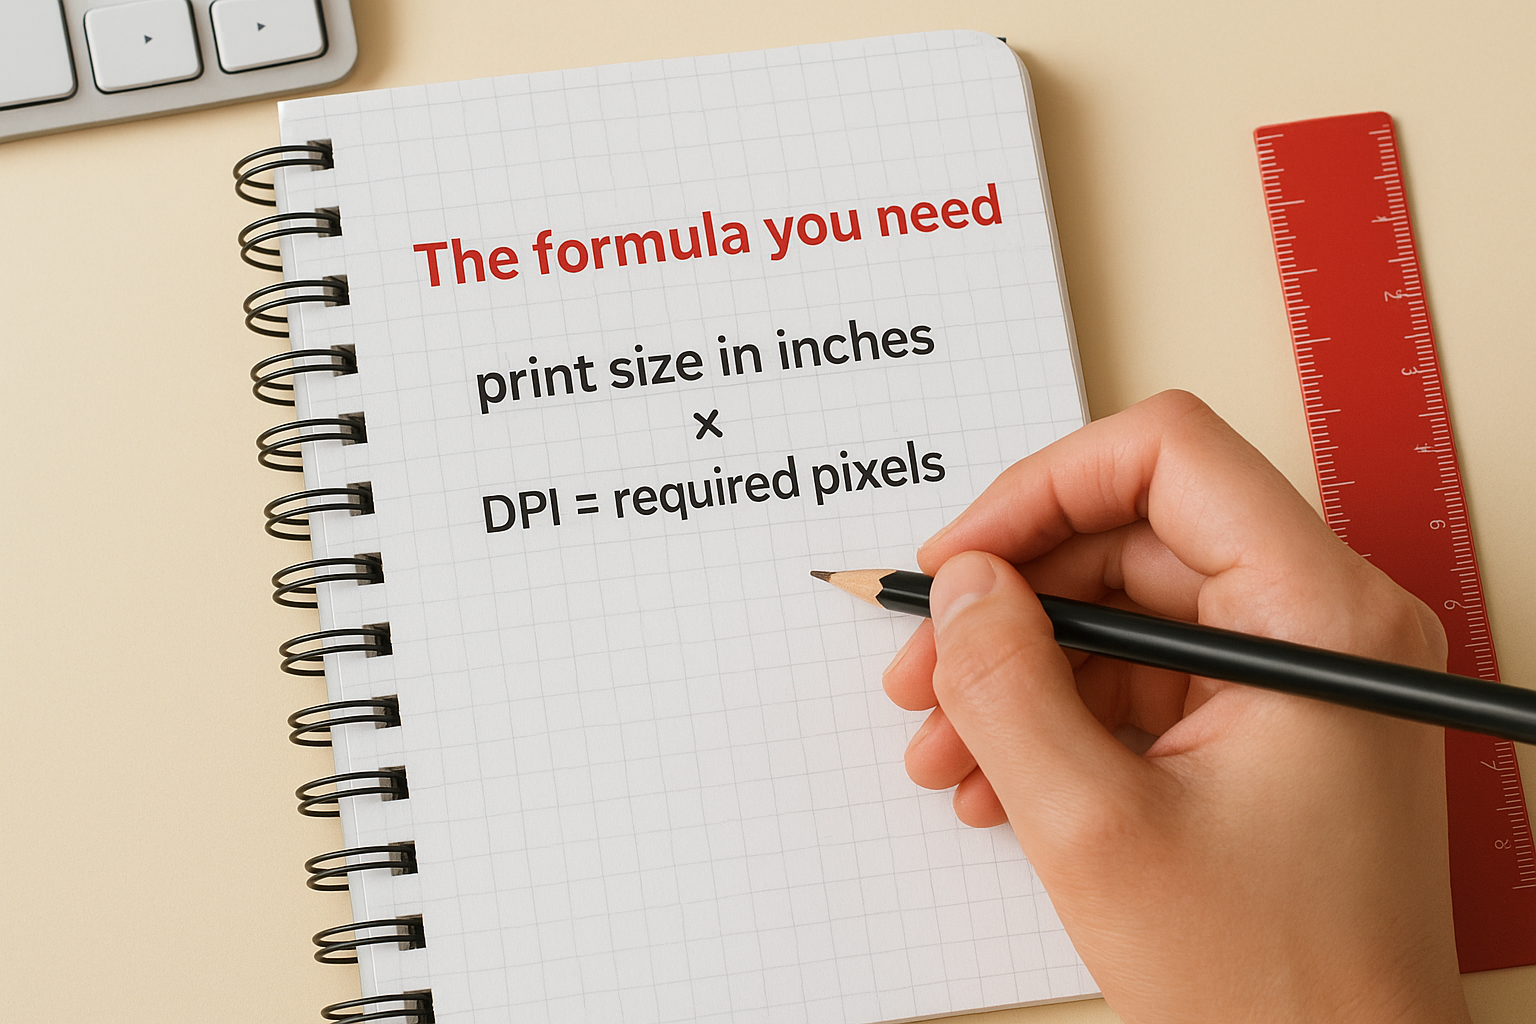
Always calculate your required pixels before resizing or exporting your file, not after.
Here’s how the numbers break down for common print sizes at 300 DPI:
| Print size (inches) | Width pixels needed | Height pixels needed |
|---|---|---|
| Business card (3.5 × 2) | 1,050 | 600 |
| A5 flyer (5.8 × 8.3) | 1,740 | 2,490 |
| A4 brochure (8.3 × 11.7) | 2,490 | 3,510 |
| Poster (18 × 24) | 5,400 | 7,200 |
What this means for your file
When you start a new document in design software, set your canvas dimensions using these pixel values rather than adjusting resolution later. Scaling up a low-resolution image after the fact does not add genuine detail; it only stretches existing pixels, which produces the same soft, blurry result you were trying to avoid.
Your safest approach is to work at the correct resolution from the start. If your design software asks whether to set up your file in pixels or inches, choose inches and enter 300 in the resolution field. This keeps your workflow clean and removes any last-minute surprises when you export your final artwork.
How to check and fix DPI before printing
Before you submit artwork, verify your file’s resolution rather than assume it’s correct. Most design applications show you this information in a few clicks, and catching a DPI problem now costs nothing compared to paying for a reprint after the job comes back soft or blurry.
How to check DPI in common software
In Adobe Photoshop, navigate to Image > Image Size and look at the Resolution field. Your target is 300 pixels per inch for standard print materials like business cards, flyers, and apparel labels. In Illustrator or InDesign, resolution applies to any embedded raster images within your document; right-click a placed image and check its effective resolution to confirm it meets the standard for dpi for printing (300 dpi explained throughout professional print workflows).
Here’s a quick reference for checking resolution in the most common design applications:
- Photoshop: Image > Image Size > Resolution field
- Illustrator: Select placed image > Document Info panel > Effective Resolution
- InDesign: Right-click placed image > Image Information
If your effective resolution reads below 300 PPI, do not simply retype the number in the resolution field and expect the problem to disappear.
What to do if your DPI is too low
Retyping the resolution value without resampling only changes how the file describes itself; it does not generate new pixel data. Your only genuine fix is to source a higher-resolution version of the image or rebuild the artwork at the correct dimensions from the start.
Vector artwork created in Illustrator or a similar programme sidesteps this issue entirely, because vectors scale to any size without losing sharpness. When working with photographs, always request high-resolution originals from your photographer or stock image supplier before you start building the layout.
When you need more or less than 300 DPI
The 300 DPI benchmark covers most standard commercial print jobs, but it is not a universal rule. Your actual requirement depends on two factors: how close the viewer will stand to the printed piece, and the physical size of the final output. Once you understand those two variables, you can make an informed call on whether to push resolution higher or accept something lower.
When to go above 300 DPI
Some applications genuinely benefit from higher resolution. Fine jewellery photography, detailed product close-ups, and high-end magazine editorial work are common examples where 350 or even 400 DPI produces a noticeably crisper result at close reading distances. If you are printing very small type or fine line art on a business card or product label, working at 400 DPI gives your printer more data to hold those thin strokes without them breaking apart.
The smaller the printed element and the closer the viewer, the more resolution actually pays off.
When lower DPI is acceptable
Large-format printing is the clearest case where lower resolution works perfectly well. A banner or a coroplast yard sign is typically viewed from several metres away, not arm’s length, which means 72 to 150 DPI at full print size is often sufficient for a sharp result. Understanding dpi for printing (300 dpi explained as a close-range standard) makes it clear why: the viewing distance closes the perceptual gap that low resolution would otherwise expose. For posters viewed from across a room, 150 DPI routinely delivers results that look clean and professional without requiring massive file sizes.
Ready to print without surprises
Understanding dpi for printing (300 dpi explained) removes one of the biggest sources of wasted money in custom print projects. You now know what DPI actually measures, why 300 is the benchmark for close-range materials, how to calculate the pixel dimensions your file needs, and when to adjust that number up or down based on viewing distance and output size. None of this is complicated once you know the logic behind it.
The next step is straightforward: check your files before you submit them, not after the order ships. Verify your resolution in your design software, source higher-resolution originals where needed, and build from a vector base whenever your artwork allows it. Getting these details right means your finished prints match what you designed, every time.
When you’re ready to order custom apparel, signage, or business print products, get a free quote from Apex Workwear and submit your artwork with confidence.