You’ve got a logo, a slogan, or maybe just an idea, and you want it on a hoodie that actually looks professional, not like an iron-on transfer gone wrong. Searching to design your own hoodie Canada usually means you’re stuck between overseas print sites with confusing minimums and local shops that never reply to your quote request. That’s a frustrating place to be when you just want one clean product, done properly.
The good news: designing a custom hoodie in Canada doesn’t need to be complicated. You need a clear file, a printer who understands embroidery versus DTG printing, and a process that doesn’t force you to order fifty units just to get started. With the right partner, you can go from a rough idea to a finished proof in a matter of days, not weeks.
This guide walks you through every stage of the process, from prepping your artwork and picking the right blank hoodie to choosing a printing method and placing an order with no minimum requirements. Whether you’re branding a small team, launching a merch line, or making one hoodie for yourself, you’ll know exactly what to do next by the end of this article.
What you need before designing your own hoodie
Before you open any design tool, gather a few basics so the process moves quickly once you start. Trying to design your own hoodie in Canada without your artwork, sizing, and budget sorted first is the main reason projects stall halfway through. Spend fifteen minutes upfront and you’ll avoid back-and-forth emails later.
Your artwork or logo file
Your logo or design needs to exist as a proper file, not just a screenshot pulled from your website. Printers work best with vector files (AI, EPS, or PDF) for embroidery and screen print setup, and high-resolution PNG or JPEG (300 DPI minimum) for direct-to-garment printing. If you only have a low-resolution image, say so upfront. Most shops, Apex Workwear included, can recreate or clean up a rough logo for a small fee or sometimes for free as part of basic design support.
A blurry logo on a screen becomes a blurry logo on a hoodie, so fix the file before you fix the design.
Your quantity and budget
Quantity changes almost everything about your order, from the printing method available to you to the price per unit. One hoodie for yourself works fine with no minimum order shops, while a team of twenty gets better per-piece pricing through bulk discounts. Decide roughly how many you need before requesting a quote, since printers price screen printing and embroidery very differently depending on volume.
| Quantity | Typical best method | What to expect |
|---|---|---|
| 1-5 hoodies | DTG or embroidery | Higher cost per unit, full colour detail |
| 6-24 hoodies | Embroidery or screen print | Balanced pricing, durable finish |
| 25+ hoodies | Screen print | Lowest cost per unit, best for bulk branding |
Your timeline and deadline
Next, figure out when you actually need the hoodies in hand, not just when you’d like them. Standard production runs 5 to 7 business days once your proof is approved, so build in extra time for shipping and any design revisions. If you’re working toward an event, a launch, or a specific date, mention rush turnaround when you request your quote, since most Canadian print shops can accommodate it for an added fee.
A quick checklist before you begin
With your file, quantity, and timeline settled, run through this short checklist so nothing gets missed once you start the actual design work:
- Artwork file ready in vector or high-resolution format
- Colours confirmed, including any specific Pantone matches for brand consistency
- Hoodie colour chosen, since dark fabrics limit some printing options
- Quantity range decided, even if it’s an estimate
- Deadline identified, including whether rush service is needed
- Budget range in mind, so quotes can be compared realistically
Getting these six items sorted means your first conversation with a printer covers real decisions instead of basic questions. It also means the quote you receive within 24 hours will actually reflect what you need, rather than a generic estimate that changes three times before you place the order. Once you’ve got this groundwork in place, you’re ready to move on to the part most people find the most fun: picking the actual hoodie.
Step 1. Choose your hoodie style and fabric weight
Once your artwork and quantity are sorted, the next decision is the blank hoodie itself. This matters more than people expect, since a cheap, thin hoodie makes even a perfect print job look low-quality. Pick a blank hoodie that suits both your budget and how it’ll actually be worn, whether that’s a warehouse crew in winter or a lightweight team hoodie for spring events.
Pullover vs zip-up
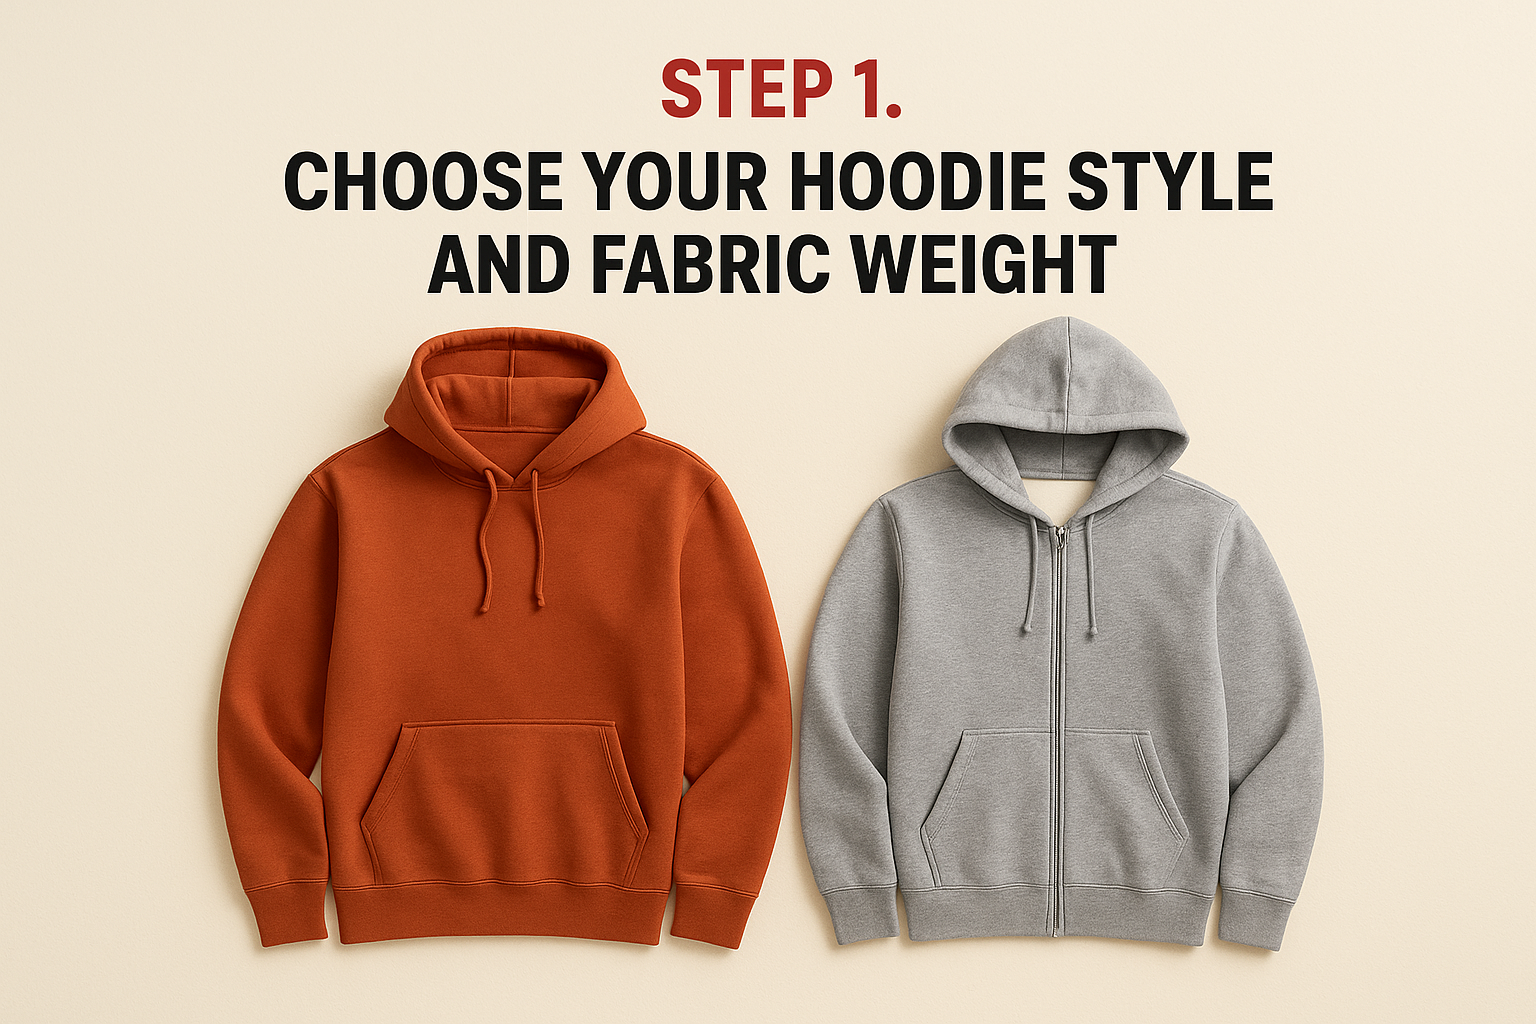
Pullover hoodies are the standard choice for most branding jobs since the front panel gives you one clean, uninterrupted surface for a logo or design. Zip-up hoodies split that surface down the middle, which works fine for a small chest logo or back print but limits your options for a large centred design. If you’re not sure which to pick, think about how the hoodie gets worn day to day. Contractors and warehouse teams often prefer zip-ups for layering over safety gear, while retail or event merch usually leans pullover for the cleaner print area.
Fabric weight and blend
Fabric weight is measured in grams per square metre (GSM), and it tells you how heavy and warm the hoodie feels. Lighter hoodies sit around 240 to 280 GSM and suit spring or indoor wear, while heavier fleece in the 320 GSM-plus range holds up better for outdoor Canadian winters and repeated washing. Blend matters too. A cotton-polyester mix resists shrinking and prints more evenly than 100% cotton, especially for DTG printing, which needs a smoother surface to lay down colour accurately.
The hoodie you print on matters as much as the design itself, since a thin blank undercuts even the best artwork.
Comparing common hoodie options
| Fabric weight | Feel | Best for |
|---|---|---|
| 240-280 GSM | Light, breathable | Spring/summer events, indoor wear |
| 300-320 GSM | Mid-weight, standard | Everyday team apparel, year-round use |
| 340+ GSM | Heavy fleece, warm | Winter work crews, outdoor branding |
Colour choice ties into this decision too. Dark hoodies limit embroidery thread visibility less than they limit DTG ink, which needs a white underbase to show bright colours on black or navy fabric. If your logo has fine detail or multiple colours, ask your printer which base colours print cleanest before you commit to a shade. Apex Workwear can talk you through which weight and blend suits your specific use case as part of the free quote process, so you’re not guessing based on a product photo alone. Once you’ve settled on style, weight, and colour, you’re ready to decide how the design actually gets applied to the fabric.
Step 2. Select your decoration method
With your blank hoodie chosen, the next decision is how your design actually gets applied to it. Custom hoodie printing in Canada generally comes down to three methods: embroidery, direct-to-garment (DTG) printing, and screen printing. Each one suits a different type of artwork, budget, and durability need, so picking the wrong method can leave you with a design that fades, cracks, or simply doesn’t reflect the logo you sent over.
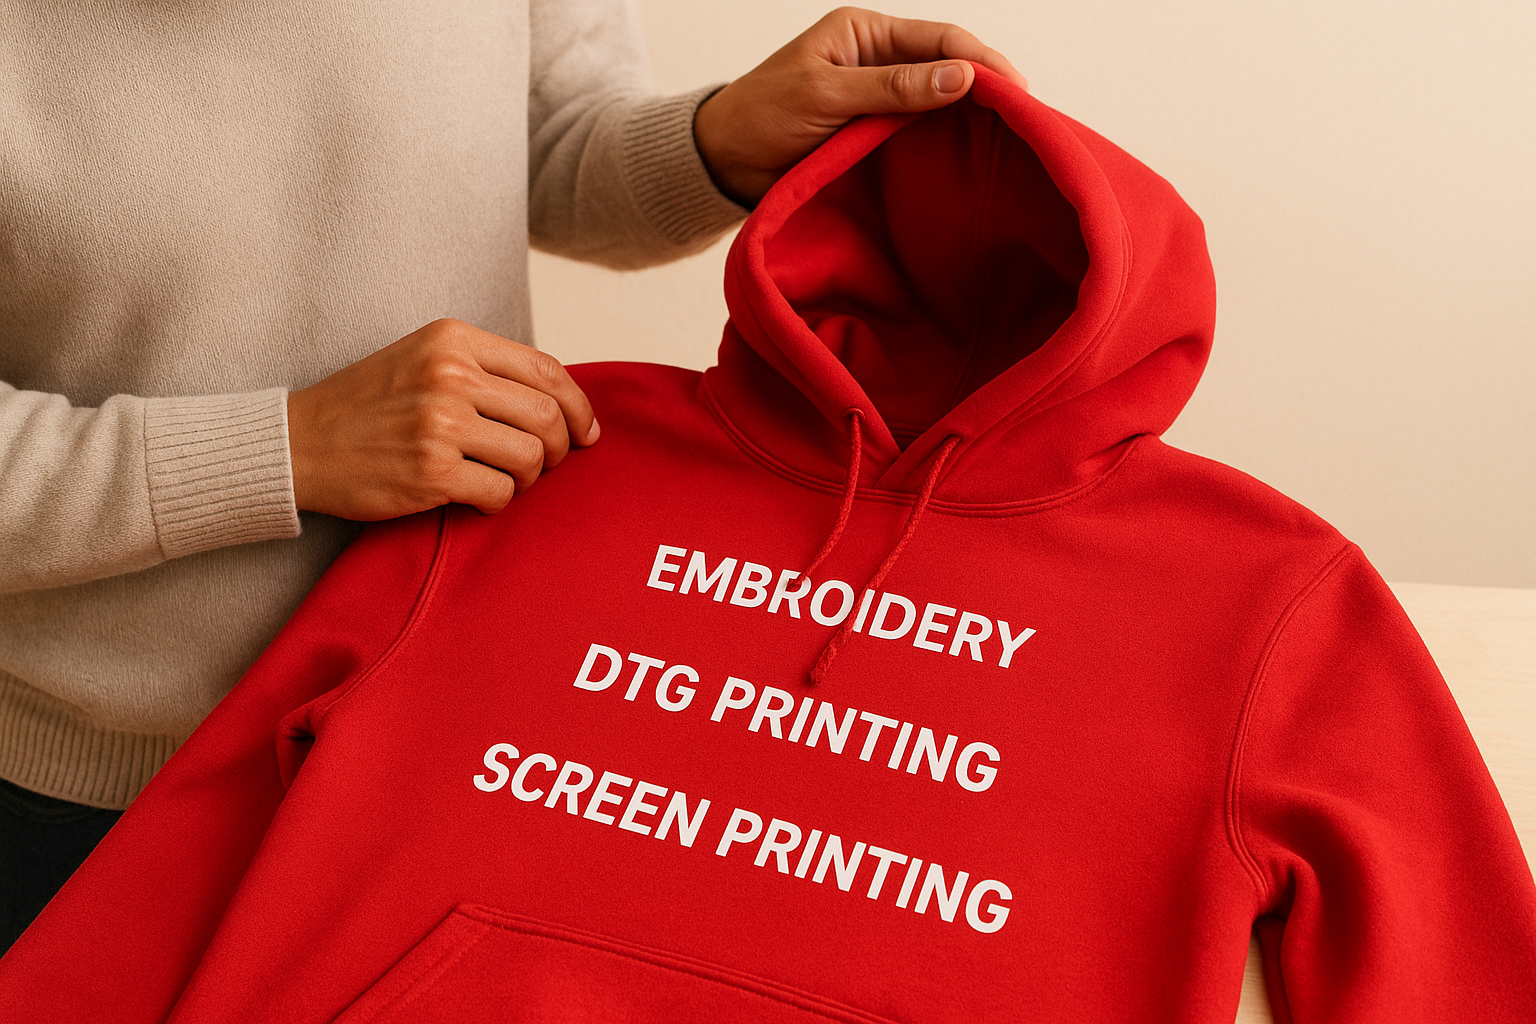
Embroidery for logos and text
Embroidery stitches your design directly into the fabric using thread, which makes it the go-to choice for simple logos, wordmarks, and small chest prints that need to survive years of washing. It holds up better than any printed method on heavy fleece, and it gives hoodies a premium, tactile finish that customers associate with established brands. The trade-off is detail. Fine gradients, photographic elements, or more than a handful of thread colours get expensive fast and can lose sharpness once stitched.
Choose your decoration method based on your artwork’s complexity, not just your budget, since the wrong match shows up the moment the hoodie is worn.
DTG printing for detailed artwork
DTG printing works like an inkjet printer for fabric, applying your design directly onto the hoodie in full colour. It’s the better option when your artwork includes gradients, photos, or a wide colour palette that embroidery can’t replicate cost-effectively. DTG also suits low quantities well, since there’s no setup cost tied to the number of colours in your design, unlike screen printing.
Screen printing for bulk orders
Screen printing pushes ink through a mesh stencil, one colour at a time, which makes it the most cost-effective method once you’re ordering in bulk. It produces bold, long-lasting colour on both light and dark fabric, though each additional colour in your design adds a setup step and cost. For teams ordering 25 or more hoodies with a simple one or two colour logo, screen printing usually beats both embroidery and DTG on price per unit.
| Method | Best for | Colour limit | Durability |
|---|---|---|---|
| Embroidery | Logos, text, small designs | Limited by thread count | Excellent |
| DTG printing | Detailed, multi-colour art | Unlimited (full colour) | Good |
| Screen printing | Bulk orders, bold designs | Cost rises per colour | Very good |
Apex Workwear’s team reviews your artwork as part of the free quote and flags if a different method would print cleaner or cost less, so you’re not locked into a guess before production starts.
Step 3. Prepare your logo or artwork
With your decoration method chosen, it’s time to get your actual artwork ready for production. This step trips up more people than any other in the hoodie design process, mostly because a file that looks fine on a phone screen often falls apart once a printer tries to scale it up or separate it into colours. Getting this right before you upload anything saves you a round of revision emails and keeps your timeline intact.
File formats that actually work
Vector files, saved as AI, EPS, or PDF, are the gold standard for embroidery and screen printing because they scale to any size without losing sharpness. Raster files like PNG or JPEG work fine for DTG printing as long as they’re at least 300 DPI at the size you want printed, since anything lower comes out fuzzy or pixelated on fabric. If your only version of your logo is a low-resolution download from your own website, flag that early. Apex Workwear can often trace or rebuild a rough file into a clean vector as part of basic design support, so you’re not stuck redoing your branding from scratch.
A hoodie can only look as sharp as the file you send, so fix resolution problems before worrying about placement.
Colours and Pantone matching
Screen printing and embroidery both price by colour count, so knowing exactly how many colours are in your design affects your quote before you even get to layout. If brand consistency matters to you, provide Pantone (PMS) codes rather than relying on how a colour looks on your monitor, since screens display colour differently across devices. This matters most for custom team hoodies, where you want every hoodie to match regardless of which printer or batch produced it.
A quick artwork checklist
Run through this before moving to the design tool itself:
- File saved as vector (AI, EPS, PDF) or 300 DPI raster
- Colours confirmed with Pantone codes where possible
- Background removed or transparent, not a white box around your logo
- Text outlined or converted to paths so fonts don’t shift on someone else’s computer
- A second copy saved in case revisions are needed
Once your file passes this checklist, you’re ready to actually place it on the hoodie using a design tool, which is where the visual side of the project starts to take shape.
Step 4. Design your hoodie using an online tool
With your artwork checked and your decoration method chosen, you’re ready to actually see your design on the hoodie. Most Canadian print shops, Apex Workwear included, offer an online design tool where you upload your file, pick a hoodie colour, and drop your logo onto a mock-up before anything goes into production. This step turns an abstract idea into something you can actually look at, which makes it much easier to catch problems like a logo that’s too small or a colour that clashes with the fabric.
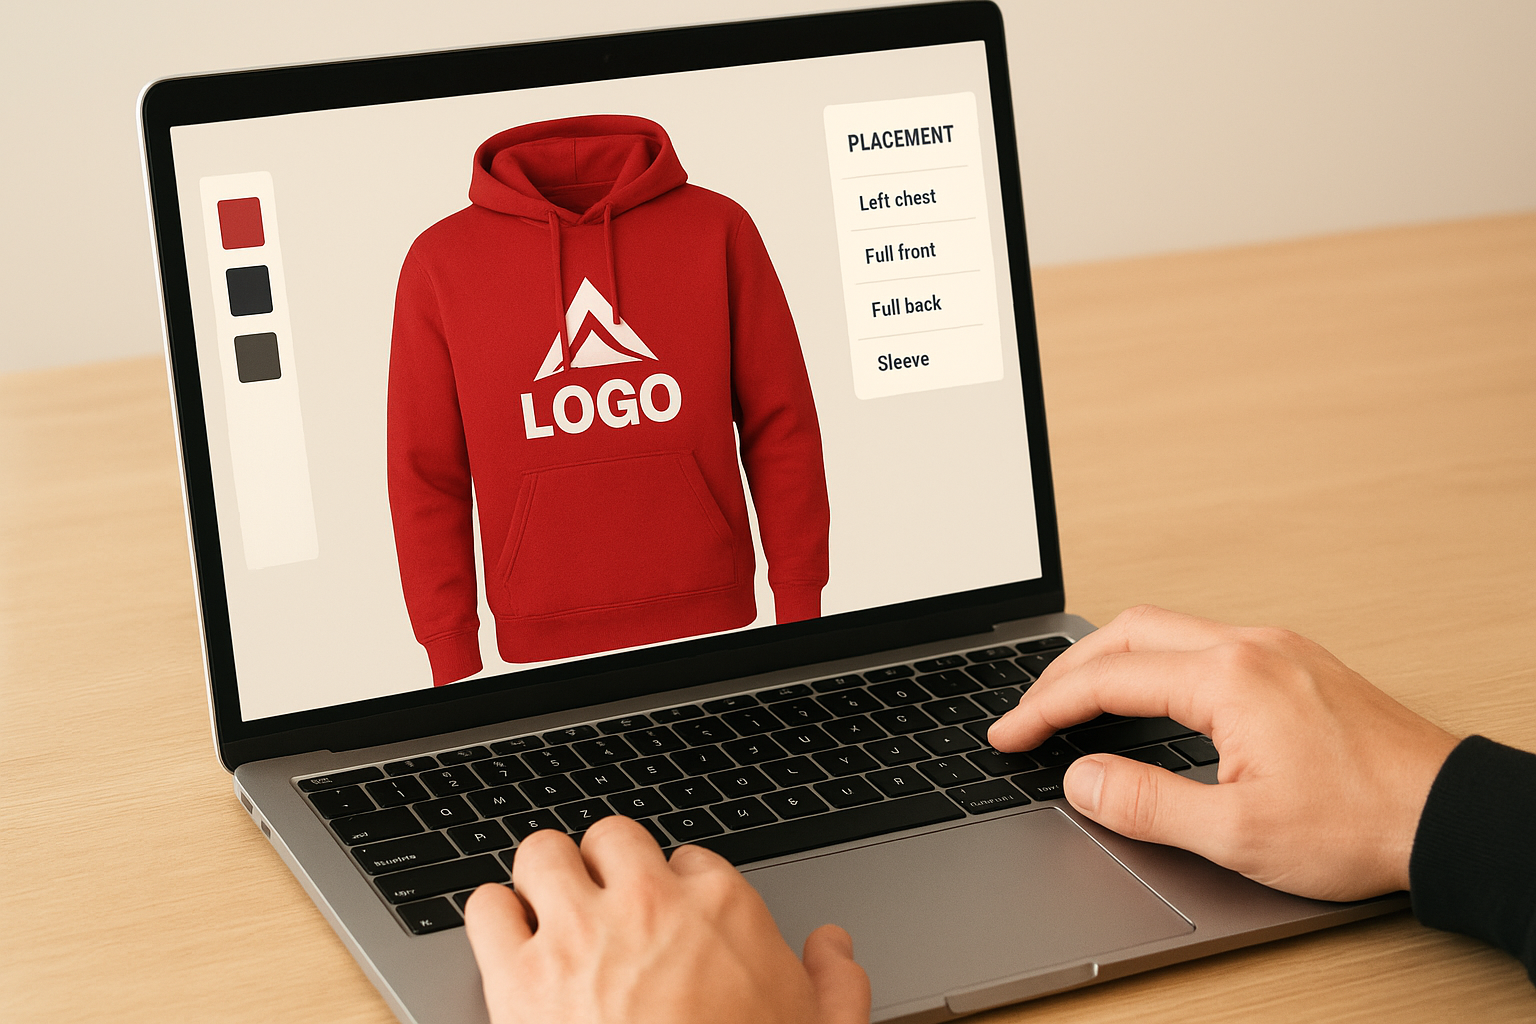
Uploading your file and picking placement
Start by selecting your hoodie style and colour in the tool, then upload the vector or high-resolution file you prepped in the last step. From there, you’ll drag your artwork into position and resize it within the print area the tool allows. Standard placement options cover most branding needs, but it helps to know which spots suit which purpose before you start dragging:
- Left chest: small logo, subtle branding, works well with embroidery
- Full front: bold statement piece, best suited to DTG or screen print
- Full back: high visibility for teams or event merch
- Sleeve: secondary logo, sponsor mark, or small text detail
Placement changes how a design reads on a hoodie almost as much as the artwork itself, so don’t default to full front just because it’s the first option in the tool.
Adjusting scale, colour, and text
Once your logo sits where you want it, check the scale against the hoodie’s actual dimensions rather than how it looks zoomed in on your screen. A logo that looks proportional at 100% zoom can look tiny or oversized once printed at real size. If you’re adding text alongside your logo, most tools let you pick from a library of fonts, but stick to fonts you’ve already outlined in your source file if exact matching matters. This is also the point where you’ll confirm hoodie colour against your artwork’s colours, since a navy logo on a navy hoodie disappears the moment it’s stitched or printed.
Saving your layout inside the online tool doesn’t lock anything in yet. It simply gives the production team a working file to build your actual proof from, which is the next stage in getting your design out of the browser and onto real fabric.
Step 5. Review your digital proof and sizing
Once your layout is finalised, the printer builds a digital proof, a mock-up showing exactly how your design will sit on the actual hoodie colour, size, and print area you selected. This is your last checkpoint before production starts, so treat it as a real review rather than a quick glance. Apex Workwear sends proofs before any printing begins, giving you a chance to catch mistakes while they’re still free to fix.
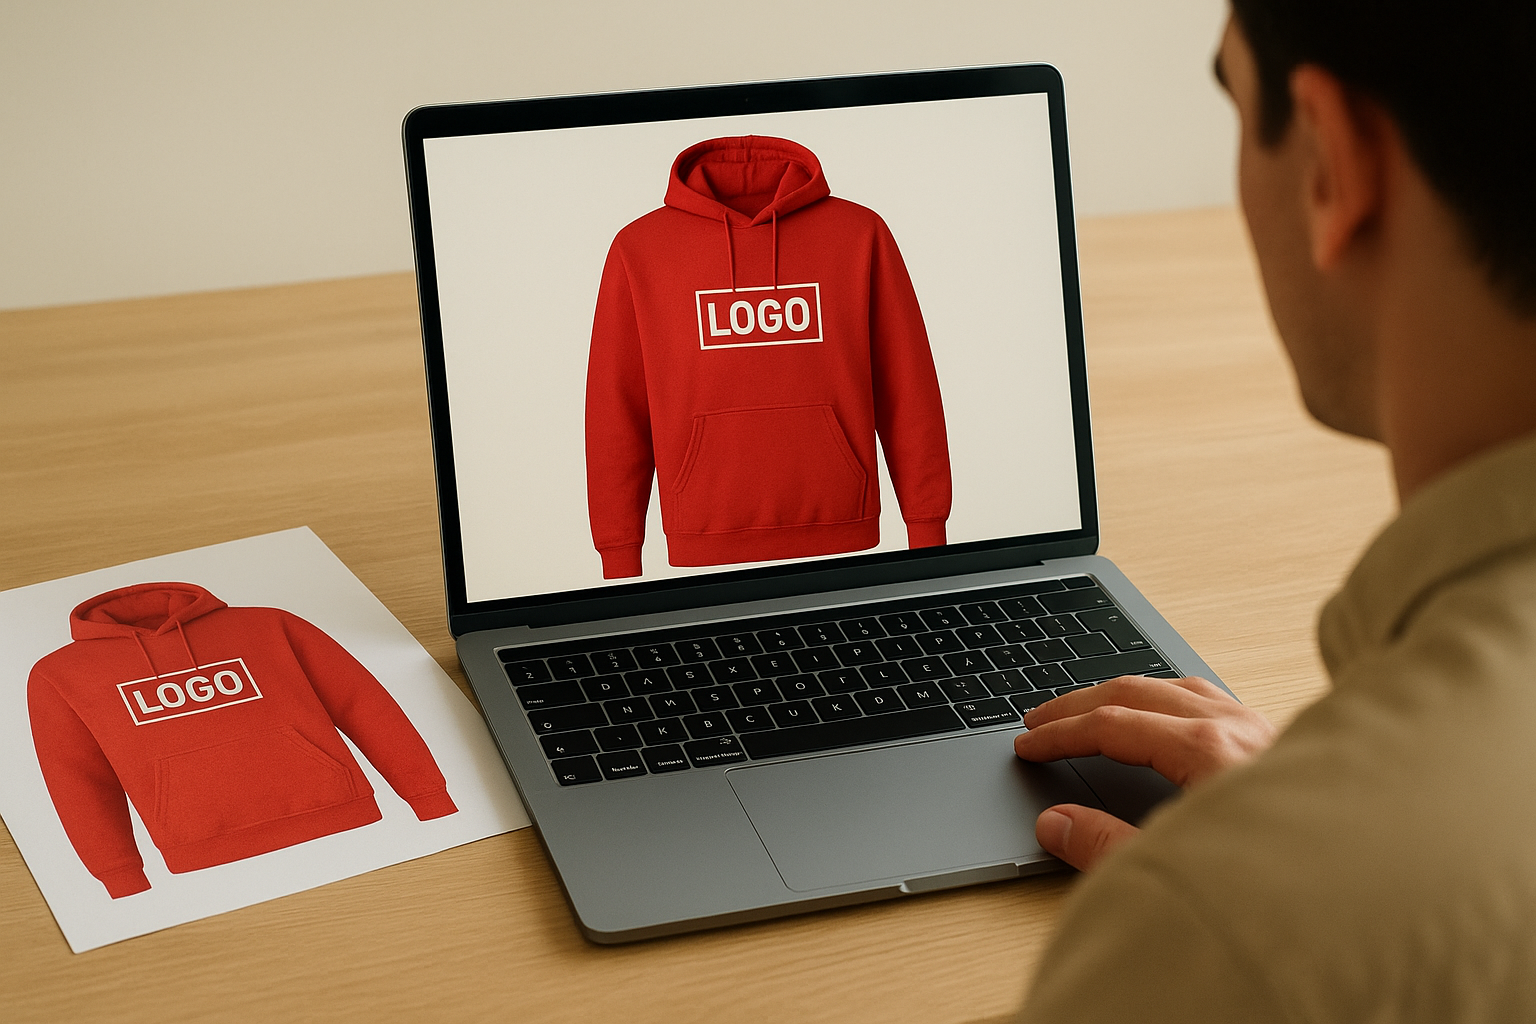
What to check in your digital proof
Go through the proof line by line rather than trusting a first impression, since small errors hide easily in a mock-up you’re excited to see. Check that colours match your Pantone codes, not just how they look on your screen, and confirm the placement matches what you agreed on in the design tool. Look closely at text for spelling, especially if a printer retyped anything from your original file.
- Logo placement matches the chest, back, or sleeve position you chose
- Colours match your Pantone codes, not just a screen approximation
- Text spelling is correct, particularly if it was retyped by the printer
- Scale looks proportional against the hoodie, not stretched or shrunk
- Hoodie colour matches what you ordered, not a similar shade
Approving a proof without checking every detail is the single most common reason reprints happen, so slow down before you sign off.
Confirming your sizing before production
Sizing matters just as much as the artwork itself, particularly for custom team hoodies where a run of mismatched sizes causes real headaches once the order arrives. Request a size chart from your printer and compare it against actual measurements, not just S, M, L labels, since sizing varies between brands and blank suppliers. If you’re ordering for a team, send out a quick sizing survey before you confirm quantities rather than guessing based on regular clothing sizes.
| Size | Chest width (approx.) | Length (approx.) |
|---|---|---|
| Small | 51 cm | 66 cm |
| Medium | 56 cm | 69 cm |
| Large | 61 cm | 71 cm |
| XL | 66 cm | 74 cm |
Exact measurements shift slightly by hoodie brand, so always confirm against the specific blank your printer uses rather than a generic chart. Requesting one physical sample before a large order is worth the small extra cost if you’re ordering more than 25 pieces, since it lets you check fit and fabric weight in person before committing. Sizing corrections after production starts almost always cost more than catching them here, so this step deserves the same attention as the artwork review.
Step 6. Place your order and confirm turnaround
Once you’ve signed off on the proof and sizing, the next step is locking in the order itself. This is where quantity, deposit, and delivery details all get confirmed in writing, so there’s no ambiguity about what you’re paying for or when it lands. Apex Workwear requires proof approval before any hoodie goes into production, which protects you from paying for a run that has an error you missed.
Confirming payment and order details
Before you send payment, double check the order summary against everything you agreed on earlier: hoodie style, colour, decoration method, quantity, and the approved proof itself. Most Canadian print shops ask for a deposit or full payment upfront on smaller orders, with larger bulk orders sometimes split into a deposit and balance due before shipping. Get the final invoice in writing and compare it line by line against your quote, since a mismatched quantity or missed rush fee is easier to fix before production than after.
A signed proof and a paid invoice are your two checkpoints, so don’t let either one slide by without a proper read-through.
Turnaround times and rush options
Standard production for custom hoodie printing runs 5 to 7 business days from the point your proof is approved, not from the day you placed your order. If you’re working against an event date or a tight deadline, ask about rush turnaround when you confirm the order rather than after production has already started, since most shops can accommodate it for an added fee but need the lead time built in early.
| Order type | Typical turnaround | Notes |
|---|---|---|
| Standard order | 5-7 business days | Starts after proof approval |
| Rush order | 2-4 business days | Added fee, confirm availability upfront |
| Bulk order (25+) | 7-10 business days | May vary by decoration method |
Shipping timelines sit on top of production, so factor that into your deadline too. Apex Workwear offers free local shipping across the GTA and surrounding areas, which shaves a day or two off orders headed to nearby businesses compared to standard courier delivery further afield. Tracking details usually go out the same day your order ships, so you’ll know exactly when to expect your hoodies rather than guessing based on a general estimate.
Placement, care and sizing tips for your hoodie
Your hoodie is designed, proofed, and ordered, but a few practical details still affect how good it looks months from now. Getting placement right at the design stage matters, but so does how the hoodie gets washed and worn afterward, since even a perfect print job fades fast under the wrong care routine. A little attention here protects the investment you’ve already made in getting the design right.
Placement choices that age well
Centring a logo dead-centre on the chest looks fine in a mock-up but can shift visually once someone’s actually wearing the hoodie, since fabric drapes differently on a body than on a flat template. Left-chest placement tends to sit more naturally and reads as more polished for custom team hoodies, while full-front or full-back designs suit bold branding where visibility matters more than subtlety. Sleeve placement works well as a secondary detail, like a sponsor logo or small text, without competing with a main design elsewhere on the garment.
A design that photographs well on a flat mock-up doesn’t always sit the same way on a moving body, so lean toward proven placements over experimental ones.
Washing and care instructions
Embroidered logos hold up to regular washing better than most printed methods, but turning hoodies inside out before washing still protects both stitching and printed designs from friction against other garments. Cold water and a low or no-heat dryer setting extend the life of DTG and screen-printed graphics significantly, since heat is what breaks down ink adhesion over repeated cycles. Avoid ironing directly over a printed or embroidered area, since direct heat can crack ink or melt certain thread finishes.
- Wash inside out in cold water
- Skip the dryer’s high heat setting, or air dry when possible
- Avoid ironing directly on printed or embroidered sections
- Wash with similar colours to prevent dye transfer onto light hoodies
Sizing tips worth remembering
Hoodies often run larger than a standard t-shirt in the same labelled size, since the fleece lining and looser cut add bulk that a size chart doesn’t always communicate clearly. When ordering for a team, request one sample size before confirming a full size run, particularly if people are used to sizing based on other brands. Consistent sizing across a batch matters more for group photos and uniform appearance than most people expect until they see the finished order.
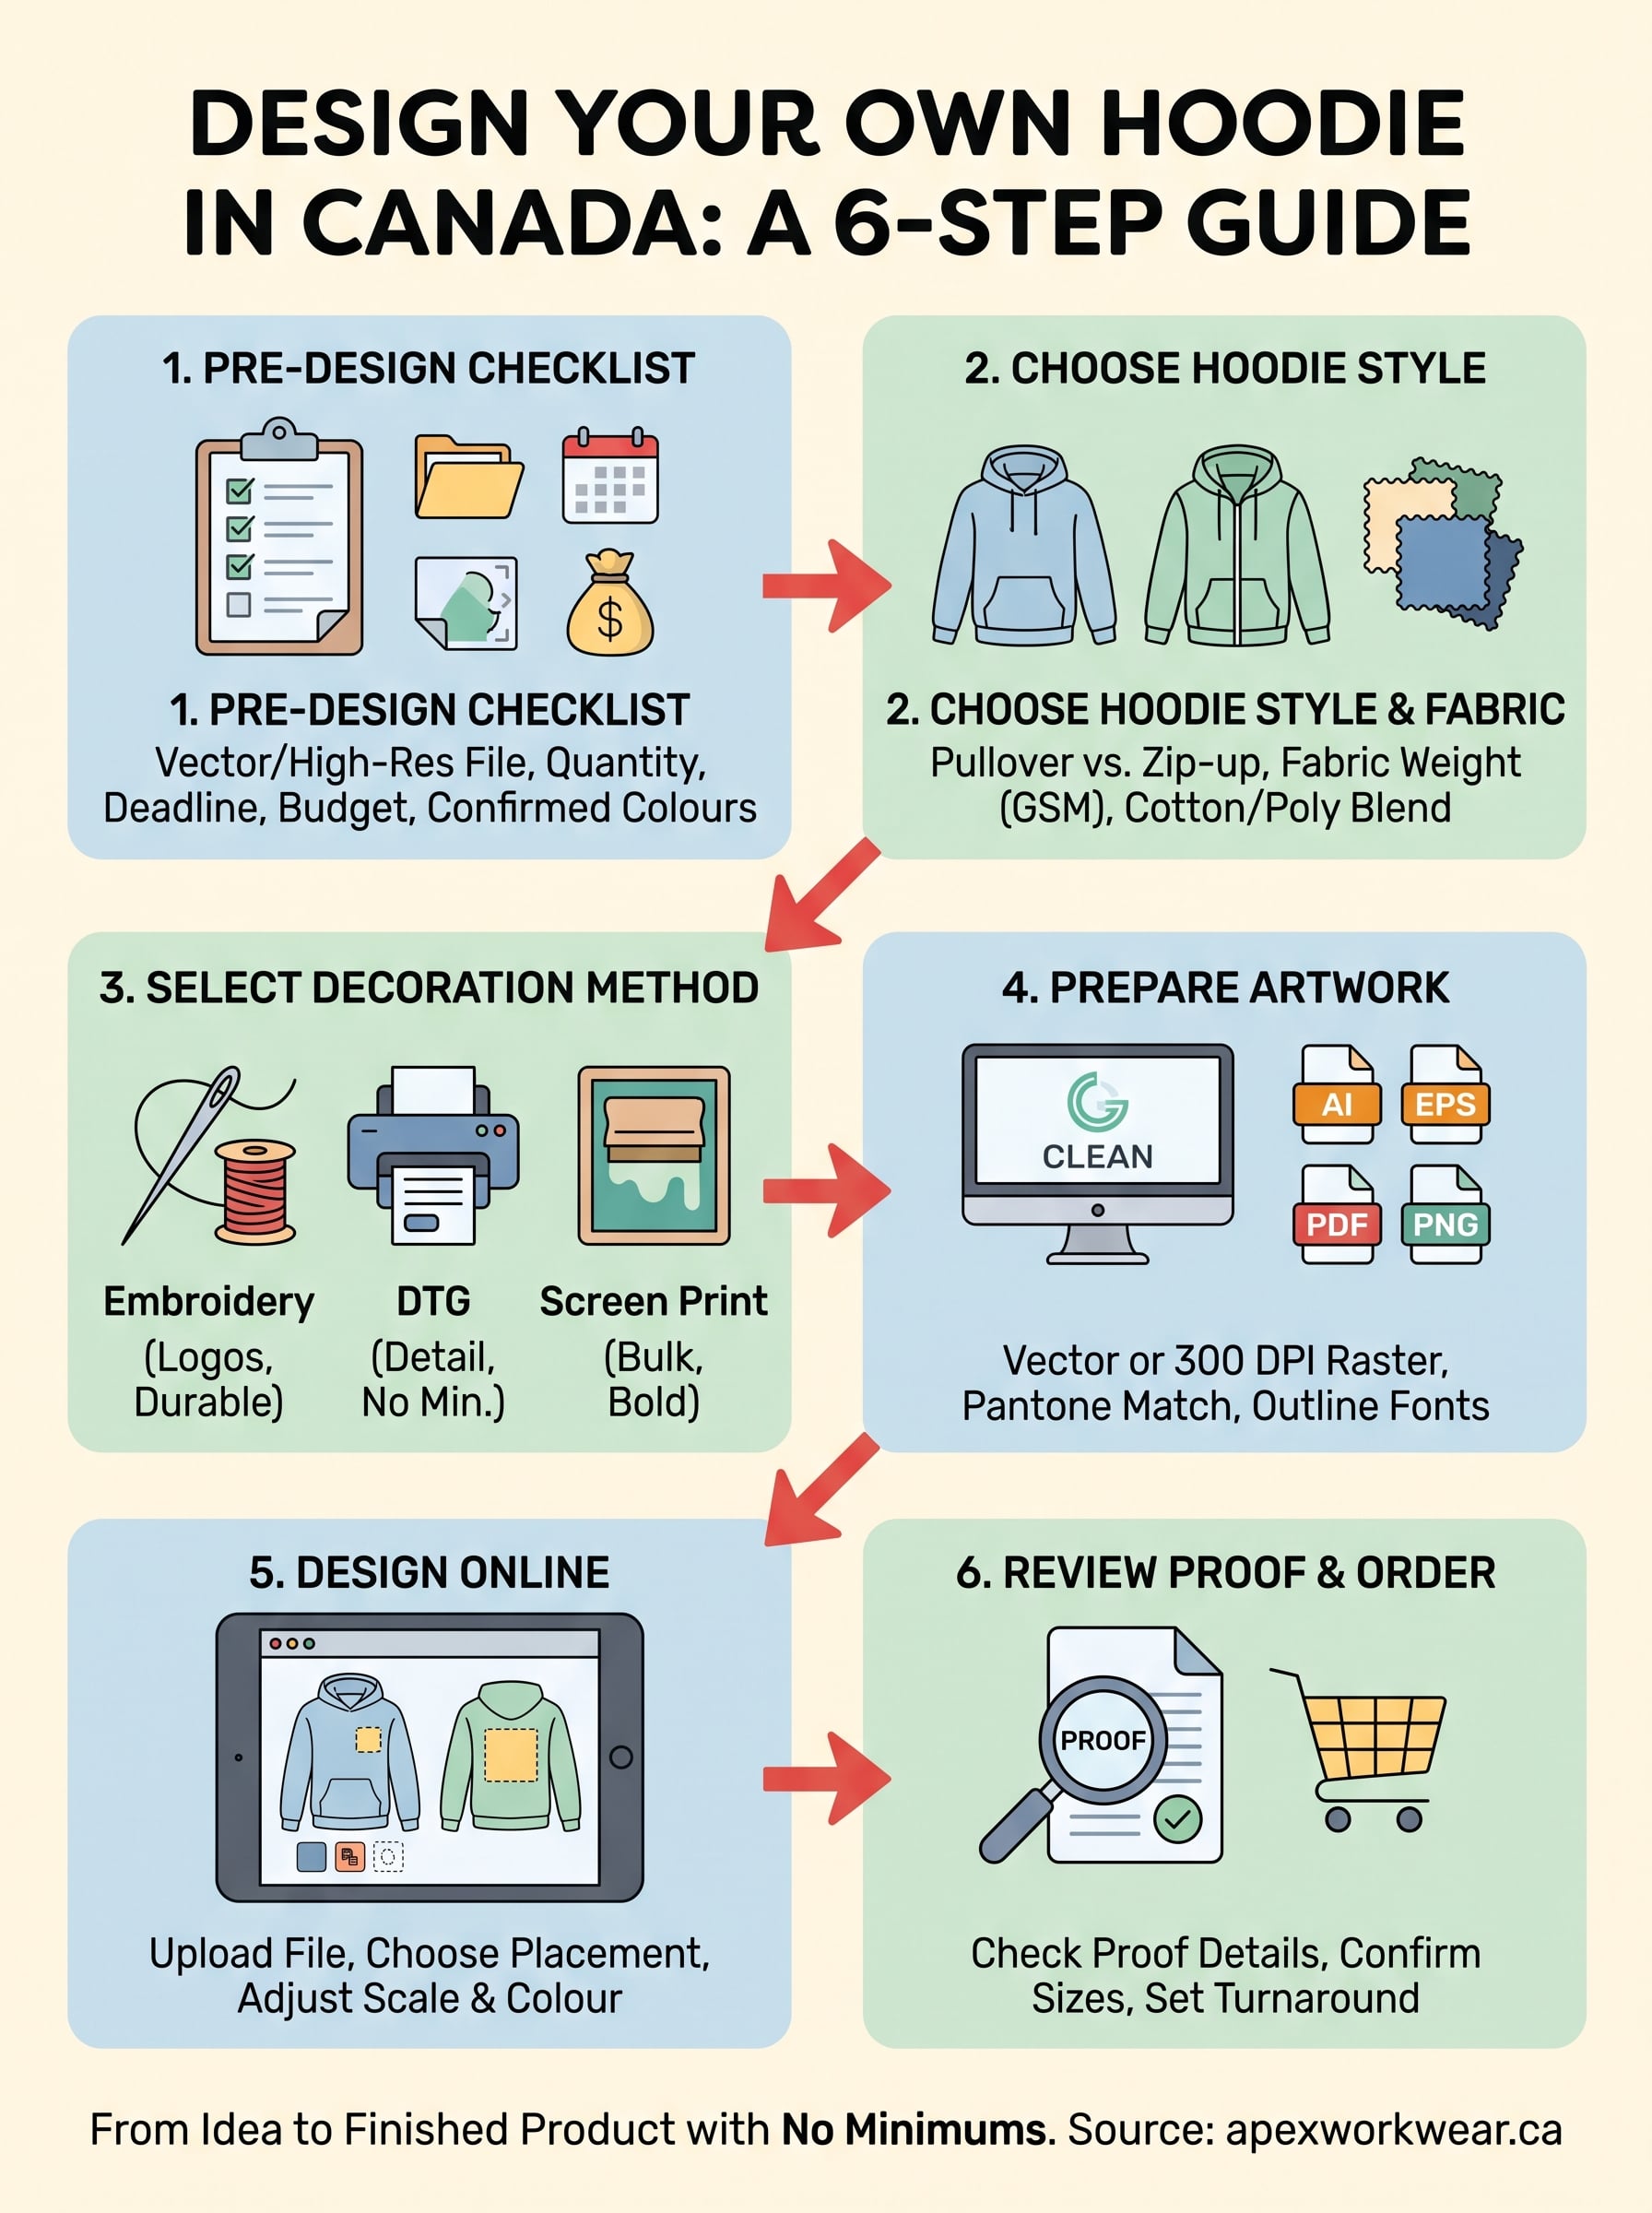
From design to doorstep
Designing your own hoodie in Canada comes down to six clear steps: gather your artwork and budget, pick a blank that suits how it’ll be worn, choose the right decoration method, prep a clean file, build your layout in a design tool, then review your proof and sizing before production starts. Skip any one of these and you risk a reprint, a delay, or a hoodie that doesn’t quite match what you pictured. Follow them in order and you end up with a finished product that looks like it came from a proper brand, not a rushed side project.
You don’t need overseas minimums or a shop that ghosts your quote request to get this right. A Canadian print partner who reviews your artwork, sends a real proof, and ships fast covers everything this guide walks through. If you’re ready to move from idea to finished hoodie, get your free quote from Apex Workwear and see your design mocked up within 24 hours.