You bought a pack of Uline laser labels for a shipping run or a product launch, and now you’re stuck trying to get the alignment right without wasting half the sheet. Uline label printing feels simple until your first test print lands two millimetres off and you’re left peeling labels off cardboard. That mismatch between the label sheet and your printer settings is the single biggest reason home label jobs go wrong.
This guide gives you the actual steps: which Uline template numbers match which label sizes, how to set up your printer margins correctly for laser or inkjet, and where to grab free templates instead of guessing dimensions in Word. You’ll also see the common mistakes that cause smudged or crooked prints, and how to avoid them before you burn through a whole sheet.
We also know that homemade labels only get you so far. Once you’re printing hundreds of labels a week, or you need something that looks properly branded on a box, pallet, or storefront window, it’s worth knowing when to hand the job to a Canadian print shop instead. We’ll cover that too, so you can decide what actually makes sense for your business.
What you need before printing labels at home
Before you touch a label sheet, sort out three things: your printer type, the exact Uline product number on your box, and the software you’ll use to build the design. Skipping this prep is why most first attempts at home label printing end up crooked or smeared. Get these basics right and the actual printing steps later in this guide take five minutes instead of an hour of trial and error.
Know your printer type
Uline sells separate label lines for laser and inkjet printers, and mixing them up ruins the print before you even start. Laser labels use a matte or glossy face designed to handle the heat from a laser printer’s fusing process. Run them through an inkjet and the ink sits on the surface without drying properly, so it smudges the moment you touch it. Inkjet labels have a coating built to absorb liquid ink quickly, but feed those through a laser printer and the heat can warp the sheet or melt the adhesive backing inside the machine.
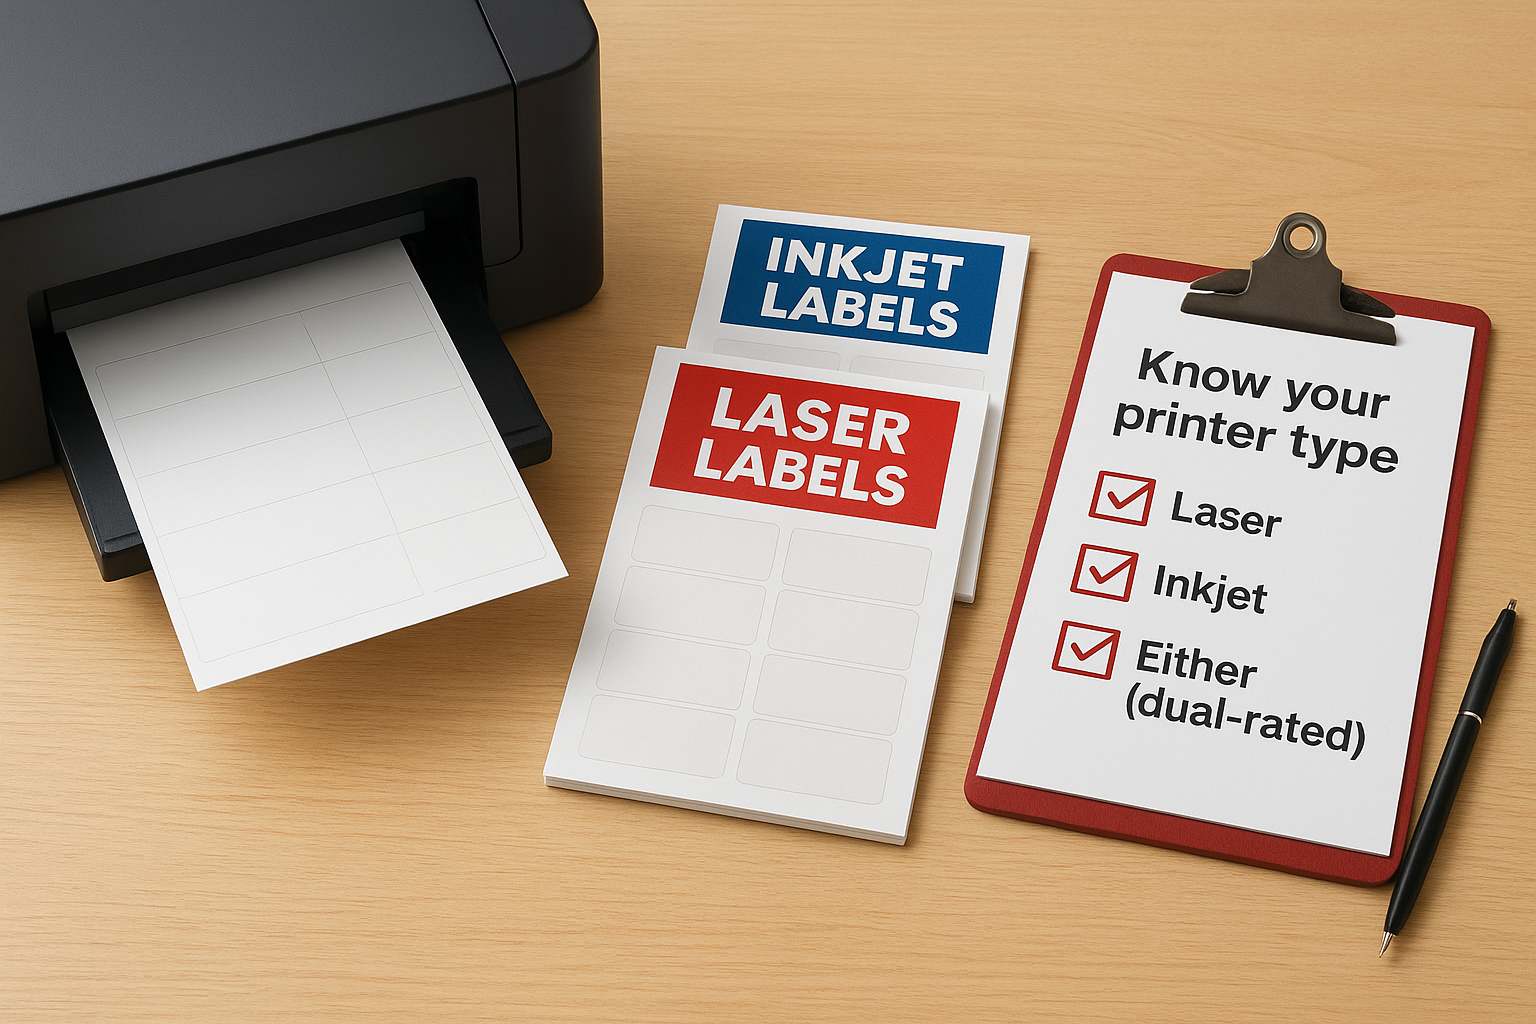
Match your label stock to your printer type first. Everything else in this guide only works if you get that one detail right.
Check the small print on the label pack or the product page on uline.ca before you buy. If you already have a printer at your desk, here’s a quick reference for what to look for:
| Printer type | Label finish to buy | Common failure if mismatched |
|---|---|---|
| Laser | Laser-specific labels (matte/glossy) | Ink smudges, doesn’t dry |
| Inkjet | Inkjet-specific labels | Sheet jams, adhesive melts |
| Either (some Uline lines) | "Laser/Inkjet" dual-rated labels | None, safe for both |
Find your Uline product number
Second, dig out the part number printed on the label box or packing slip. Uline labels are sold under specific SKUs, and each one corresponds to a fixed label size and sheet layout, for example a 2" x 4" shipping label or a 1" x 2⅝" address label with 30 labels per sheet. Without that number, you’re guessing at dimensions, and even a millimetre of error compounds across a full sheet. Note the number now so you’re not hunting through packaging later when you’re mid-project.
Gather your software and supplies
Third, decide what you’ll design in. Microsoft Word works fine for text-only labels using a downloaded template, but if you’re adding a logo, barcode, or multiple colours, design software like Canva or Adobe Illustrator gives you more control over positioning. Whichever you pick, you’ll want a few things on hand before you start the actual build:
- The exact Uline SKU or template number from your label box
- A printer confirmed as laser or inkjet, matched to your labels
- Word, Canva, or similar design software installed and ready
- A blank test sheet of plain paper for trial prints
- Your logo file or text content ready to paste in
Gathering this upfront saves you from stopping halfway through a print run to hunt for a file or double-check a measurement. Once you’ve confirmed these four things, you’re ready to pick the right template and start building your design properly.
Step 1. Choose the right Uline label size and material
Picking the wrong label size is the fastest way to waste a full sheet before you’ve even opened your design software. Uline label printing only works cleanly when the size on the box matches the job you’re printing for, whether that’s a small product label, a shipping label, or a warning sticker for a pallet. Before you open any template, hold the physical label sheet next to what you’re labelling and check that the dimensions actually make sense for the space you have.
Match the label size to the job
Shipping labels typically run 2" x 4" or 4" x 6", sized to fit a barcode and address block without cramming. Address and return labels are usually 1" x 2⅝", printed 30 to a sheet, which is the same layout most people know from standard office labels. Product or inventory labels vary more, often 2" x 2" or 1" x 3", depending on what you’re sticking them to. If you’re not sure which size you’ve got, the SKU on the box tells you exactly what you’re working with.
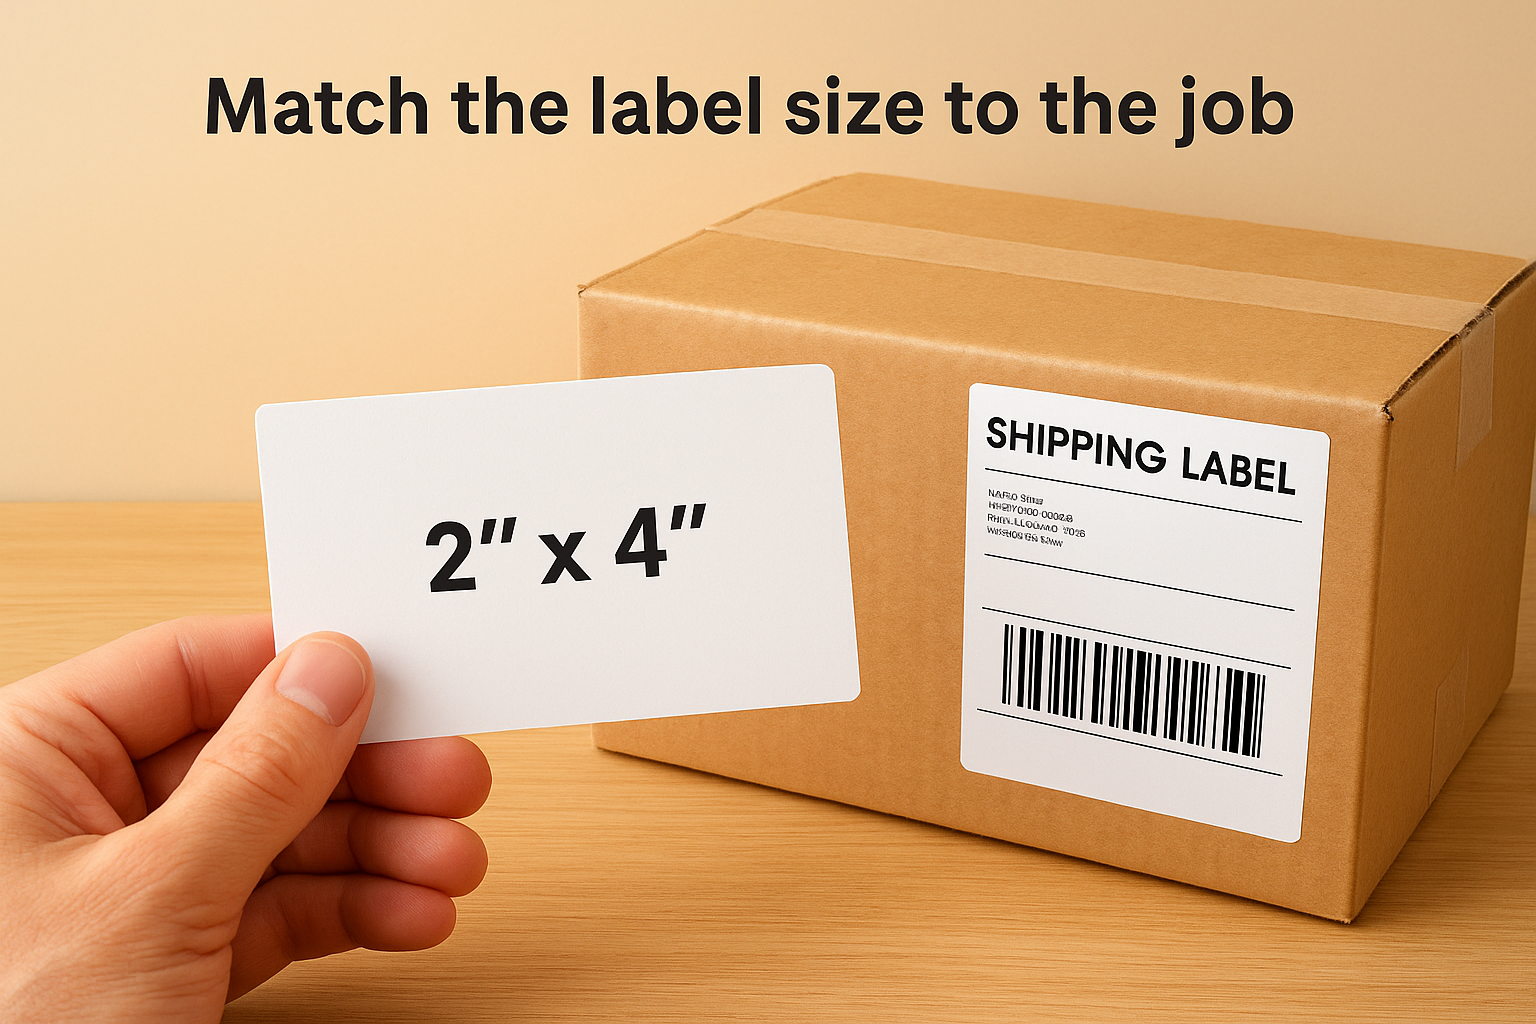
The label size printed on your Uline box is the only number that matters. Guess it, and every template you download afterwards will be wrong too.
Choose the material for where the label ends up
Weatherproof jobs need a different material than anything staying indoors. Uline sells plain paper labels for short-term indoor use, but if a label is going on a box heading outside, on a cooler, or somewhere it might get wet or scuffed, look for their polypropylene or waterproof label lines instead. These hold up to moisture, handling, and temperature swings far better than standard paper stock, though they cost more per sheet.
Here’s a quick way to match material to use case:
| Use case | Recommended material | Why |
|---|---|---|
| Indoor product or office labels | Standard paper (laser or inkjet) | Cheapest, fine for short shelf life |
| Shipping boxes, outdoor storage | Waterproof polypropylene | Resists moisture, tearing, handling |
| Freezer or cold storage items | Freezer-grade adhesive labels | Stays stuck at low temperatures |
| High-visibility warnings or signage | Glossy or fluorescent stock | Stands out, holds colour better |
Once you’ve confirmed the size and material match your job, you’re ready to track down the exact template that fits that SKU, which is where a lot of home printing goes wrong if you skip straight to Word without it.
Step 2. Download the matching label template
Once you know your SKU, the fastest route to a clean print is grabbing the matching label template straight from Uline rather than measuring boxes yourself in Word. Uline hosts free downloadable templates for nearly every label product it sells, formatted for Word, Avery-compatible layouts, and PDF, so you’re not eyeballing gaps between labels or guessing at margins. Skipping this step and building a grid from scratch is where most home print jobs go sideways, because even a 1mm error on a template repeats across every label on the sheet.
Find the right template on Uline’s site
Head to the product page for your specific label SKU on uline.ca and look for a "template" or "download" link, usually sitting just under the product images or in a tab labelled Resources. Search by the SKU number rather than a general description like "shipping label", since Uline runs dozens of sizes and the wrong template will misalign your print even if the label looks similar by eye. If you can’t find it on the product page, Uline’s support team can usually point you to the right file within a business day.
Always download the template using your exact SKU number, not a guess based on label size, because near-identical sizes rarely share the same spacing.
Match the file format to your software
Templates usually come in a few formats, and picking the right one saves you a conversion step later:
- .doc or .docx – opens directly in Microsoft Word, best if you’re only adding text
- .pdf – useful for reference or printing directly without editing
- .ai or .eps – for Adobe Illustrator, best when you’re placing a logo or artwork precisely
- .png or .jpg grid – occasionally offered as a visual guide, not ideal for actual printing
If your label pack didn’t come with a printed SKU, or the template library doesn’t have an exact match, measure the label width, height, and gap between labels with a ruler and compare it against the closest listed template before printing anything. A near match isn’t a real match here.
Once the template’s open on your screen and the grid lines up with your physical label sheet held up to the light, you’re ready to move into the actual design work, which is where Word or your chosen software takes over.
Step 3. Set up your design in Word or design software
With the template open, the next job is dropping your content into it without disturbing the grid you just downloaded. Uline label printing goes wrong at this stage more often than any other, because people resize text boxes or nudge a logo half a centimetre and don’t notice until the sheet’s already printed. Work inside the template’s existing boxes rather than drawing new ones, and you’ll keep every label lined up automatically.
Building the design in Word
Open the downloaded .doc file and you’ll see a table or set of text boxes already sized to match your label sheet. Click into the first cell, type your text or paste your logo, then use Word’s "Update Labels" or copy-paste function to repeat that content across the rest of the grid instead of retyping each one. Keep font sizes conservative, anything under 8pt tends to blur slightly on laser output, and leave at least 2mm of padding from the edge of each label box so nothing gets clipped during printing.
Never resize the template’s boxes to fit your design. Resize your design to fit the boxes instead, or the whole sheet drifts out of alignment.
Building the design in Canva or Illustrator
If you’re working with a logo, barcode, or multiple colours, import the .ai or .eps template into your design software and treat the label outlines as a locked layer underneath your artwork. Canva users can upload the template as a background reference, then use guides or grid snapping to keep new elements inside the label boundary. In Illustrator, lock the template layer entirely so you can’t accidentally drag it while positioning your design.
A few things worth checking before you move to printing:
- Colour mode: set to CMYK if your design software offers the option, since RGB colours can shift slightly on some laser printers
- Bleed and margins: keep artwork at least 2-3mm inside the label edge to avoid clipping
- Font embedding: flatten text to outlines or embed fonts so nothing reflows if you open the file on another machine
- File resolution: images should be at least 300dpi to avoid pixelation once printed
Once your design sits cleanly inside every label box on the template and nothing’s spilling over the edges, save the file and move straight to a test print. Don’t print the full sheet yet, that’s the next step, and it’s the one that catches problems before you’ve wasted a single real label.
Step 4. Run a test print and check the alignment
Before you feed in a real Uline sheet, print on plain paper first. This one habit saves more labels than anything else in this guide, because it catches alignment problems while they cost you a sheet of printer paper instead of a sheet of labels. Set your printer to the correct paper size in the print dialog, matching the label sheet dimensions rather than a default like A4 or Letter, and run a single test copy.
Hold the test sheet up to the light
Once it’s printed, take that plain paper test and hold it directly over an actual label sheet, up to a window or a bright lamp. Check whether the text or logo lands inside each label boundary or drifts toward one edge. A slight shift in one direction across every label usually means your printer’s default margin doesn’t match the template, and you can fix that in the print settings rather than the design file itself.
Never trust a test print by eye alone. Hold it against the real label sheet under light, because that’s the only way to catch a 1-2mm drift before it ruins a full batch.
Adjust margins and scaling if needed
Most printers apply their own default margins regardless of what the template says, and that mismatch is the usual cause of crooked prints. Open your printer’s advanced settings and look for an option to disable auto-scaling or "fit to page", since these settings resize your design slightly and throw off alignment on label sheets specifically. Set scaling to 100% and turn off any "shrink to fit" option before running another test.
If the drift persists after that, check these settings in order:
- Paper size: confirm it matches your label sheet exactly, not the closest standard size
- Print quality: set to "best" or "high" for laser labels, since draft mode can shift ink placement
- Orientation: portrait or landscape, easy to overlook and an instant cause of full-sheet misalignment
- Tray selection: some printers default to a different tray than the one holding your label stock
Run a second test after each adjustment rather than changing several settings at once, since that makes it far easier to tell which setting actually fixed the problem. Once your test print lines up cleanly inside every label boundary on the sheet, you’re ready to load real labels and print the full batch.
Step 5. Print and finish your full label batch
Once your test print lines up cleanly, load the actual Uline label sheet and print one sheet at a time rather than stacking several into the tray. Label sheets are thicker than plain paper and feed unevenly if you load a stack, which is how you end up with a jam halfway through a run or a sheet that prints slightly skewed because it caught the edge of the one below it. Feed each sheet by hand if your printer allows it, especially for smaller runs under 20 sheets, since the extra thirty seconds per sheet beats reprinting a batch.
Load and feed the sheets correctly
Check the arrow or orientation mark printed on the edge of the label sheet before you load it, because Uline sheets have a top and bottom that matches the template layout exactly. Loading a sheet upside down or backwards prints your design mirrored or on the wrong side of the label backing, and you won’t catch it until the sheet’s already out of the printer. Keep the label side facing the direction your printer’s manual specifies, laser printers usually feed face-up from a rear tray, while inkjets often feed face-down from the front.
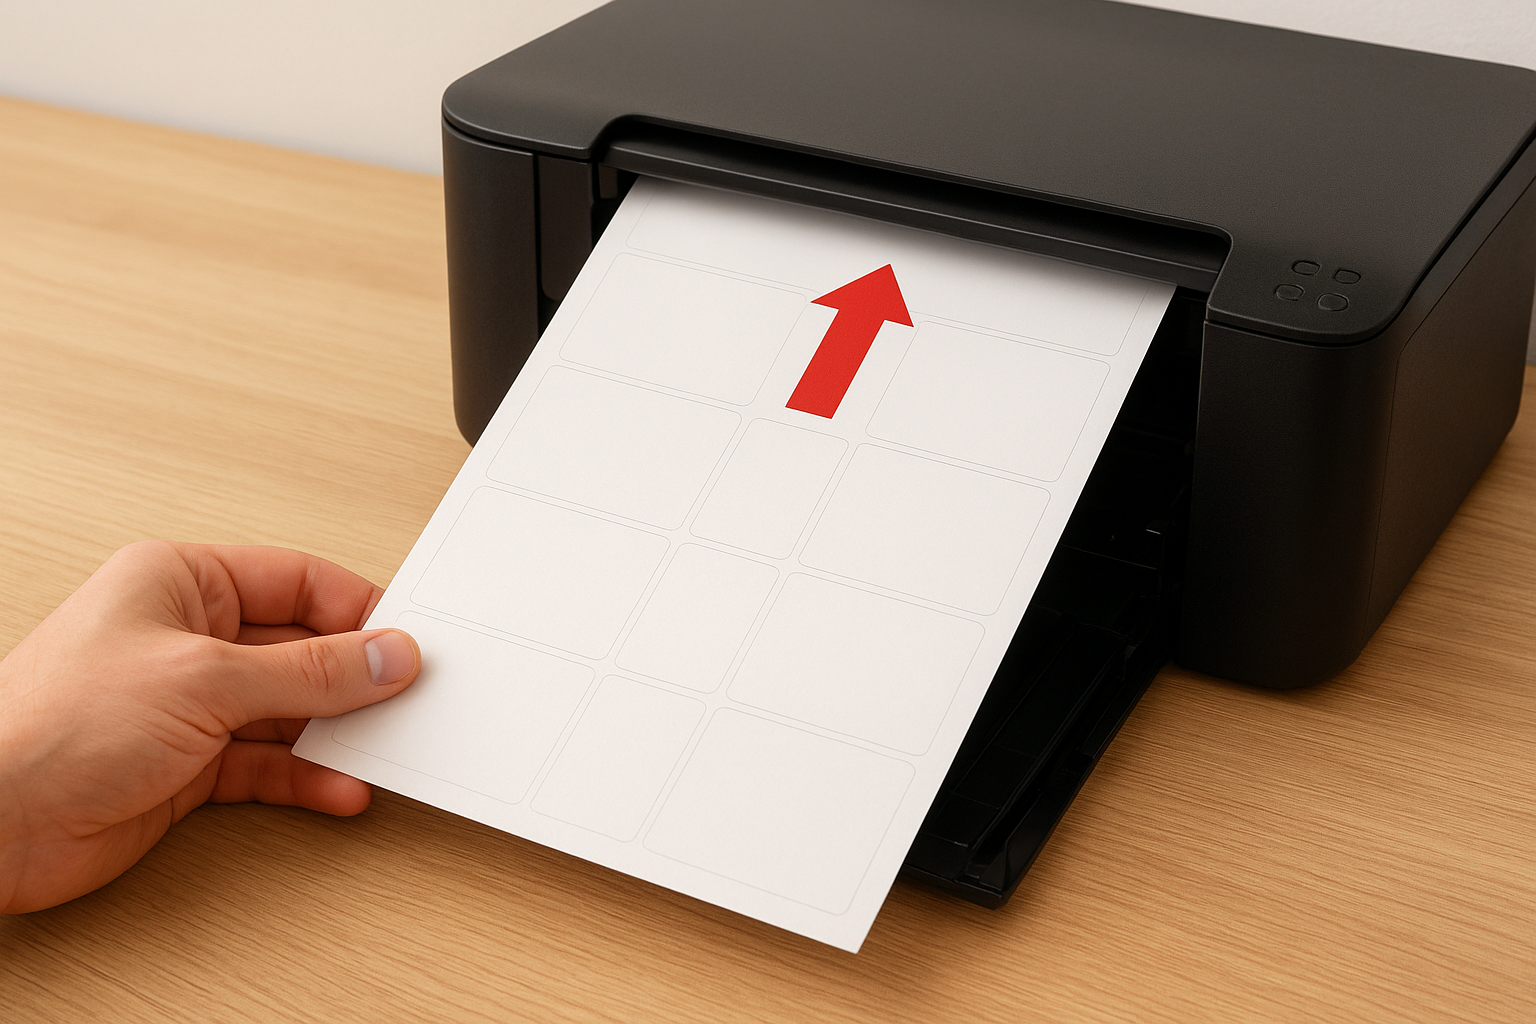
Print label sheets one at a time and check the feed direction every time, because a single reversed sheet can ruin an entire batch before you notice.
Let the ink or toner cure before handling
After printing, resist the urge to peel or stack sheets straight away. Laser prints need a minute or two to cool fully before you handle them, since toner that hasn’t set can smudge under pressure. Inkjet prints need longer, often five to ten minutes depending on humidity, before the ink’s dry enough to touch without leaving a fingerprint on the label surface.
Use this checklist for finishing a full batch cleanly:
- Print one sheet, let it cure, then check it before printing the next
- Stack finished sheets loosely, don’t press them together while curing
- Store printed sheets flat, away from direct sunlight or heat
- Peel labels from the corner, not the middle, to avoid tearing the face stock
- Apply labels to a clean, dry surface for the adhesive to hold properly
Once you’ve finished the batch and every label’s peeling and sticking the way it should, you’re set for the job. If something still isn’t sitting right, the next section covers the specific problems that crop up most often and how to fix each one.
Step 6. Troubleshoot common label printing problems
Even with a careful setup, a few problems show up again and again in home label printing, and most trace back to a setting you can fix in under a minute. Rather than guessing at what went wrong, work through the symptom against the likely cause below before you burn through another sheet.
Match the symptom to the fix
Smudging, misalignment, and jamming each point to a specific cause, and knowing which one you’re dealing with saves you from reprinting the same broken sheet three times in a row.
| Symptom | Likely cause | Fix |
|---|---|---|
| Text or logo shifted on every label | Printer default margin doesn’t match template | Set scaling to 100%, disable "fit to page" |
| Ink smudges when touched | Wrong label type for printer, or handled too soon | Confirm laser/inkjet match, let ink cure fully |
| Sheet jammed mid-print | Labels loaded in stack, or wrong tray selected | Feed one sheet at a time, check tray setting |
| Labels peeling off the backing sheet | Sheet ran through a laser printer meant for inkjet | Switch to the correct label stock |
| Blurry or faded text | Print quality set to draft mode | Set print quality to "best" or "high" |
| Design printed mirrored or upside down | Sheet loaded backwards | Check the orientation arrow before loading |
Most label printing problems trace back to one setting, not a faulty printer or bad labels, so check your print dialog before you assume the hardware’s at fault.
When the problem keeps recurring
Sometimes a fix works for one sheet and then the same issue reappears a few sheets later, and that’s usually a sign of a deeper mismatch rather than a one-off setting slip. Recurring jams often mean the label stock is too thick for your specific printer model, even if it’s rated for laser or inkjet generally, since older machines struggle with heavier label backing. Check your printer’s manual for its maximum supported paper weight and compare it against the label stock’s gsm rating, printed on the Uline packaging.
Persistent alignment drift, even after resetting scaling and margins, sometimes points to a printer that’s simply worn at the rollers, which pulls sheets through slightly crooked regardless of settings. If you’ve tried every fix above and the same printing problems keep showing up on a machine that’s a few years old, that’s less about your setup and more about the hardware reaching the end of its reliable life for precision jobs like label sheets.
When custom-printed labels make more sense
Home printing works fine for short runs, but there’s a point where it starts costing you more time than it saves. Once you’re printing more than a few hundred labels a week, replacing toner or ink cartridges every few days, or noticing your printer’s rollers struggling with label stock, it’s worth pricing out a proper print run instead of patching the same DIY setup. Custom-printed labels from a dedicated shop also solve the branding problem home printing can’t, since you’re limited to whatever finish and colour range your printer and label stock support.
If you’re spending more time troubleshooting your printer than actually applying labels, that’s the signal to move the job to a print shop.
Where DIY starts to break down
A few situations come up again and again where home printing simply isn’t the right tool for the job:
- Volume: runs over 500-1,000 labels a week wear out inkjet and laser printers faster than the machines are built for
- Branding: die-cut shapes, foil finishes, or spot colours that match a brand guide precisely
- Durability: labels going outdoors, in freezers, or on equipment exposed to constant handling
- Consistency: multiple people printing the same label across different printers, with colour and alignment drifting between machines
- Time: design, test, print, and troubleshooting time adding up to more than the cost difference of ordering printed
Getting quality labels without the printer headaches
This is exactly the gap Apex Workwear fills for small businesses across the GTA. Production runs in Canada, there’s no minimum order on most label and sticker jobs, and you can send through your existing Uline template or artwork file directly, so you’re not redesigning anything from scratch. Turnaround typically runs 5-7 business days, with rush options if you’re working against a deadline, and every order gets a digital proof before anything goes to print, so you catch alignment or colour issues before they hit a full batch rather than after.
If you’re already juggling custom apparel, signage, or business cards for the same brand, ordering labels through the same Canadian print shop keeps everything consistent and cuts out the back-and-forth of managing multiple suppliers. Request a free quote through apexworkwear.ca and you’ll typically have pricing back within 24 hours, seven days a week.
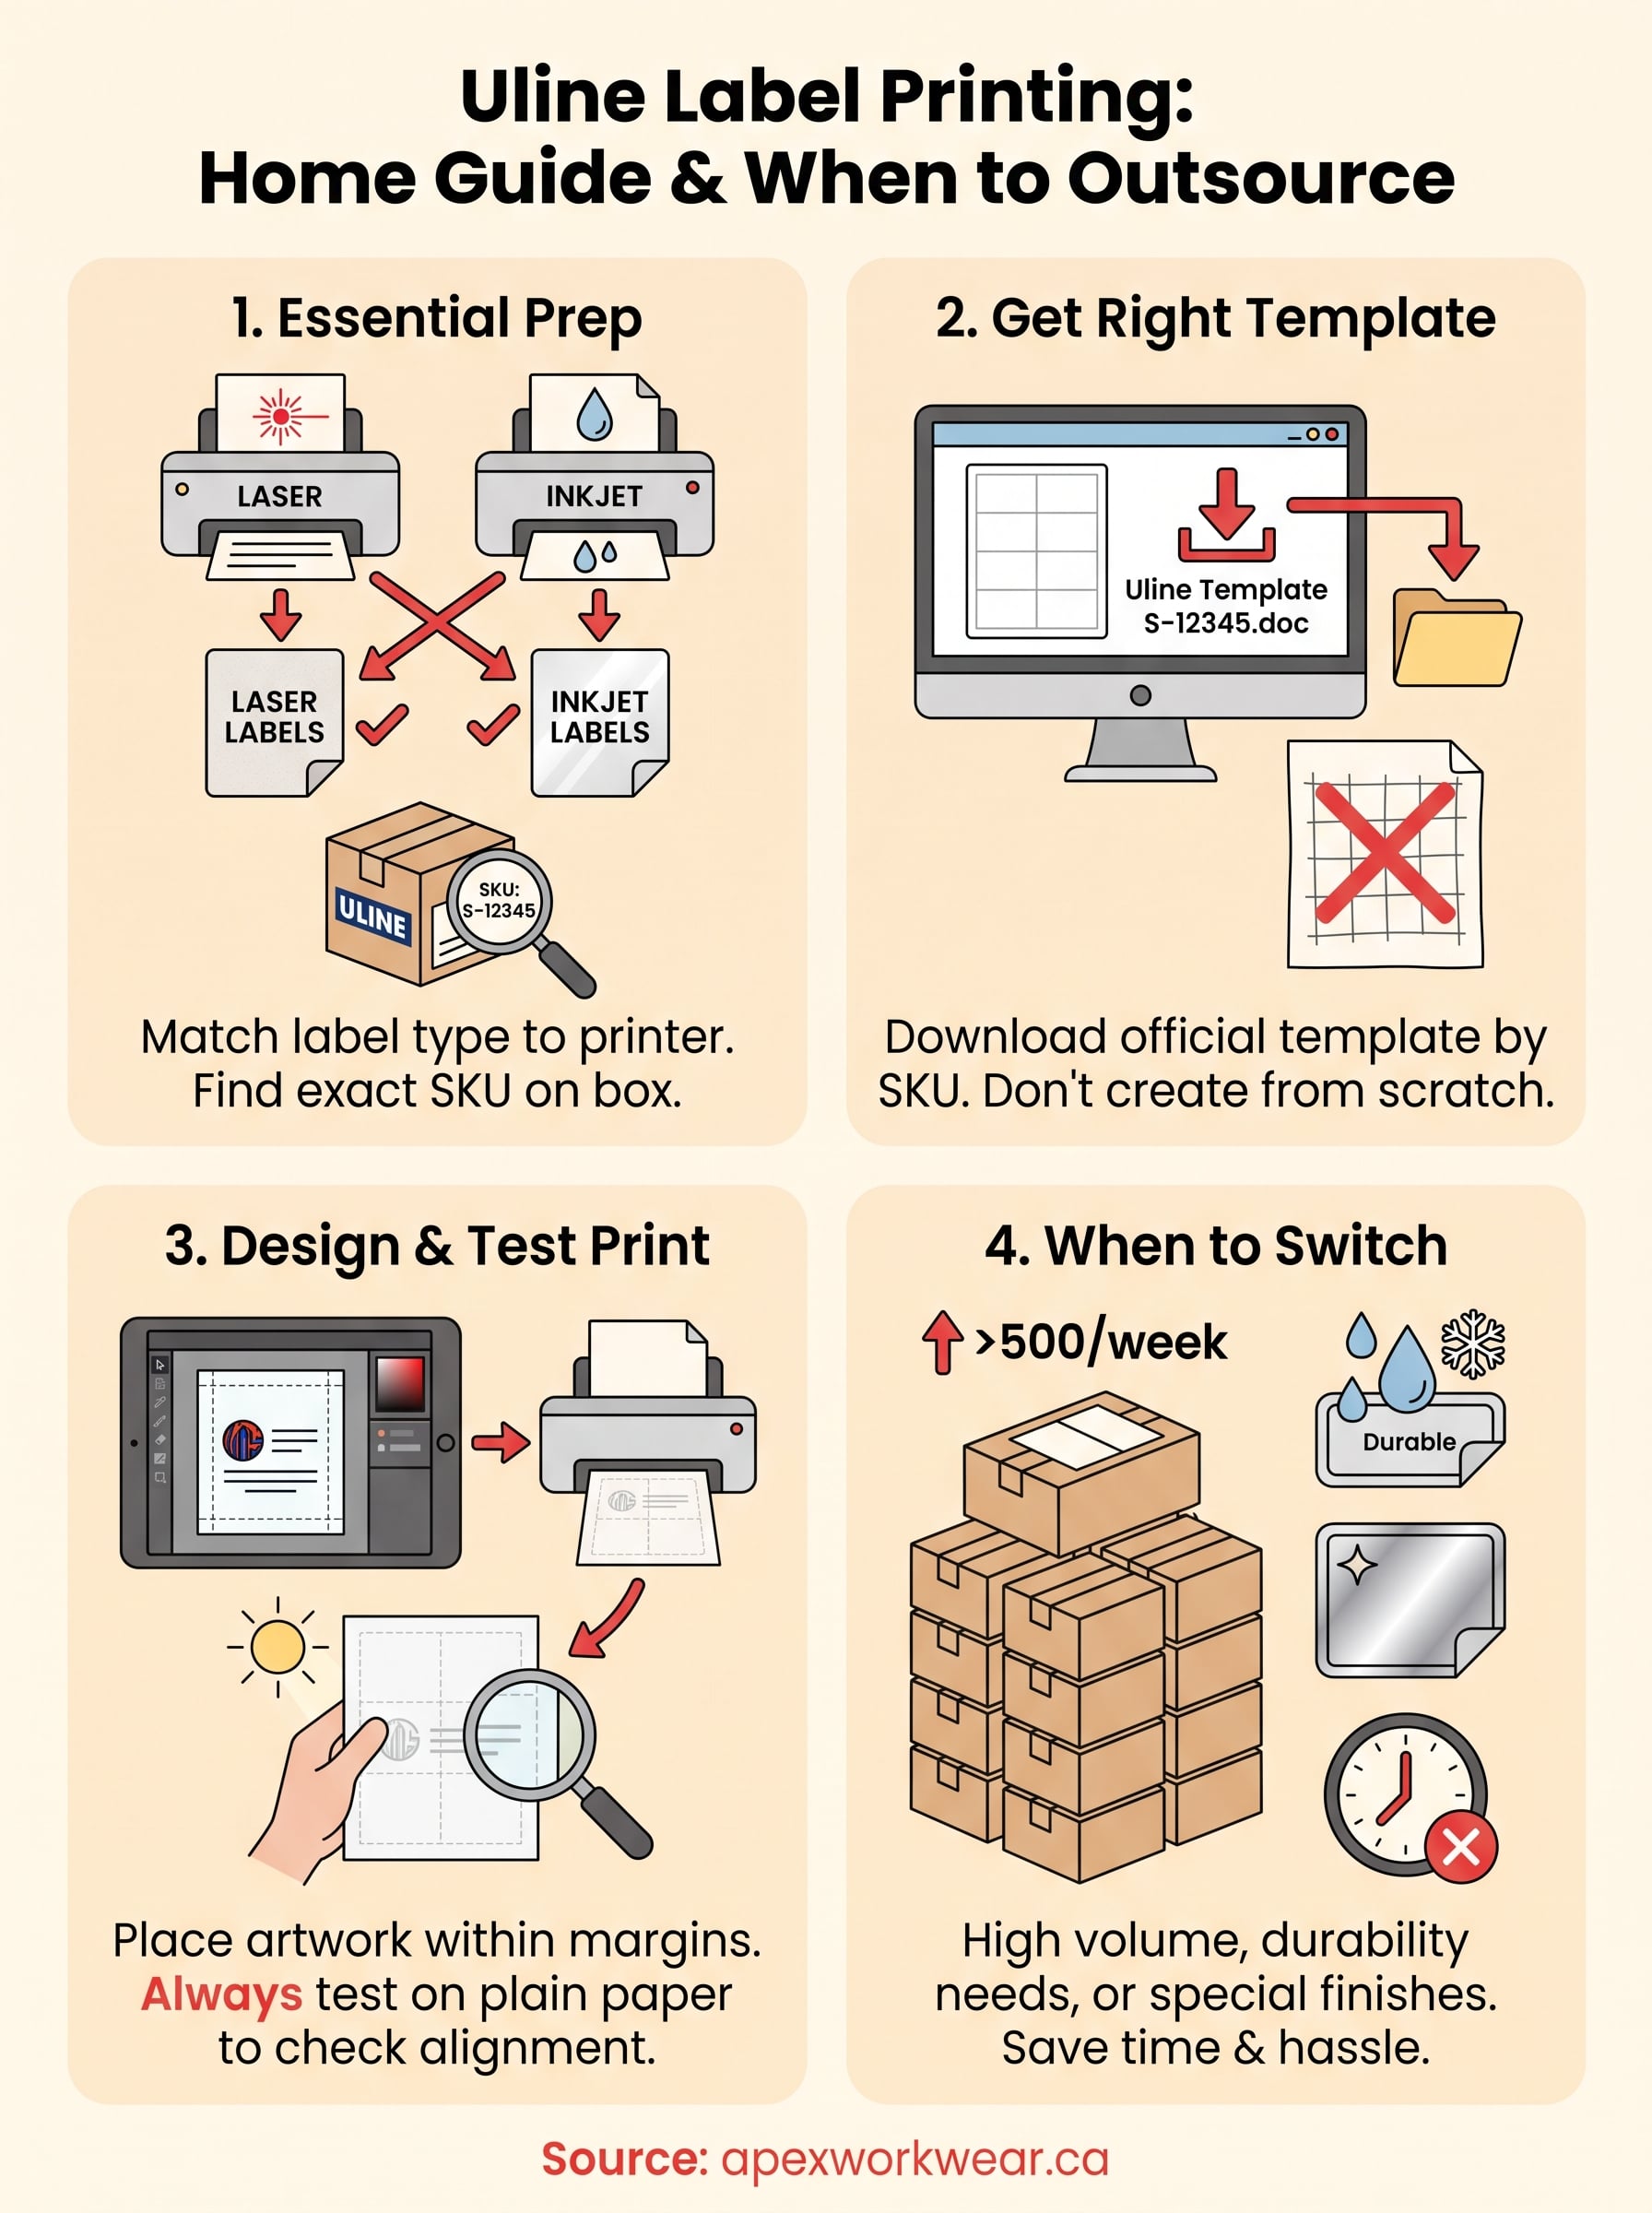
Printing labels with confidence
Getting Uline label printing right at home comes down to matching your printer to your label stock, downloading the correct template for your exact SKU, and testing on plain paper before you commit a real sheet. Skip any one of those steps and you’ll end up peeling misaligned labels off a batch you can’t reuse. Follow the sequence in this guide and you’ll waste far less stock, and you’ll know exactly which setting to check when something does go wrong.
But recognise when the job’s outgrown your desk printer too. Once you’re running hundreds of labels a week, or you need a finish your inkjet simply can’t produce, home printing stops being the cheaper option. That’s when a Canadian print shop with no minimums and fast turnaround earns its keep. When you reach that point, get a free quote from Apex Workwear and have proper pricing back within a day.