You’ve probably seen heat transfer vinyl on custom t-shirts, team uniforms, and branded hoodies without even realising it. It’s one of the most popular methods for putting designs onto fabric, and for good reason. But how does heat transfer vinyl work, exactly? The short answer: a heat-activated adhesive bonds a thin vinyl layer to your garment when you apply pressure and temperature. The longer answer is a bit more interesting.
Understanding the mechanics behind HTV helps you make smarter choices about your custom apparel, whether you’re experimenting at home or ordering professionally printed gear for your business. At Apex Workwear, we work with custom printing methods daily to produce durable, sharp-looking apparel for small businesses, teams, and contractors across Canada, so we know what separates a clean HTV application from one that peels after a few washes.
This article breaks down exactly how heat transfer vinyl works at a material level, walks you through the step-by-step application process, and covers the practical details beginners need to get it right. By the end, you’ll know enough to decide whether HTV is the right fit for your next project, or whether another method might serve you better.
Why heat transfer vinyl works so well on fabric
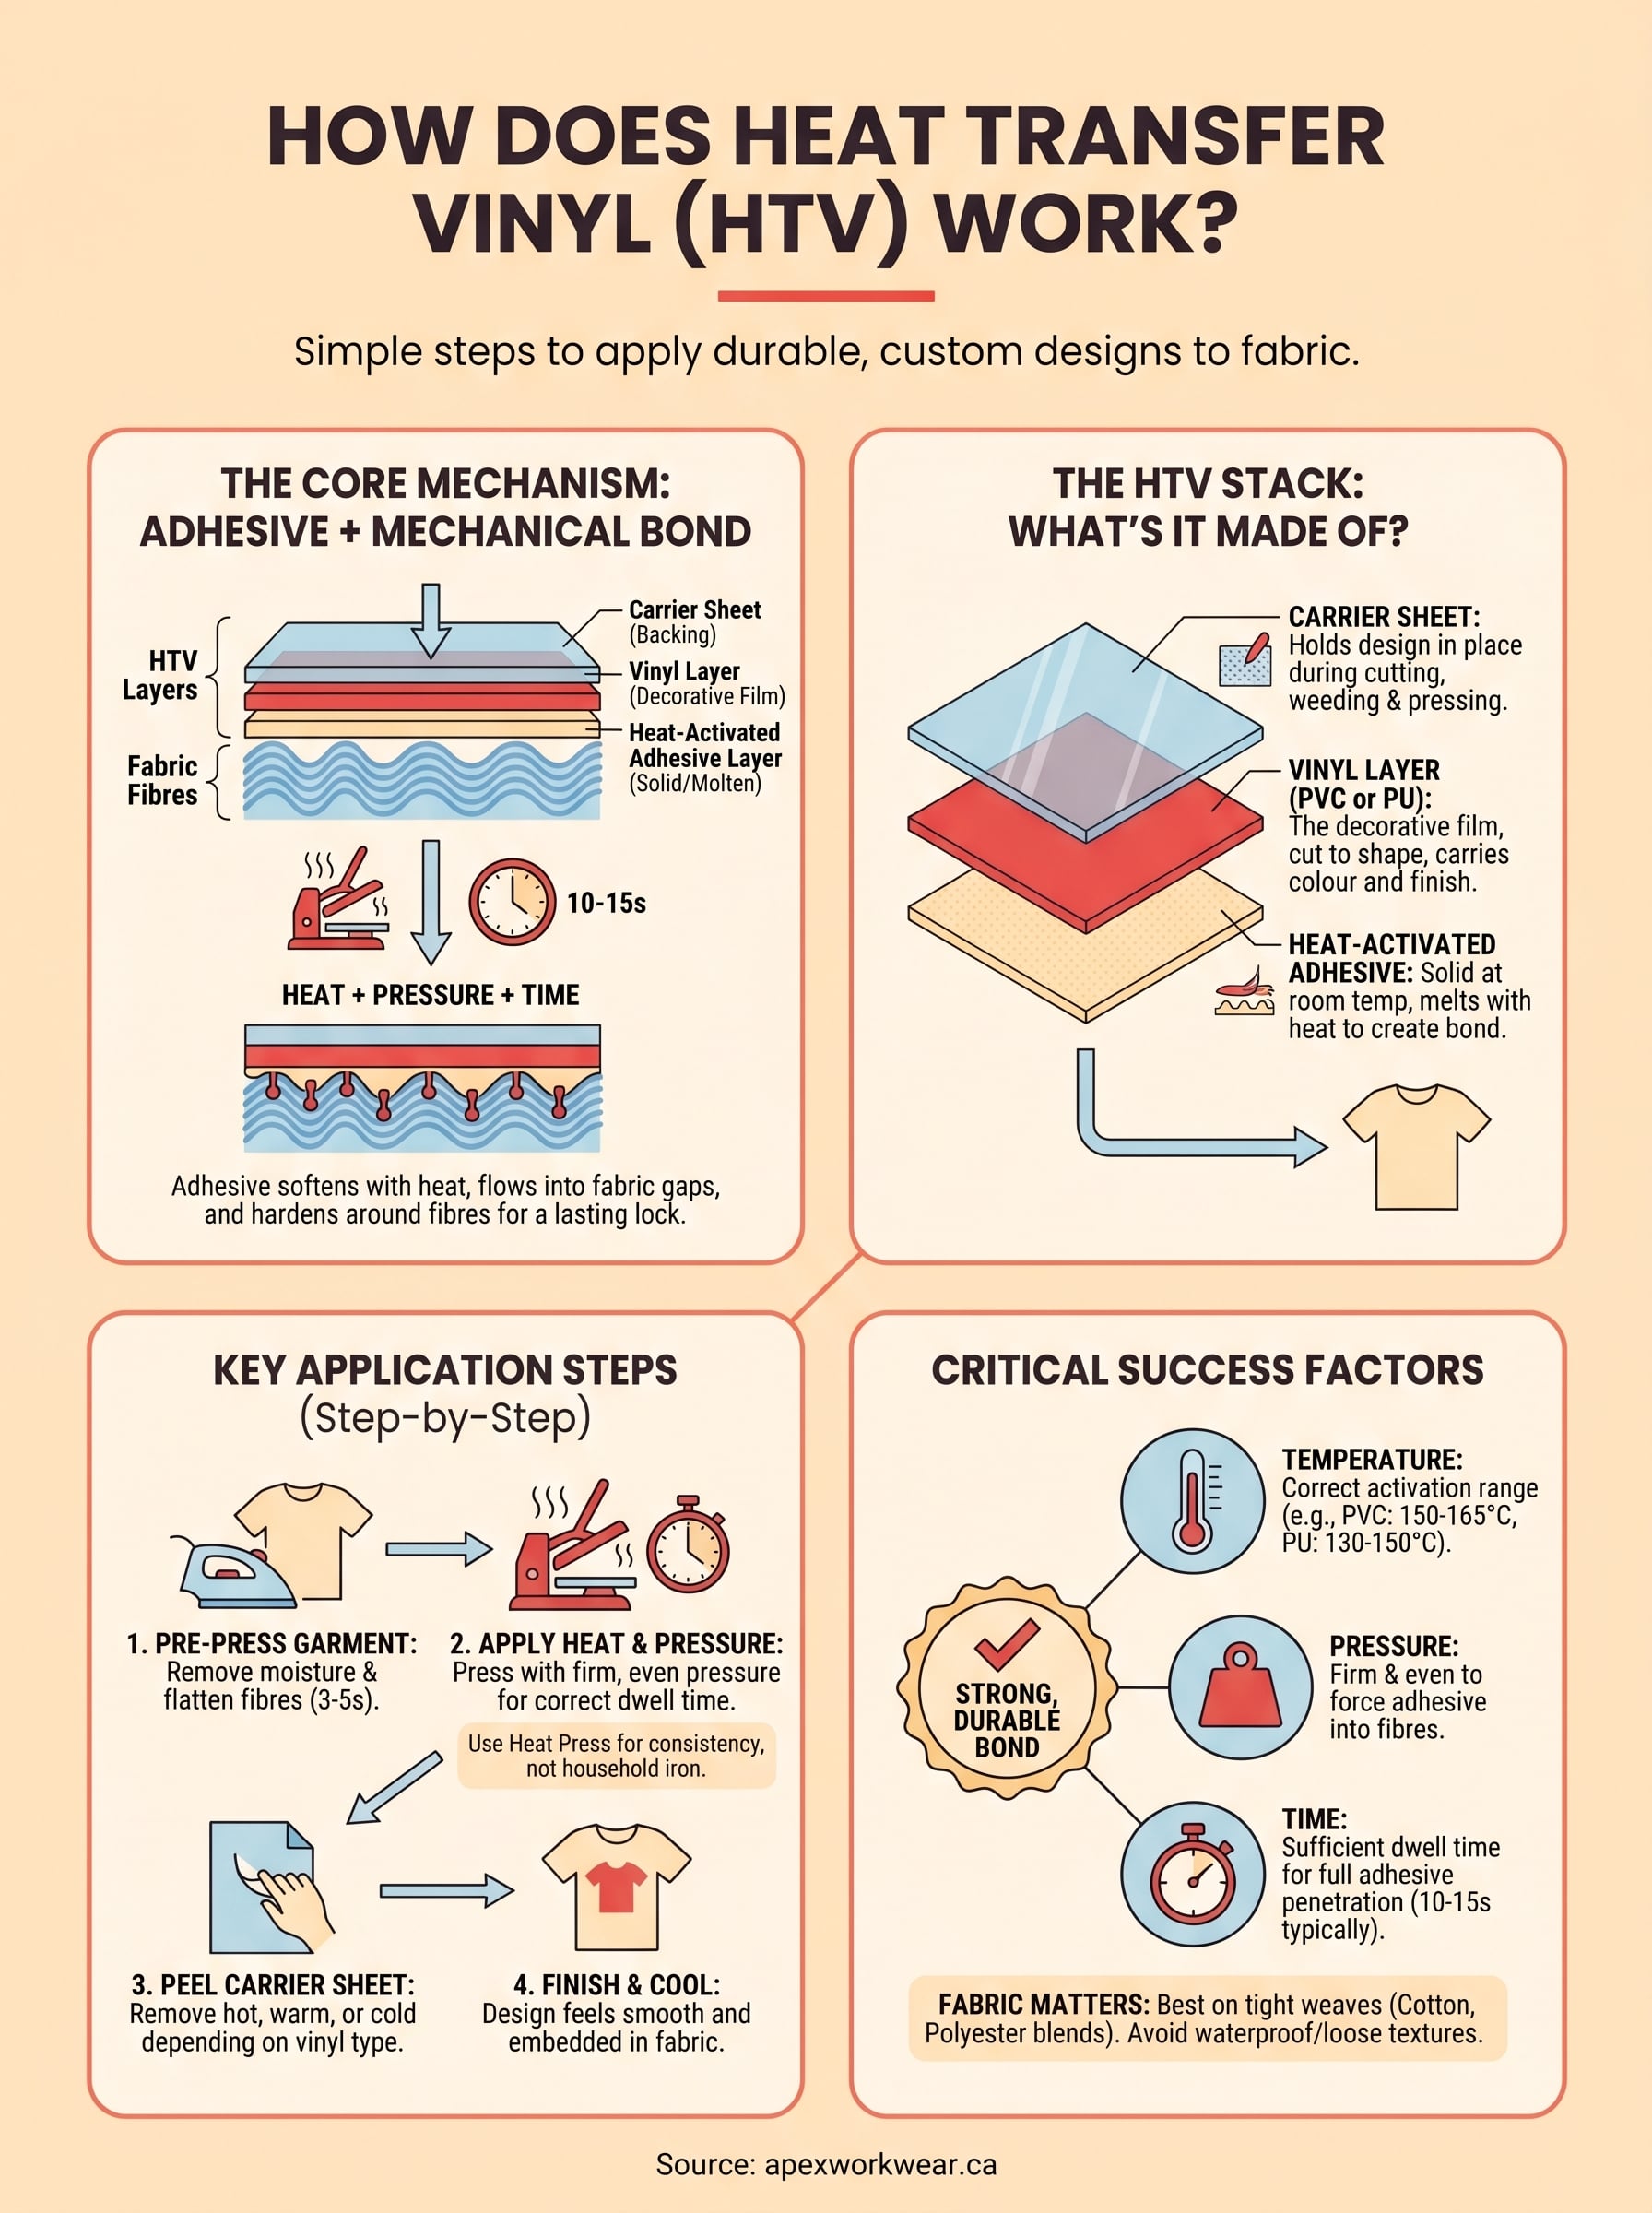
HTV performs reliably on fabric because the bond it creates is mechanical as well as adhesive. When heat activates the glue layer on the back of the vinyl, it softens and flows into the tiny gaps between fabric fibres. As it cools, it hardens around those fibres, locking the design in place from multiple contact points at once. This is why a properly applied HTV graphic doesn’t just sit on the surface of your garment; it becomes physically intertwined with the fabric beneath it, which is what gives it staying power through repeated washing and wearing.
The combination of mechanical anchoring and adhesive bonding is what makes HTV significantly more durable than a simple surface-level print when applied correctly.
How fabric texture affects the bond
The weave and texture of your fabric play a direct role in how well HTV adheres. Tightly woven fabrics like cotton and polyester blends give the adhesive more surface area to grip, while extremely loose or coarse weaves can limit direct contact between the adhesive and the fibres. When you press HTV onto a smooth, even surface, the adhesive distributes consistently and creates reliable grip across the entire design. Textured or ribbed fabrics, by contrast, can trap small pockets of air under the vinyl, which weakens the bond at those specific points and often leads to edge lifting over time.
This is also why pre-pressing your garment matters before you apply anything. Removing moisture and flattening the fabric fibres with a few seconds of dry heat before you lay down your design gives the adhesive the best possible surface to work with. A flat, dry fabric surface means more contact points between the adhesive and the fibres, which directly translates to a stronger and longer-lasting result.
Why heat and pressure work together
Heat alone is not enough to create a strong bond. Pressure forces the softened adhesive into the fabric at a microscopic level, ensuring the glue penetrates the fibre structure rather than pooling on the surface. This is the core of how heat transfer vinyl works: both elements need to act simultaneously. If you apply heat without adequate pressure, the adhesive softens but never fully reaches the fibres. If you apply pressure without enough heat, the adhesive stays rigid and brittle, and the bond will fail quickly.
Understanding this also explains why hand irons produce less consistent results than dedicated heat press machines. A heat press applies even, measured pressure across the full design area simultaneously, while an iron creates uneven pressure that varies with every pass you make. For small home projects an iron can work, but for business use or high-volume orders, consistent even pressure is what separates a lasting application from one that starts lifting at the edges after a handful of washes.
The flexibility factor
One reason HTV stays intact through repeated washing and wearing is its built-in flexibility. Unlike rigid prints that crack when the fabric stretches, quality vinyl is designed to move with your garment. The adhesive layer remains bonded to the fibres even as the fabric flexes, because both the vinyl and the adhesive are formulated to handle the same range of motion as the textile they’re attached to. This matters more than most people realise when they first start working with HTV.
Flexibility also explains why HTV handles the mechanical stress of the wash cycle better than you might expect. The vinyl stretches slightly with the fabric during washing rather than resisting it, which prevents the adhesive from shearing away from the fibre contact points. When you choose a high-quality vinyl product from a reputable supplier, that flexibility is already engineered into the material.
What heat transfer vinyl is made of
HTV looks simple from the outside, but it’s actually a multi-layer material where each layer has a specific job. Knowing what those layers are and how they work together helps you understand why application conditions matter so much. It also explains why cutting, weeding, and pressing in the right order produces clean, lasting results rather than a design that peels or tears during application.
The vinyl layer
The top layer is the decorative vinyl film itself, which carries the colour and finish of your design. This layer is typically made from polyvinyl chloride (PVC) or, in some specialty products, polyurethane (PU). PVC-based HTV is common, affordable, and comes in a wide range of solid colours and finishes including matte, gloss, and metallic. PU-based vinyl is thinner, softer, and more breathable, which makes it a popular choice for athletic and performance wear where garment flexibility is important. The vinyl layer is what you cut with a cutter or plotter, and it’s the part of the design that remains visible once the application is complete.
The adhesive layer
Directly underneath the vinyl film sits the heat-activated adhesive, and this is the layer that makes HTV work. At room temperature, this adhesive is solid and non-tacky, which means it won’t stick to anything on its own. When heat brings it to its activation temperature, it softens into a molten state that flows into the fabric fibres. Once you remove the heat source and the adhesive cools, it solidifies again with those fibres locked inside it. That transition from solid to molten and back again is the core of how heat transfer vinyl work functions at a material level.
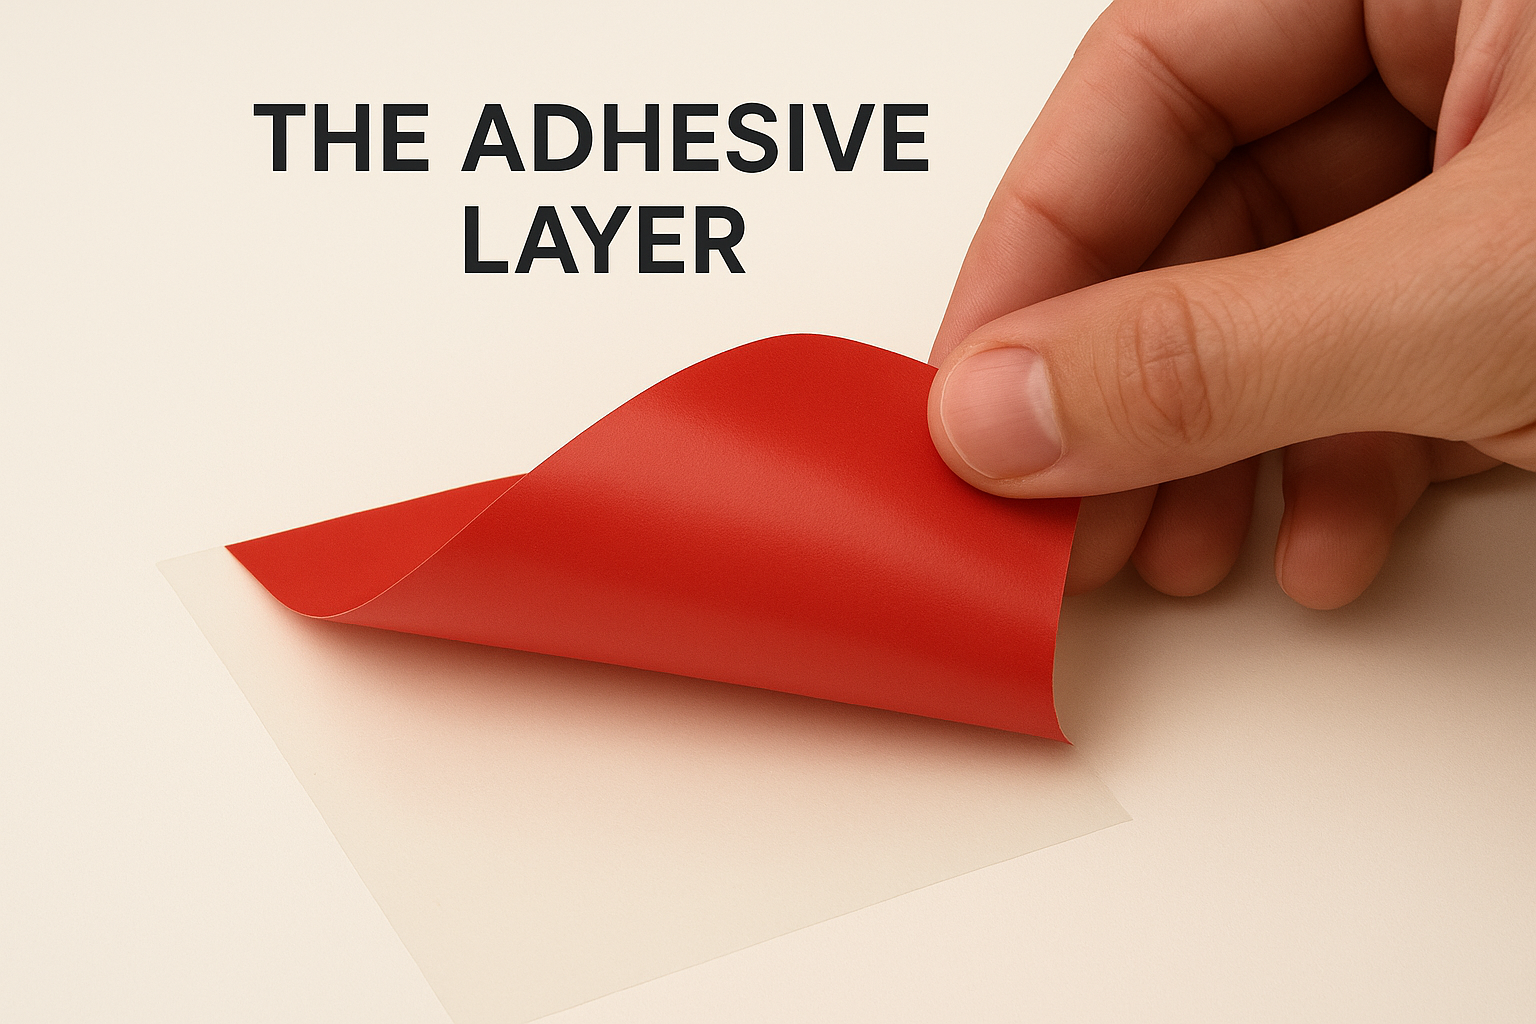
The adhesive layer is the most critical component in the stack because no amount of good vinyl or careful cutting will compensate for an adhesive that’s been activated at the wrong temperature.
The carrier sheet
The carrier sheet is the transparent or semi-transparent backing that holds the vinyl in place during cutting, weeding, and pressing. It keeps your cut design positioned correctly and prevents the vinyl from shifting when you move it to your garment. Carrier sheets vary in thickness and tack depending on the brand and vinyl type. Some are low-tack and easy to peel, while others have a firmer grip designed for intricate cuts with fine details. The carrier sheet is removed after pressing, either while the design is still warm or after it cools, depending on whether you’re using a hot or cold peel vinyl.
How heat, pressure, and time create the bond
Heat, pressure, and time work together as a trio, and removing any one of them from the equation produces a weak result. Understanding how each variable contributes to the bond helps you troubleshoot problems before they happen and explains why consistent application technique matters more than most beginners expect. This is also the clearest way to understand how heat transfer vinyl work actually creates a lasting connection between the design and your fabric.
Why temperature is the trigger
Temperature is what starts the entire bonding process. The heat-activated adhesive on the back of your vinyl is inert at room temperature; it will not stick to anything. Once you bring it up to its activation threshold, typically somewhere between 130°C and 165°C depending on the vinyl type, the adhesive shifts from a solid to a molten state and becomes capable of flowing into the fabric structure beneath it. Below that threshold, the adhesive stays rigid and the bond simply will not form, no matter how hard you press or how long you hold.
Getting your temperature right is the single most important variable in the process, because an adhesive activated at the wrong temperature either never bonds properly or degrades and loses its grip permanently.
Different vinyl types have different activation temperatures, so checking the manufacturer’s specifications before you press is not optional. Using too much heat is just as damaging as too little, since overheating the adhesive can cause it to bleed beyond the design edges, scorch the fabric, or break down the vinyl film itself.
What pressure actually does
Pressure is what drives the softened adhesive into the fabric. When you apply firm, even pressure with a heat press, you physically push the molten adhesive down into the gaps between the fibres rather than leaving it sitting on the surface. More contact between the adhesive and individual fibres means more anchor points, which directly increases how well your design holds up over time. Uneven pressure leaves sections of the design with weaker adhesion, and those are the spots that peel first.
Why time completes the process
Time gives the adhesive enough opportunity to fully penetrate the fabric fibres while it is in its molten state. Pulling the press too early means the adhesive has not had enough contact time to flow into the weave properly. Holding it too long at high heat can degrade both the adhesive and the vinyl. Most applications fall between 10 and 15 seconds, but following the specific timing for your vinyl type ensures the bond reaches full strength before you release the pressure.
What you need before you start pressing
Having the right equipment ready before you start removes most of the variables that cause failed applications. Understanding how does heat transfer vinyl work at a mechanical level is useful, but none of that knowledge helps if your heat source is inconsistent or your garment is not prepared properly. Getting your setup right before your first press saves you from wasted vinyl and ruined garments.
Your heat source
The most important piece of equipment you need is a reliable heat source that can hit and hold a consistent temperature. A dedicated heat press machine is the best option for consistent results; it applies even pressure across the full design area and holds a set temperature accurately. A household iron can work for small, simple designs, but it creates uneven pressure and struggles to maintain a precise temperature, which makes the bond less reliable. If you plan to press HTV regularly or produce apparel for your business, a heat press is worth the investment.
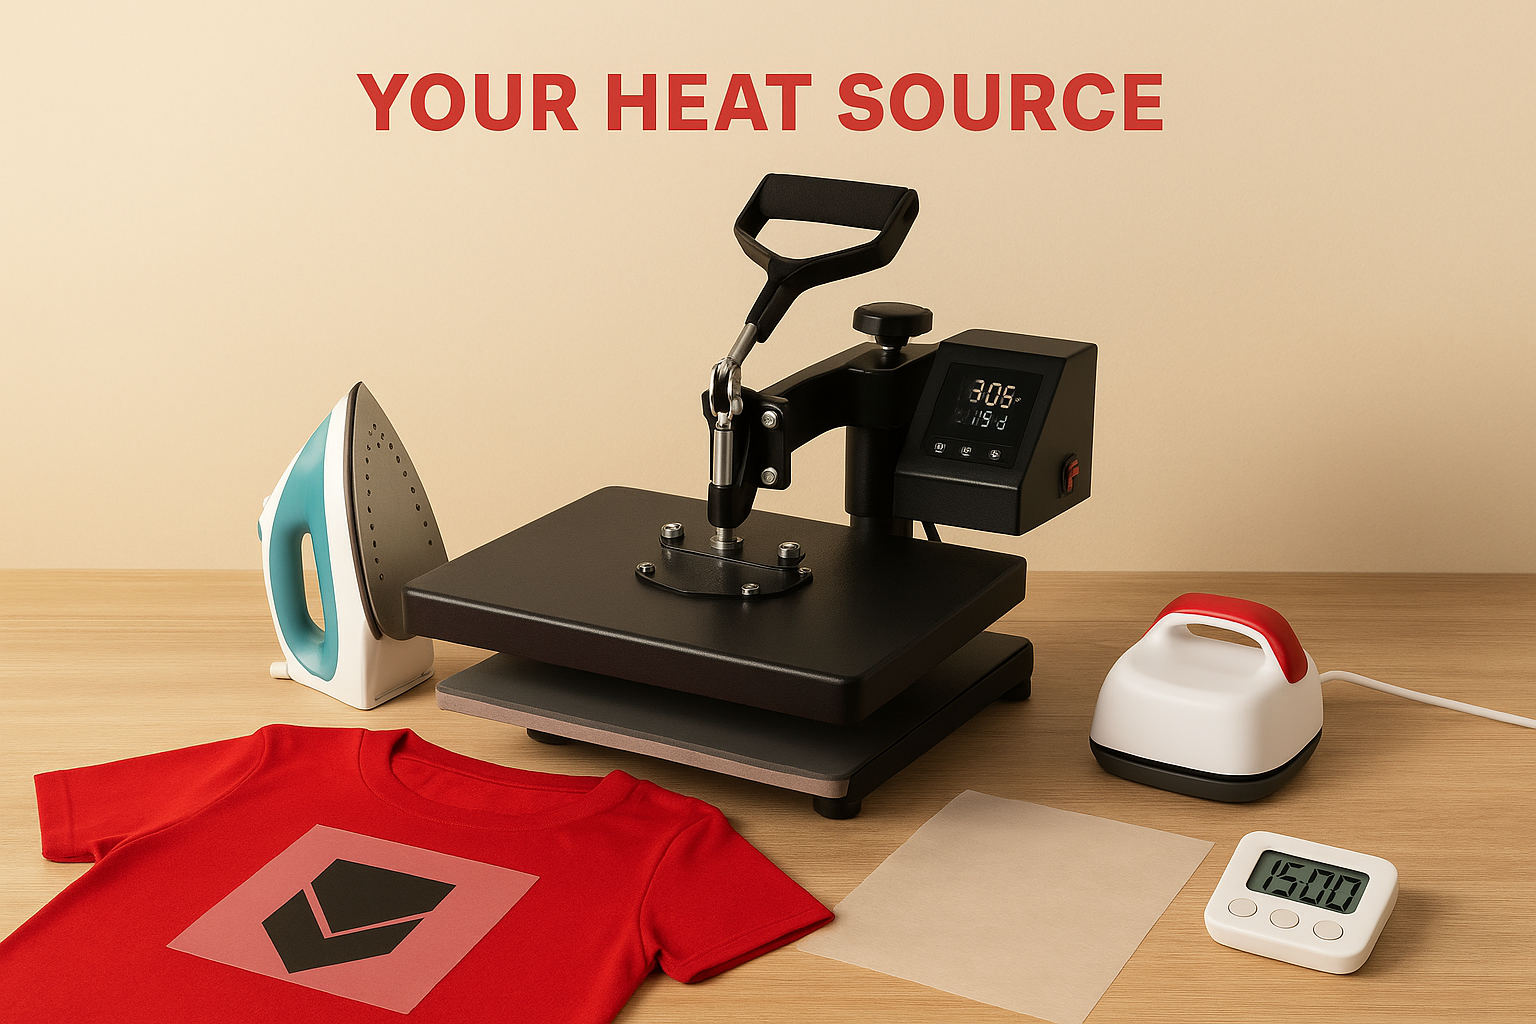
Here are the three main heat source options and where each one fits:
- Heat press machine: Best for business use, bulk orders, and consistent repeatable results
- Household iron: Suitable for small one-off projects on simple designs only
- Mini heat press: A compact option for small design areas like chest logos or hat panels
Your vinyl, garment, and support surface
You need your cut and weeded HTV design ready before you start pressing. Weeding removes the vinyl you do not want from around and inside your design, leaving only the graphic sitting on the carrier sheet. You also need a clean, dry garment placed on a hard, flat pressing surface. A heat press platen works perfectly, but a firm wooden board covered with a thin layer of heat-resistant foam also does the job.
Avoid pressing on soft or padded surfaces because they absorb pressure rather than pushing it back into the fabric, which weakens the adhesive bond at the fibre level.
Protective layers and your timer
A Teflon sheet or parchment paper placed over your design during pressing protects both the vinyl surface and your press platen from adhesive bleed or scorching. Some vinyl types require this cover sheet; others do not, so check the instructions for your specific product before you press.
A cover sheet costs almost nothing and protects your press platen from adhesive residue that builds up over time and contaminates future applications.
You also need a reliable timer set before you close the press, not after. A few seconds over or under the recommended dwell time affects how fully the adhesive bonds to the fibres, and guessing by feel is never consistent enough for repeatable results.
How to apply heat transfer vinyl step by step
Once your design is cut, weeded, and your equipment is at temperature, the application itself takes less than a minute. Following the correct sequence is what separates a clean, lasting result from one that peels after a few washes. Understanding how does heat transfer vinyl work at a mechanical level makes each step make sense, because you can see exactly what the heat and pressure are doing to the adhesive at every stage.
Preparing your garment and workspace
Start by pre-pressing your garment for three to five seconds on your pressing surface with nothing underneath it. This removes residual moisture and flattens the fabric fibres, giving the adhesive the smoothest possible bonding surface. Skipping this step is one of the most common causes of edge lifting after the first wash, and it adds almost nothing to your total pressing time.
Before you position your design, confirm that everything you need is within reach:
- Your cut and weeded HTV design on its carrier sheet
- A Teflon sheet or parchment paper if your vinyl requires a cover sheet
- A reliable timer ready to set before you close the press
- A flat, firm pressing surface with no give underneath
The pressing process
Lay your weeded design face down on the garment with the carrier sheet facing up toward the platen. Check your alignment carefully at this stage, because once the adhesive activates you cannot reposition the design without damaging either the vinyl or the fabric. Using a ruler or a fabric chalk line to mark a placement reference before you set the design down removes the guesswork entirely.
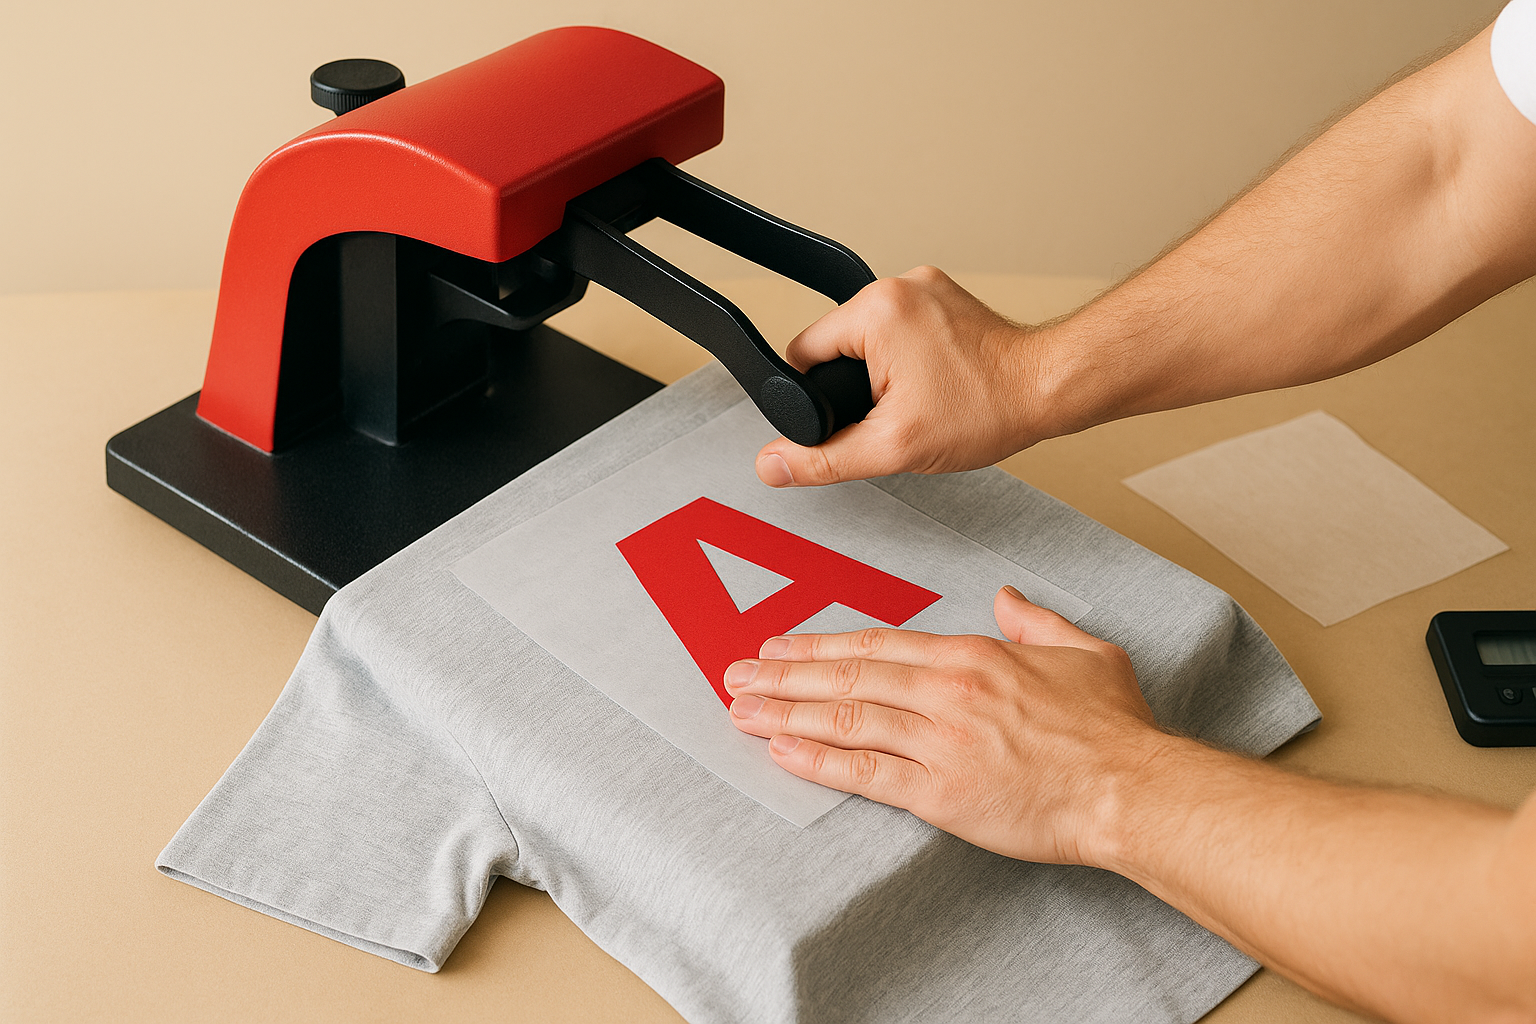
Taking an extra ten seconds to confirm placement before you press saves you from having to cut and re-weed a completely new design.
Close the press firmly and start your timer immediately, pressing for the manufacturer’s recommended dwell time without lifting the press mid-application. Opening the press too early interrupts the bonding process before the adhesive has fully penetrated the fibres, which produces weak adhesion that fails quickly under washing stress.
Finishing after the press
Open the press once the timer goes off and peel the carrier sheet at a shallow angle, either warm or cool depending on whether you’re using a hot peel or cold peel vinyl. Pull the sheet back slowly and steadily rather than yanking it away. If any part of the design lifts with the carrier, lay it back down and press for a few additional seconds before trying again.
Run your hand across the finished design once it cools fully. A properly bonded HTV application feels smooth and slightly embedded into the fabric rather than raised and stiff on the surface, which confirms the adhesive has locked into the fibres correctly.
Temperature and time guidelines you can trust
Getting your temperature and dwell time right is where understanding how does heat transfer vinyl work pays off most directly. The adhesive layer in your HTV only activates within a specific temperature window, and pressing outside that window produces a bond that either never forms fully or degrades before it cures. Following the manufacturer’s specifications for your specific vinyl type is always the starting point, but having reliable general ranges in your head helps you catch setting errors before they ruin a garment.
Standard temperature ranges by vinyl type
Different vinyl formulations have different activation thresholds, and treating them all the same is one of the most common mistakes beginners make. PVC-based vinyl typically presses well between 150°C and 165°C, while PU-based vinyl generally runs slightly cooler, around 130°C to 150°C, because its adhesive activates at a lower temperature. Specialty finishes like glitter, flock, and stretch vinyl each have their own narrower windows, so checking the spec sheet before you press is not a step you skip.
Using the wrong temperature for your vinyl type is the most common reason a design looks fine immediately after pressing but begins lifting at the edges within the first few washes.
The table below gives you a working reference for the most common HTV categories:
| Vinyl Type | Temperature Range | Dwell Time | Peel Type |
|---|---|---|---|
| Standard PVC | 150°C to 165°C | 10 to 15 seconds | Cold peel |
| PU / Soft vinyl | 130°C to 150°C | 10 to 15 seconds | Warm or hot peel |
| Glitter HTV | 150°C to 160°C | 15 to 20 seconds | Cold peel |
| Flock HTV | 150°C to 160°C | 10 to 15 seconds | Cold peel |
| Stretch vinyl | 130°C to 145°C | 10 to 12 seconds | Warm peel |
Timing guidelines that hold up in practice
Dwell time and temperature work together, so adjusting one without the other throws off your results. If you lower the temperature slightly to protect a heat-sensitive fabric, you typically need to add a few seconds to give the adhesive enough time to fully penetrate the fibres. Running a quick test press on a fabric scrap before committing to your actual garment takes less than a minute and confirms that your settings produce a clean bond without scorching.
Thicker or layered applications also need slightly longer dwell times because the adhesive on the lower layer takes longer to reach full activation when another layer of vinyl sits above it. Plan for an extra three to five seconds per additional layer and always let each layer cool completely before adding the next.
Peel types, carrier sheets, and when to peel
The carrier sheet and peel timing are two details that beginners often treat as afterthoughts, but getting them wrong ruins an otherwise perfect application. Understanding how does heat transfer vinyl work includes knowing what the carrier sheet is doing during the press and exactly when to remove it, because pulling too early or too late affects whether the adhesive stays locked into the fabric or lifts away with the backing.
Hot peel versus cold peel
Hot peel vinyl is designed so you can remove the carrier sheet immediately after you open the press, while the adhesive is still warm and slightly molten. This works because the adhesive in hot peel formulations cures quickly and holds its position even before it drops to room temperature. Hot peel is faster for production workflows where you are pressing multiple pieces in a row, since you do not need to wait between pressing and peeling.
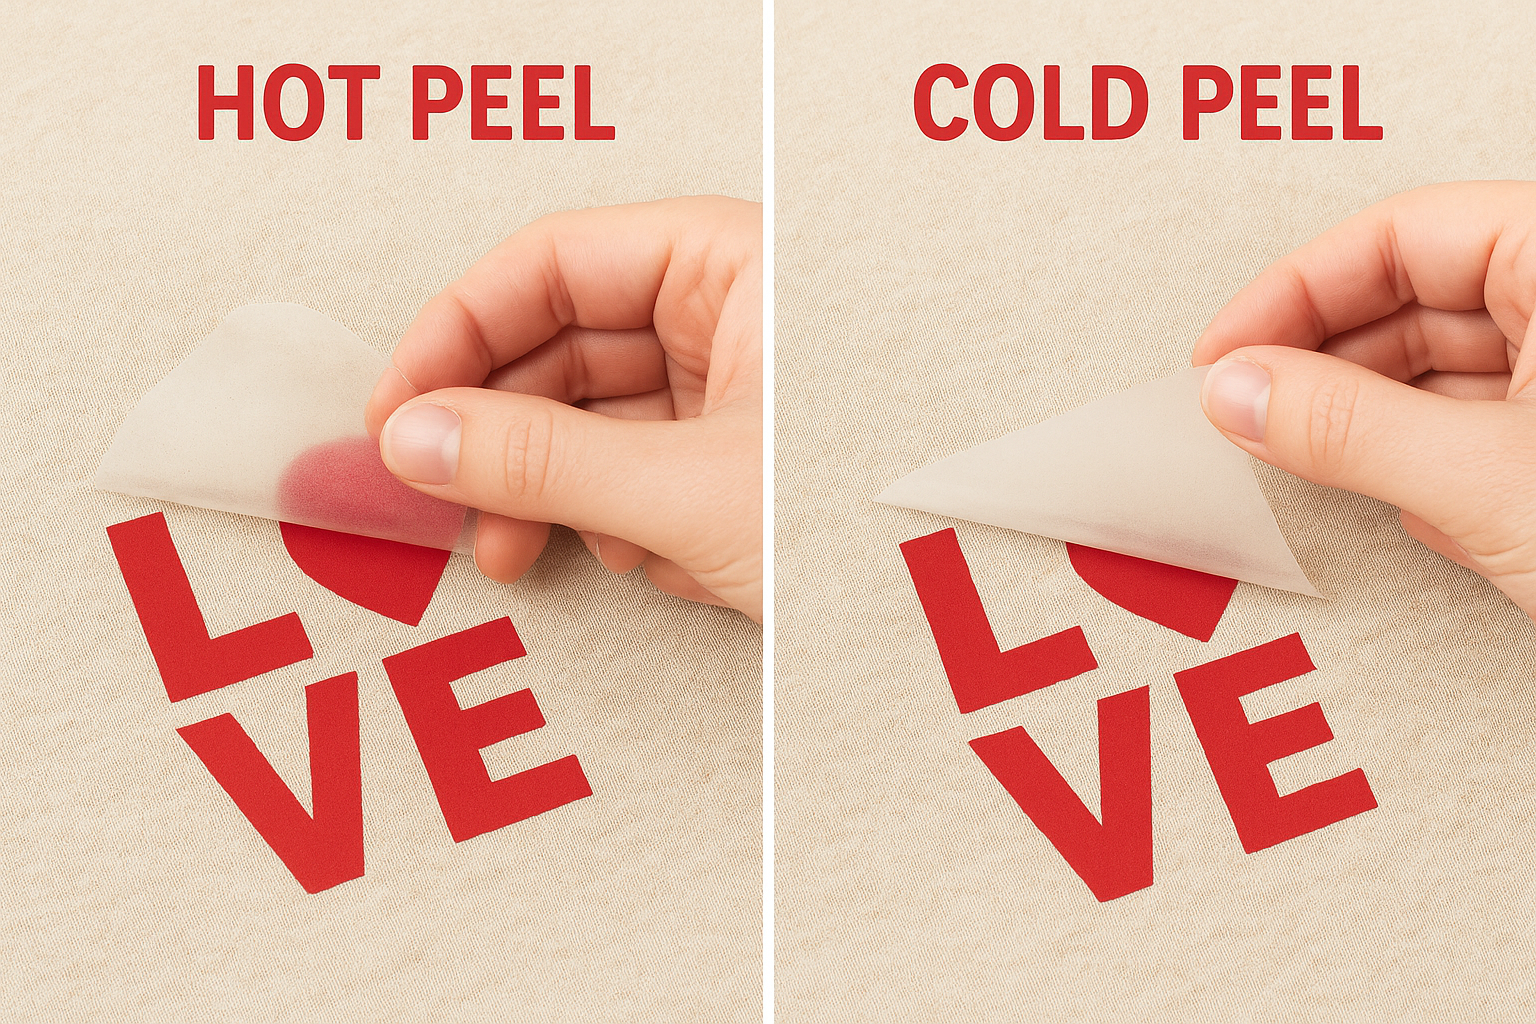
Cold peel vinyl requires you to let the design cool completely before you remove the carrier sheet. The adhesive needs that cooling time to fully solidify around the fabric fibres, and peeling while it is still warm pulls the vinyl away from the fabric before the bond has set properly. Patience here directly determines how long your design lasts through washing.
If you are unsure which peel type your vinyl uses, always default to cold peel to avoid lifting the design before the adhesive has cured.
Here is a quick comparison to help you choose the right approach for your vinyl type:
| Peel Type | When to Peel | Best For |
|---|---|---|
| Hot peel | Immediately after pressing | Fast production, solid fills |
| Warm peel | 5 to 10 seconds after pressing | PU vinyl, fine details |
| Cold peel | Fully cooled to room temperature | Glitter, flock, multi-layer designs |
What the carrier sheet is actually doing
The carrier sheet holds your cut and weeded design in exact position from the moment you finish weeding through the entire pressing process. Without it, individual letters, small shapes, and fine details would shift or separate the moment you picked them up to position them on your garment. The sheet keeps every element of your design spatially locked relative to the others so it transfers as a single unit.
Peeling the carrier sheet at the correct time also confirms whether your press was successful. If the vinyl releases cleanly and lies flat against the fabric, your temperature, pressure, and dwell time were all on target. If sections of the design lift with the carrier as you peel, lay it back down and press for a few additional seconds before trying again.
Fabric compatibility and when HTV will fail
Understanding how does heat transfer vinyl work also means knowing where it does not work at all. HTV relies on a combination of heat, pressure, and a fabric structure that accepts the adhesive, so not every material on your workbench is going to give you a reliable result. Choosing the wrong base fabric is one of the leading reasons a design fails on the very first wash, even when your temperature and timing settings were correct.
Fabrics that work well with HTV
100% cotton is the most forgiving and widely used base for HTV applications. Its tight, natural fibre structure gives the adhesive plenty of contact points to lock into, and it tolerates the heat range that most standard vinyl types require. Polyester and poly-cotton blends also perform well, provided you use a lower pressing temperature to prevent the synthetic fibres from scorching or dye migration from discolouring your design. For athletic and performance wear, a polyester-dominant blend paired with PU vinyl is a reliable combination because both materials are built to flex and recover together.
Cotton and cotton blends remain the safest starting point for anyone new to HTV because they produce consistent results across almost every vinyl type on the market.
Nylon and spandex-heavy fabrics can accept HTV, but they require lower temperatures and shorter dwell times than cotton. Testing on a small fabric scrap before pressing your actual garment is essential with these materials, since nylon in particular can distort permanently if your press runs even slightly too hot.
Fabrics and surfaces where HTV fails
Waterproof and water-resistant fabrics are among the most problematic surfaces for HTV. The coating that makes these materials repel water also prevents the adhesive from penetrating the fibres properly, so the bond sits on the surface rather than anchoring into the weave. The design may look fine immediately after pressing but will peel away within a handful of uses.
Loosely woven fabrics like burlap, canvas with a rough texture, or heavily ribbed knits create air pockets under the vinyl during pressing, which leads to uneven adhesion and edge lifting over time. Fur, fleece with a high pile, and leather present similar problems because the adhesive cannot reach a flat, even fibre surface to bond against. For these materials, embroidery or a different decoration method is a more practical choice than HTV, and the end result will hold up significantly better under regular use.
Common HTV problems and quick fixes
Even when you understand how does heat transfer vinyl work at a material level, problems still show up during application. Most issues come down to one of three variables: temperature, pressure, or timing. Identifying which one is off puts you in a position to fix the problem on your next press rather than repeating the same mistake across multiple garments.
Edges peeling after washing
Peeling edges almost always point to insufficient pressure or a temperature that was slightly too low. The adhesive activated but did not penetrate the fibre structure deeply enough to hold under the mechanical stress of washing. Re-press the design at the correct temperature with firm, even pressure for the full dwell time, making sure your pressing surface is hard and flat rather than padded.
Skipping the pre-press step is the second most common cause of edge lifting, because residual moisture in the fabric prevents the adhesive from bonding cleanly to the fibres.
Bubbling or lifting during the peel
If sections of the design bubble or lift as you peel the carrier sheet, the adhesive has not fully cured before you started removing the backing. This happens most often when you peel cold peel vinyl while it is still warm. Lay the carrier sheet back down, apply light pressure with your hand, and let the design cool completely before trying again. If the bubbling is widespread rather than isolated, your dwell time was too short and the adhesive needs another full press cycle to cure.
Vinyl not sticking at all
When the vinyl transfers no adhesion to the fabric, your temperature setting is the first thing to check. A press running below the activation threshold leaves the adhesive in its solid state, so no bond forms regardless of how long you hold the press down. Verify your press temperature with an infrared thermometer rather than relying on the press display, since built-in gauges can read inaccurately over time.
Scorching or discolouration on the fabric
Scorching means your temperature is too high for the fabric you are pressing. Polyester and synthetic blends are particularly sensitive to heat, and running standard PVC vinyl settings on them causes permanent dye migration or fabric damage. Drop your temperature by 10 to 15 degrees, switch to a PU-based vinyl formulated for lower activation, and place a Teflon sheet between the press platen and your design to distribute heat more evenly across the surface.
Where to go from here
Now you understand how does heat transfer vinyl work from the adhesive layer up through the carrier sheet, and you have a clear picture of what temperature, pressure, and timing each do to create a lasting bond. That knowledge puts you in a much stronger position to either run your own applications or evaluate the quality of work you order from a supplier. The details matter, and knowing them helps you ask better questions and spot problems before they become wasted money.
If you need custom apparel with professional results for your business, team, or event, you do not have to manage the equipment, settings, and material choices yourself. The team at Apex Workwear handles custom printed and decorated apparel for businesses across Canada, with fast turnaround, no minimum orders on select products, and free local shipping across the GTA. Get a quote and see what your brand looks like on quality gear.