Siser EasyWeed is one of the most popular heat transfer vinyl (HTV) brands on the market, and for good reason. It cuts cleanly, weeds easily, and sticks to fabric without a fight. But if your settings are off or your process is out of order, you’ll end up with peeling, cracking, or incomplete transfers. Getting the details right matters. This guide covers the complete Siser EasyWeed heat transfer vinyl instructions you need, from cutting and weeding through to pressing and aftercare.
At Apex Workwear, we work with custom apparel every day. We know what makes a clean, lasting print, whether it’s produced on our professional equipment or applied at home with a heat press. That hands-on experience is exactly what shaped this guide. You’ll find specific temperature and time settings for heat presses and home irons, cutting parameters for Cricut and Silhouette machines, and step-by-step application instructions that actually work.
Whether you’re making custom shirts for your small business, prepping team uniforms, or just personalising a one-off project, the steps below will help you get a professional-quality result without wasted vinyl or ruined blanks. And if you’d rather skip the DIY route entirely, Apex Workwear handles custom apparel printing from start to finish, no minimums, fast turnaround, and free local shipping in the GTA.
What you need and how EasyWeed works
Before you follow any Siser EasyWeed heat transfer vinyl instructions, gather your materials and understand what you’re actually working with. EasyWeed is a polyurethane-based film that bonds to fabric through heat and pressure. The vinyl sits on a clear plastic carrier sheet, and the adhesive side faces up when you cut. Getting those basics wrong before you even touch a heat press means the whole project falls apart from the start, and wasted vinyl and ruined garments add up fast.
The materials you need
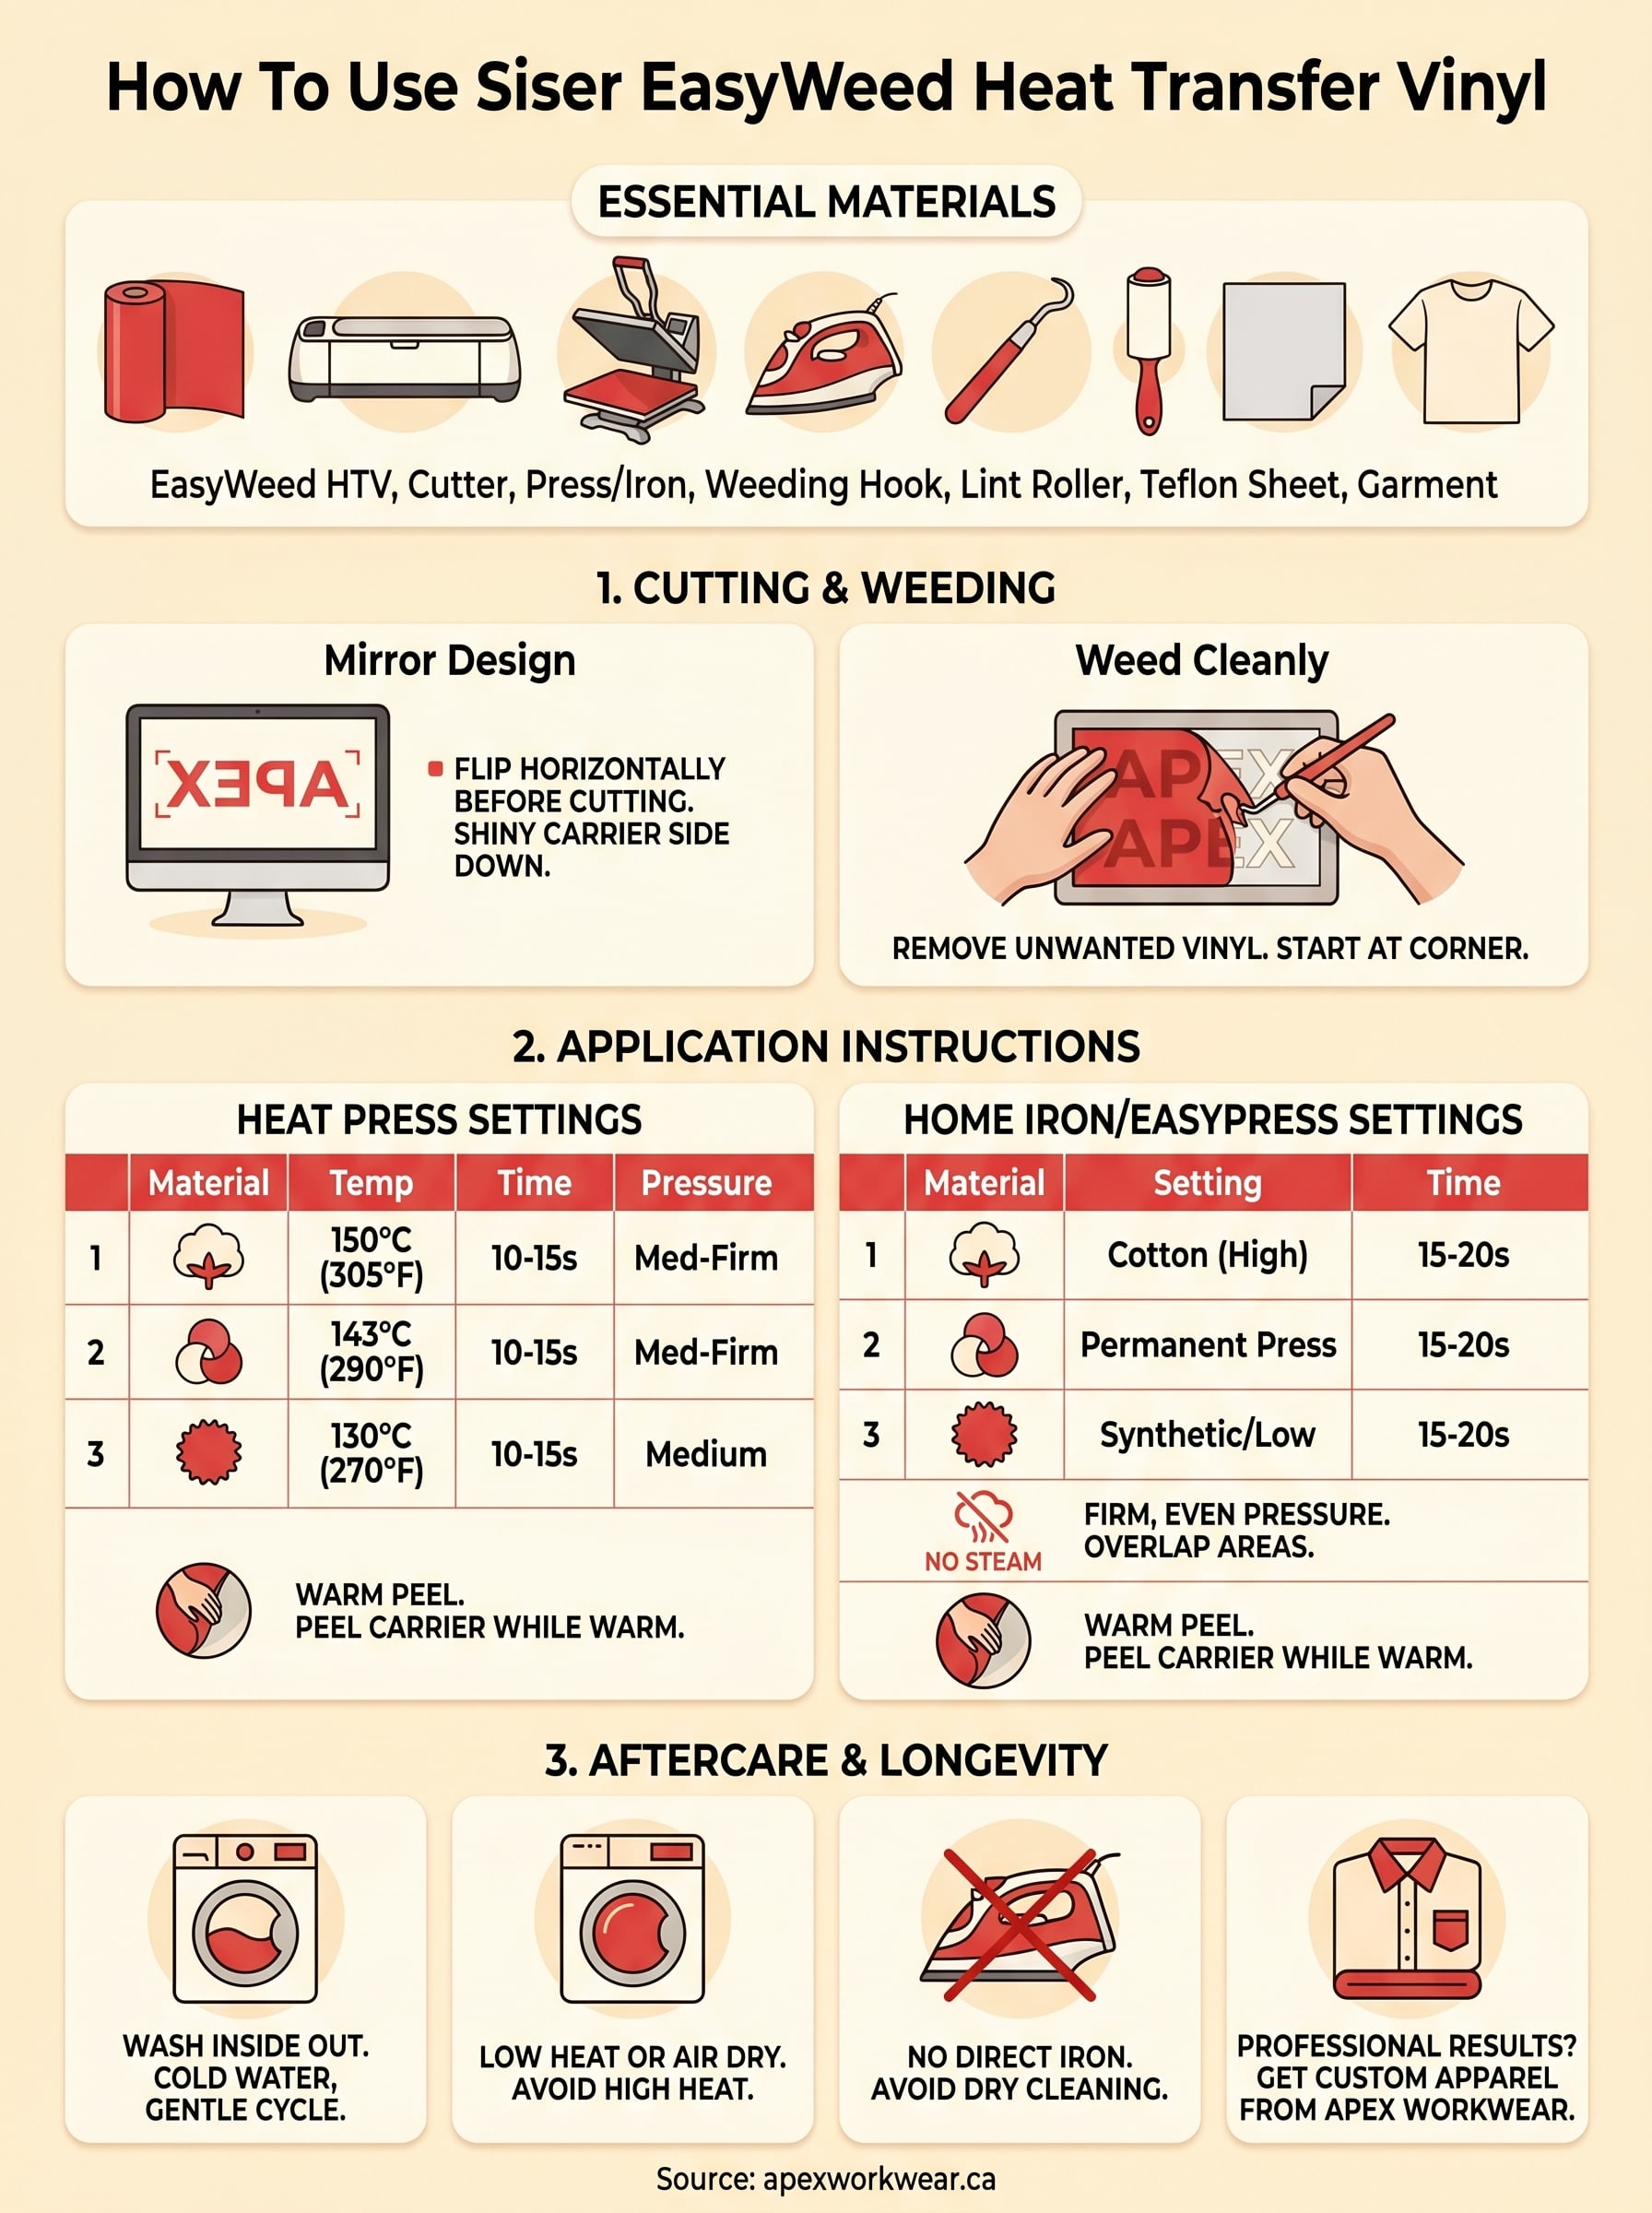
You don’t need a professional setup to get good results, but you do need the right tools ready before you start. Missing even one item, like a lint roller or a Teflon sheet, leads to problems that are hard to fix once the vinyl is already pressed into the fabric.
Here’s what to have ready before you begin:
| Item | Why you need it |
|---|---|
| Siser EasyWeed HTV | The vinyl itself, in your chosen colour |
| Cutting machine (Cricut Maker, Silhouette Cameo, or similar) | Cuts the design from the vinyl sheet |
| Heat press, home iron, or Cricut EasyPress | Applies the heat and pressure needed to bond the vinyl |
| Weeding tool (hook tool) | Removes excess vinyl from around your design |
| Lint roller | Preps the garment surface before pressing |
| Teflon sheet or parchment paper | Protects the vinyl from direct heat contact |
| Hard, flat pressing surface | Ensures even pressure across the design |
| Your garment or blank | The item you’re transferring onto |
How EasyWeed is structured
EasyWeed has a three-layer structure that you need to understand before you cut your first piece. The top layer is the clear carrier sheet, which holds the vinyl in position during both cutting and transfer. Below that sits the coloured vinyl film itself, and beneath that is a heat-activated adhesive layer that bonds to fabric fibres when you apply the right combination of heat and pressure.
When you cut EasyWeed, you cut through the vinyl film and adhesive layer only, without cutting through the carrier sheet. This technique is called a kiss cut, and it’s what makes clean weeding possible.
When you weed the design, you remove the unwanted vinyl from around your artwork, leaving only the design itself on the carrier sheet. That carrier sheet then acts as a transfer layer during pressing. Once heat is applied, the adhesive releases from the carrier and bonds permanently to the fabric. This is why the carrier sheet always faces up during the press, and you peel it away only after the transfer is complete.
Why EasyWeed works across so many fabrics
EasyWeed bonds reliably to cotton, polyester, and cotton-polyester blends, which covers the vast majority of garments people work with. It also adheres to nylon and most lightly treated fabrics, though results depend on the fabric’s surface texture and any finish applied during manufacturing. Fabrics with a tight weave and smooth surface consistently give the cleanest bond and the sharpest edge definition.
Fabric content affects your press temperature more than most beginners expect. A 100% cotton shirt presses at a higher temperature than a 50/50 blend, and synthetic fabrics scorch or shrink if you push the heat too high. Before you press anything, check the garment’s care label and match your settings to the fabric type.
Step 1. Set up artwork and cut EasyWeed
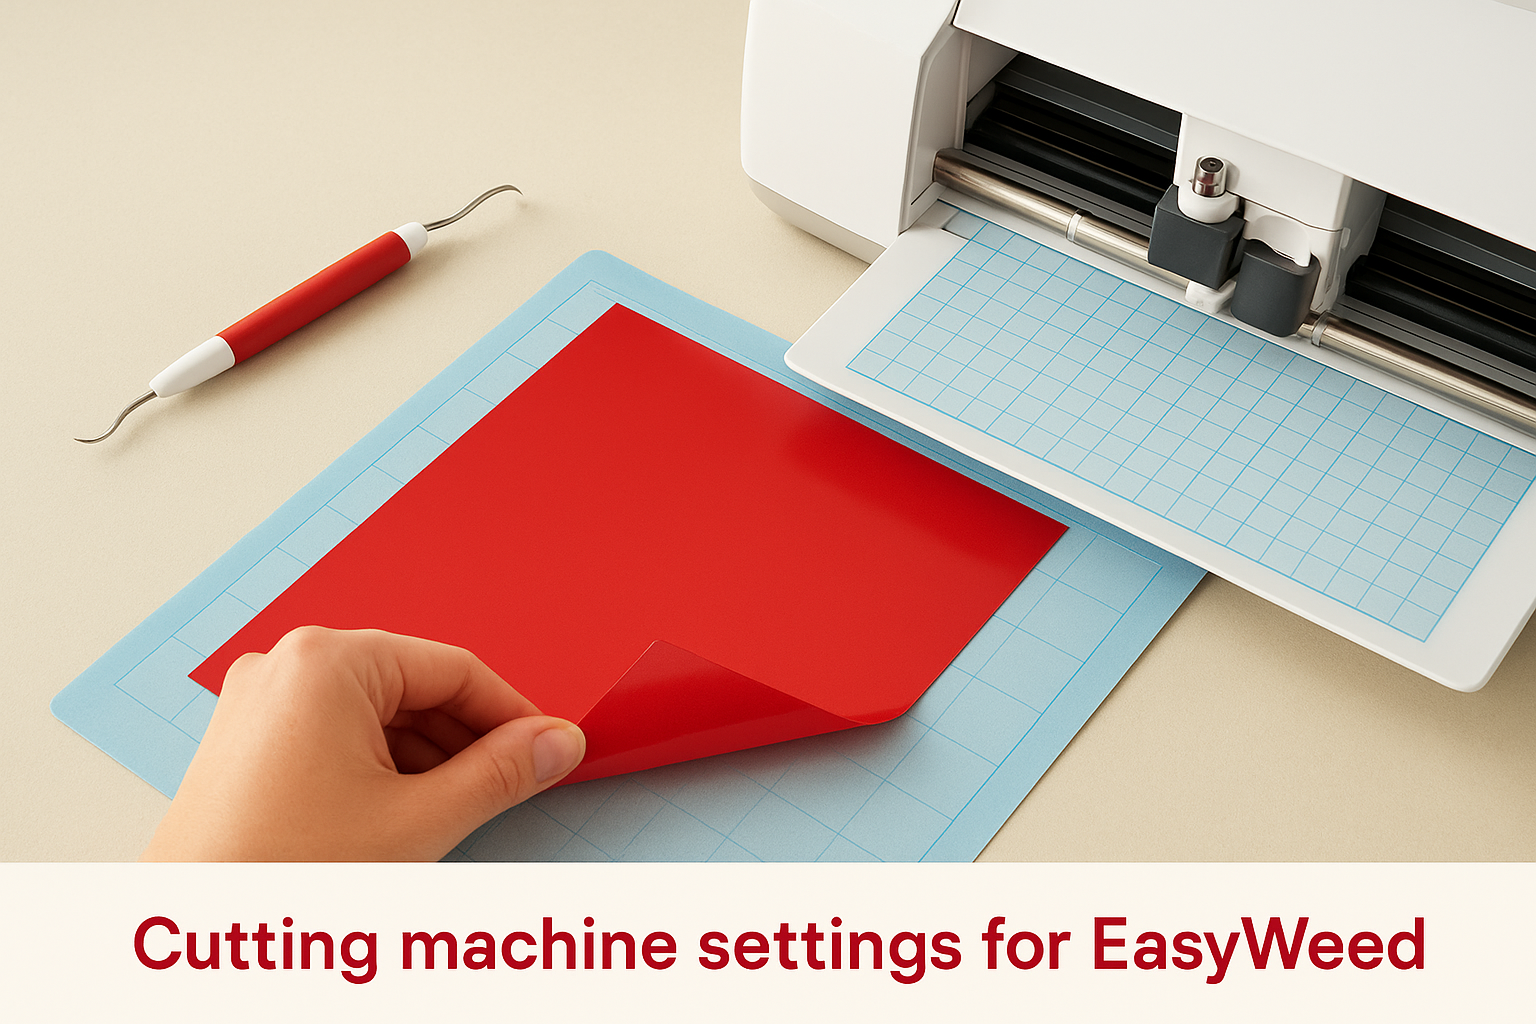
Getting your artwork ready correctly is what separates a clean cut from a wasted sheet of vinyl. Before you touch your cutting machine, you need to mirror (flip horizontally) your design in your design software. Because you cut EasyWeed from the back, the carrier sheet faces down on the cutting mat and the coloured vinyl side faces up. If you skip the mirror step, your finished transfer will be a reversed image on the garment, and there is no fixing that once the vinyl is pressed.
Mirror your design before you cut
Open your design in your software, whether that’s Cricut Design Space, Silhouette Studio, or any vector programme. Select your design and flip it horizontally before you send it to the cutter. This single step is where most beginners make an irreversible mistake, particularly when working with text, numbers, or directional logos. Once a non-mirrored design is cut and weeded, the only option is to start again with fresh vinyl.
Always confirm the mirror setting is active in your software before you press cut, especially when your design includes text or any element that reads in only one direction.
Cutting machine settings for EasyWeed
Place your EasyWeed on the cutting mat with the shiny carrier sheet facing down and the coloured vinyl facing up. Load it into your machine and apply the correct settings for a clean kiss cut. The table below covers recommended starting points for the most common cutting machines.
| Machine | Blade type | Pressure / Force | Speed | Passes |
|---|---|---|---|---|
| Cricut Maker | Fine-Point Blade | Iron-On preset or 130-160 | 300 | 1 |
| Cricut Explore Air 2 | Fine-Point Blade | Iron-On preset | 300 | 1 |
| Silhouette Cameo 4 | AutoBlade | Force: 8-10 | 5 | 1 |
Following these Siser EasyWeed heat transfer vinyl instructions for cutting gives you a clean kiss cut through the vinyl layer without scoring the carrier sheet underneath. After the cut finishes, lift a small corner of the design. If the vinyl pulls away cleanly without the carrier sheet wrinkling or tearing, your settings are correct. If the vinyl resists or tears, increase blade pressure slightly and run a second test on a scrap piece before committing to the full sheet.
Step 2. Weed cleanly and prep the garment
Weeding is the process of removing the unwanted vinyl from around your cut design, leaving only the artwork on the carrier sheet. Poor weeding technique tears design edges, leaves behind stray vinyl fragments, and creates visible defects in the finished transfer. Take your time here. A design that is two inches wide can take less than a minute to weed properly, but rushing it almost always means pulling up part of the design itself.
How to weed EasyWeed correctly
Start at a corner of your design rather than the centre. Slide the tip of your weeding hook under the excess vinyl and pull it back at a low angle, keeping the motion slow and consistent. Lifting at a steep angle puts tension on the cut edges and tears fine details. For designs with small interior cutouts, like the centres of letters such as "O" or "A", use the hook tip to lift each piece individually rather than trying to pull them all at once.
If a piece of vinyl you want to keep starts to lift, press it back down gently with your fingertip and re-approach from a different angle with your weeding tool.
Work in good lighting so you can clearly see the cut lines. A light pad placed underneath the vinyl makes the cuts visible on darker colours and helps you avoid missing small pieces. Once weeding is complete, hold the carrier sheet up to the light to confirm no stray vinyl remains outside the design boundary.
Prepping the garment before you press
Garment preparation directly affects how well the vinyl bonds. Lay your garment on a flat, hard pressing surface and use a lint roller to remove any dust, fibres, or debris from the area where you will press. Even small particles under the vinyl create raised spots that prevent a clean bond.
Pre-press the garment for three to five seconds with your heat press or iron before placing the vinyl. This step removes moisture and wrinkles from the fabric, giving you a flat, dry surface that the adhesive can grip properly. Following these Siser EasyWeed heat transfer vinyl instructions for garment prep takes under a minute but makes a measurable difference in how well the transfer holds through repeated washes.
Step 3. Press EasyWeed with a heat press
A heat press delivers consistent temperature and even pressure across the entire design, which is why it produces more reliable results than a home iron. Place your weeded design on the prepped garment with the carrier sheet facing up and the vinyl side down against the fabric. Position it exactly where you want it before applying heat, because once the adhesive contacts the fabric under pressure, adjustments are nearly impossible.
Heat press temperature and time settings
The settings you use depend on the fabric content of your garment, not on guesswork. Cotton handles higher heat than polyester, and using the wrong temperature either fails to bond the vinyl or scorches the fabric underneath. Use the table below as your starting point, then adjust slightly if your specific press runs hot or cold.
| Fabric type | Temperature | Press time | Pressure |
|---|---|---|---|
| 100% cotton | 305°F / 150°C | 10-15 seconds | Medium-firm |
| 50/50 cotton-poly blend | 290°F / 143°C | 10-15 seconds | Medium-firm |
| 100% polyester | 270°F / 130°C | 10-15 seconds | Medium |
| Nylon | 270°F / 130°C | 10 seconds | Light-medium |
These settings align with the official Siser EasyWeed heat transfer vinyl instructions and apply to a standard clamshell or swing-away heat press with a firm lower platen. If your press is older or the platen surface has worn unevenly, add one to two seconds to compensate for pressure inconsistencies.
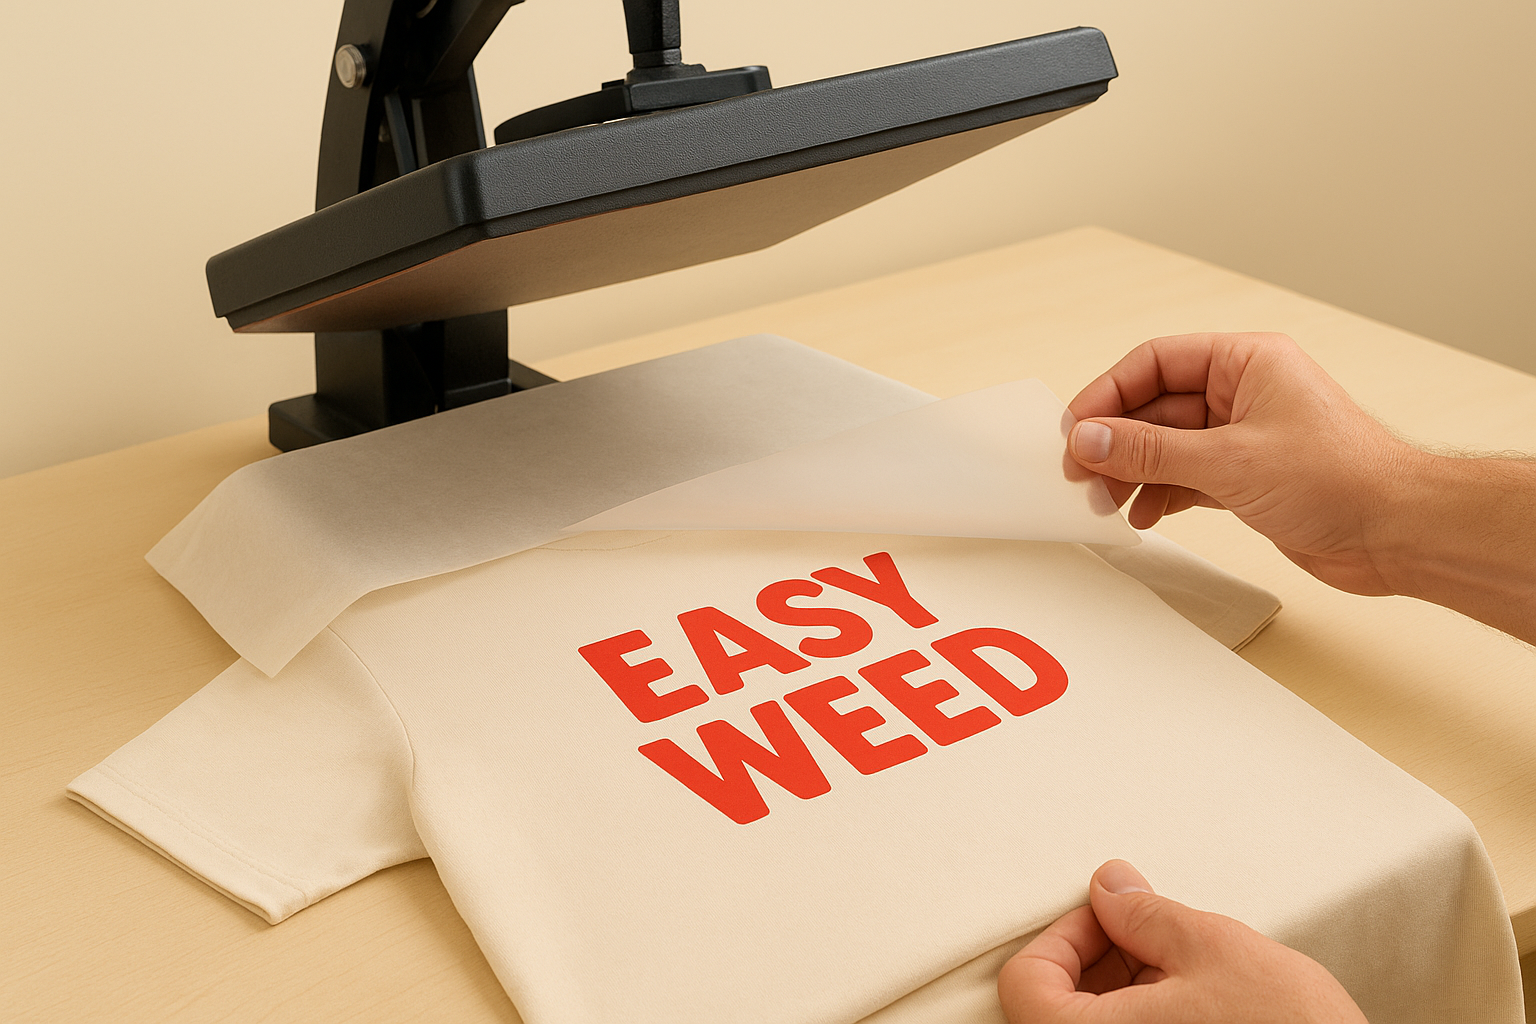
How to complete the press
Cover the design with a Teflon sheet or parchment paper before you lower the press. This protects the vinyl surface from direct platen contact and prevents unwanted sheen or texture changes on the finished transfer. Lower the press firmly and start your timer the moment the platen makes contact.
Do not lift the press mid-cycle to check progress. Breaking the press early interrupts the bond while the adhesive is still in a semi-liquid state, which causes partial adhesion and peeling after the first wash.
Once the timer finishes, lift the press and peel the carrier sheet back while the vinyl is still warm. EasyWeed is a warm peel material. Pull the carrier at a low angle rather than straight up. If the vinyl starts to lift with the carrier, lay the carrier back down, press for three to five more seconds, and try again.
Step 4. Apply EasyWeed with an iron or EasyPress
A heat press is the most reliable tool for HTV, but a home iron or Cricut EasyPress gets the job done when that’s what you have available. Following the Siser EasyWeed heat transfer vinyl instructions for these tools requires more attention than using a heat press, because neither delivers perfectly even pressure or a consistent temperature reading across the full surface. Understanding the limitations of each tool before you start helps you compensate for them and still get a durable result.
Home iron settings
Your iron needs to reach the right temperature for the fabric you’re pressing, and most irons don’t display exact temperatures. As a guide, the cotton setting on a standard household iron reaches approximately 400°F / 200°C, which is too hot for EasyWeed on polyester. Set your iron to the cotton setting for 100% cotton garments and the permanent press or medium setting for blends and synthetics.
| Fabric type | Iron setting | Press time |
|---|---|---|
| 100% cotton | Cotton (high) | 15-20 seconds |
| 50/50 blend | Permanent press | 15-20 seconds |
| 100% polyester | Synthetic / low | 15-20 seconds |
Turn off the steam function completely before you press. Steam creates moisture under the vinyl and prevents the adhesive from bonding properly to the fabric fibres.
Cricut EasyPress settings
The EasyPress gives you more temperature control than a standard iron and a larger contact surface, which makes it a solid option between a household iron and a full heat press. Set the temperature to match the fabric type using the same ranges from the heat press section, but add five seconds to each press duration to compensate for the lower platen pressure compared to a commercial press.
Press the EasyPress straight down and hold it steady without rocking or sliding it across the design. Movement during the press shifts the vinyl and blurs the edges.
How to press with an iron or EasyPress
Place your weeded design carrier-side up on the pre-pressed garment and cover it with parchment paper before you apply any heat. This protects the vinyl surface from direct contact. Apply firm, steady downward pressure and work the iron in small, overlapping circles across the entire design to cover every edge evenly.
Once the time is up, peel the carrier sheet back at a low angle while the vinyl is still warm, exactly as you would after a heat press cycle. If any part of the design lifts with the carrier, lay it back down, press for an additional five seconds, and try again.
Troubleshooting and wash care that prevents peeling
Even when you follow the Siser EasyWeed heat transfer vinyl instructions carefully, issues can still appear. Most problems trace back to one of three causes: incorrect temperature, insufficient pressure, or poor garment prep. Knowing what to look for after the press saves you time and helps you fix mistakes before they become permanent.
Common problems and how to fix them
The table below covers the most frequent issues and what adjustments to make. Each fix is specific, so you can diagnose the exact problem rather than guessing.
| Problem | Likely cause | Fix |
|---|---|---|
| Edges lifting after peel | Temperature too low or press time too short | Re-press for 5 seconds with a Teflon sheet, then warm peel again |
| Vinyl pulls off with carrier | Adhesive did not fully activate | Lay carrier back down, add 3-5 seconds, increase pressure slightly |
| Cracking after first wash | Fabric stretched during pressing or heat too high | Press on a firm surface, lower temperature by 10°F for the next piece |
| Blurry or shifted design edges | Vinyl moved during pressing | Hold design in place with heat-resistant tape before lowering the press |
| Vinyl peeling at corners | Pressure was uneven across the design | Re-press corners individually with firm, direct pressure for 5 seconds |
If the vinyl lifts cleanly off the fabric after pressing without leaving any adhesive residue, the surface temperature of your press is almost certainly too low, even if your display reads the correct setting.
Wash care that keeps the transfer intact
How you wash a pressed garment has just as much impact on transfer longevity as the application process itself. A correctly pressed EasyWeed design will last through dozens of washes when you follow the right care routine.
Turn the garment inside out before every wash. This protects the vinyl surface from direct friction against other items in the drum. Wash in cold water on a gentle cycle and avoid high-heat tumble drying, since sustained heat breaks down the adhesive bond over time. Lay the garment flat to dry or use a low-heat dryer setting. Never iron directly over the vinyl design, and keep the garment away from dry-cleaning chemicals, which strip the adhesive layer entirely.
You are ready to press
You now have everything you need to work through the full Siser EasyWeed heat transfer vinyl instructions from the first cut to the final peel. Mirror your design, cut at the right pressure, weed carefully, prep the garment, apply consistent heat and firm pressure, and follow the wash care rules to keep the transfer intact wash after wash. Every step builds on the one before it, so skipping any part of the process is where most problems start.
If you want a professional result without the trial and error, Apex Workwear produces custom apparel using commercial-grade equipment on your behalf. No minimum orders, fast turnaround, and free local shipping across the GTA mean you get print-ready garments delivered without the setup time. Whether it’s a single piece or a bulk run for your team or business, we handle the whole process for you. Get a custom apparel quote from Apex Workwear and have your order in motion within 24 hours.