You hit print, wait for the page to roll out, and the result looks like someone smeared vaseline across your design. Frustrating, right? If you’ve been searching for how to avoid blurry prints, the fix is usually simpler than you’d expect. The problem almost always traces back to one of two places: your printer’s hardware settings or the quality of your source file.
At Apex Workwear, we produce thousands of custom prints, from apparel graphics to business cards, banners, and signage, so sharp, accurate output is something we think about daily. That hands-on experience has taught us exactly where things go wrong, whether it’s on a commercial press or a home printer.
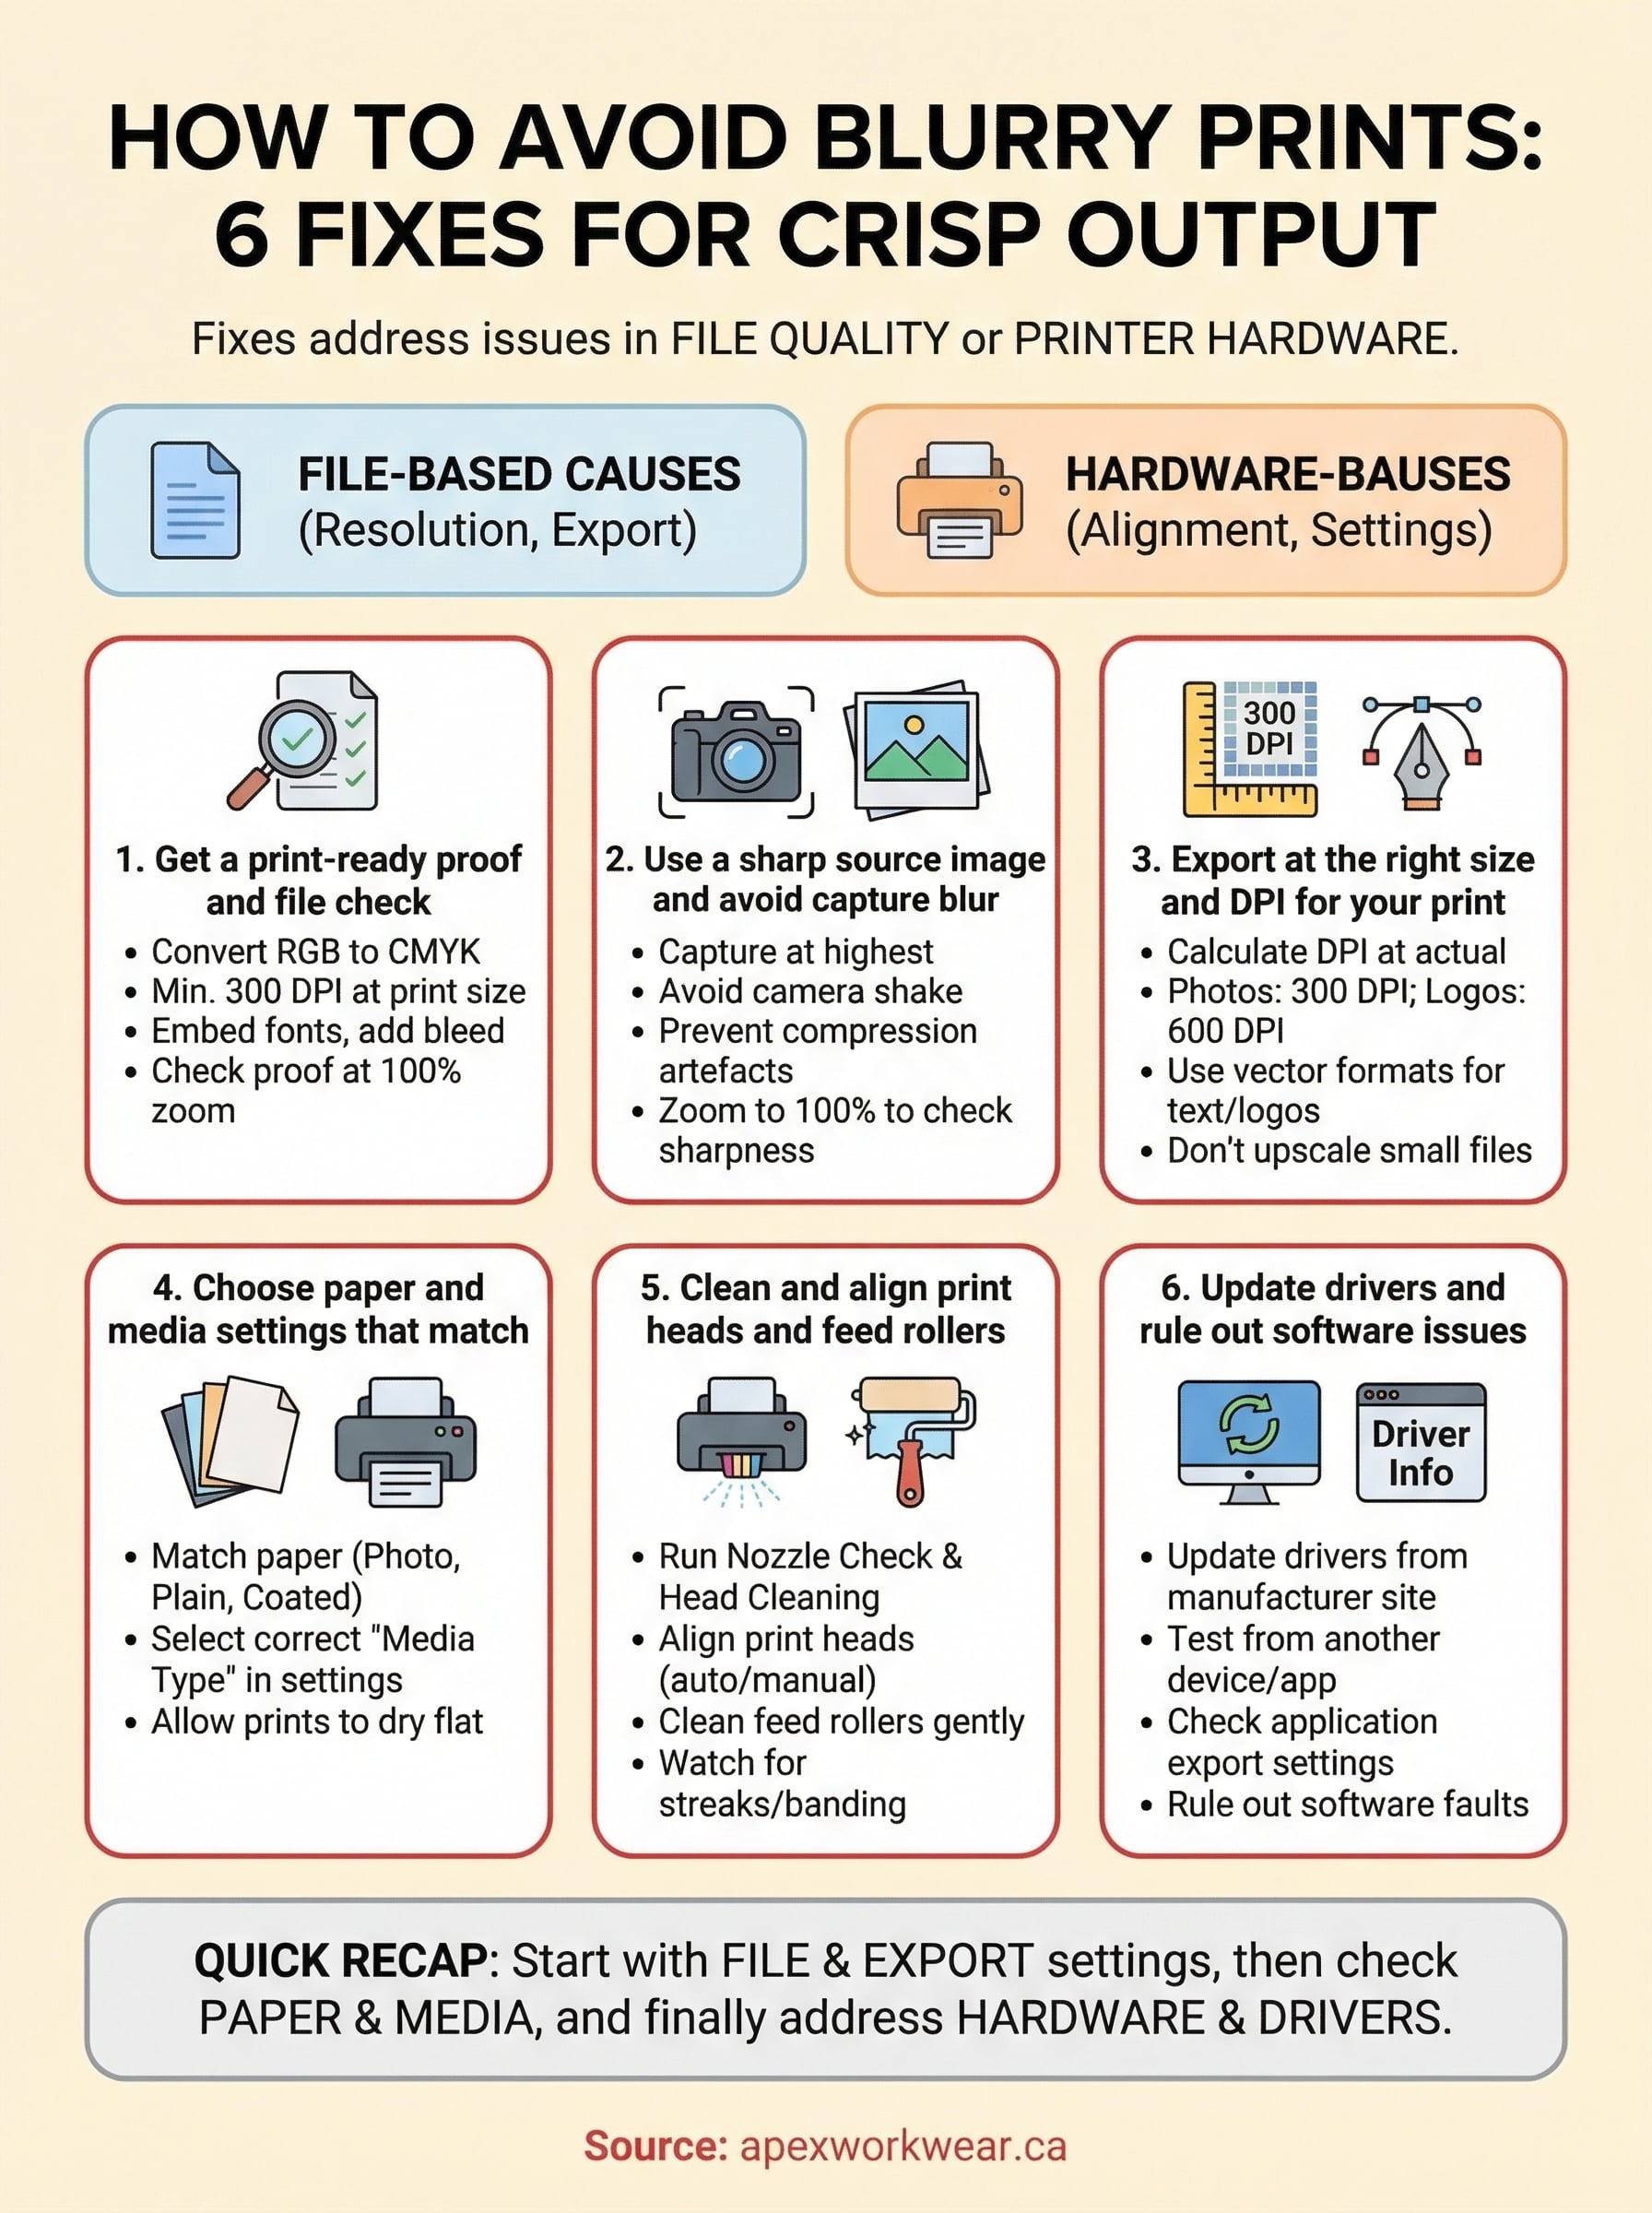
Below, we’ll walk you through six practical fixes that cover everything from DPI and resolution basics to printhead alignment and driver settings. Each one targets a specific cause of blurry output, so you can diagnose the issue fast and get back to printing clean, crisp results.
1. Get a print-ready proof and file check
Before you look at your printer hardware, start with your file. Most blurry prints come from a source file that was never print-ready to begin with, so catching issues at this stage saves you wasted ink, paper, and time.
What this fix prevents
Sending a flawed file straight to your printer locks in problems you cannot fix once the job runs. Low-resolution artwork and RGB colour files not converted to CMYK both produce output that looks soft, smeared, or off-colour. Catching these issues first is one of the most direct answers to how to avoid blurry prints at source.
What to check in your file before you print
Run through these checks on your file before you send it to any printer. File issues are the most common cause of blur, and most of them take less than five minutes to correct once you know what to look for:
- Resolution: minimum 300 DPI at final print size for photos; 600 DPI or higher for text and logos
- Colour mode: convert RGB files to CMYK for physical print output
- Embedded fonts: outline or embed all fonts so they do not substitute on render
- Bleed and crop marks: add at least 3mm bleed if your design runs to the edge
- File format: export as PDF/X-1a or high-resolution TIFF rather than a screen-optimised JPEG
How a proof catches blur before you waste paper and ink
A soft proof on screen or a physical proof print lets you spot sharpness issues, colour shifts, and pixelation at actual size before you commit to a full run. Zoom into your digital proof at 100% view rather than scaling it to fit the screen, because zooming out hides the very pixel issues that will show up clearly on paper.
Always review a proof at 100% zoom before printing, because any soft or pixelated areas visible at that scale will appear just as clearly on the finished sheet.
When to use a local print partner like Apex Workwear
If you are producing something that needs to look professional, such as custom apparel, business cards, or signage, working with a print partner removes the guesswork entirely. Apex Workwear reviews every file before production and provides a digital proof at no extra cost, so blur from a bad source file gets caught before it ever reaches the press.
2. Use a sharp source image and avoid capture blur
Even a perfect printer setting won’t save a blurry source image. If the photo or graphic you’re printing was captured poorly or saved at a low resolution, no software fix will fully recover the lost detail. This is one of the most overlooked answers to how to avoid blurry prints.
What blur in the original file looks like
Motion blur from a shaky camera and compression artefacts from over-saved JPEGs are the two most common types. Both show up as soft edges, smeared fine detail, and muddy text that no amount of sharpening can fully reverse.
How to capture sharper photos for printing
To get sharp photos for print, focus on these three things at the point of capture:
- Use a tripod or brace your camera against a fixed surface to eliminate camera shake
- Shoot at the highest resolution your device supports so you have detail to work with
- Use a fast shutter speed in low light to prevent motion blur before it happens
Always capture at the largest file size your device supports, because you can crop down later but you cannot add back detail that was never there.
How to check sharpness properly on screen
Open your image and zoom to 100% in your editing software rather than fitting it to the window. At that scale, any soft or smeared areas become immediately obvious and will match what you see on the finished print.
When sharpening in editing helps and when it makes it worse
Unsharp mask or smart sharpen can recover subtle softness in an otherwise clean file, but applying it to a genuinely blurry image only amplifies artefacts rather than restoring true detail. Treat sharpening as a finish step, not a rescue tool.
3. Export at the right size and DPI for your print
Getting your export settings right is one of the most reliable ways to handle how to avoid blurry prints at the file level. Many people design at screen resolution and only realise the problem when the print comes out soft and pixelated.
How print size, pixels, and DPI actually relate
DPI stands for dots per inch, and it describes how many ink dots your printer lays down per inch of paper. The more pixels your file contains at a given print size, the higher the DPI and the sharper the output. A 1000px wide image printed at 10 inches wide equals just 100 DPI, which is far too low for clean print output.
![]()
Always calculate your DPI at the actual intended print size, not the size it appears on screen.
Simple DPI targets for common print products
Different products need different minimum resolutions. Use this as a quick reference:
| Product | Minimum DPI |
|---|---|
| Photos and flyers | 300 DPI |
| Business cards | 300-600 DPI |
| Logos and text | 600 DPI |
| Large-format banners | 150 DPI at final size |
How to resize without ruining detail
Always resize down from a larger file rather than scaling up a small one. Upscaling forces your software to invent pixels, which introduces artificial softness that looks worse in print than on screen.
Best export settings for photos, logos, and text
Export photos as high-quality TIFF or PDF files rather than compressed JPEGs. For logos and text, use vector formats like PDF or EPS where possible, since they scale to any size without any loss of sharpness.
4. Choose paper and media settings that match
Paper choice and printer media settings are easy to overlook when you’re thinking about how to avoid blurry prints, but they directly affect how ink sits on the surface and how sharp the final output looks.
Why the wrong paper makes prints look soft
Plain copy paper absorbs ink too quickly, which causes ink to spread and feather into the fibres before it dries. That spreading effect softens edges and fine detail, making even a well-prepared file look blurry on the finished sheet.
How to pick paper for photos, flyers, and documents
Match your paper to your content type and you’ll see an immediate improvement in sharpness:
- Photos: use a coated photo paper or gloss stock rated for your printer type (inkjet or laser)
- Flyers and marketing prints: a matte or silk coated stock holds fine text and colour blocks cleanly
- Documents and forms: standard 90gsm or 100gsm uncoated paper works well for text-only output
Which printer media settings matter most
Your printer uses the media type setting to control ink volume and drying time for each paper type. Always select the correct media type in your print dialogue before you run the job.
Selecting "plain paper" while printing on photo stock causes your printer to lay down too much ink, which bleeds and blurs the output.
How to prevent smudging and ink bleed
Allow prints to dry flat for at least 60 seconds before stacking or handling them. Handling wet inkjet prints immediately smears the surface and ruins fine detail that the file itself had perfectly preserved.
5. Clean and align print heads and feed rollers
Even a perfectly prepared file printed on the right paper can come out blurry if your printer’s physical components are dirty or misaligned. When you’ve ruled out file quality and paper settings, the hardware itself is the next place to check for how to avoid blurry prints.
The telltale signs of a printer-side blur
Printer-side blur has a distinct look compared to file-based softness. You’ll typically see streaks, banding, or one colour printing slightly offset from the others, which creates a faint ghost or halo effect around text and edges.
Watch for these specific symptoms before you start cleaning:
- Horizontal white gaps or lines running across solid colour areas
- Text that appears doubled or slightly smeared in one direction only
- One colour noticeably weaker or missing compared to others
How to run nozzle checks and head cleaning
Most inkjet printers include a built-in nozzle check you can run directly from the printer menu or through your computer’s printer utility. Print the nozzle pattern, inspect it for gaps or missing lines, then run a head cleaning cycle if you spot any.
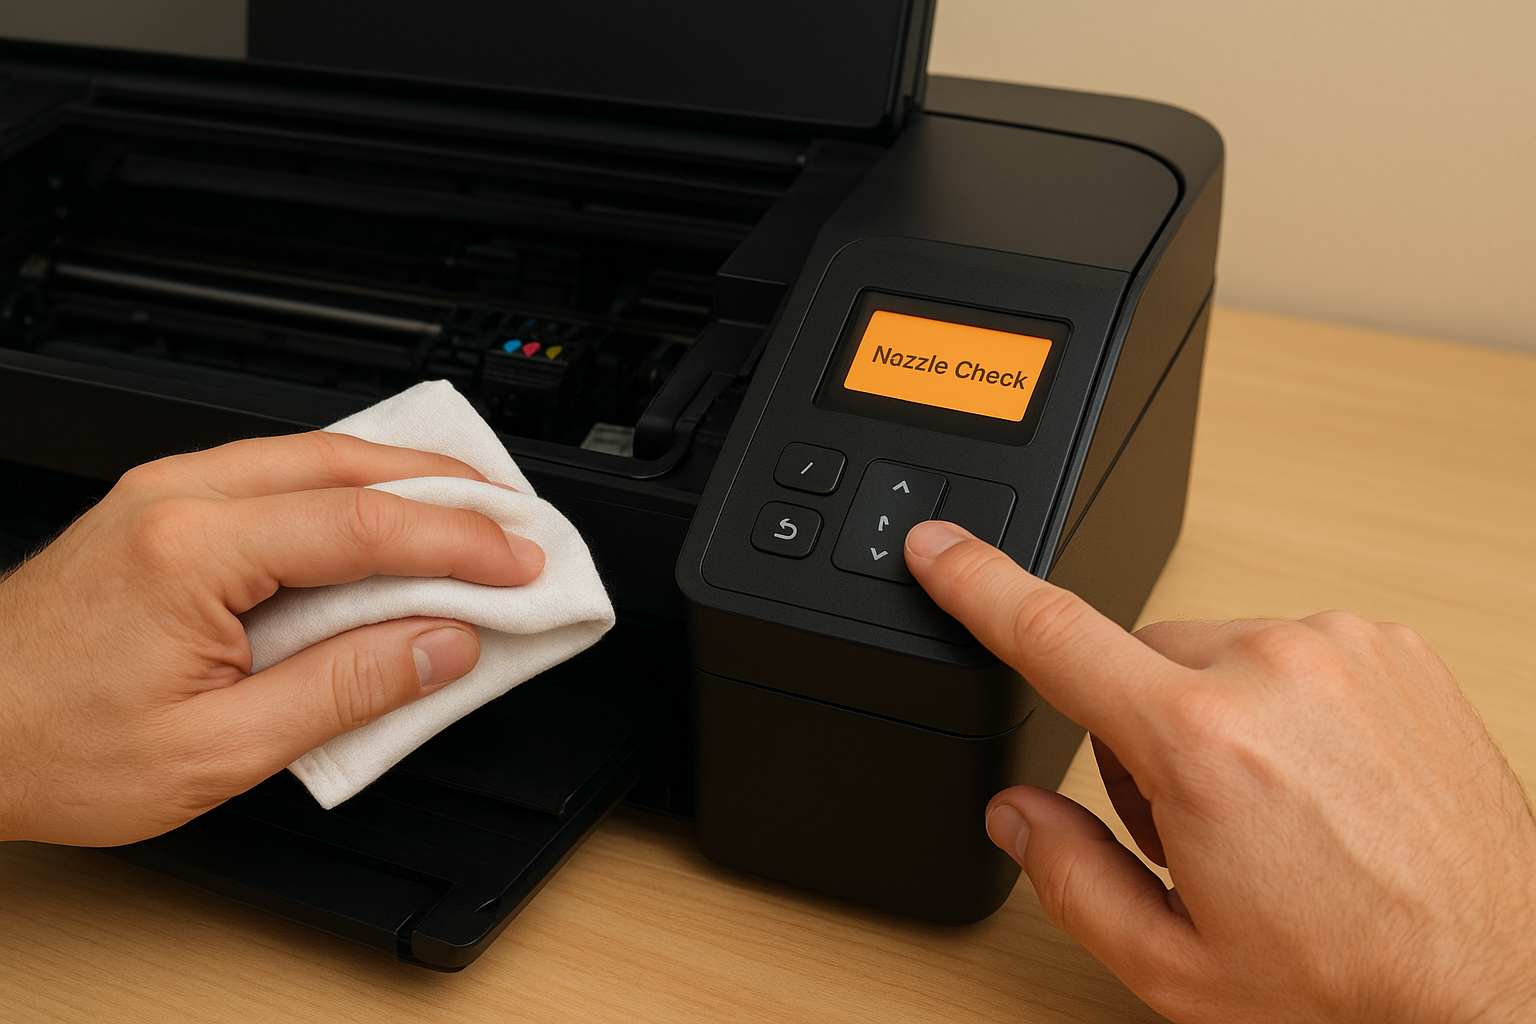
Run a nozzle check before every long print job, because blocked nozzles are one of the most common causes of banding and soft output.
How to align print heads for crisp text and lines
After cleaning, run the automatic printhead alignment tool from your printer’s maintenance menu. This tool prints a calibration page and, on most models, reads it automatically with a built-in sensor to correct any offset.
What to do if rollers, dust, or humidity cause blur
Dirty feed rollers can cause paper to slip mid-print, which smears an otherwise sharp image. Wipe the rollers gently with a lightly damp lint-free cloth, then let them dry fully before running another job. Keep your printer away from humid environments, since moisture warps paper and causes ink to spread before it sets.
6. Update drivers and rule out software issues
When your file is clean, your paper matches, and your printheads are aligned, a software or driver fault is often the last remaining culprit. Outdated or corrupted drivers misread your file and send incorrect instructions to the hardware, producing output that looks soft or misregistered even though nothing physical has changed.
Why blurry prints can be a driver or app problem
Your printer driver acts as the translator between your file and the physical hardware. If it is outdated or partially corrupted, it can misinterpret colour profiles, resolution settings, or paper dimensions, all of which contribute to blurry output. This is a common and fixable cause of how to avoid blurry prints being harder than it should be.
Always check your driver version before assuming a hardware fault, because a corrupted driver mimics symptoms that look identical to a broken printhead.
How to update drivers and firmware safely
Visit your printer manufacturer’s official support page directly and download the latest driver for your exact model. Avoid third-party driver sites entirely. Once installed, restart your computer and run a test print from a known-good file to confirm the update resolved the issue.
How to test from another device or file type
Print the same file from a different device or application to isolate whether the problem lives in your software or your printer. If the second device produces a clean result, the issue is in your original application’s export or print settings, not the hardware.
When hardware faults are likely and what to do next
If updating drivers and testing across devices still produces blurry or streaked output, the fault is most likely physical. Contact your manufacturer’s support line or arrange a professional service inspection before replacing the unit entirely.
A quick recap
Blurry prints almost always come from one of two places: a file that was never print-ready, or a printer that needs basic maintenance. Working through these six fixes in order, starting with your source file and export settings, then moving on to paper, hardware, and drivers, gives you a clear and logical path to clean output without guessing.
The fastest way to solve how to avoid blurry prints at home is to check your DPI, match your paper to your media settings, and run a nozzle check before anything else. Those three steps alone resolve the majority of cases.
If you need sharp, professional results for custom apparel, business cards, banners, or signage without managing any of this yourself, the team at Apex Workwear reviews every file, provides a digital proof, and handles production from start to finish, so you get crisp output every time.