Placing heat transfer vinyl the wrong way on your cutting mat wastes material and time, and it’s one of the most common beginner mistakes. The answer to which side of heat transfer vinyl goes down is straightforward once you know what to look for, but getting it wrong means your design won’t transfer properly onto the garment.
The short version: the shiny or glossy side (the carrier sheet) faces down on your cutting mat, and you cut into the dull or matte side, which is the actual vinyl. You also need to mirror your design before cutting, since the image gets flipped when you heat press it onto fabric.
At Apex Workwear, we produce custom apparel for businesses, teams, and individuals across Canada, so we understand the importance of proper technique when working with HTV. Whether you’re handling a small DIY project or testing designs before placing a bulk order with a professional printer, this guide covers exactly how to orient your vinyl, identify carrier sheets across different HTV types, and avoid the mistakes that ruin otherwise good work.
Know your HTV sides and key terms
Before you can answer which side of heat transfer vinyl goes down, you need to understand what you are actually working with. HTV is a two-layer material, and each layer has a specific job. Mixing them up leads to a ruined cut, a failed transfer, or vinyl that peels off after a single wash.
The two layers of HTV
Every piece of HTV has a carrier sheet and a vinyl layer. The carrier sheet is the stiff, shiny or glossy side you see when you unroll the material. It acts as a backing that holds the vinyl in place during cutting and protects the heat-activated adhesive underneath. The vinyl layer is the dull or matte side that faces up when you load the material onto your cutting mat. This is the side your blade actually cuts into.
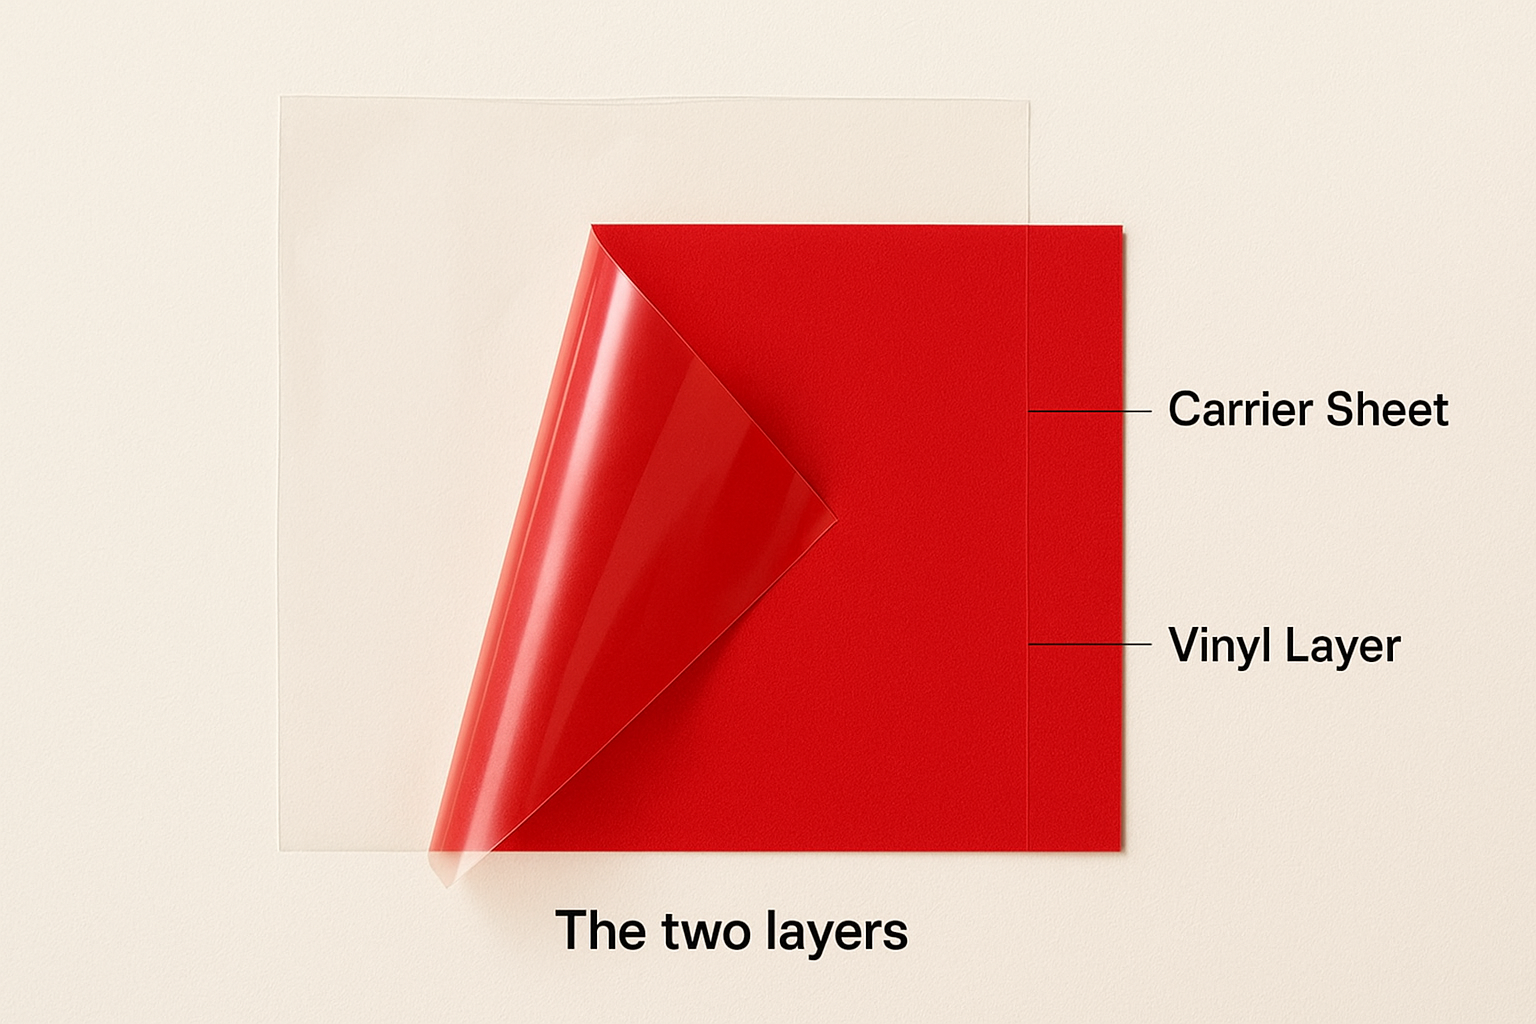
The carrier sheet always goes face down on the mat, and the matte vinyl side always faces up toward the blade.
When you peel the carrier sheet away after pressing, it lifts off cleanly and leaves the vinyl design bonded to your fabric. If you load the material the wrong way, your blade cuts through the carrier sheet instead of the vinyl, and the design either fails to transfer or falls apart completely.
Common HTV types and how their surfaces differ
Not all HTV looks and feels the same, and different finishes can make it harder to tell the sides apart. Knowing your specific material before you cut saves wasted stock and avoids frustration mid-project.
Here is a quick reference for the most common HTV types:
| HTV Type | Carrier Sheet (Shiny Side) | Vinyl Side (Matte Side) |
|---|---|---|
| Standard smooth HTV | Clear, glossy, stiff | Flat, slightly rubbery feel |
| Glitter HTV | Clear or frosted backing | Sparkly, textured surface |
| Flock HTV | Clear or white backing | Soft, velvety texture |
| Stretch HTV | Clear, flexible backing | Smooth, slightly stretchy |
| Foil HTV | Clear backing | Metallic, reflective surface |
With glitter and flock HTV, the matte rule gets less obvious because the vinyl side has heavy texture. In these cases, focus on identifying the clear or frosted carrier sheet rather than searching for a dull surface.
Why mirroring your design is non-negotiable
Mirroring is the step most people skip the first time, and it always results in a backwards design on the finished garment. When you cut HTV and then press it onto fabric, the vinyl flips 180 degrees. Any text, logo, or directional image will read in reverse unless you mirror it before sending the file to the cutter.
Your cutting software, whether it is Cricut Design Space, Silhouette Studio, or another programme, has a mirror or flip horizontal option built in. Always activate it before cutting HTV. The only exception is when you are working with a design that looks identical in both directions, such as a solid-colour geometric shape with no text and no asymmetric details.
Understanding these two layers and the mirroring requirement gives you a solid foundation for every HTV project. Once you can spot the carrier sheet from the vinyl side at a glance, loading the mat correctly becomes instinctive.
HTV vs adhesive vinyl at a glance
People often confuse HTV with adhesive vinyl because both materials come on a roll, both have a carrier layer, and both get cut on a vinyl cutter. However, they work in completely different ways, and loading them incorrectly on the mat will ruin your cut. Understanding the distinction also helps clarify why the question of which side of heat transfer vinyl goes down has a different answer than the same question for adhesive vinyl.
How HTV bonds to fabric
HTV uses heat and pressure to bond permanently to fabric. The adhesive on the underside of the vinyl layer activates when you apply a heat press or iron, fusing the design directly into the fibres of the garment. This means the vinyl side must face up on your cutting mat so the blade cuts through it cleanly, while the carrier sheet sits between the vinyl and the mat to protect the adhesive until you are ready to press.
Never pre-peel the carrier sheet before pressing, as it holds your weeded design in the exact position you need during the transfer.
How adhesive vinyl differs
Adhesive vinyl bonds to hard, smooth surfaces like mugs, windows, and signage using a pressure-sensitive adhesive rather than heat. With adhesive vinyl, the roles of the layers reverse: the glossy paper backing faces up on the mat and the vinyl itself faces down, with the adhesive resting against the mat. You cut through the vinyl layer from the top, which is the opposite loading orientation to HTV.
Here is a side-by-side comparison to keep handy:
| Feature | HTV | Adhesive Vinyl |
|---|---|---|
| Bonding method | Heat and pressure | Pressure-sensitive adhesive |
| Best surfaces | Fabric and garments | Hard, smooth surfaces |
| Carrier sheet on mat | Face down (shiny side down) | Face up (backing side up) |
| Vinyl side on mat | Faces up | Faces down |
| Mirror before cutting? | Yes, always | No |
| Transfer tool needed | Heat press or iron | Application tape |
Keeping this table as a reference prevents costly material waste when you switch between product types mid-project. Grabbing the wrong vinyl type or loading it the wrong way is far easier to do than most people expect, particularly when you are working under a tight deadline or managing multiple designs at once.
Step 1. Identify the carrier sheet and vinyl side
Before you answer which side of heat transfer vinyl goes down on your cutting mat, you need to physically examine your material. Pull out a piece and hold it under a direct light source so you can see how each surface behaves. One side will catch and reflect the light clearly, and that reflective surface is your carrier sheet. The duller side facing away from the light is the vinyl, and that is the side your cutting blade needs to reach. Getting this identification right before you ever load the mat saves you from wasted stock and a failed design.
The touch test
Your fingers give you a reliable second confirmation. Run your fingertip slowly across both surfaces of the HTV. The carrier sheet feels stiff, smooth, and plastic-like, similar to the slick surface of a laminated card. The vinyl side feels slightly rubbery or softly tacky by comparison, particularly near cut edges where the heat-activated adhesive sits close to the surface.
If you are still unsure after the touch test, flex the material gently between your hands. The carrier sheet resists bending noticeably more than the vinyl layer does.
With glitter or flock HTV, the tactile difference becomes even more obvious. The sparkly or velvety surface is always the vinyl side that faces up, while the flat, clear backing is the carrier sheet that goes face down onto the mat.
The visual check
Look at the corners and edges of your HTV sheet or roll before you load anything. On a freshly trimmed piece, you can often see the two layers separating slightly at a corner, which makes identification immediate without any guesswork. The clear or frosted layer peeling away from the coloured material is always your carrier sheet.
Hold the piece up to a window or a lamp and use the light as your tool. The carrier sheet is semi-transparent, so you can see the design colour faintly through it from the back. The vinyl side holds the pigment and appears opaque and solid when viewed from its own surface. Use this light trick any time you pick up an unfamiliar HTV brand or finish, since surface appearance varies between manufacturers more than most beginners expect. Once you identify these characteristics on a single piece, you will recognise them on every roll you open going forward.
Step 2. Load HTV on the mat the right way
With the carrier sheet and vinyl side identified, you are ready to load your material onto the cutting mat. Place the HTV with the shiny carrier sheet facing down against the adhesive surface of the mat, and the dull vinyl side facing up toward the blade. This is the direct answer to which side of heat transfer vinyl goes down: the shiny side always meets the mat. Press the material down firmly from one edge to the other to remove air pockets and prevent the sheet from shifting mid-cut.
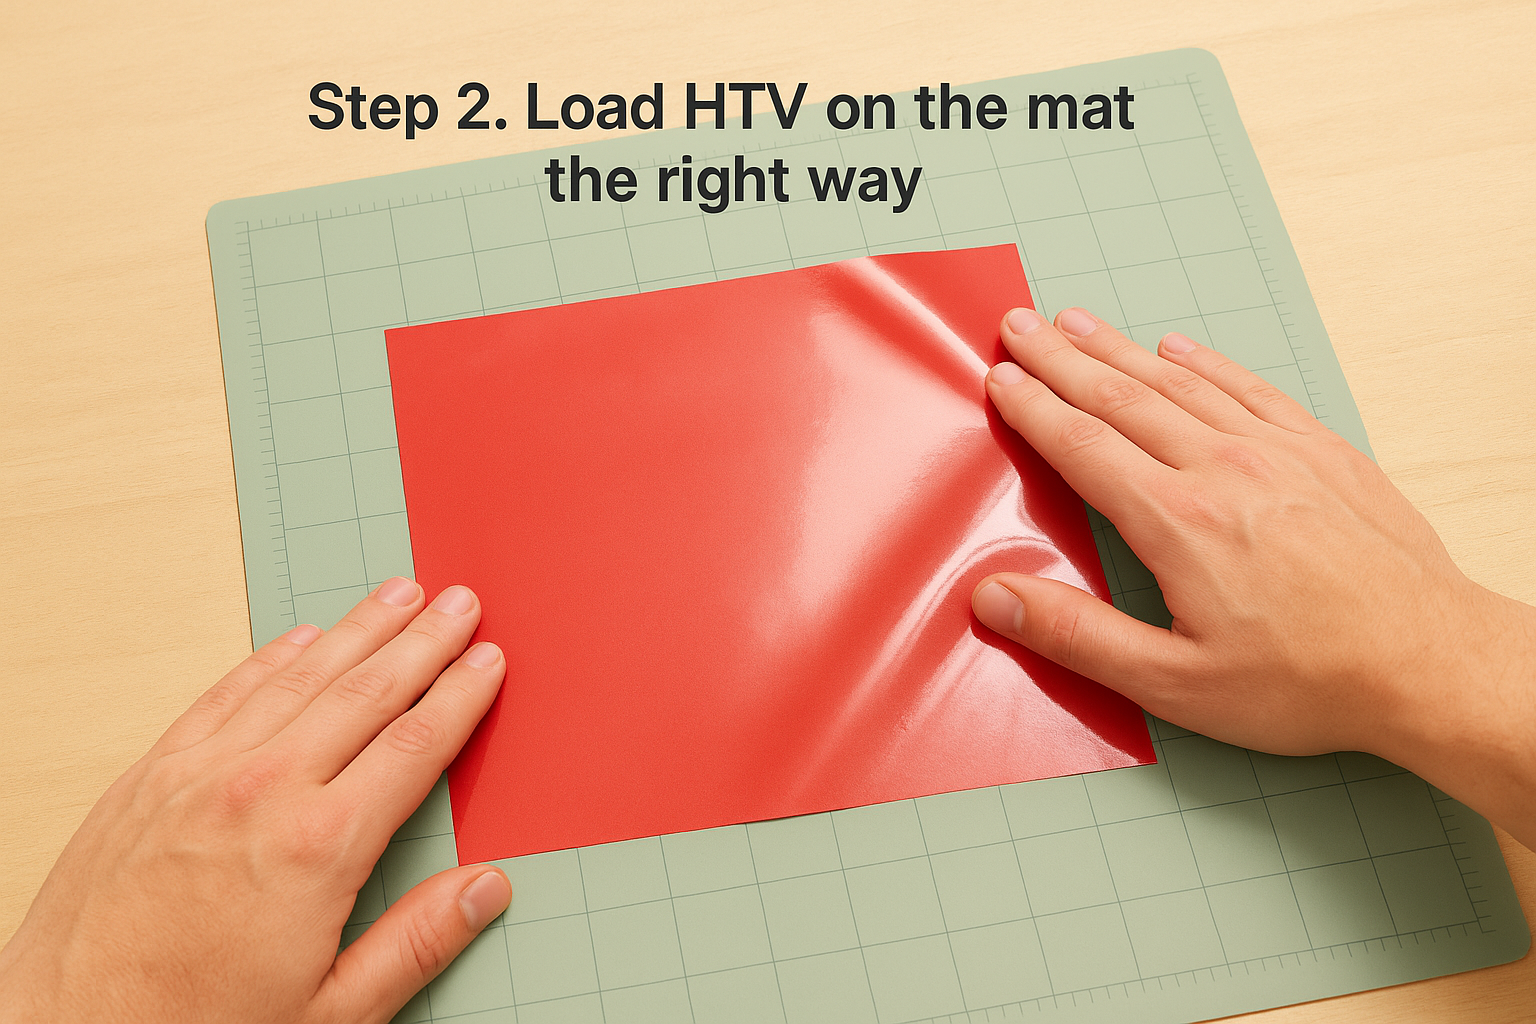
A single lifted corner during cutting is enough to cause the blade to skip, tear the vinyl, or produce an uneven cut depth across the entire design.
Align the material correctly on the mat
Proper alignment avoids wasted vinyl and reduces the chance of your design running off the edge of the material. Follow these steps each time you load a new sheet:
- Line up the top edge of your HTV with a horizontal grid line on the mat, typically the first full line below the top edge.
- Align the left edge of the material with the leftmost vertical grid line so your cutter’s rollers grip it evenly.
- Smooth the sheet down using a brayer or the edge of a credit card, working from the centre outward to push out any air.
- Check that no corners are lifting before you feed the mat into the machine.
- Load the mat into the cutter so the rollers sit on the mat itself, not on the exposed vinyl.
Taking 30 extra seconds to align the sheet correctly saves you from reprinting the entire design.
Set the correct blade depth and pressure
Your blade depth and cutting pressure determine whether the cut goes cleanly through the vinyl layer without slicing into the carrier sheet. Cutting too deep severs the carrier, which causes your design to fall apart during weeding. Cutting too shallow leaves the vinyl partially attached and tears it when you try to weed.
Most standard smooth HTV cuts well at a blade depth of 1 to 1.5 on a Cricut or at a force setting of 160 to 180 grams on a Silhouette. Always run a test cut on a scrap piece of the same material before committing to your full design, and adjust in small increments until the blade cuts cleanly through the vinyl but leaves the carrier sheet intact underneath.
Step 3. Mirror, cut and weed cleanly
Once you know which side of heat transfer vinyl goes down and your material is loaded correctly, the next two actions are mirroring your design and making a clean cut before you weed. Both steps must happen in the right order, and skipping either one produces a result you cannot fix after the fact.
Mirror your design before sending to the cutter
Open your design file in your cutting software and activate the mirror or flip horizontal function before you send anything to the machine. This step reverses your design left to right so that when you press it onto fabric and flip the carrier sheet away, text and logos read in the correct direction. Most cutting programmes place this option in the print or cut settings panel, labelled as "Mirror" in Cricut Design Space or found under the Fill panel in Silhouette Studio.

Mirroring is the step most people forget on their first HTV project, and the only fix after pressing a backwards design is cutting a new one entirely.
Confirm the mirror is active by looking at any text in your design on screen. It should appear reversed and unreadable from your normal reading direction. If your text still reads normally on screen, the mirror setting is off and you need to activate it before cutting anything.
Weed the cut vinyl cleanly
After the cut finishes, lift the mat gently from the machine and inspect the cut lines before you begin weeding. Clean, continuous cuts indicate the blade went fully through the vinyl without breaking the carrier sheet underneath. Run your fingernail lightly along a cut edge to confirm it lifts freely without resistance.
Use a weeding hook or fine-point tool to remove the excess vinyl from around your design. Work from the outer edges inward and take your time on tight corners or small interior pieces. Pulling too fast tears the design, while pulling at a shallow angle keeps the vinyl intact.
Follow these weeding steps for consistent results:
- Peel away large background areas first to clear the bulk of the material quickly.
- Use the hook tip to lift small pieces from corners and fine details.
- Hold the carrier sheet flat against a hard surface while weeding to stop the design from shifting.
- Check the finished design against a light source to spot any missed pieces before you move to pressing.
Step 4. Press, peel and care for the finished item
Knowing which side of heat transfer vinyl goes down sets the foundation, but the heat press stage determines whether your design bonds permanently or lifts at the edges after a few washes. Apply consistent pressure across the entire design, and make sure your garment is pre-pressed for three to five seconds before you lay the weeded vinyl on top. Pre-pressing removes moisture and wrinkles that would otherwise create an uneven bond.
Set the correct temperature and time
Different HTV types require different heat settings, and using the wrong temperature is one of the quickest ways to ruin a finished garment. Standard smooth HTV typically presses at 150 to 160 degrees Celsius for 10 to 15 seconds at medium-to-firm pressure. Check the manufacturer’s data sheet for your specific material, since glitter, flock, and stretch HTV each have their own tolerances that can vary by 10 to 20 degrees from standard settings.
| HTV Type | Temperature | Time | Pressure |
|---|---|---|---|
| Standard smooth | 150-160°C | 10-15 sec | Medium-firm |
| Glitter | 160-170°C | 15-20 sec | Firm |
| Flock | 150°C | 10-12 sec | Medium |
| Stretch | 140-150°C | 8-12 sec | Medium |
| Foil | 160°C | 10-15 sec | Firm |
Peel hot or cold correctly
Your HTV packaging will specify whether the material is a hot peel or cold peel product, and following this instruction matters more than most people realise. Hot peel HTV lets you remove the carrier sheet immediately after pressing while the vinyl is still warm. Cold peel HTV requires you to let the garment cool completely to room temperature before you pull the carrier away, because peeling early causes the design edges to lift and the bond to weaken permanently.
Peeling at the wrong temperature is the most common cause of HTV lifting at the edges, even when the press settings were correct.
If you are unsure which type you have, default to cold peel to protect the bond, then re-press for five seconds if any edges feel loose after peeling.
Care for HTV garments
Once the design is on, proper washing habits keep it intact for years. Turn the garment inside out before loading the machine to protect the vinyl surface from direct friction against other fabrics in the drum.
Follow these care steps each time you wash an HTV garment:
- Wash in cold water on a gentle cycle
- Turn the garment inside out before every wash
- Avoid fabric softeners, which break down the adhesive bond over time
- Do not tumble dry on high heat; use low heat or air dry
- Hang or lay flat to dry whenever possible
Quick recap and next steps
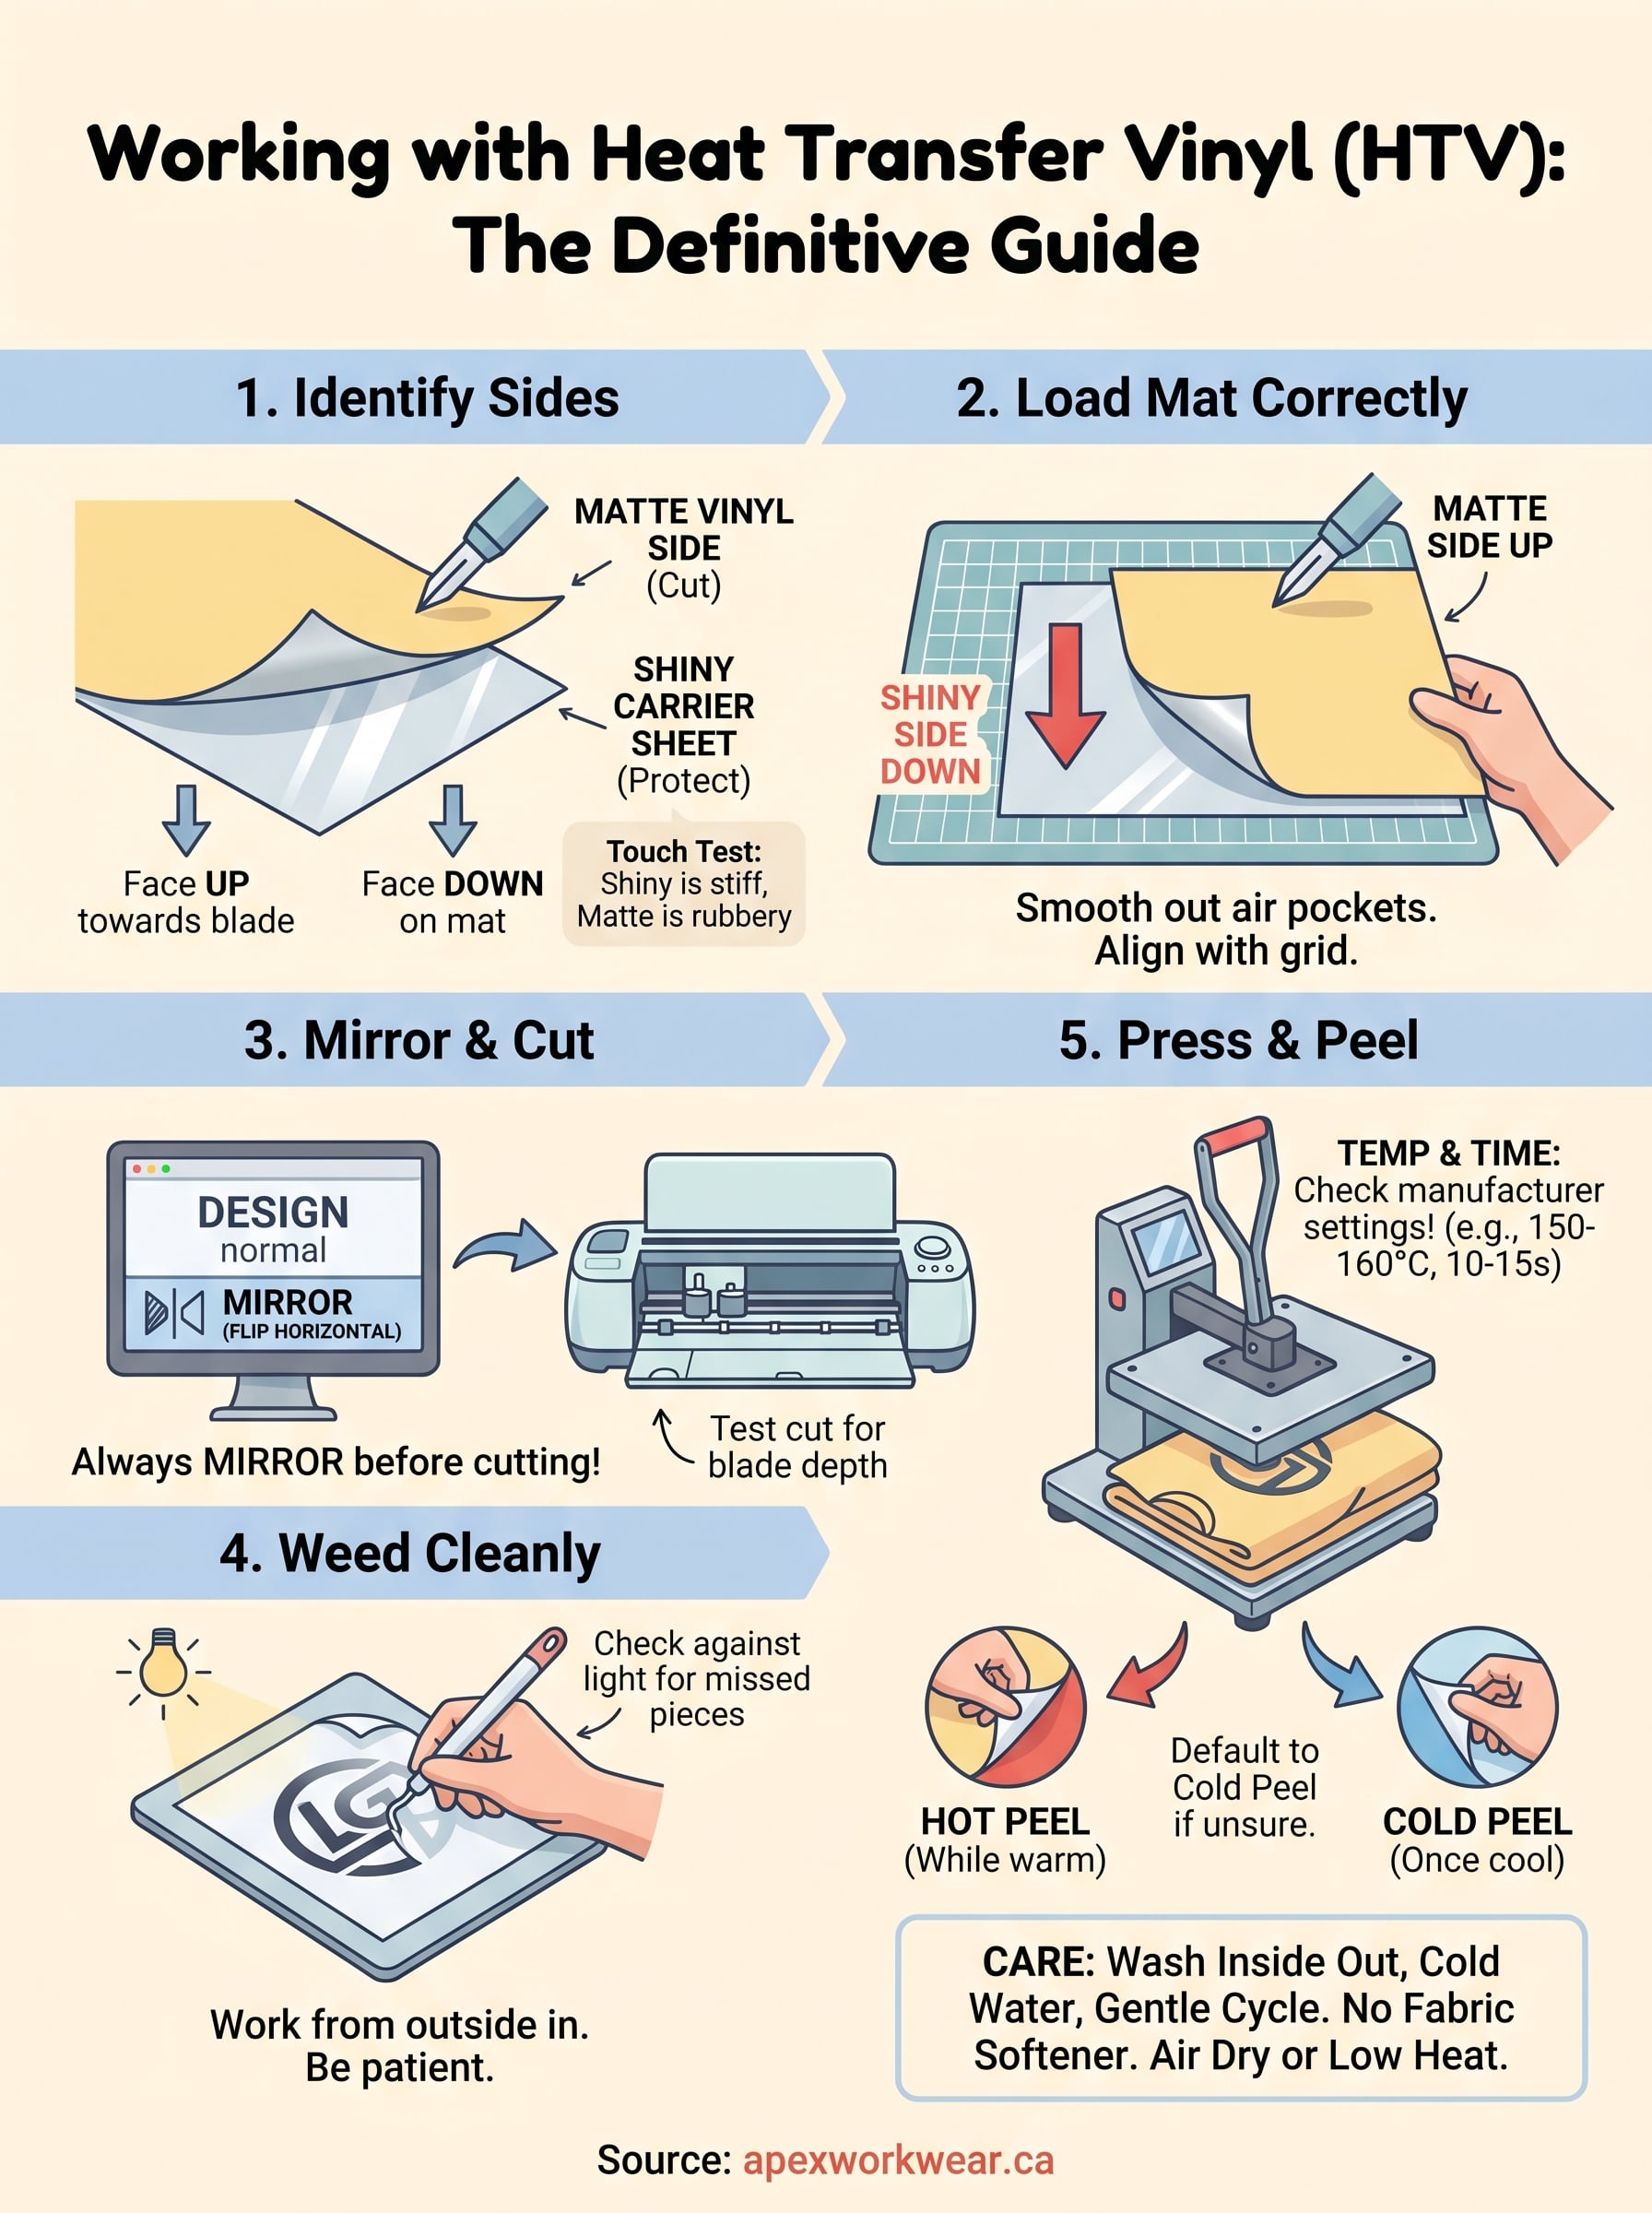
The answer to which side of heat transfer vinyl goes down is always the same: the shiny carrier sheet faces the mat, and the dull vinyl side faces up toward the blade. Mirror your design before cutting, set the correct blade depth for your specific HTV type, weed carefully, and press at the right temperature and time. Peel hot or cold according to the manufacturer’s instructions, then wash the finished garment inside out on a cold cycle to keep the design intact long term.
If you want professional results without managing materials, settings, and equipment yourself, working with a print and apparel specialist removes the guesswork entirely. At Apex Workwear, we handle custom garments for businesses, teams, and contractors across Canada with fast turnaround and no minimum order requirements on select products. Visit Apex Workwear to get a free quote within 24 hours and see what we can produce for your brand.