If you’ve searched for vistaprint sticker printing, you’re probably looking for a reliable way to get custom stickers made, whether for product labels, packaging, branding, or promotional handouts. Vistaprint is one of the most recognised online print platforms, and their sticker lineup includes sheets, rolls, singles, and vinyl decals in various shapes and sizes.
This guide walks you through the full process of designing and ordering stickers on Vistaprint, step by step. We cover choosing the right sticker type, uploading or building your design, selecting finishes, and placing your order, plus practical tips to avoid common mistakes that can delay production or affect print quality.
At Apex Workwear, we provide custom sticker and label printing from right here in Canada, alongside a full catalogue of print products and custom apparel. We wrote this guide because ordering stickers online shouldn’t feel confusing, no matter which provider you go with. Whether you’re comparing your options or just want a clear walkthrough before you order, everything you need is below.
What to decide before you start
Before you touch Vistaprint’s sticker builder or upload any artwork, you need to answer a few questions about what you actually need. Jumping straight into the design tool without a plan leads to picking the wrong format, ordering the wrong quantity, or getting a product that doesn’t hold up in its intended environment. A few minutes of planning upfront will save you from reprinting.
Know your use case first
Your use case determines almost everything else. Product labels that go on jars, bottles, or packaging need to withstand moisture, handling, and potentially heat, which points you toward vinyl or weatherproof materials. Promotional stickers handed out at events or included in orders can be standard paper stock. Decorative stickers for laptops or water bottles need a durable, waterproof finish. Write down exactly where your sticker will live and what it will be exposed to before you look at any product listings.
If your sticker will be handled, exposed to water, or stuck outdoors, standard paper stock won’t last more than a few weeks.
Pick your quantity and budget
Vistaprint sticker printing uses tiered pricing, so the more units you order, the lower your per-unit cost. Before you open the builder, decide on a realistic quantity. If you’re testing a new label design, a smaller run of 50 to 100 units makes sense. If you’re stocking up for a product launch or a trade show, ordering 500 or more brings the cost per sticker down significantly. Set a budget ceiling before you start so you don’t get drawn into add-ons or upgrades that push you past what you planned to spend.
| Quantity range | Best suited for |
|---|---|
| 25 to 100 | Testing designs, small events |
| 100 to 250 | Brand giveaways, product samples |
| 250 to 500 | Retail labels, packaging runs |
| 500+ | Bulk branding, wholesale stock |
Set your finish and material
Glossy finishes make colours pop and work well for product labels and promotional materials. Matte finishes give a more understated, premium look and are easier to write on if you need to add handwritten details like batch numbers or personalised notes. Beyond finish, material matters: paper stickers are cost-effective for indoor use, while vinyl holds up outdoors and on surfaces that get wet. Decide on both before you open the product builder so you’re not making these calls under pressure mid-order.
Step 1. Choose your sticker type and format
Vistaprint offers several distinct sticker products, and picking the wrong one early on means you’ll receive a product that doesn’t fit your actual need. Before you click anything in the vistaprint sticker printing builder, spend two minutes identifying which product category applies to your project.
Vistaprint sticker categories
Vistaprint groups their stickers into a few core formats. Sticker sheets give you multiple smaller stickers arranged on one sheet, which works well for variety packs or branding kits. Roll stickers are designed for high-volume label application, particularly for product packaging lines where you need to apply stickers quickly and consistently. Single stickers and vinyl decals are available for standalone pieces, such as logo stickers or window graphics.
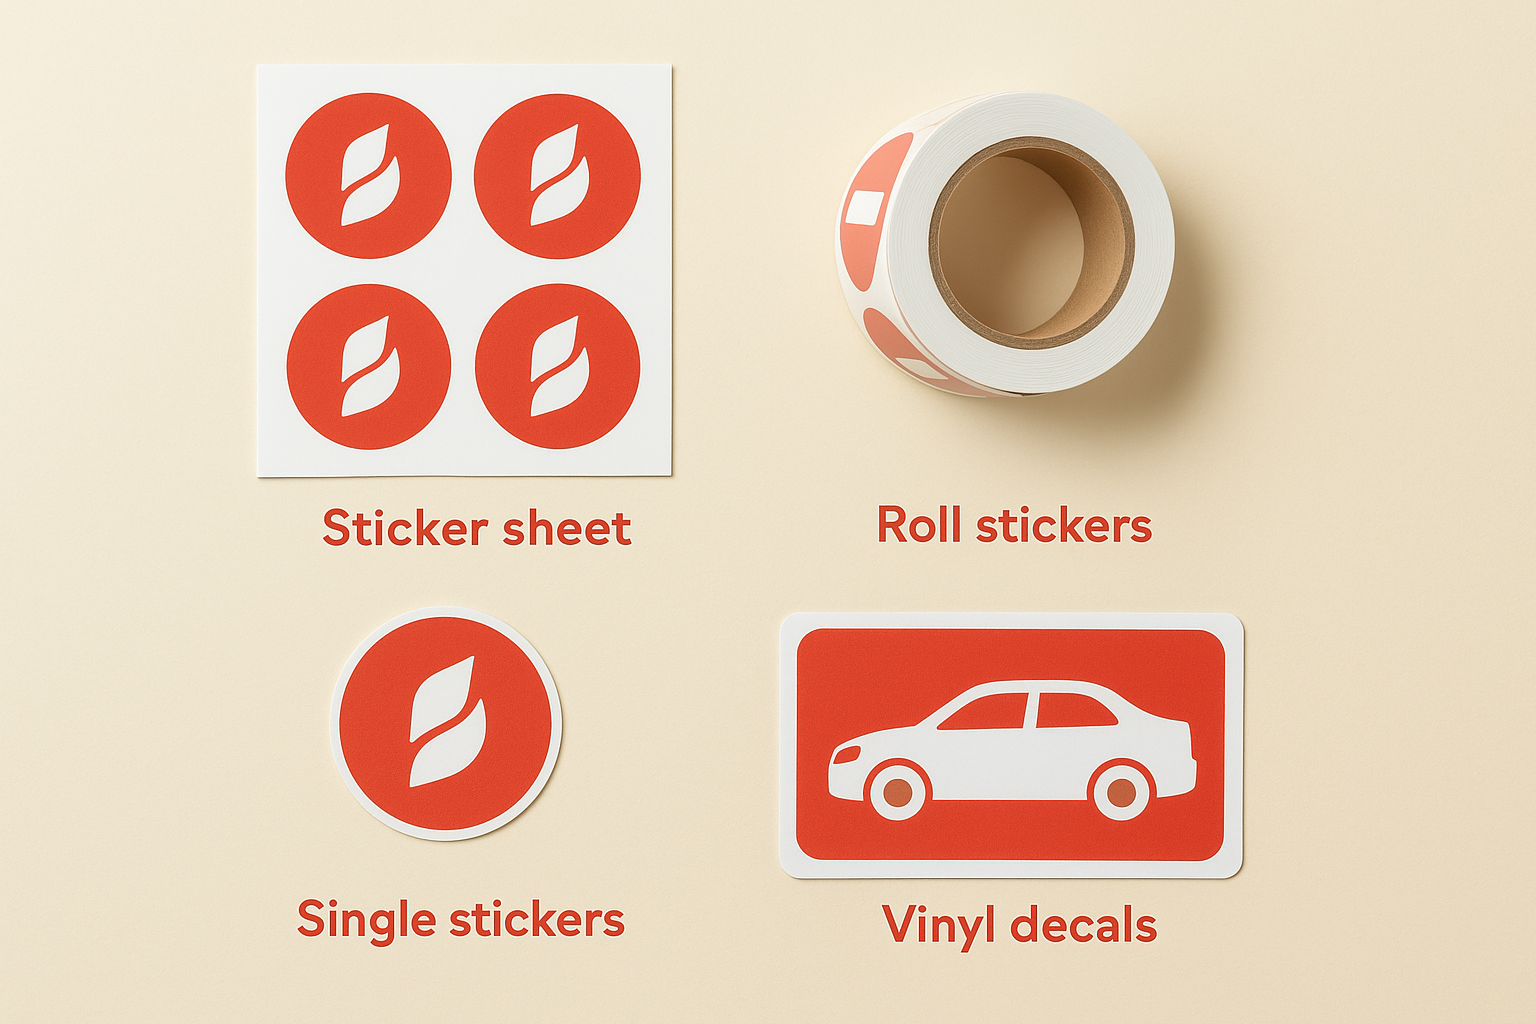
| Format | Best use |
|---|---|
| Sticker sheets | Variety packs, gift packaging inserts |
| Roll stickers | Product labels, batch packaging |
| Single stickers | Promotional giveaways, logo pieces |
| Vinyl decals | Outdoor signage, vehicle or window graphics |
Match format to your application
Shape and size are just as important as format type. Vistaprint lets you choose from standard shapes like circles, rectangles, and squares, or upload a custom die-cut shape that follows your artwork outline. If you need a clean, precise edge around a logo or icon, die-cut is the right call. For straightforward product labels where a consistent border looks intentional, a standard rectangle or circle will do the job without added cost.
Die-cut stickers cost more per unit, but they look significantly more polished on finished products and packaging.
Once you know your format and shape, you’re ready to move into preparing your artwork, which is where most print quality problems either get caught or get missed.
Step 2. Prepare artwork for clean printing
Poor artwork preparation is the most common reason stickers come back looking blurry, colour-shifted, or cropped incorrectly. Before you upload anything to vistaprint sticker printing, make sure your file meets the basic technical requirements that determine whether your design prints cleanly.
Use the right file format and resolution
Vistaprint accepts PNG, JPG, and PDF files, but not all formats perform equally. For logo-based designs or anything with crisp edges and small text, use a PDF exported from vector software, or a high-resolution PNG at 300 DPI (dots per inch). JPGs compress image data, which can introduce visible artefacts around fine lines and lettering. If you’re working with a designer, ask them to supply a print-ready PDF by default.
Anything below 300 DPI will print visibly soft or pixelated, especially on shapes with tight die-cut edges.
Your file dimensions need to match the product size you select in the builder exactly, not the size you want the sticker to appear on screen. Check the dimensions listed on the product page before you export your file.
Set up bleed and safe zones
Bleed is the extra artwork that extends beyond your sticker’s finished edge, typically 1.5mm to 3mm on each side. Without bleed, any slight shift during cutting leaves a thin white border that looks unfinished. Extend your background colour or pattern into the bleed zone before you export.
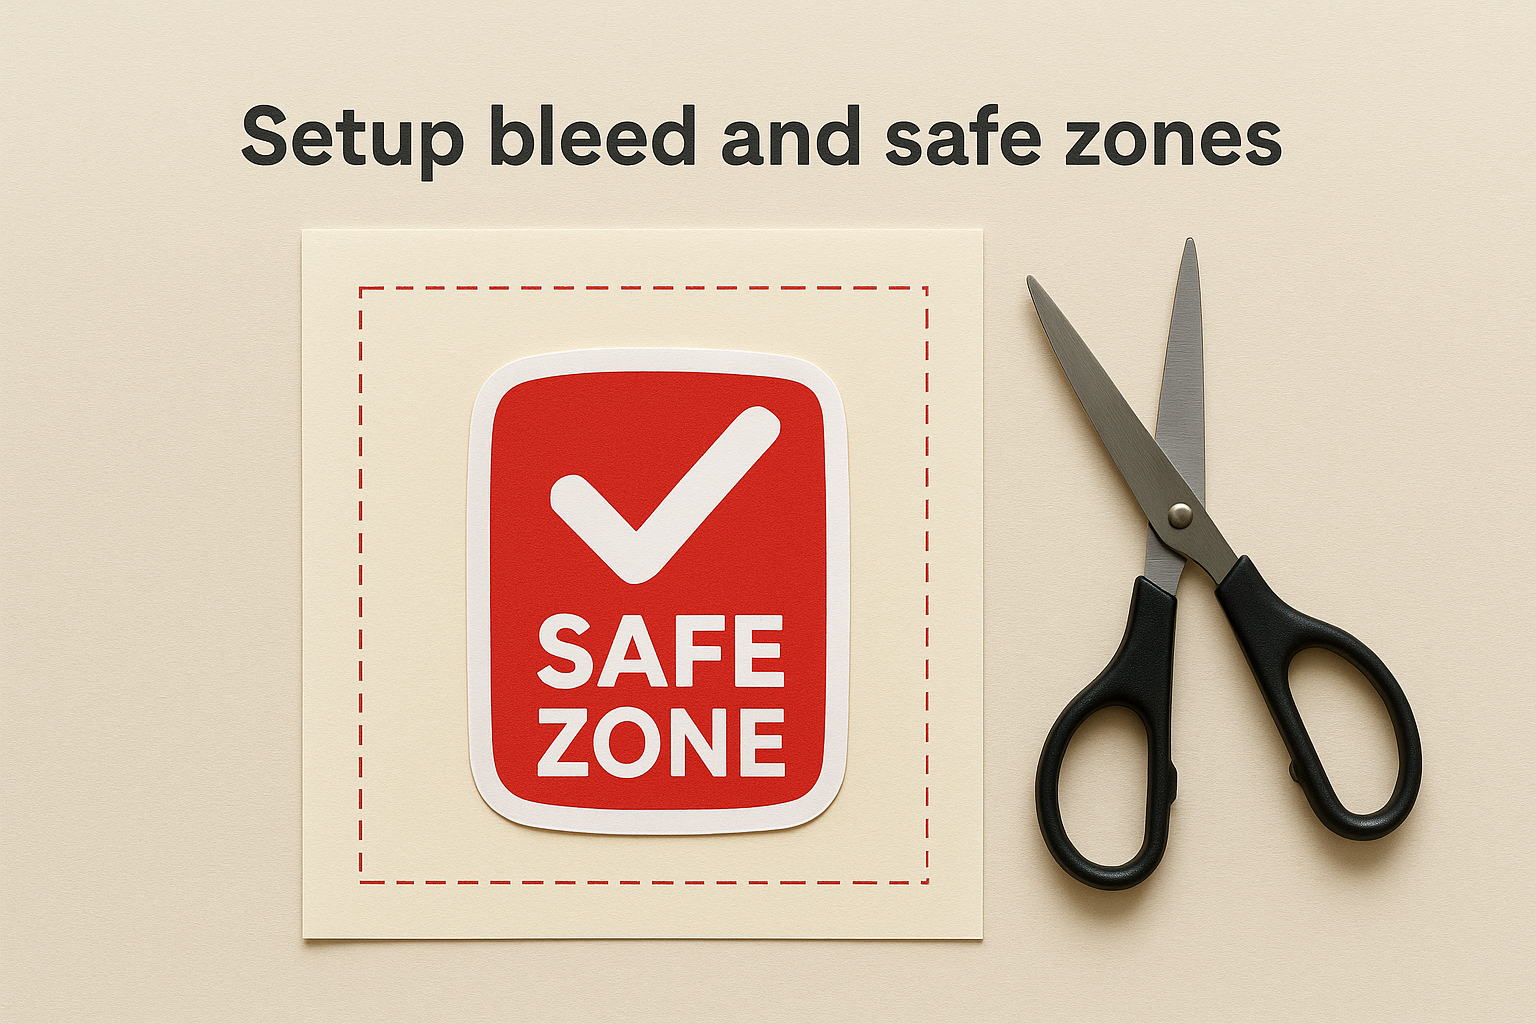
Keep all critical elements such as text, logos, and borders at least 3mm inside the finished edge. This is your safe zone. Anything placed closer than that risks being trimmed. Most design tools let you set custom canvas sizes with guide lines to mark both the bleed and safe zones before you begin placing elements, so build that into your file setup from the start.
Step 3. Build your design in Vistaprint
With your artwork file ready, you can now open the vistaprint sticker printing builder and start putting your design together. Vistaprint gives you two routes: upload your own prepared file, or build directly inside their online editor using pre-made templates. Your choice here depends on how finalised your artwork already is.
Upload your file or start from a template
If you followed the steps in the previous section, upload your print-ready file rather than rebuilding everything from scratch inside the editor. Select your sticker product, choose your size and shape, then click the upload option and drop in your PDF or high-resolution PNG. The tool will show you a live preview of how the file sits within the product dimensions, including where the bleed and safe zones fall.
If you’re starting from scratch, choose a template that matches your sticker category, such as a product label or promotional sticker, and customise the placeholder text, colours, and images from there. Templates are a useful starting point but check every element carefully before you move on.
Do not use a template’s default fonts or colours without adjusting them to match your actual brand, since generic templates are immediately recognisable and undermine professional branding.
Check spacing, font size, and contrast
Once your design is in the builder, zoom in on any text elements to confirm they are readable at the actual print size. Small text below 8pt often prints as a smudged line rather than legible copy. Check colour contrast between your text and background as well. Light grey on white or yellow on light green will both disappear in print.
Run through this checklist before moving to the next step:
- All text sits inside the safe zone
- Font size is 8pt minimum for body copy
- Contrast between text and background is strong
- Logo and key graphic elements are centred or intentionally aligned
- No important detail sits within 3mm of the trim edge
Step 4. Proof, order, and track delivery
Before you hand over payment, Vistaprint generates a digital proof of your sticker design based on the file you uploaded or built in the editor. This is your last real chance to catch problems before they go to print, so treat it seriously rather than clicking through it quickly.
Review the digital proof carefully
Open the proof at full screen size and check every element methodically. Confirm that text is crisp and fully inside the safe zone, your logo has not been cropped or distorted, and your background extends properly into the bleed area. If anything looks off at this stage, go back and fix the file rather than hoping it looks better in print.
Approving a proof with a visible problem means you own that problem. Vistaprint will not reprint at no charge simply because you missed an issue that appeared in the digital preview.
Run through this pre-approval checklist before you click confirm:
- Text is fully legible and inside the safe zone
- No unintended white borders or gaps around the design
- Colours look consistent with your original artwork
- Bleed area shows the correct background colour or pattern
- Shape and size match what you selected on the product page
Place your order and monitor progress
Once you approve the proof, proceed to checkout and confirm your quantity, material, and finish one final time before paying. Vistaprint sends an order confirmation email immediately after purchase, which includes your order number and an estimated production timeline. Keep this email accessible because you will need the order number to track your shipment.
Your vistaprint sticker printing order typically enters production within one business day of proof approval. Track your order through the confirmation email link, and check the estimated delivery date against any deadline you are working toward before you close the browser.
Wrap it up and choose your best option
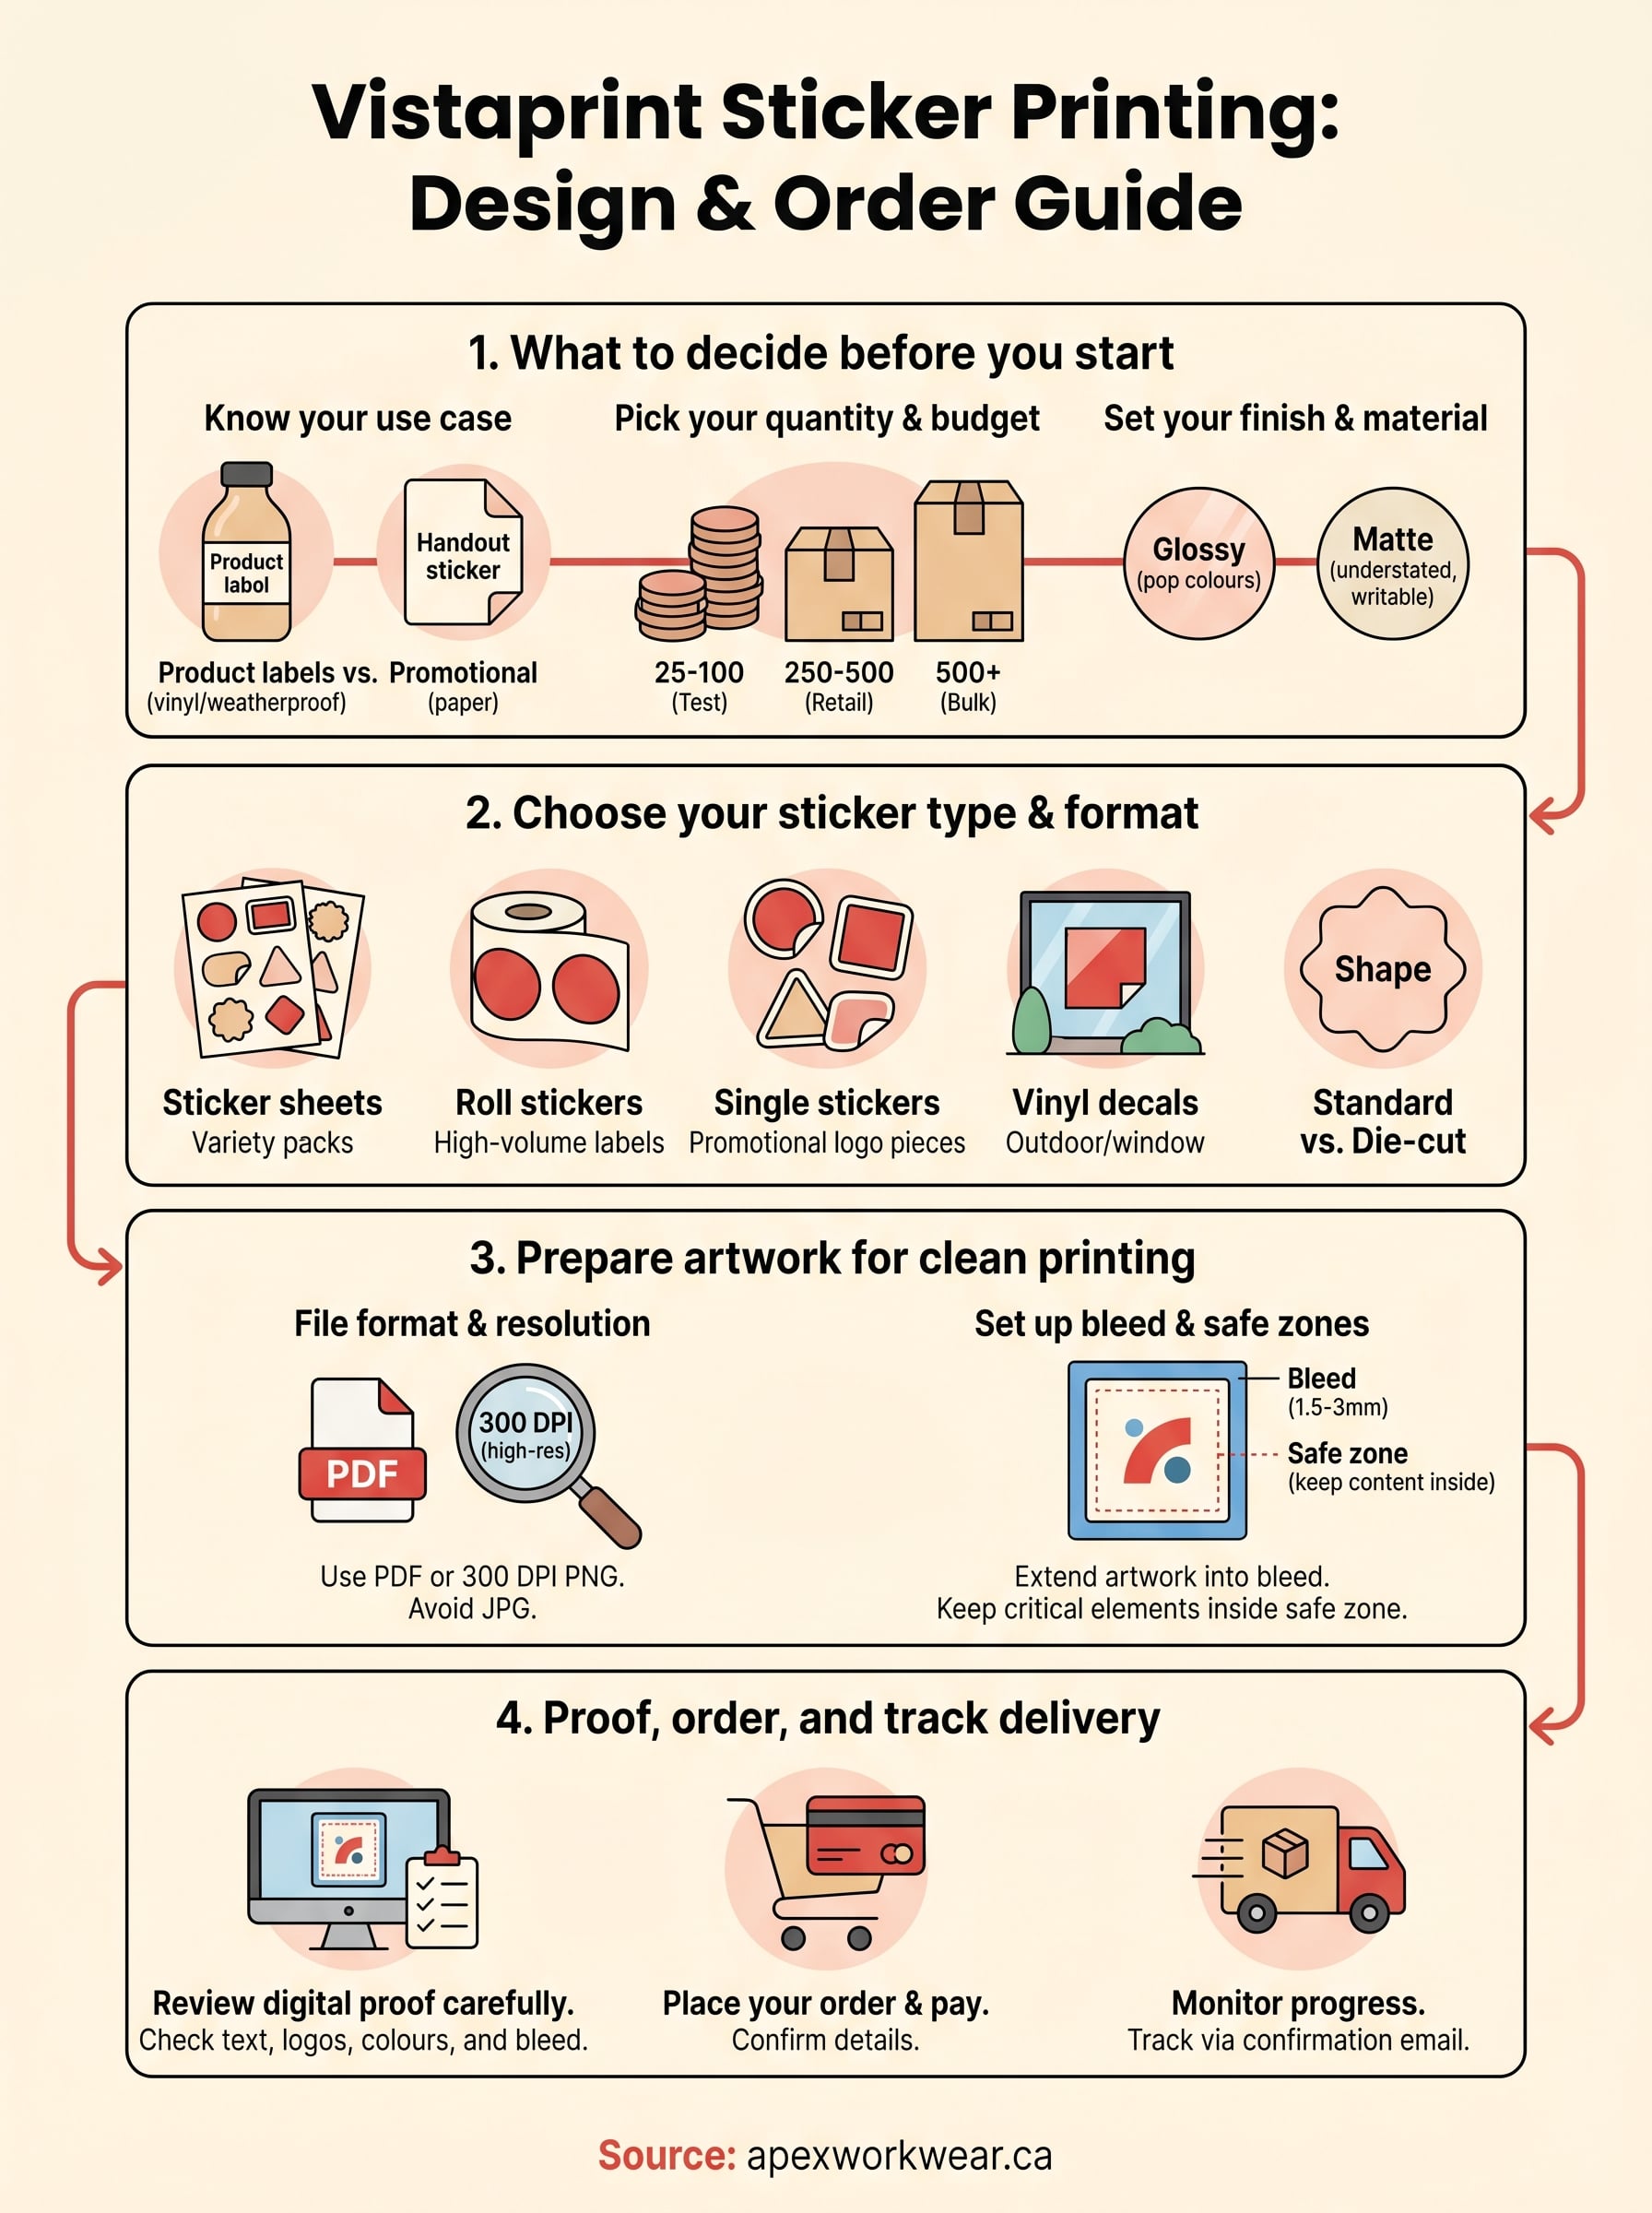
Following these four steps gives you a solid path through vistaprint sticker printing, from choosing your format and preparing print-ready artwork to proofing and placing your order. The process is straightforward once you know what each decision point means and why it matters for your final printed result.
That said, Vistaprint is not your only option. If you want to work with a Canadian-based print provider who reviews your artwork before production, offers no minimum orders on select products, and ships free within the GTA, it is worth comparing before you commit. Apex Workwear handles custom stickers and labels alongside a full range of business print products, all produced right here in Canada with fast turnaround and honest pricing.
Get a quote and see what your order would cost at Apex Workwear’s custom sticker and label printing.