If you’ve ever noticed those neat, X-shaped patterns on fabric, whether on a decorative piece at a craft fair or a vintage sampler on someone’s wall, you’ve seen cross stitch embroidery in action. It’s one of the oldest and most recognisable needlework techniques, and it remains popular because it’s genuinely approachable. You don’t need years of practice or expensive tools to produce something that looks polished and intentional.
Cross stitch falls under the broader umbrella of surface embroidery, but it plays by its own rules. It uses a single, repeated stitch formation on gridded fabric, which makes it easier to learn than most other embroidery methods. That structure is exactly what draws beginners in, and what keeps experienced stitchers coming back for more complex and creative projects.
At Apex Workwear, we work with embroidery daily, applying custom designs to apparel for businesses, teams, and individuals across Canada. While our production methods use commercial embroidery machines rather than hand-stitching, understanding techniques like cross stitch helps our customers make better-informed decisions about their custom apparel. Whether you’re exploring cross stitch as a hobby or trying to understand how embroidery works before placing a custom order, this guide covers what cross stitch is, how it differs from other embroidery styles, and everything you need to get started.
Why people choose cross stitch embroidery
People pick up cross stitch for many different reasons, but most come back to the same core appeal: it’s structured enough to feel manageable and creative enough to stay interesting. Unlike many crafts that require expensive equipment or a steep learning curve, cross stitch meets you where you are, whether you’re a complete beginner or someone who already stitches regularly.
It’s beginner-friendly without being boring
When people ask what is cross stitch embroidery and why it’s so popular, the answer often starts with accessibility. You’re working with one repeating stitch on a grid-based fabric, which means you can follow a pattern square by square without guessing where to place your needle. That predictability removes the frustration that stops many people from sticking with other crafts.
Cross stitch is one of the few needlework techniques where a complete beginner can produce a finished, professional-looking piece on their very first attempt.
As your skills grow, the patterns get more complex. Shading, detail work, and blending threads all become available to you as you gain confidence, so there’s always a next challenge waiting when you’re ready for it.
The results are consistent and precise
Cross stitch gives you a high degree of control over the final outcome. Because you’re placing each stitch on a counted grid, the design builds up in a predictable way. You’re not interpreting a sketch freehand; you’re following a map. This makes correcting mistakes straightforward, since you can remove a few stitches and redo them without disturbing the surrounding work.
That consistency is part of why cross stitch has stayed relevant for centuries. It produces clean, geometric patterns that hold their shape over time, and the fabric structure keeps everything anchored so the design doesn’t shift or distort with regular handling.
It fits around your life
Cross stitch doesn’t demand large blocks of time or a dedicated workspace. A small project travels easily in a bag, and you can pick it up and put it down without losing your place. Many stitchers work during commutes, in the evenings, or during short breaks throughout the day.
The cost of entry is also low. Basic materials are inexpensive, and a starter kit covers everything you need for several projects. You can scale up later with higher-end fabrics or specialty threads, but there’s no pressure to spend more than you’re comfortable with from the start.
How cross stitch embroidery works
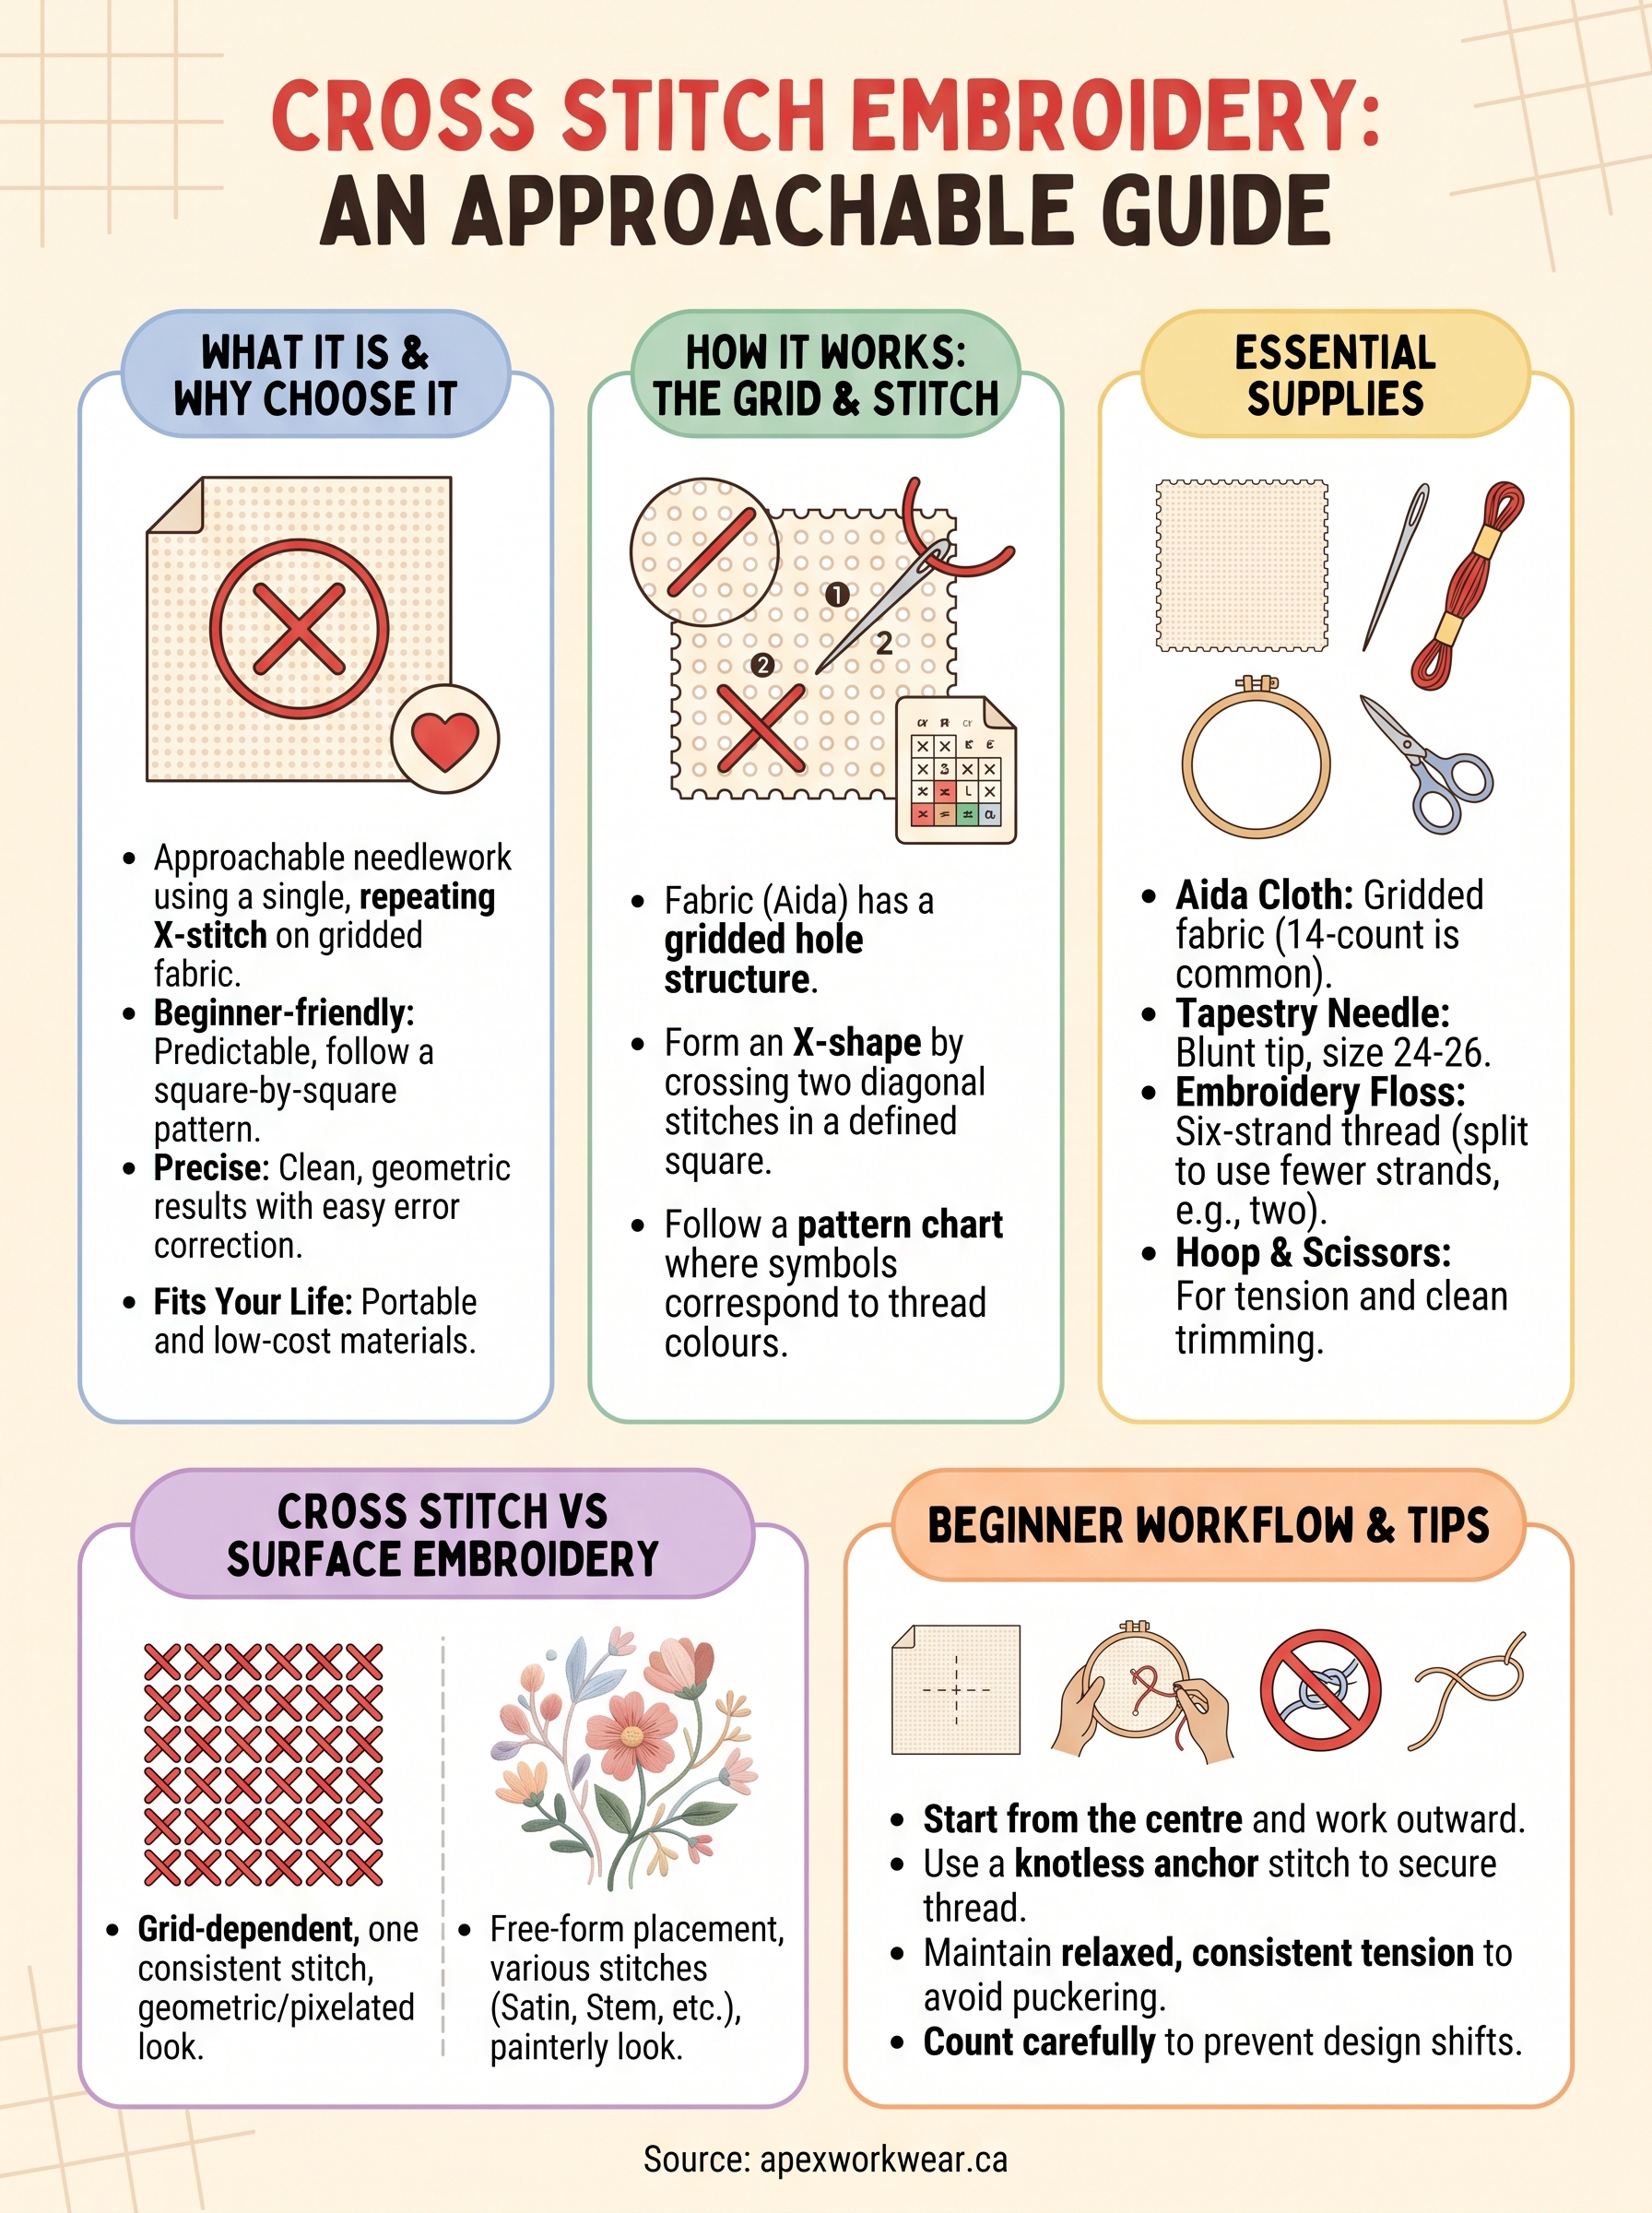
Understanding how the technique functions helps clarify what is cross stitch embroidery at a practical level. The method relies on two simple principles: a structured fabric grid and a single repeating stitch that forms an X shape. Every stitch you make sits within a defined square on the fabric, which keeps the design organised and measurable from start to finish.
The grid and the stitch
Cross stitch fabric, typically aida cloth, is woven with evenly spaced holes arranged in a grid. You push your needle up through one hole, across to the diagonal, and back through the opposite corner to form the first half of the X. You then cross back over to complete the full stitch. Repeat that process across hundreds or thousands of squares and a picture gradually takes shape.
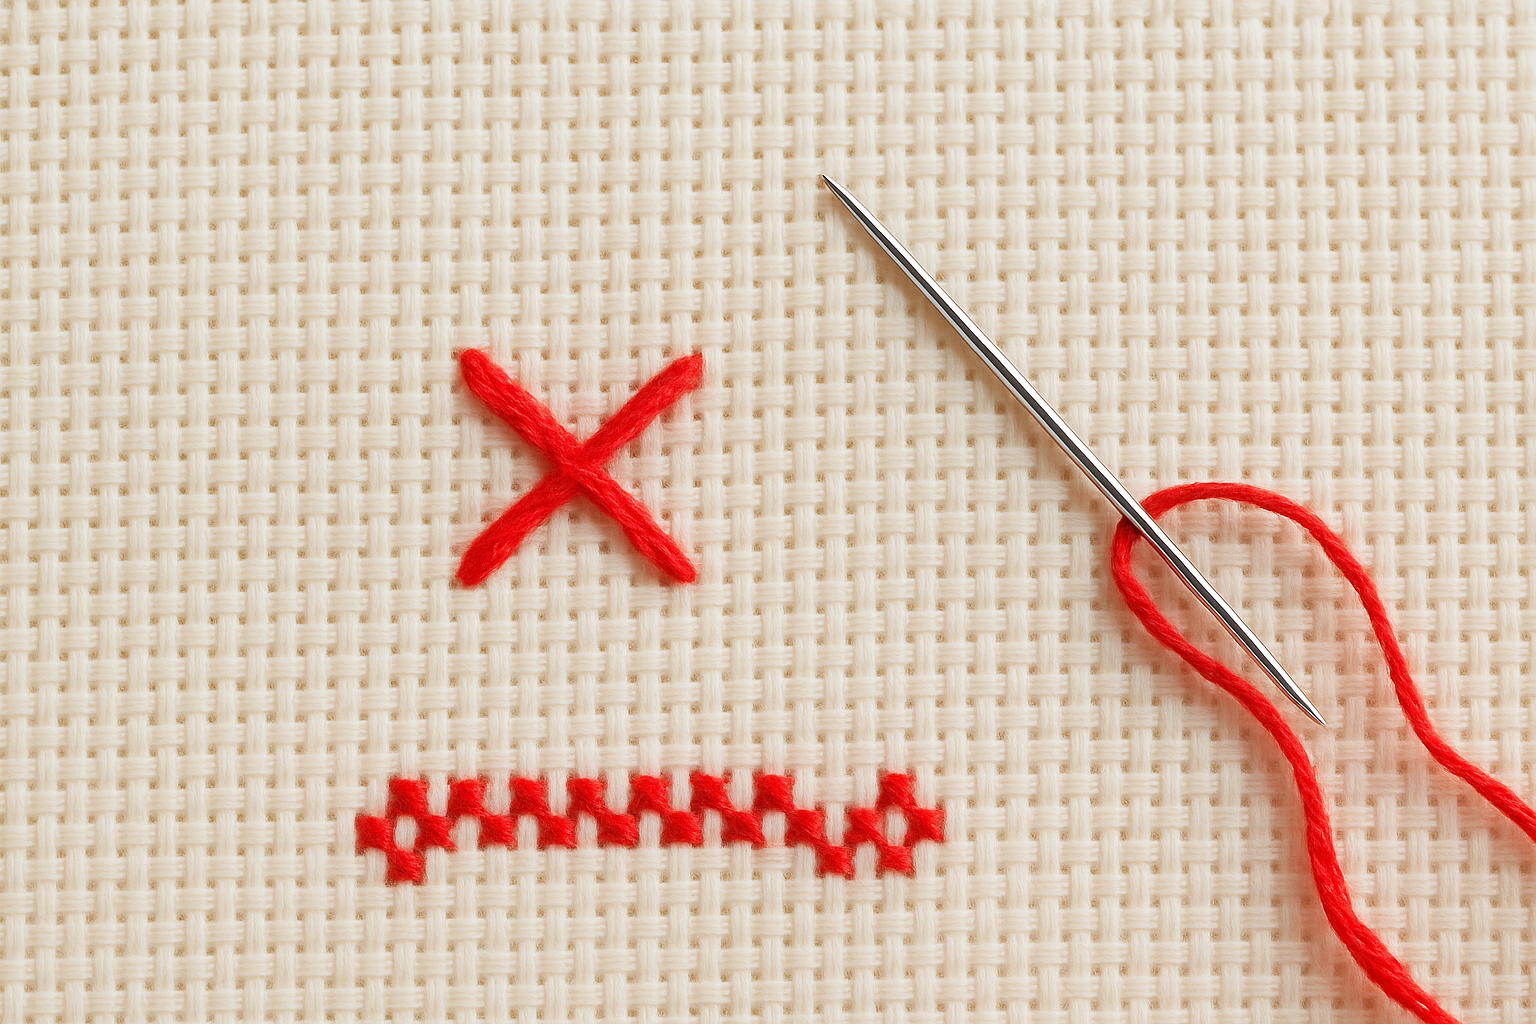
The X-stitch is always completed in the same direction across a row, which keeps the finished surface looking uniform and neat.
Each square on the fabric corresponds directly to one symbol on your pattern chart, making the translation from paper to fabric straightforward. You count squares, follow the chart, and the image builds up one stitch at a time.
Reading a pattern
Patterns use a grid of symbols, where each symbol represents a different thread colour. You identify the starting point, usually the centre of the fabric, and work outward from there. Counting carefully is the most critical skill at this stage, since one miscounted square shifts every stitch that follows.
Most printed and digital patterns include a colour key and a symbol legend, so you always know which thread to pick up next. Once you understand the grid logic, moving between patterns of any complexity becomes manageable.
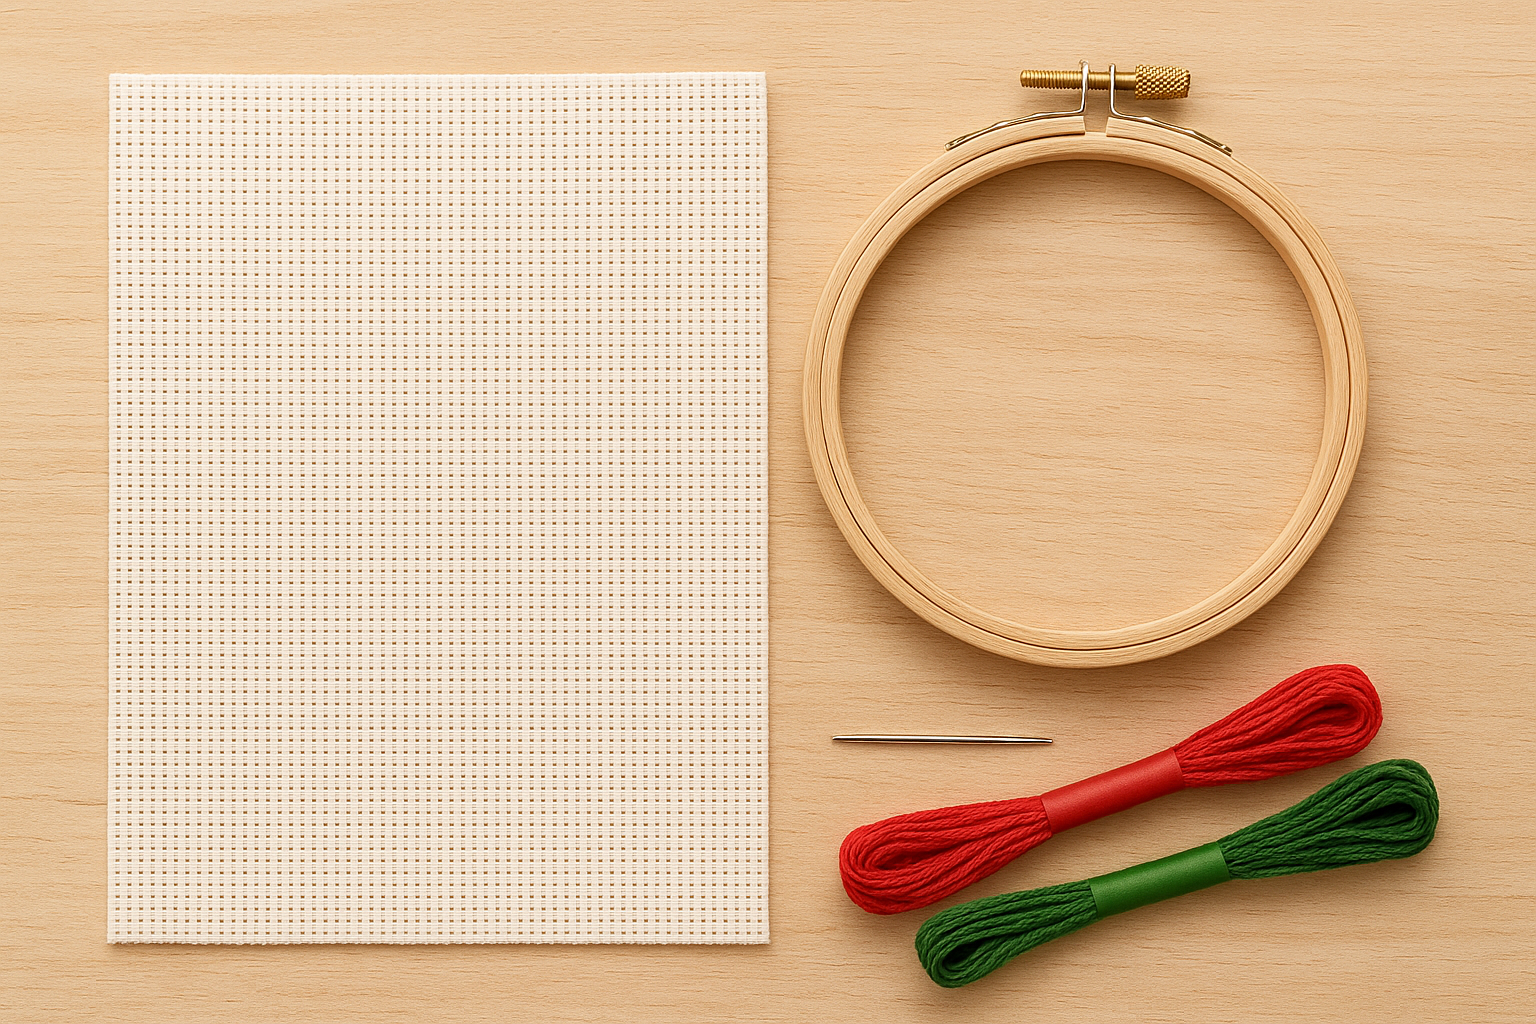
Supplies and materials you need
Getting started with cross stitch doesn’t require a big investment. A small set of core materials covers everything you need for your first several projects, and most of it is available at craft stores or online for very little cost. Understanding what is cross stitch embroidery at a practical level means knowing which supplies actually matter and which ones you can add later as your skills develop.
Fabric and needles
Aida cloth is the standard fabric for beginners. It comes in different counts, measured in holes per inch, with 14-count being the most common starting point because the holes are easy to see and the grid is manageable. A higher count gives you finer detail but requires more precision.
The count of your aida fabric directly affects the finished size of your design, so always check the recommended count on your pattern before buying fabric.
You’ll use a blunt tapestry needle, which slides through the pre-woven holes without splitting the fabric threads. Sizes 24 and 26 are the most widely recommended for 14-count aida and suit most beginners well.
Thread and tools
Six-strand embroidery floss is the standard thread for cross stitch. Most patterns are designed around DMC or Anchor brand colours, and both are widely available at craft shops. You typically split the floss and work with two strands at a time on 14-count fabric, though your pattern will specify if a different number is needed.
Beyond fabric, needles, and thread, a few additional tools make the process easier. An embroidery hoop holds your fabric taut while you stitch, which keeps tension consistent and prevents puckering. You’ll also want small, sharp scissors for trimming thread ends cleanly between colour changes.
Cross stitch vs surface embroidery
Understanding what is cross stitch embroidery becomes clearer when you set it against the broader category it belongs to. Surface embroidery is the general term for any needlework technique where thread sits on the surface of a base fabric. Cross stitch belongs to that category, but it follows a more rigid, counted structure than most other methods under that umbrella.
What counts as surface embroidery
Surface embroidery covers a wide range of techniques, each with its own character and demands. Common examples include:
- Satin stitch: parallel threads laid side by side to fill shapes with a smooth, solid finish
- Stem stitch: overlapping stitches that follow curves and outlines with a rope-like appearance
- French knots: small raised dots formed by wrapping thread around the needle before inserting it back through the fabric
- Crewelwork: detailed designs stitched with wool thread to create a textured, dimensional result
These techniques give you creative freedom with placement, since you work without a fixed grid directing each stitch. That flexibility suits detailed, illustrative designs well, but it also introduces more room for inconsistency when you are still building confidence with a needle.
Where cross stitch differs
Cross stitch narrows that open-ended approach down to a single, consistent stitch repeated across gridded fabric. You don’t interpret a design freehand; you translate it square by square from a counted chart. This removes much of the guesswork that comes with other embroidery styles, which is why beginners find it significantly less intimidating as a starting point.
Cross stitch is defined by its grid dependency, while most surface embroidery techniques work independently of any fabric structure.
The visual results also differ noticeably. Surface embroidery can mimic painting, blending colours in smooth gradients and following organic shapes. Cross stitch produces a more geometric, pixelated aesthetic that is immediately recognisable. Both approaches can produce impressive finished pieces, but they suit different project types and different levels of experience.
Beginner workflow and common mistakes
Once you understand what is cross stitch embroidery in theory, the practical steps become straightforward. Starting with a clear workflow saves you from frustration and helps you build good habits from your very first project. The process follows a logical sequence, and knowing the common pitfalls in advance means you spend more time stitching and less time unpicking mistakes.
Setting up and starting your first project
Begin by finding the centre of your fabric and marking it lightly with a water-soluble pen or a short length of temporary tacking thread. Your pattern will indicate a centre point too, and matching these two points ensures your design sits evenly on the fabric with enough border all around. Mount the fabric in your hoop with even tension, not so tight that it distorts the weave, but firm enough to keep the surface stable as you work.
Starting from the centre and working outward is the single most reliable way to keep your design correctly positioned on the fabric.
Thread your needle with two strands of floss and begin with a knotless anchor stitch, leaving a short tail on the back that you secure under your first few stitches. Work one colour at a time where possible to avoid constantly switching threads.
Mistakes that catch beginners off guard
The most common errors beginners make come down to counting too quickly and pulling thread too tight. Miscounting shifts the entire design, so slow down and double-check your position every ten stitches or so. Pulling thread too firmly puckers the fabric and distorts the finished look, so keep your tension relaxed and consistent throughout.
Finishing your thread correctly matters just as much as starting it. Run the tail through the back of four or five existing stitches before trimming, which keeps everything secure without creating bulky knots on the reverse side.
Next steps
Now that you understand what is cross stitch embroidery, how it works, and what supplies you need, the best move is to pick up a small starter kit and begin a simple pattern. Choose a design with fewer than five colours and a modest stitch count so your first project stays manageable and finishes quickly. That early win builds the confidence to tackle more ambitious work without feeling overwhelmed.
Cross stitch is a hands-on craft, and reading about it only gets you so far. Put the guide down, buy your aida cloth and floss, and start stitching today.
If you’re interested in taking embroidery beyond a personal hobby and applying it to custom apparel for your business, team, or event, the process is simpler than you might expect. Visit Apex Workwear to explore custom embroidery options for clothing and branded items, with expert support and fast turnaround across Canada.