Getting your Cricut iron-on vinyl heat press settings wrong usually means one of two things: vinyl that peels off after a single wash, or scorch marks on a shirt you actually liked. Neither is fun, and both are avoidable once you know the right temperature, time, and pressure for each material.
At Apex Workwear, we work with heat transfer vinyl and custom apparel production daily, it’s a core part of what we do as a Canadian custom printing provider. That hands-on experience means we know exactly where settings tend to trip people up, whether you’re using a Cricut EasyPress, a full-size heat press, or even a household iron in a pinch.
This guide breaks down the specific settings you need for every type of Cricut iron-on vinyl, organized into a clear reference chart you can bookmark and come back to. We’ll cover standard, everyday, holographic, glitter, foil, and more, along with fabric-specific adjustments that make the difference between a transfer that lasts and one that doesn’t. If you’ve been guessing at your settings, this is where you stop.
What changes Cricut iron-on press settings
The short answer is: almost everything. Your vinyl type, base material, press tool, and pressure level all interact with each other, and changing any one of them can mean the difference between a clean, lasting transfer and a peeling mess after the first wash. Before you apply a single sheet, you need to understand the four main variables that determine your settings, because adjusting one without accounting for the others will still get you inconsistent results.
Vinyl type
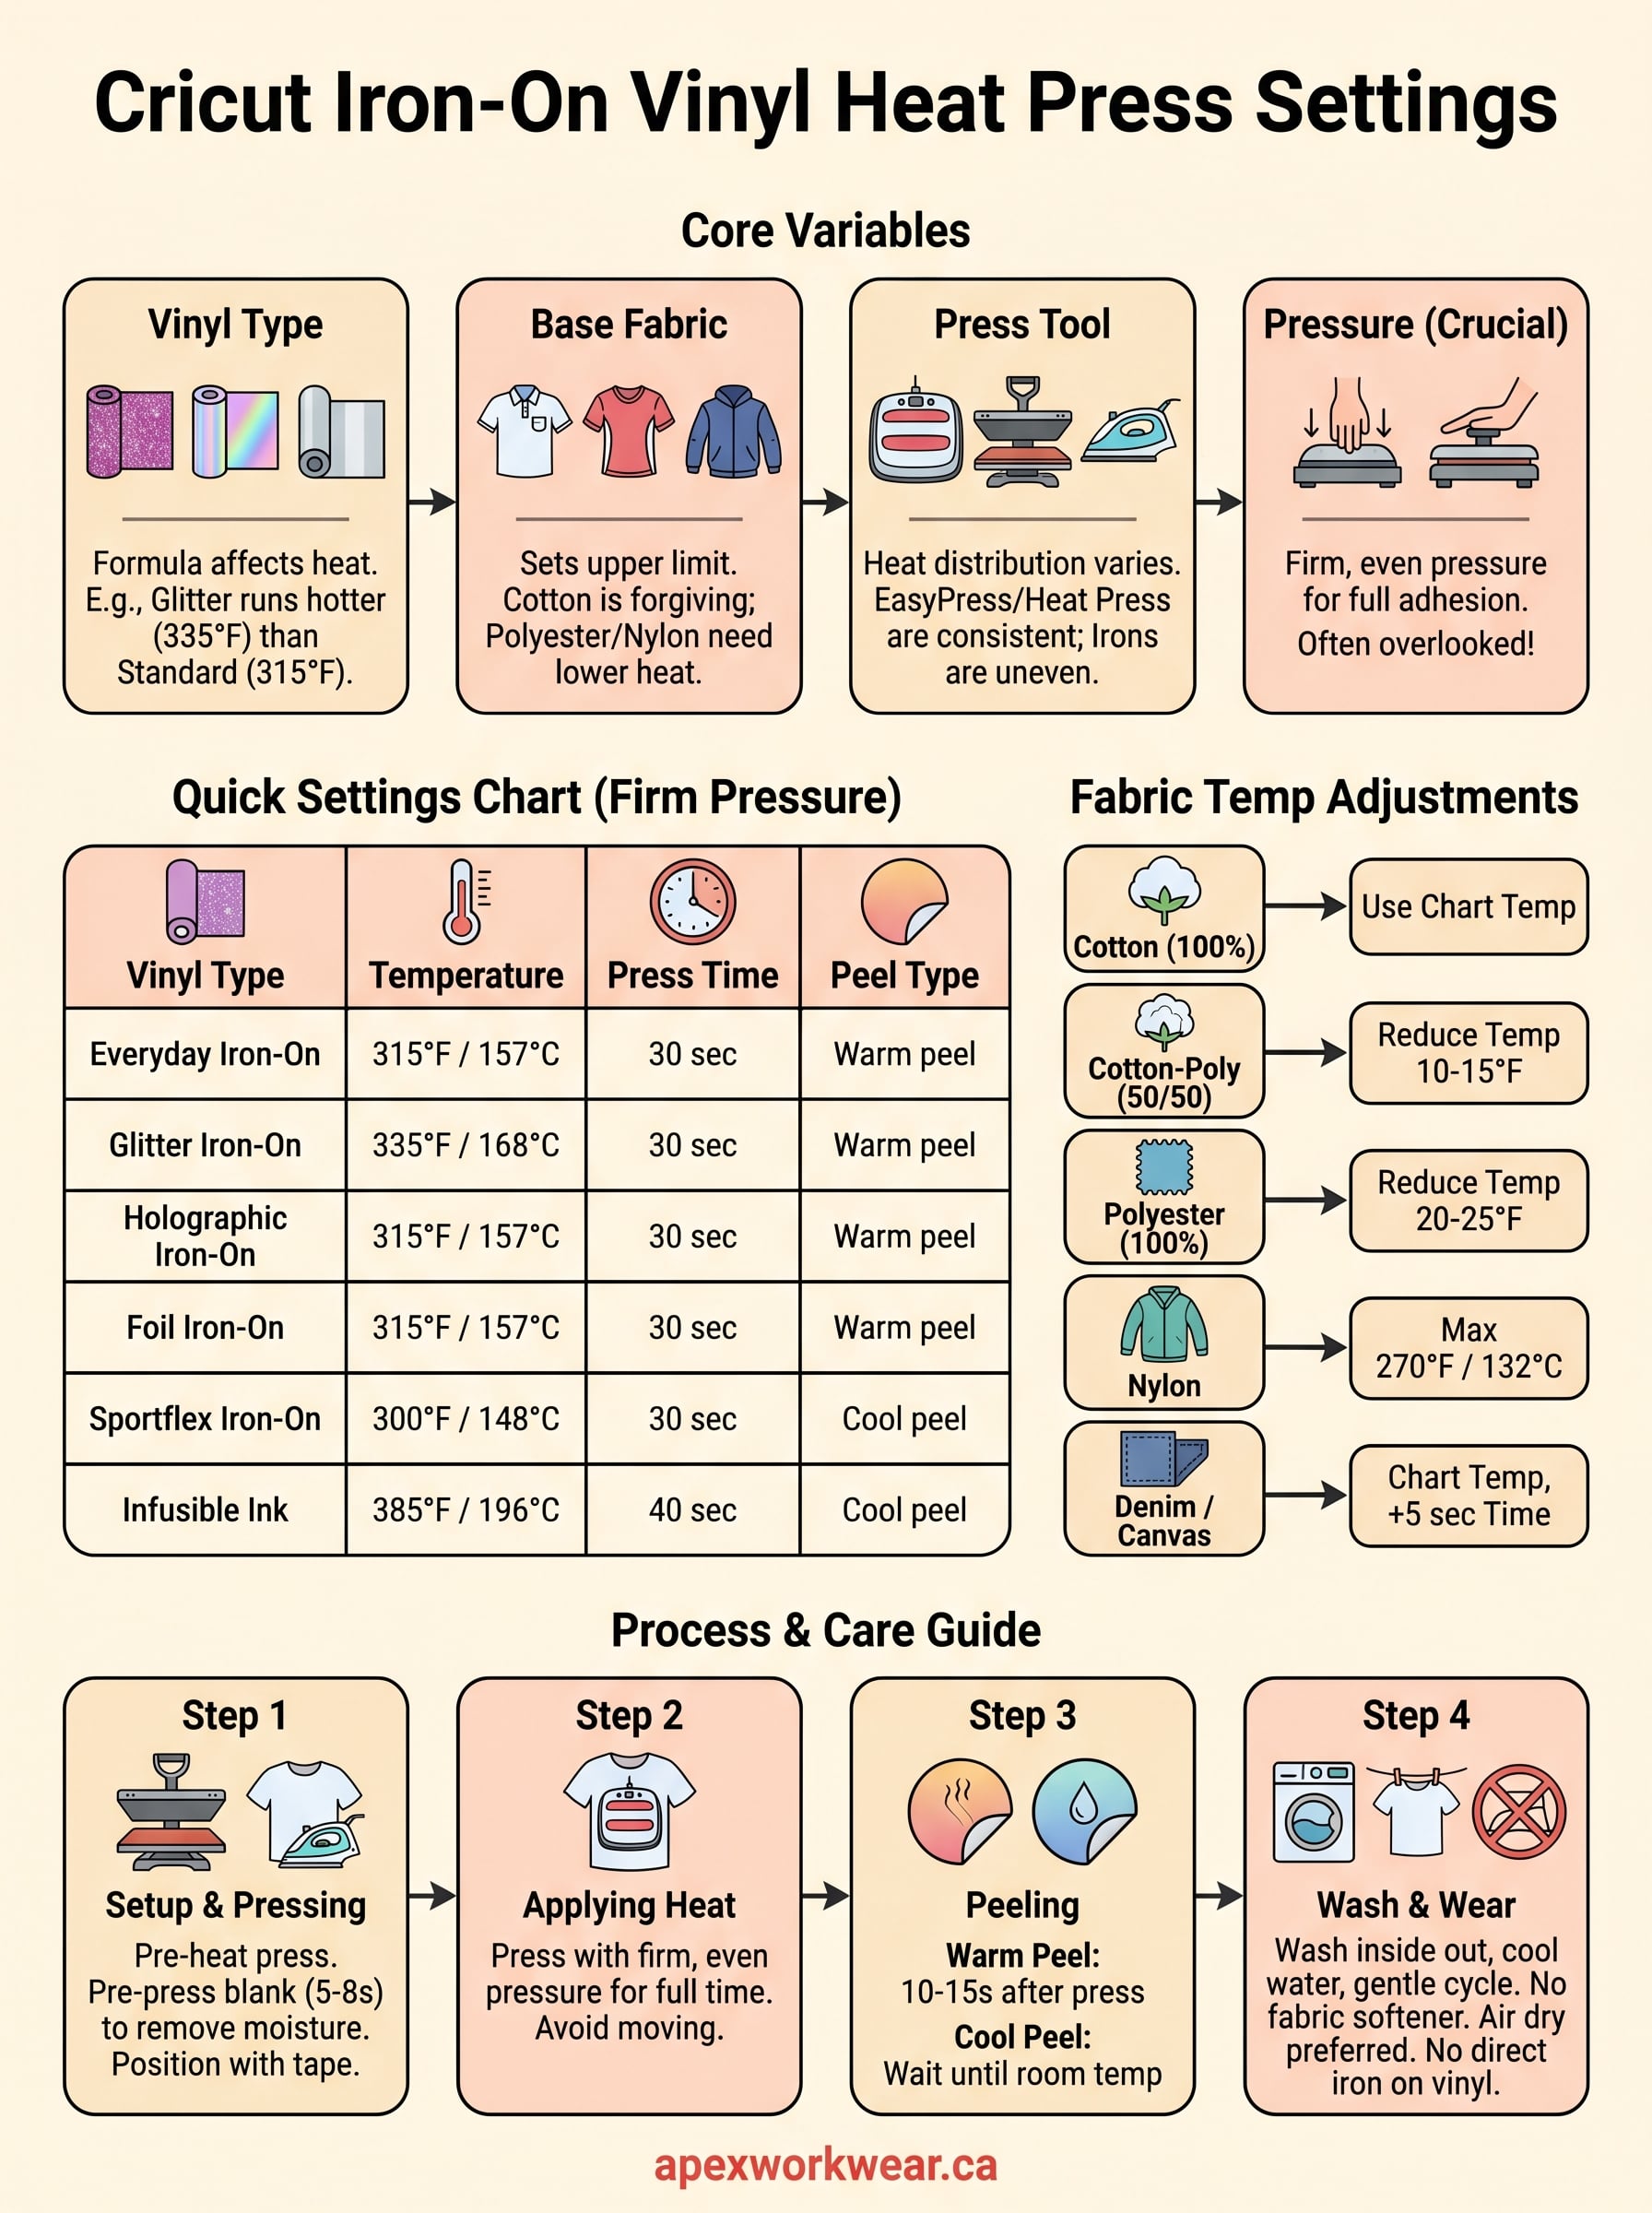
Each Cricut iron-on vinyl formula requires a different heat range because of how its adhesive is engineered. Standard Everyday Iron-On needs around 315°F (157°C), while Glitter Iron-On runs hotter at roughly 335°F (168°C) because the glitter particles resist heat transfer more than a flat film does. Foil and holographic materials require even more precise temperature control since they can lose their finish if you push the heat too high. Sportflex Iron-On, designed for stretchy fabrics, needs lower temperatures to avoid damaging the elasticity of the base material. Cricut’s own Heat Guide, available directly inside the Cricut Design Space app, lists current recommended settings by material type and is worth checking before you press any vinyl you haven’t used before.
Always verify the recommended settings for each specific vinyl type before pressing, even if you’ve used a visually similar material in the past.
Your base fabric
Cotton and cotton blends are the most forgiving fabrics and accept heat well. You can press cotton at higher temperatures without damage, which makes it the easiest starting point. Polyester and performance fabrics are a different story – they scorch, melt, or shrink if your temperature climbs too high. Nylon requires the lowest heat settings of all, often below 270°F (132°C), and even a few degrees over can destroy the fabric entirely. Denim and canvas tolerate higher heat but often need a longer press time to push the adhesive all the way through the tighter weave.
If you’re working with a 50/50 cotton-poly blend, always lean toward the lower end of the temperature range. The polyester content is the limiting factor, not the cotton, so treat every blended fabric like it’s mostly synthetic until you know how it responds.
The tool you’re using
Your heat press, EasyPress, or household iron all deliver heat differently, and your cricut iron-on vinyl heat press settings need to reflect whichever tool you’re using. A professional clamshell or swing-away heat press distributes heat evenly across the entire platen, giving you consistent results with minimal variation across the surface. An EasyPress covers a defined area and holds a steady, accurate temperature, which makes it far more reliable than a traditional iron for consistent adhesion.
A regular household iron has hot spots, cold spots, and no real pressure control, so you’ll often need to move it in slow circles and press for longer to compensate. The steam vents can leave marks on certain materials too, so always work with the iron on its flat, dry surface only and avoid setting it down in one spot for too long.
Pressure: the variable most people overlook
Pressure directly affects adhesion strength and long-term durability, and it gets far less attention than temperature or time. Too little pressure means the vinyl doesn’t bond fully, regardless of how accurate your temperature dial is. Too much pressure on stretch fabrics or delicate blends can distort the weave or flatten the garment permanently.
Firm, even, consistent pressure is what you’re aiming for across all materials. On a manual heat press, you should feel clear resistance when you close the handle. On an EasyPress, press straight down with both hands and your full body weight for small to medium transfers. A light, tentative touch on any press is one of the most common reasons vinyl lifts at the edges after just a few washes.
Quick settings chart for common Cricut iron-on
The table below covers the most common Cricut iron-on vinyl types and their recommended heat press settings. These numbers reflect firm, even pressure across all entries, so if your pressure is light, expect to add a few seconds or repeat the press. Use this as a starting reference, then fine-tune based on your specific fabric and press tool.
Settings by vinyl type
The figures below come from Cricut’s official heat guide recommendations and reflect standard starting points for each vinyl formula. Always verify against the latest guidance in Cricut Design Space before pressing a new material, since formulations can update between product runs.
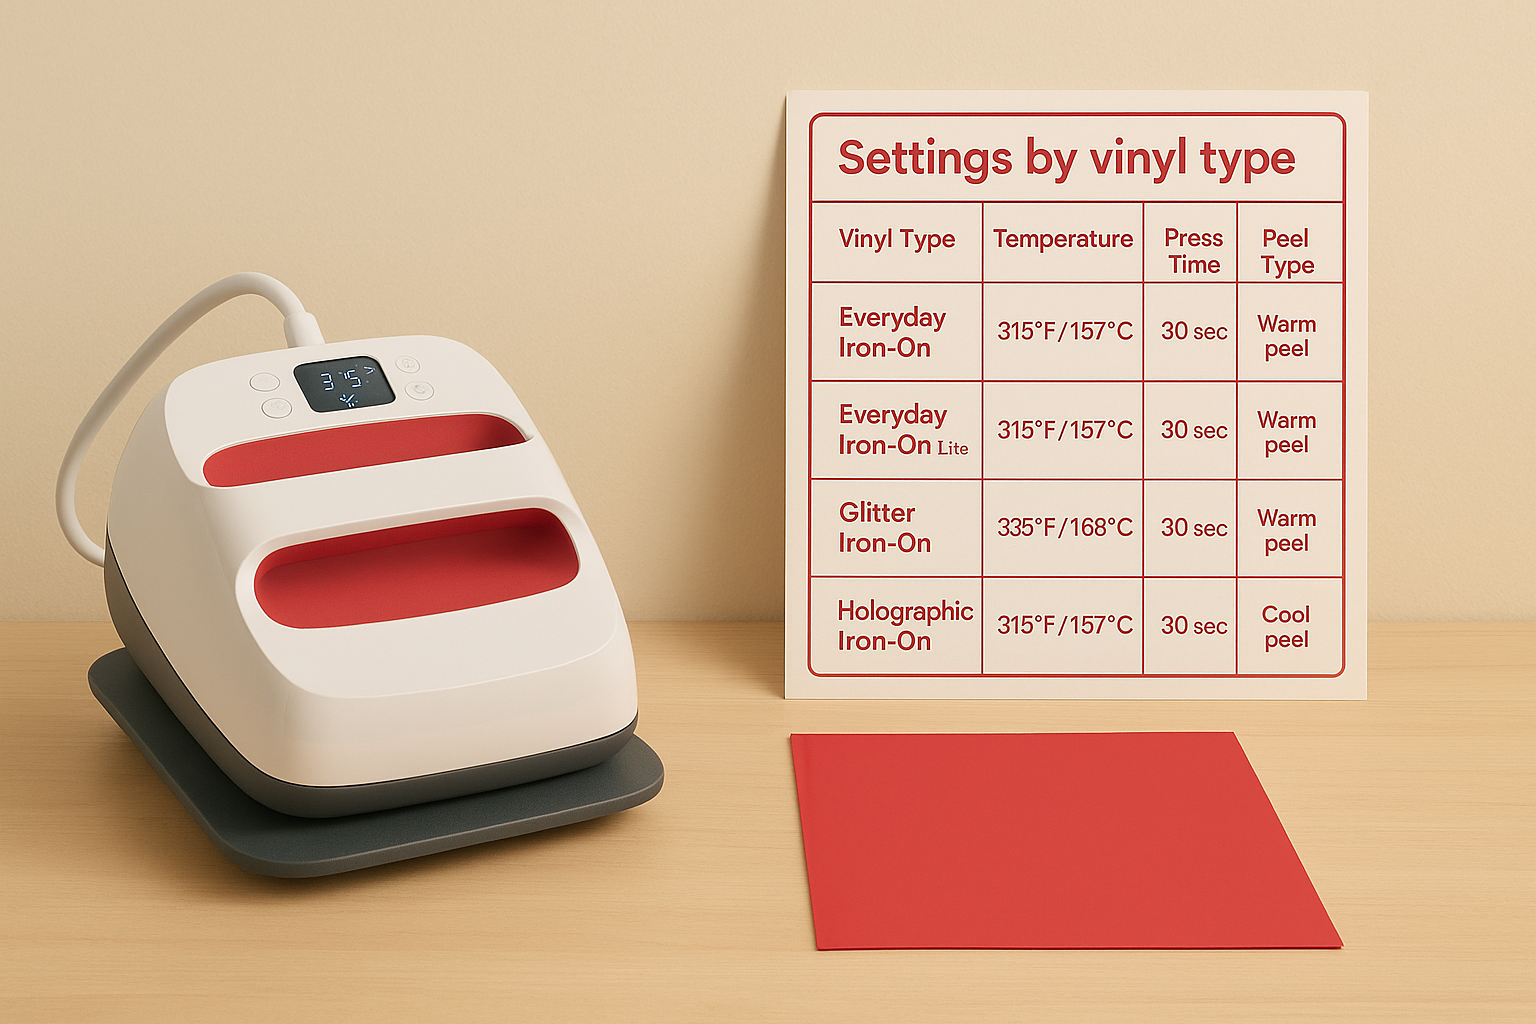
| Vinyl Type | Temperature | Press Time | Peel Type |
|---|---|---|---|
| Everyday Iron-On | 315°F / 157°C | 30 sec | Warm peel |
| Everyday Iron-On Lite | 315°F / 157°C | 30 sec | Warm peel |
| Glitter Iron-On | 335°F / 168°C | 30 sec | Warm peel |
| Holographic Iron-On | 315°F / 157°C | 30 sec | Warm peel |
| Foil Iron-On | 315°F / 157°C | 30 sec | Warm peel |
| Sportflex Iron-On | 300°F / 148°C | 30 sec | Cool peel |
| Infusible Ink | 385°F / 196°C | 40 sec | Cool peel |
These settings apply to a Cricut EasyPress or professional heat press. If you’re using a household iron, increase press time by 10 to 15 seconds and use slow, overlapping strokes to compensate for uneven heat distribution.
Fabric temperature adjustments
Your base material sets the upper limit of what temperature you can safely use, regardless of which vinyl type you’re pressing. The chart above assumes 100% cotton as the base. If you’re pressing onto a different fabric, apply these adjustments to the temperature column:
- Cotton (100%): Use the chart temperature as listed
- Cotton-poly blend (50/50): Reduce temperature by 10 to 15°F
- Polyester (100%): Reduce temperature by 20 to 25°F
- Nylon: Drop to 270°F / 132°C maximum, regardless of vinyl type
- Denim or canvas: Use chart temperature, increase press time by 5 seconds
Keep these cricut iron-on vinyl heat press settings adjustments in mind whenever you switch between fabric types mid-project. A quick test press on a scrap piece of the same fabric before committing to your final blank will save you from ruining a finished garment.
Set up your press and blank for consistent results
Before you press a single transfer, how you prepare your equipment and your garment matters as much as the settings themselves. Skipping the setup steps is where most beginners run into problems, and a badly applied transfer is far harder to fix after the fact than it is to prevent in the first place.
Pre-heat your press
Give your press at least three to five minutes to reach the target temperature before you place any vinyl on it. Most heat press machines and EasyPress units take time to stabilize, and the reading on the display can be ahead of the actual platen surface temperature. Pressing too soon means your first transfer receives less heat than the dial suggests, which leads to weak adhesion even if every subsequent piece comes out perfectly.
Pre-heating also drives residual moisture out of the platen itself. Any humidity left in the heat plate can interfere with adhesion and cause surface bubbling on the vinyl during the press, which is difficult to fix once it happens.
Prepare your blank
Moisture in the fabric directly undermines adhesion, so pre-press your blank before you apply any vinyl. Place the empty garment on the platen and press it for five to eight seconds. This removes wrinkles, flattens the surface, and pulls moisture out of the fibres so your cricut iron-on vinyl heat press settings perform exactly as the chart specifies.
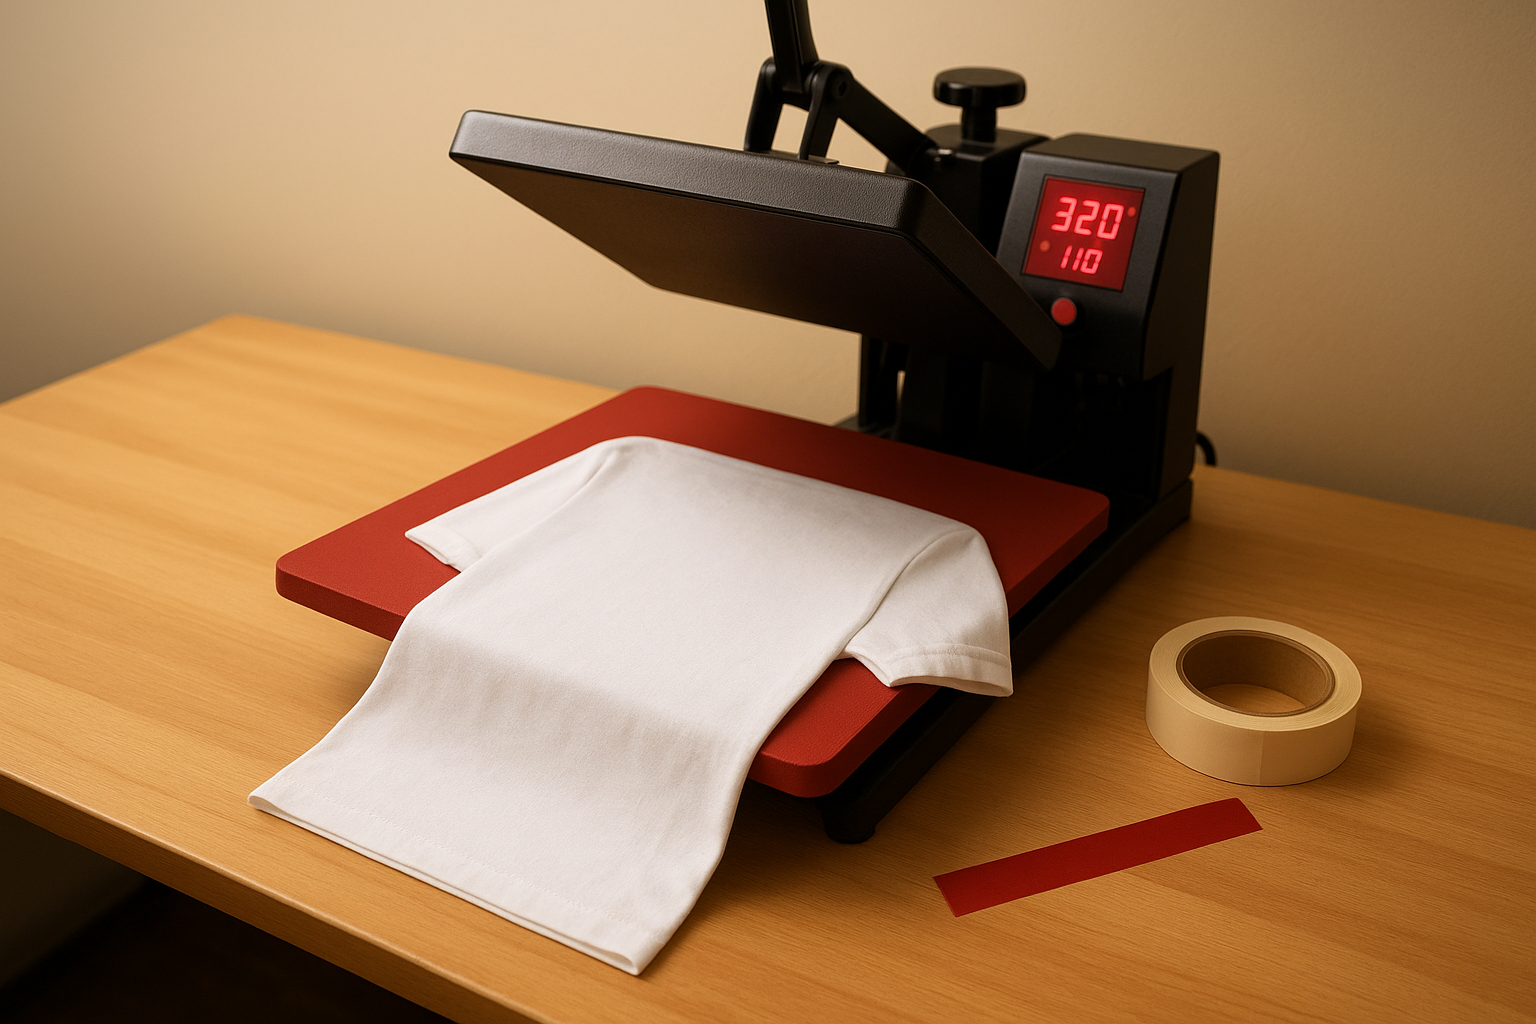
Pre-pressing your blank takes less than ten seconds and eliminates two of the most common causes of failed transfers: moisture and uneven surfaces.
Lay your garment on a flat, stable surface after the pre-press and let it cool for thirty seconds before positioning your transfer. A heat-resistant pillow or foam pad placed inside a shirt keeps the platen surface flat and prevents the back seam from creating an uneven ridge underneath your design. That ridge causes incomplete contact across the transfer area, which shows up as lifting edges after the first wash.
Use heat-resistant tape to hold your cut vinyl in position once you’ve placed it on the blank. Small pieces and layered designs can shift during the press if nothing is securing them, and even a two-millimetre shift ruins the alignment on a finished piece. Positioning everything before you close the press is the step that separates clean, professional results from transfers you end up remaking.
Press iron-on vinyl with EasyPress or heat press
Once your blank is pre-pressed and your vinyl is correctly positioned, you are ready to apply heat. The actual pressing motion and the sequence you follow both affect how well the vinyl bonds, and the steps differ slightly depending on whether you are using an EasyPress or a professional heat press machine.
Pressing with a Cricut EasyPress
Place your EasyPress directly over the transfer and lower it straight down without sliding it sideways. Apply firm, consistent downward pressure for the full duration listed in your cricut iron-on vinyl heat press settings chart, for example 30 seconds on standard Everyday Iron-On at 315°F (157°C). Keep both hands on the handle and lean your body weight into it rather than relying on arm strength alone. A light touch is one of the most common reasons vinyl lifts at the edges after the first wash.
Once the timer completes, lift the EasyPress straight up rather than dragging it sideways, since lateral movement shifts the vinyl before it has a chance to set.
When your design is larger than the EasyPress plate, press in overlapping sections and give each section the full recommended time. Start from the centre and work toward the edges. Leaving incomplete edge coverage is where corners and seam lines tend to fail first.
Pressing with a heat press
Close the platen firmly over your blank and lock the handle so consistent pressure is maintained across the full press time. Unlike an EasyPress, a heat press applies uniform force across a wider area, which makes it better suited for large or full-front designs where even adhesion across the entire transfer matters. Set your timer before you close the press so the duration is accurate.
Follow this pressing sequence for both tools:
- Position vinyl with the shiny carrier sheet facing up
- Place a Teflon sheet or parchment paper cover over the design
- Close the press and apply firm, even pressure
- Hold for the full recommended time without releasing
- Open the press and lift straight up off the garment
- Follow the correct peel method for your vinyl type (warm or cool peel)
When pressing layered HTV designs, press each layer separately before adding the next one on top. Press the bottom layer, let it cool fully, then position the second layer and press again at the same temperature and duration. Each layer needs its own complete press cycle to bond correctly, and combining multiple layers into a single press almost always causes the outer vinyl to lift away from the base after washing.
Peel rules and how to fix lifting vinyl
Peeling your carrier sheet at the wrong time is one of the fastest ways to ruin a transfer that pressed perfectly. When you peel matters just as much as the temperature and time you used, and getting it wrong pulls the vinyl off the fabric before the adhesive has fully set. Every vinyl type specifies either a warm peel or a cool peel, and following the correct method keeps your cricut iron-on vinyl heat press settings working as intended.
Warm peel vs. cool peel
Warm peel means you lift the carrier sheet while the vinyl is still warm to the touch, roughly ten to fifteen seconds after the press opens. Standard Everyday Iron-On, Glitter, Holographic, and Foil Iron-On all fall into the warm peel category. Peeling while warm allows the carrier to release cleanly from the vinyl surface without dragging any edges up with it.
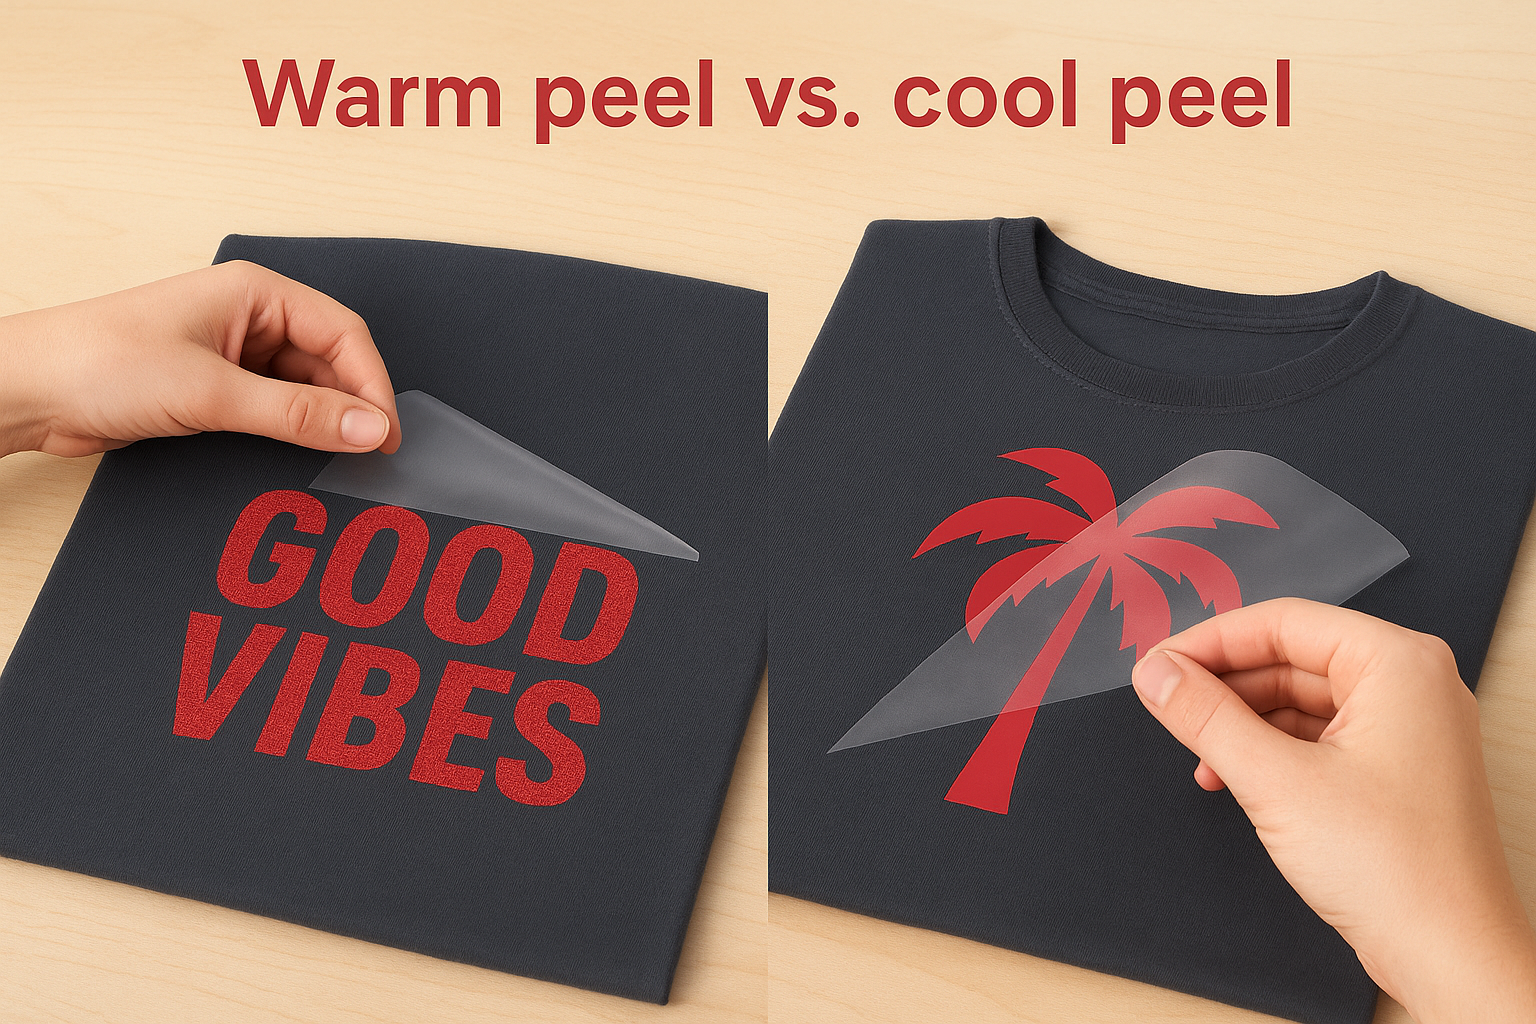
Cool peel means you wait until the transfer has fully returned to room temperature before touching the carrier. Sportflex Iron-On and Infusible Ink both require a cool peel because the adhesive needs time to set completely before the carrier releases without pulling the vinyl off the fabric. Rushing a cool peel, even by thirty seconds, often causes entire sections to lift away cleanly attached to the carrier sheet rather than staying on the garment.
If you’re ever unsure which peel method applies, check the product page in Cricut Design Space before you press rather than guessing once the vinyl is already on the fabric.
How to fix lifting edges
Lifting edges after peeling almost always point to one of three causes: insufficient pressure, incomplete press coverage, or moisture in the fabric before the transfer was applied. Before you attempt a fix, identify which of these caused the problem so you address the right issue rather than repeating the same mistake.
Follow these steps to re-press a partially lifted transfer:
- Lay the garment flat on the platen with the lifted section fully visible
- Place a Teflon sheet or parchment paper over the design to protect the vinyl surface
- Re-press at the original temperature for 10 to 15 seconds with firm, even downward pressure
- Hold the vinyl edges flat immediately after lifting the press
- Let the transfer cool fully before handling the garment
Re-pressing works well for small lifted sections caught early. If the vinyl has already been through a wash cycle, the adhesive bond is likely compromised and re-pressing will not restore a durable hold on that area.
Wash and wear: how to care for HTV
You can apply the most accurate cricut iron-on vinyl heat press settings in the world, but poor washing habits will still destroy a transfer within a few cycles. HTV bonds to fabric through heat-activated adhesive, and that bond weakens when exposed to high temperatures, harsh detergents, or abrasive tumbling in a standard dryer. The good news is that caring for HTV garments is straightforward once you know which steps actually matter.
Washing your HTV garments
Turn your garment inside out before placing it in the washing machine. This single step reduces direct friction on the vinyl surface during the wash cycle and protects the transfer from rubbing against other items in the load. Use a cold or cool water setting and select a gentle or delicate cycle rather than a standard or heavy-duty wash.
Avoid using fabric softener on HTV garments, since the conditioning agents in softener coat fibres and gradually break down the adhesive bond between the vinyl and the fabric.
Stick to a mild, standard laundry detergent without bleach or brightening agents. Bleach degrades the vinyl film itself over repeated washes, causing colours to fade and edges to lift. Washing on a gentle cycle with cold water preserves both the fabric and the transfer far longer than aggressive washing, even on garments you wear and wash frequently.
Drying and ironing after washing
Skip the tumble dryer whenever possible. High heat in a dryer is the fastest way to shorten the lifespan of an HTV transfer, regardless of how well the initial press went. Air drying your garment flat or on a hanger keeps the vinyl intact and prevents the repeated thermal cycling that causes edges to lift over time.
If you need to use a dryer, choose the lowest heat setting available and remove the garment while it is still slightly damp rather than running a full dry cycle. Avoid leaving HTV garments sitting in a hot dryer drum after the cycle finishes.
When ironing a garment after washing, never apply the iron directly to the vinyl surface. Turn the garment inside out, or place a pressing cloth or parchment paper between the iron and the transfer if ironing from the front. Use a low heat setting without steam. Direct contact between a hot iron and HTV melts the vinyl surface and permanently damages the finish in a way that cannot be reversed.
Get consistent results on every project
Getting your cricut iron-on vinyl heat press settings right comes down to four things working together: correct temperature for your vinyl type, the right press time, firm and even pressure, and a properly pre-pressed blank. None of these factors works in isolation, and skipping any one of them is usually what causes a transfer to fail. Use the chart in this guide as your reference, pre-press your blanks every time, and always match your peel method to the specific vinyl you’re using.
Small adjustments add up quickly. Testing on a scrap piece of fabric before pressing your final blank takes under a minute and saves you from ruining a finished garment. Keep notes on what settings worked for each fabric and vinyl combination you try, so you build a reliable personal reference over time rather than starting from scratch on every new project.
When you want professionally printed custom apparel without the setup or trial and error, custom apparel from Apex Workwear gets the job done with fast turnaround and Canadian-based production.