Standard rectangular stickers get the job done, but they don’t exactly turn heads. When you print die cut stickers, you get a custom shape that follows your design edge to edge, no wasted white border, no generic look. They’re one of the most effective (and affordable) ways to make your brand feel polished and intentional, whether you’re sticking them on packaging, laptops, helmets, or storefronts.
The problem? Ordering them for the first time can feel like guesswork. File formats, cut paths, bleed areas, material choices, there are a few technical details that trip people up and delay production unnecessarily. Get them right from the start, and you’ll have professional stickers in hand within days. Get them wrong, and you’re stuck in a back-and-forth revision loop that nobody enjoys.
At Apex Workwear, we print custom die cut stickers right here in Canada with no minimum order requirements and most orders shipping within 5–7 business days. This guide walks you through the entire ordering process step by step, from preparing your artwork and choosing the right material, to placing your order and getting your stickers delivered fast. Whether you’re a small business owner branding your first product run or a contractor who needs durable vinyl decals for the job site, you’ll have everything you need to order with confidence.
What to decide before you print die cut stickers
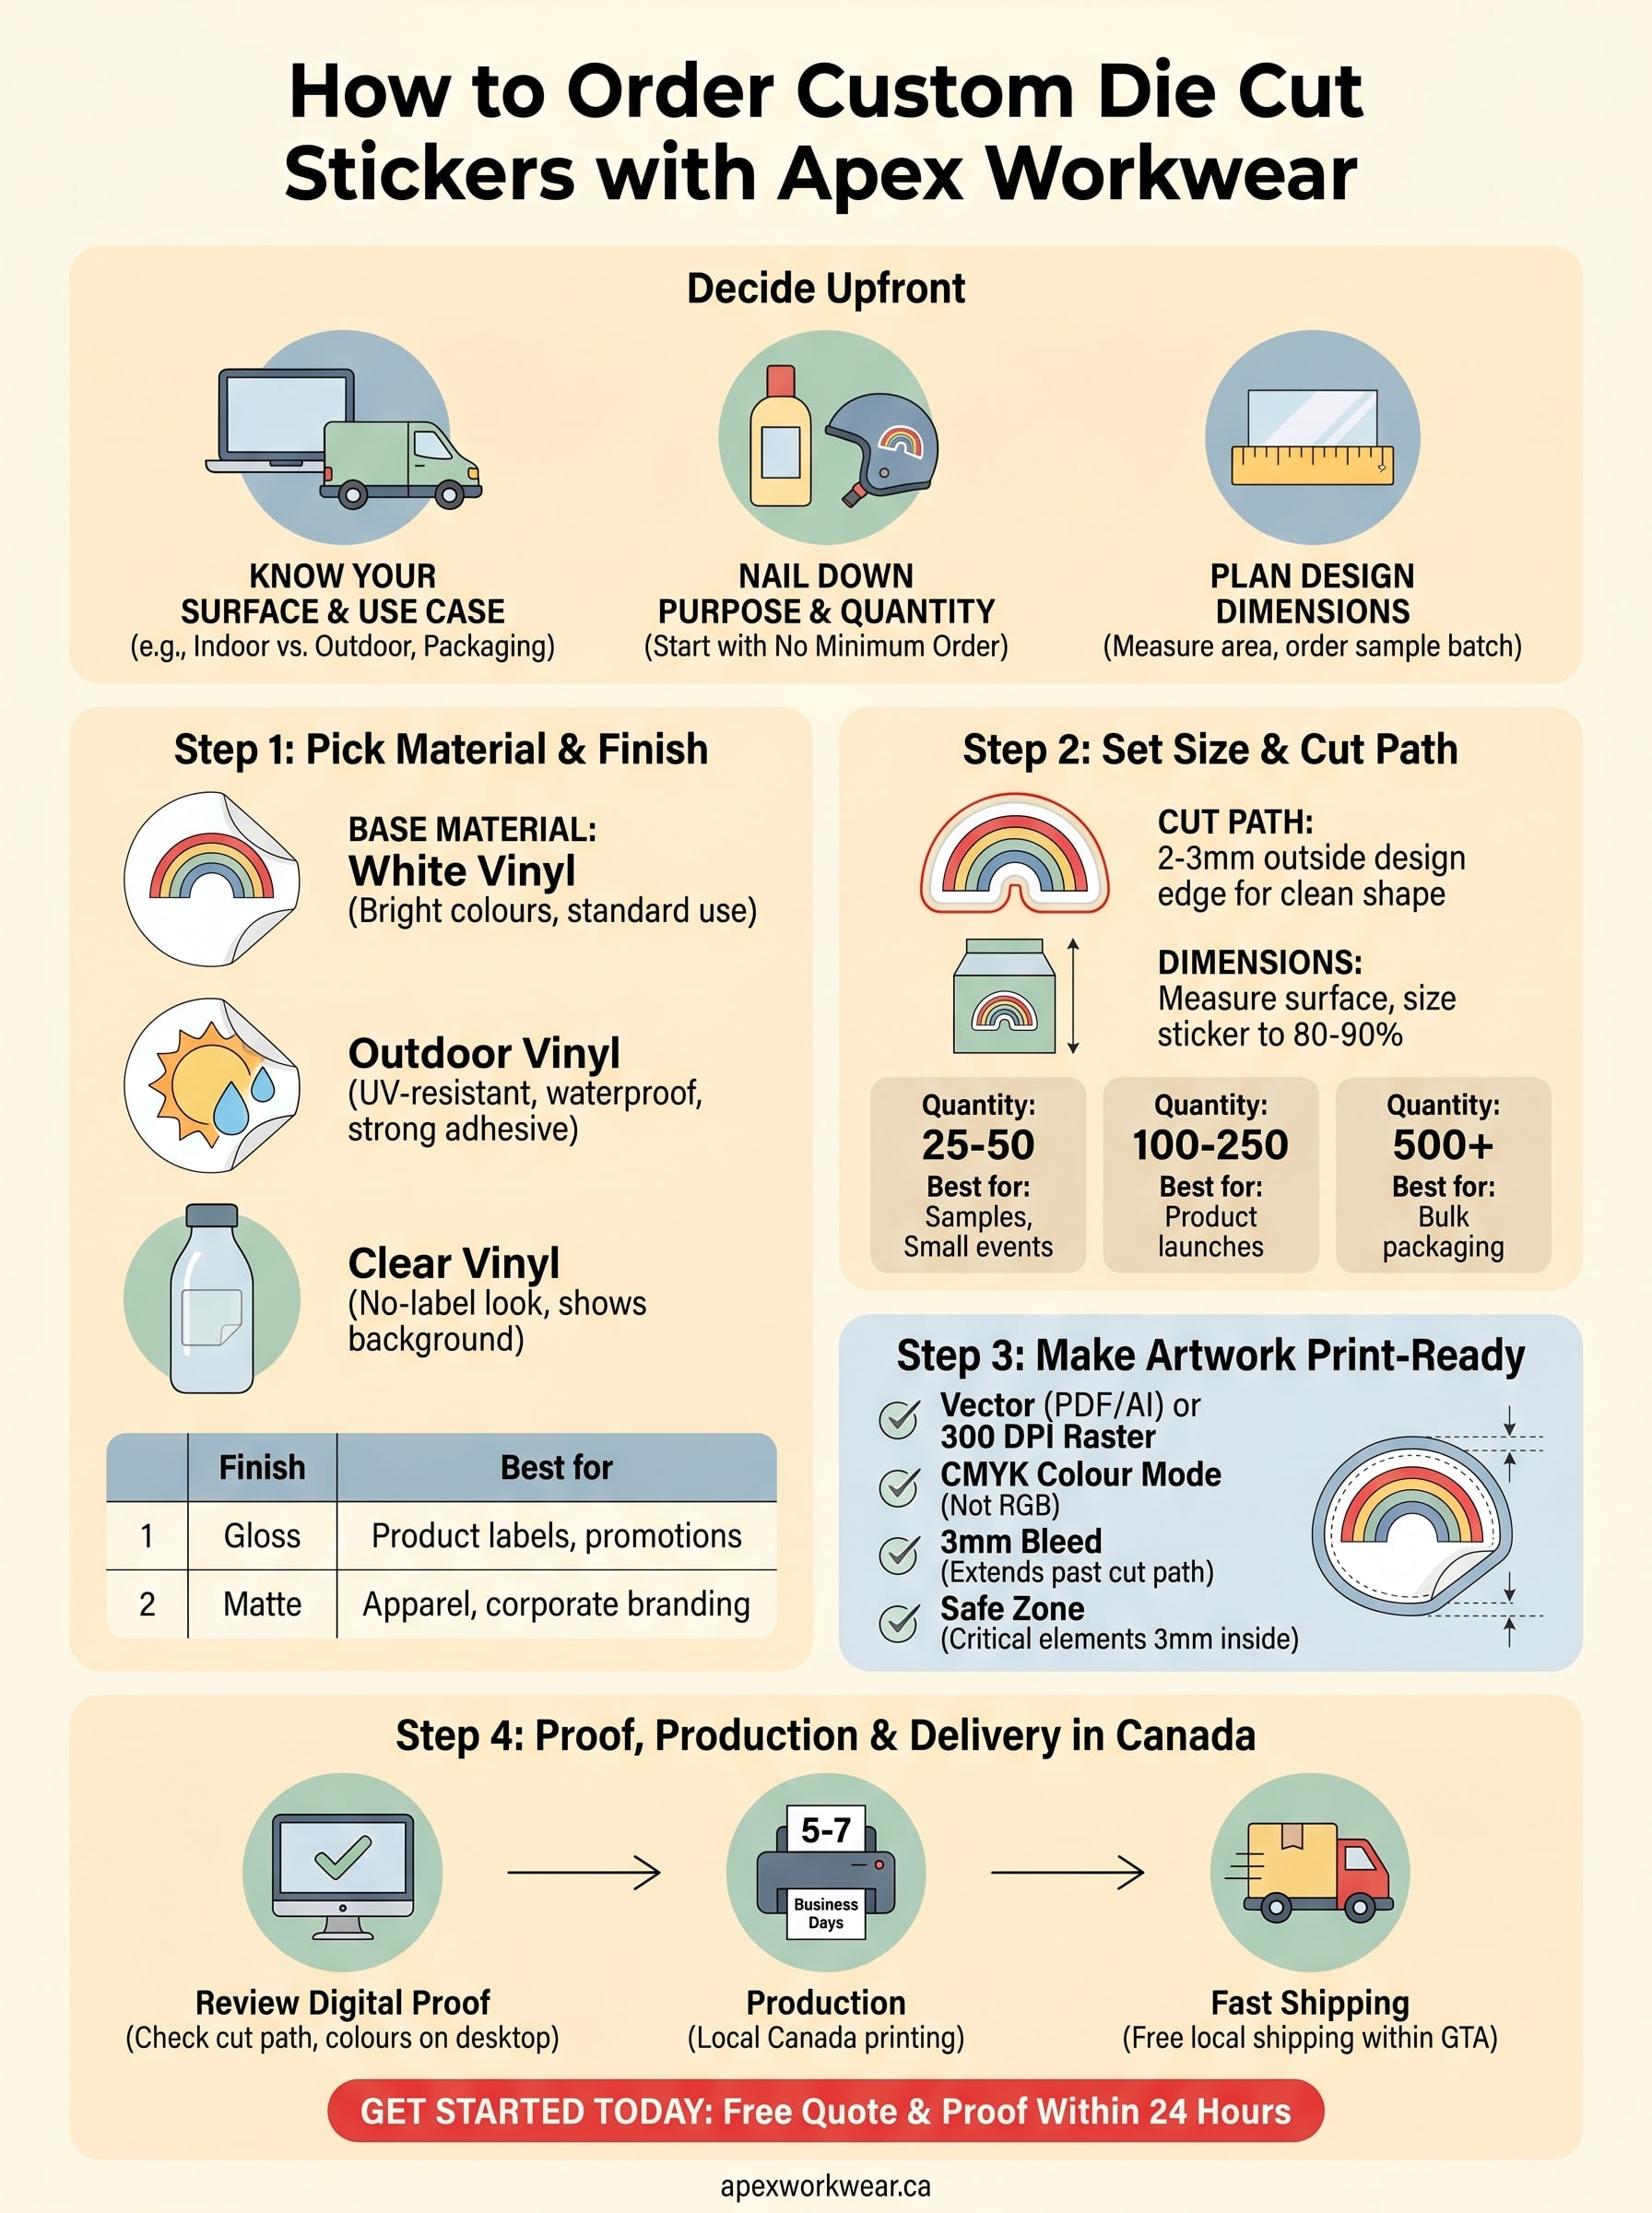
Before you place an order to print die cut stickers, a few upfront decisions will save you time and prevent costly mistakes. The biggest one is knowing exactly where your stickers will end up once they’re printed. Indoor product labels have different material requirements than outdoor decals on a van or a toolbox. Getting clear on this before you open a design file keeps you from ordering the wrong material and having to start the whole process over.
Know your use case and surface
Your intended surface and environment dictate material and laminate choices more than anything else. Indoor stickers on packaging or notebooks can use standard matte or gloss vinyl. Stickers going on vehicles, water bottles, or outdoor equipment need UV-resistant, waterproof vinyl to hold up long-term. Think about whether the surface is flat or curved, and whether the sticker will face direct sunlight, moisture, or frequent handling before you commit to a material.
If your sticker will face outdoor conditions, always choose a waterproof laminate to prevent fading and peeling within the first season of use.
Nail down your purpose and quantity
Purpose shapes your quantity needs, and quantity shapes your unit cost. A small business ordering stickers for product packaging might need 250 to 500 units to cover a product launch. A contractor branding a job site might only need 25 helmet decals. No minimum order requirements mean you can order exactly what you need without committing to a large run you won’t use.
Having a firm number in mind also helps you plan your design dimensions correctly. A sticker destined for a 500ml bottle has very different size constraints than one going on a storefront window. Write down your target quantity, placement surface, and approximate size before you move on to artwork, and the rest of the process becomes much more straightforward.
Step 1. Pick a sticker type and material
When you print die cut stickers, your first decision is base material. Most jobs use white vinyl, which gives colours a bright, accurate finish. Clear vinyl is available if you want a no-label look on transparent packaging or glass surfaces. Pick your base material based on where the sticker will live long-term, because switching materials after artwork is finalised means starting that decision from scratch.
Vinyl base options
Standard white vinyl covers most indoor and product branding applications. Outdoor-grade vinyl uses a stronger adhesive and UV stabilisers that resist fading. Clear vinyl works well on glass or transparent packaging where you want the background to show through. Each option affects how your design reads, so match the vinyl to the surface before you finalise anything.
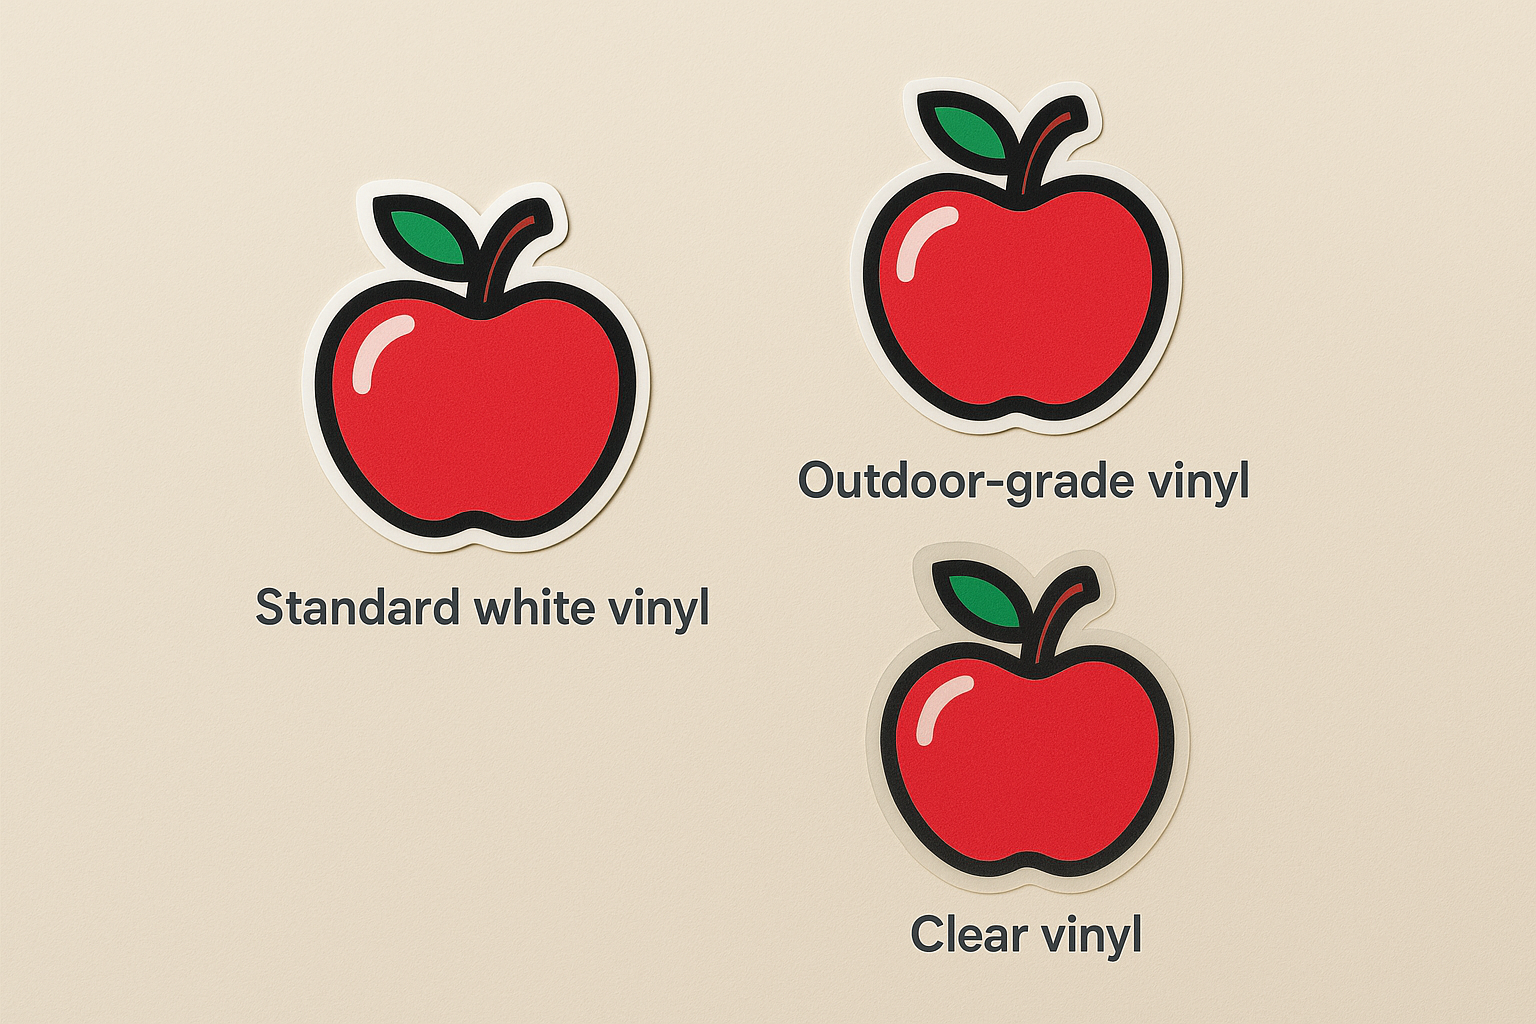
For stickers on water bottles, vehicles, or outdoor equipment, always choose outdoor vinyl with a UV laminate or the colours will fade within months.
Choosing your finish
Your laminate finish changes both look and durability. Gloss laminate makes colours pop and resists scratches. Matte delivers a clean, understated result that suits minimalist designs. High-gloss is the go-to choice for product labels, while matte works well for corporate and apparel applications.
| Finish | Best for |
|---|---|
| Gloss | Product labels, promotional stickers |
| Matte | Apparel labels, corporate branding |
| No laminate | Indoor-only, short-term use |
Step 2. Set size, shape, and quantity
Once you have your material sorted, the next step is locking in your sticker dimensions, cut shape, and how many you need. These three elements work together, so changing one often means revisiting the others. Confirming them before you open a design file keeps the process clean and avoids unnecessary rework.
Choosing your dimensions
Most custom stickers for everyday product and branding use fall between 2" x 2" and 5" x 5". Larger formats are available for window and signage applications. A practical rule: measure the surface where the sticker will sit, then size your sticker to roughly 80-90% of that area so it fits without overwhelming the space.
If you are unsure about sizing, order a small sample batch across two or three sizes before committing to a full production run.
Defining your cut path and quantity
Your cut path is the line the die-cutting machine follows to trim around your design. It should sit 2-3mm outside your design edge so the blade never cuts into the artwork. When you print die cut stickers, a clean, closed cut path is what makes the final shape look intentional rather than rough.
Quantity directly affects your unit cost, so plan ahead using this guide:
| Quantity | Best for |
|---|---|
| 25-50 | Samples, small events |
| 100-250 | Product launches, promotions |
| 500+ | Bulk packaging, ongoing branding |
Step 3. Make your artwork print-ready
Your file setup determines whether production runs smoothly or stalls at the proof stage. When you print die cut stickers, vector files in PDF or AI format are the standard because they scale without losing edge sharpness. Raster files like JPG or PNG work only if your resolution is 300 DPI or higher at the final print size.
File format and colour mode
Submit your artwork in CMYK colour mode, not RGB. Screens display RGB, but printers use CMYK, so colours shift when the conversion happens automatically during production. Convert your file to CMYK before submitting and adjust any colours that look off after the conversion, particularly bright blues and oranges.
If your brand uses a specific Pantone colour, request a colour match when you place your order rather than relying on a standard CMYK conversion.
Bleed and cut path setup
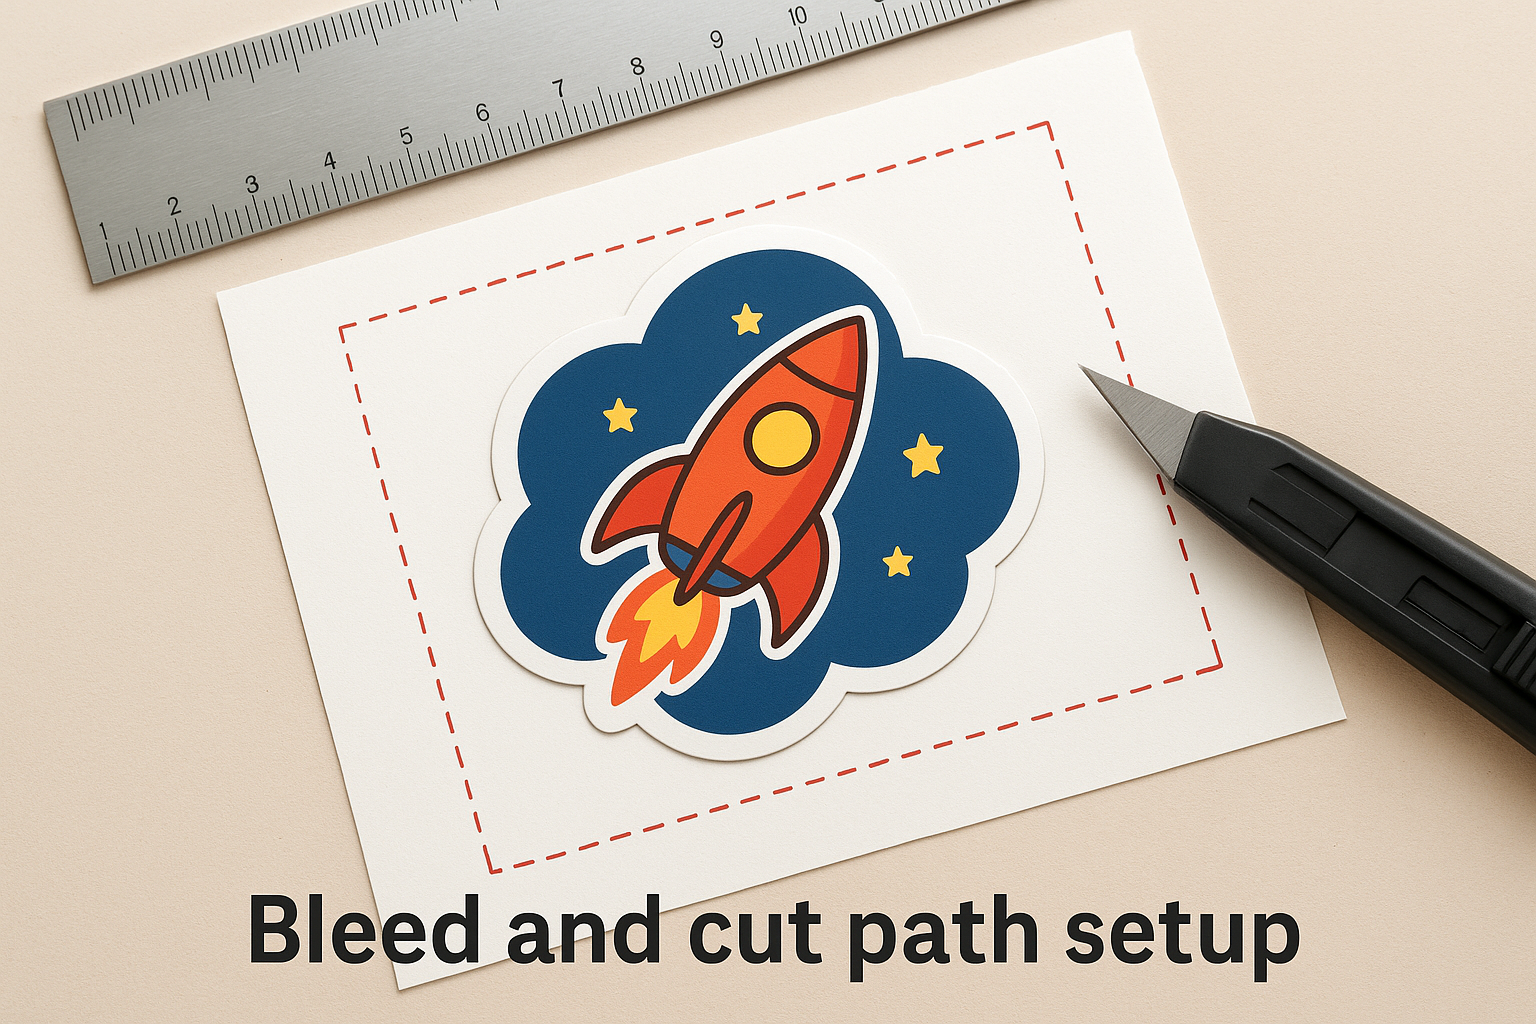
Your artwork needs a 3mm bleed extending beyond the cut path so no white edges appear if the blade shifts slightly during cutting. Keep all critical design elements like text and logos at least 3mm inside the cut path so nothing gets trimmed. Use this checklist before you submit your file:
- File format: PDF or AI (vector preferred)
- Colour mode: CMYK
- Resolution: 300 DPI minimum
- Bleed: 3mm outside cut path
- Safe zone: 3mm inside cut path
- Cut path: closed, 2-3mm from design edge
Step 4. Proof, production, and delivery in Canada
Once you submit your file, Apex Workwear reviews it and begins the proof stage. This is where your print die cut stickers move from artwork to a production-ready file, so staying responsive at this stage keeps your order on schedule.
Reviewing your digital proof
You will receive a digital proof before printing starts. Review it carefully on a desktop screen, checking the cut path position, colours, text accuracy, and dimensions. Approve only when satisfied, because any changes after approval reset the production timeline.
Never approve a proof on a phone screen alone. Colours shift significantly on mobile displays, and small errors are easy to miss.
Use this checklist when reviewing:
- Cut path sits 2-3mm from your design edge
- Text is free of spelling errors
- Colours look correct in CMYK
- Bleed extends 3mm beyond the cut path
- Dimensions match your original order
Production timeline and shipping
After approval, most orders ship within 5 to 7 business days. Rush options are available for tight deadlines. All production is done in Canada, and free local shipping covers eligible orders within the GTA and surrounding areas.
Double-check your delivery address at checkout before submitting. Confirm the expected dispatch date from your order confirmation so you can plan around your shipping window.
Ready to print your stickers
You now have everything you need to order with confidence. You know which material suits your surface, how to size your cut path correctly, and what a print-ready file actually looks like before it goes to production. That upfront preparation is what separates a smooth order from one that stalls at the proof stage.
When you print die cut stickers through a Canadian printer, you get fast turnaround, no guesswork on import duties, and production done locally without unnecessary delays. The steps in this guide work for any order size, whether you need 25 stickers for a product sample run or 500 for a full packaging rollout.
Get your order started today and have professional custom stickers in hand within days. Visit Apex Workwear to request a free quote, upload your artwork, and get a digital proof back within 24 hours, seven days a week.