If you’ve ever worn a branded t-shirt, picked up a printed tote bag, or spotted a logo on a uniform, there’s a good chance you were looking at screen printing. It’s one of the most widely used methods for putting designs onto fabric and other surfaces, and it’s been around for centuries. Yet for most people ordering custom apparel, the actual process remains a bit of a mystery. This article is screen printing explained from start to finish: what it is, how it works mechanically, and why it produces the results it does.
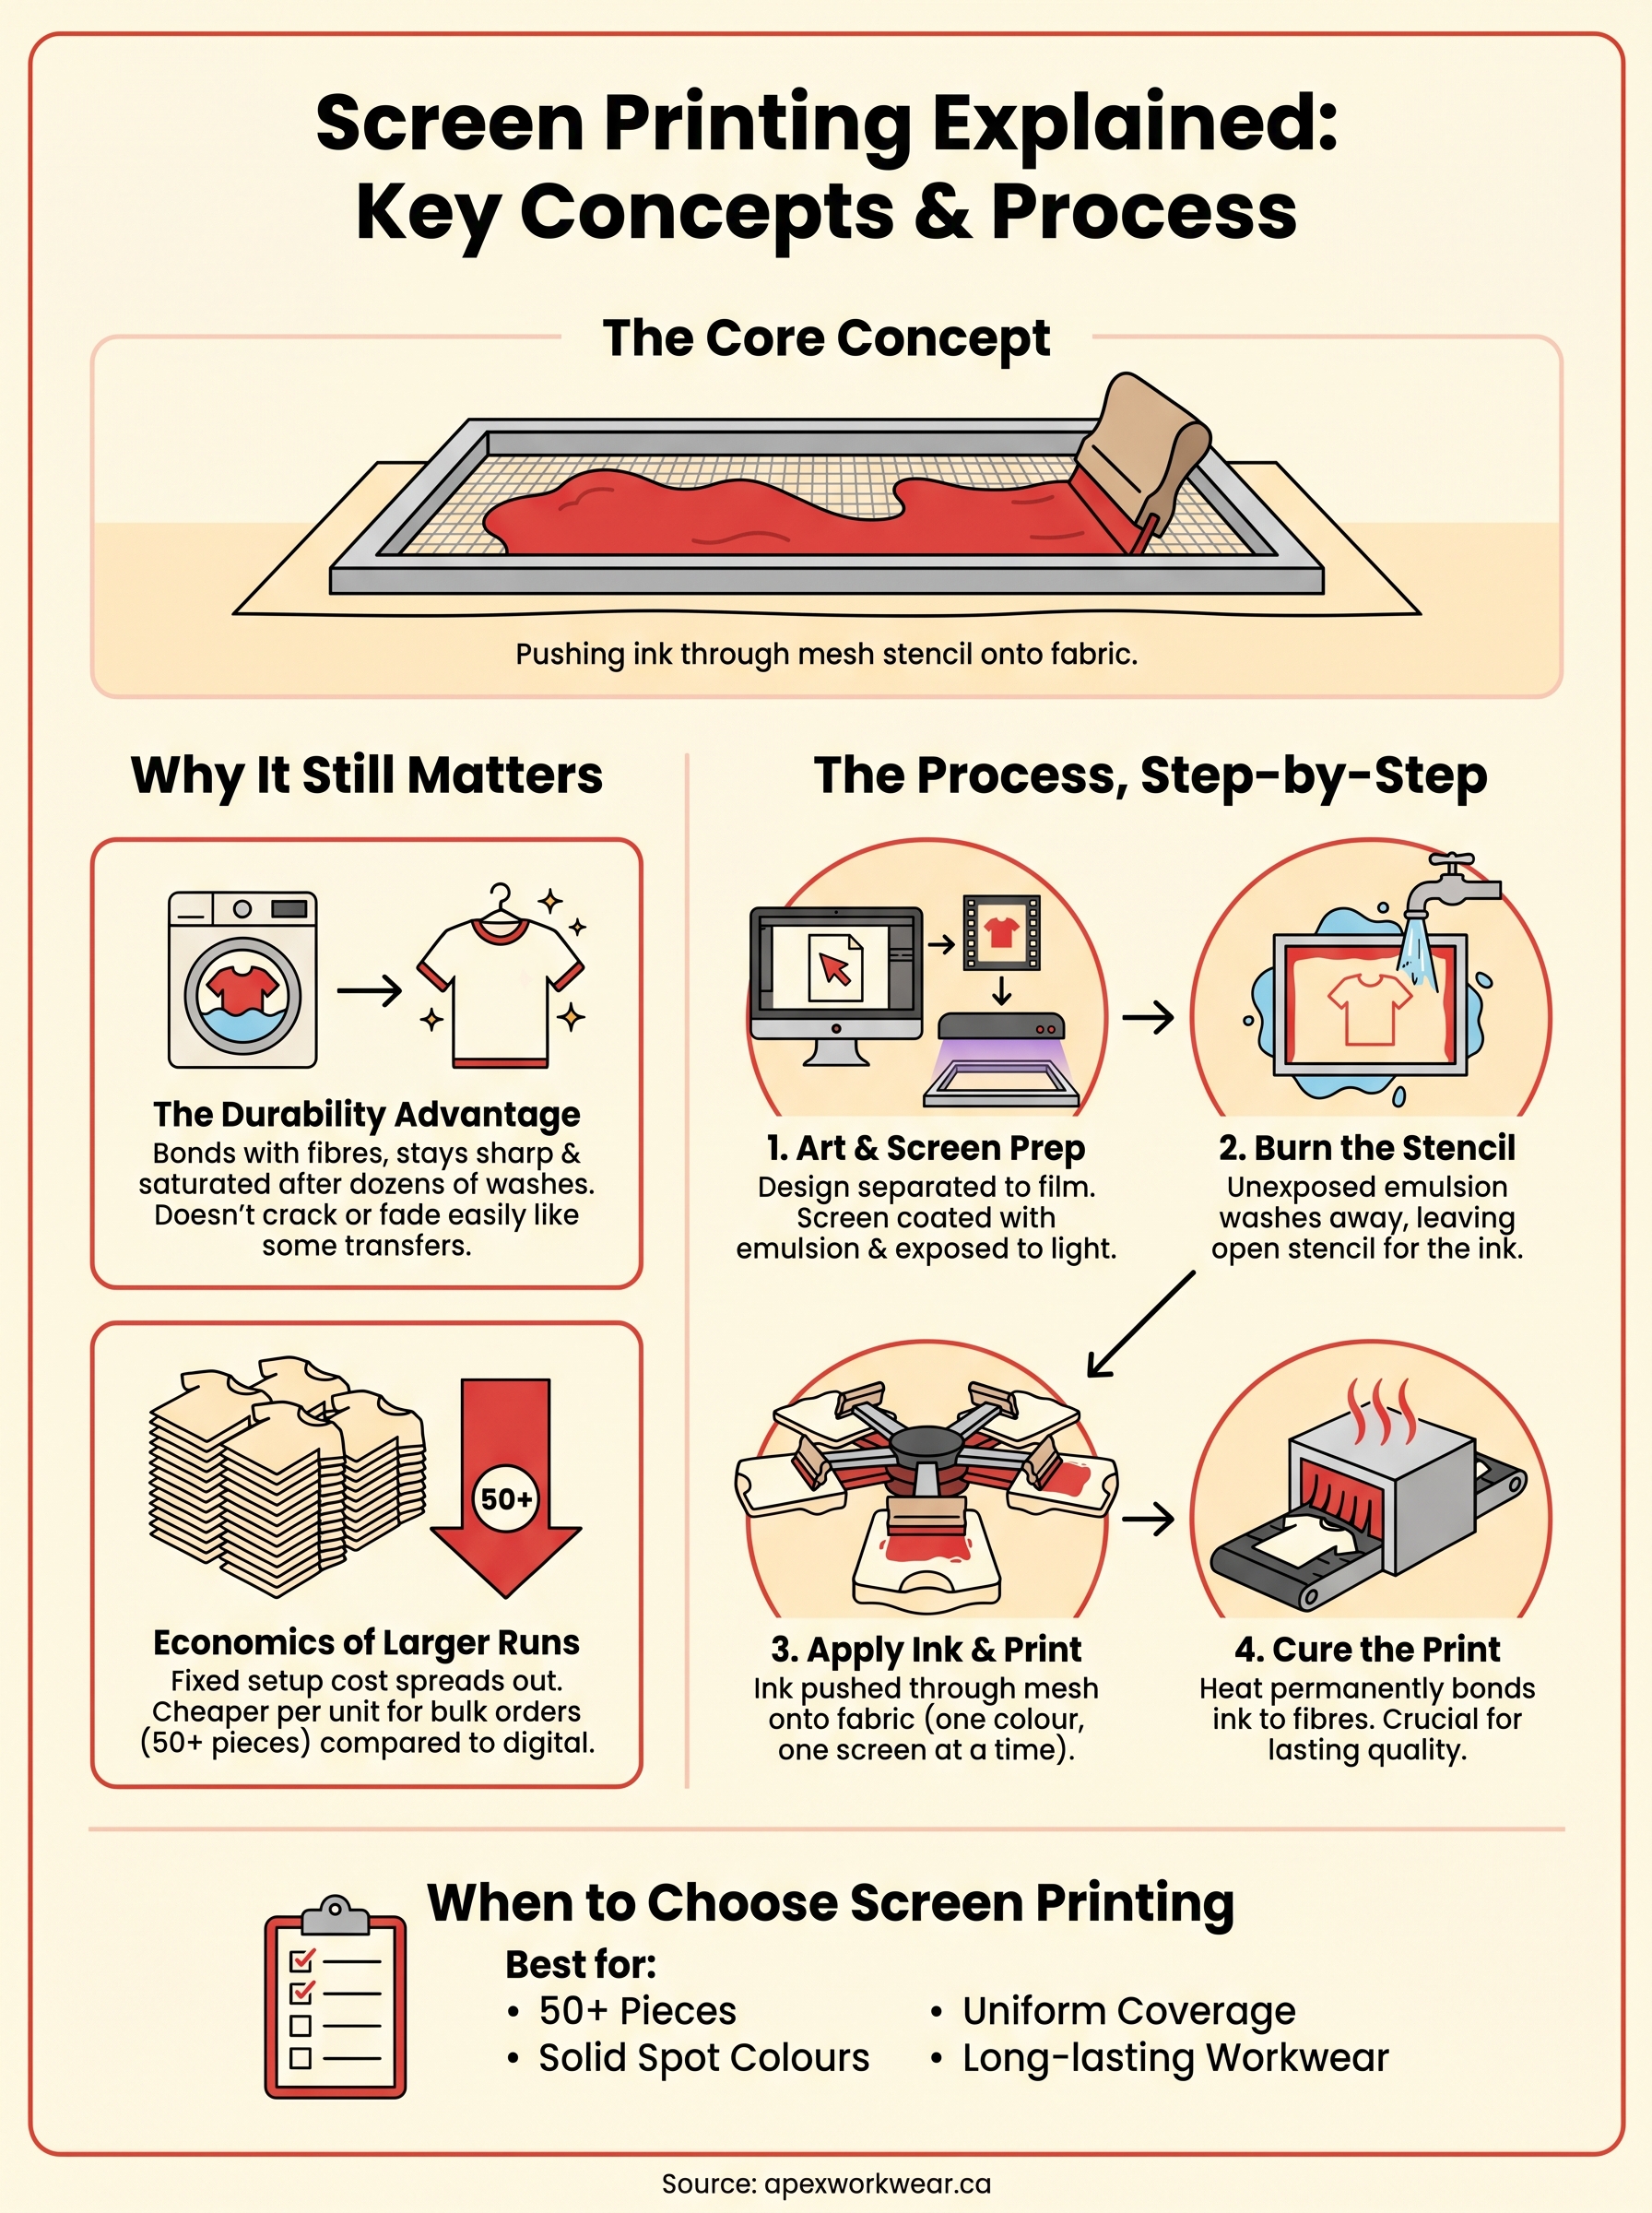
Screen printing works by pushing ink through a mesh stencil onto a surface, one colour at a time. That might sound simple, but there’s real craft involved at every stage, from preparing the screen to curing the final print. Understanding the process helps you make better decisions when ordering custom apparel, especially when it comes to colour choices, design complexity, and fabric selection.
At Apex Workwear, we use screen printing (among other methods) to produce custom t-shirts, hoodies, and apparel for businesses, teams, and organisations across Canada. We see the questions that come up regularly, How many colours can I use? Why does setup matter? What makes screen printing different from digital? Below, we’ll walk through each step of the screen printing process so you know exactly what’s happening between your design file and the finished product in your hands.
Why screen printing still matters
With digital printing and embroidery available at nearly every custom apparel shop, you might wonder why screen printing is still so dominant. The answer comes down to output quality, cost at scale, and a set of physical properties that other methods simply cannot replicate. Whether you’re ordering branded uniforms for a crew of 50 or t-shirts for a team fundraiser, screen printing consistently delivers results that hold up in the real world.
The durability advantage
Screen printing forces thick, pigment-rich ink directly into the fabric fibres rather than sitting on top of the material like a film. That means the print bonds with the garment at a physical level. After dozens of washes, a well-executed screen print stays sharp and saturated, whereas many heat-transfer and direct-to-garment prints begin to crack or fade noticeably after regular use.
The depth of ink penetration is what separates screen printing from most other methods: prints that last are built from the substrate up, not applied on top.
For workwear and uniforms specifically, this matters considerably. Your staff’s clothing takes real punishment, and a logo that fades after a few months reflects poorly on your brand. Screen printing holds colour better under repeated industrial washing cycles, which is why industries like construction, hospitality, and logistics have relied on it for decades.
Where digital printing falls short
Direct-to-garment (DTG) printing is genuinely excellent for short runs with photographic complexity, but it carries real limitations. Colour vibrancy on dark fabrics is one of the most common complaints with DTG, particularly on black or navy garments, where the base underlay required to carry the ink softens the overall finish. Screen printing does not have this problem because the inks are opaque and applied in controlled layers.
Coverage is another factor worth understanding. Screen printing applies a denser, more saturated layer of colour across a large print area with complete consistency. With DTG, coverage can vary slightly between individual garments, which becomes noticeable when you line up 40 shirts side by side and compare them directly.
The economics of larger runs
Once you have screen printing explained clearly, the cost structure makes immediate sense. Each colour in a design requires its own screen, so there is a fixed setup cost upfront. That cost spreads across every unit in the run, which means the more pieces you order, the cheaper each individual item becomes.
For businesses ordering in volume, this is a straightforward advantage. Bulk pricing rewards larger orders in a way that per-unit digital printing simply cannot match. If you need 50 or more pieces carrying a consistent two or three colour logo, screen printing almost always delivers a lower cost per unit while maintaining superior print quality across the entire run.
The screen printing process, step by step
Once you have screen printing explained at a conceptual level, the mechanical steps become straightforward. Each stage builds directly on the last, and skipping or rushing any one of them affects the quality of the finished print. Here is exactly what happens between your design file and the garment in your hands.
Preparing the artwork and burning the screen
Your design file gets separated into individual colour layers, each printed onto a transparent film sheet called a film positive, with the artwork appearing in solid black ink. The printer then coats a mesh screen with light-sensitive emulsion and places the film positive on top. Exposing the screen to UV light hardens the emulsion everywhere except where the black ink blocked it. Washing the screen removes that soft emulsion and leaves an open stencil in the precise shape of your design.
Getting the colour separation and exposure time right at this stage determines everything that follows: an incorrectly burned screen produces jagged edges and inconsistent ink coverage no matter how carefully the rest of the job is handled.
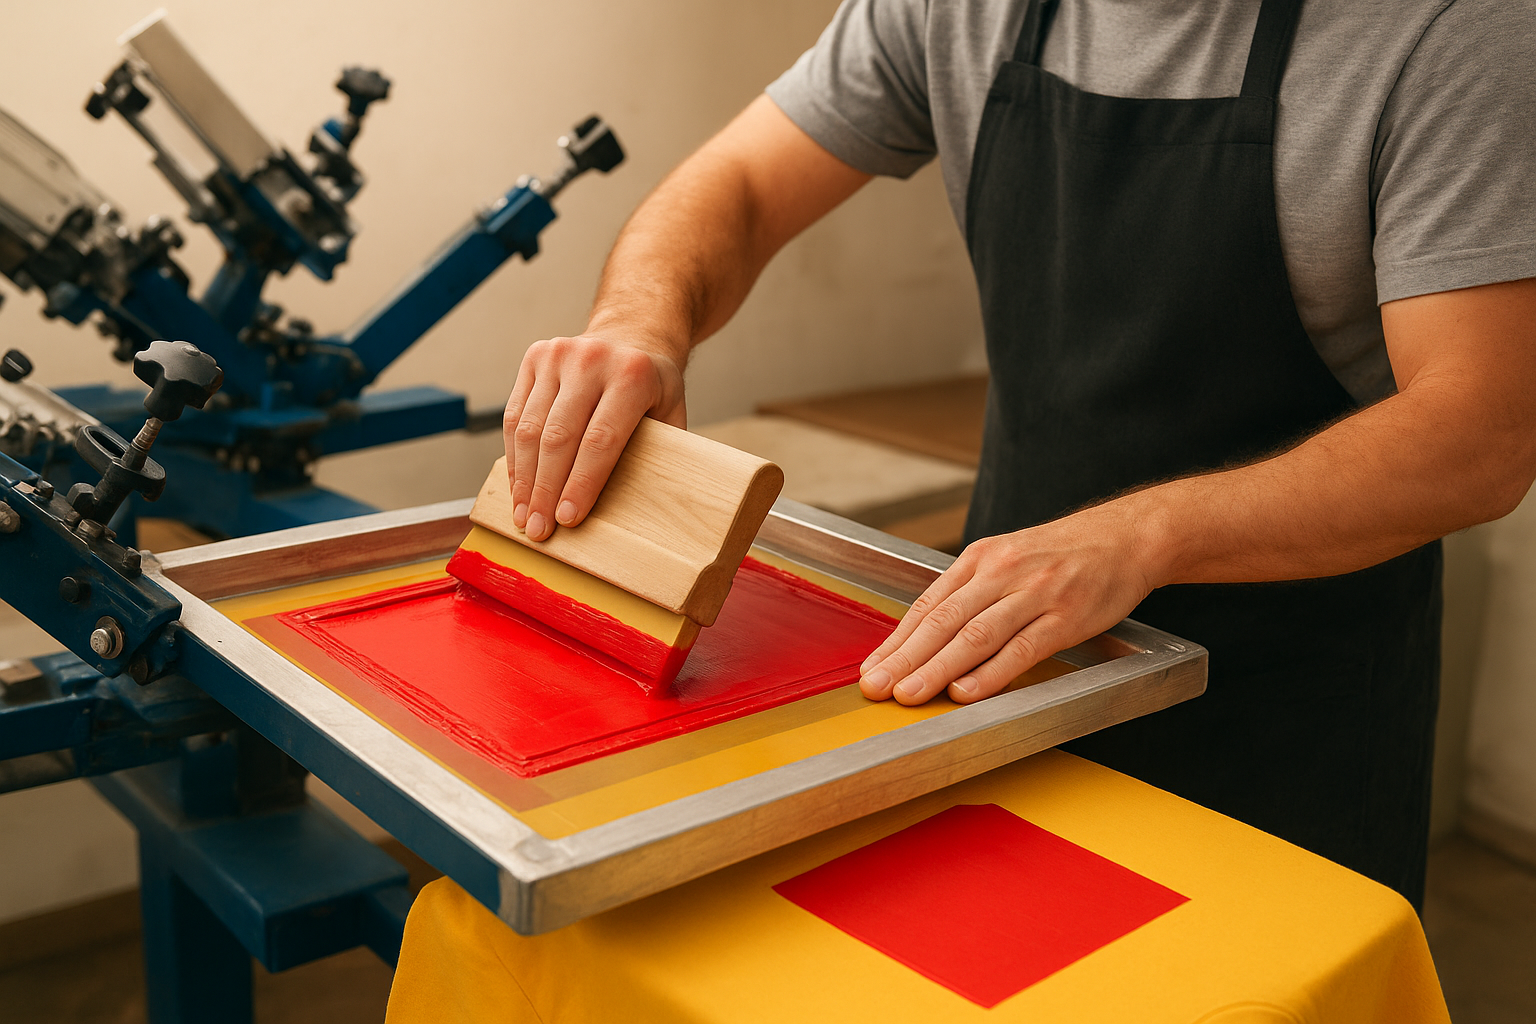
Loading the press and applying ink
The screen clamps into a multi-arm printing press, and the garment lies flat on a padded pallet directly beneath it. The printer spreads ink across the top of the screen and pulls a firm rubber squeegee across the surface, pushing ink through the open mesh and onto the fabric in a single controlled stroke. Multi-colour designs require a separate screen and a separate press pass for each colour, with each layer needing precise registration to align properly with the one before it.
Curing the finished print
After printing, the garment travels through a conveyor dryer calibrated to a specific temperature. This curing step bonds the ink permanently into the fabric fibres rather than simply drying on the surface. Insufficient heat or too-fast a belt speed leaves the ink under-cured, which causes cracking and fading after just a few washes. Once the garment passes through and cools, it gets inspected for quality before packing and shipment.
Screens, inks, and tools you actually need
Getting screen printing explained at a technical level requires understanding the physical components involved. The quality of every print traces back to the equipment you select and the materials you use before ink ever touches fabric. Cutting corners on any one of these elements shows up directly in the finished result.
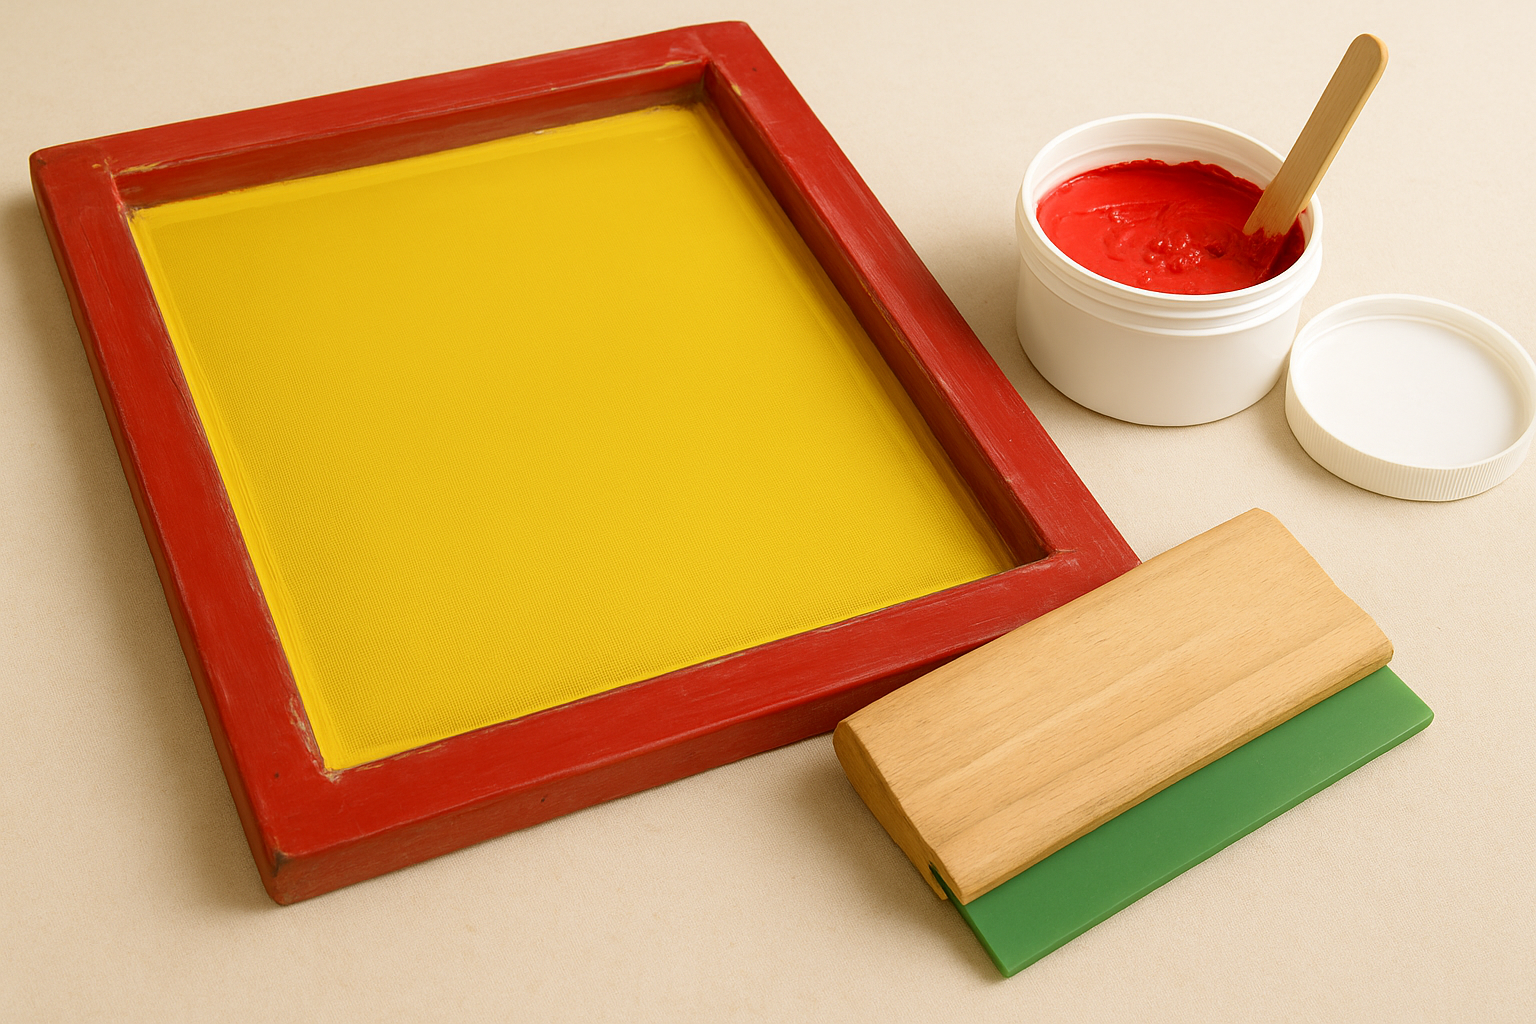
The screen and mesh count
The screen itself is an aluminium or wooden frame stretched tight with polyester mesh. The mesh count, measured in threads per inch, controls how much ink passes through with each squeegee stroke. Lower mesh counts (around 110) work well for thick, opaque inks on dark fabrics, while higher mesh counts (around 230 to 305) suit fine detail and thinner ink formulations.
Choosing the wrong mesh count is one of the most common causes of poor ink coverage or lost detail in a finished print.
Ink types and when to use them
Not all screen printing inks behave the same way, and picking the right formulation for your fabric and design makes a significant difference to the final result. Here are the main types you will encounter:
- Plastisol ink: The industry standard for most apparel; sits on top of the fabric and requires heat to cure, producing vivid and durable colours on virtually any garment.
- Water-based ink: Penetrates the fabric fibres more deeply, producing a softer hand feel, and suits light-coloured garments where a vintage finish is the goal.
- Discharge ink: Removes the dye from the fabric itself and replaces it with pigment, leaving an extremely soft finish on darker garments.
Beyond screens and inks, you need a squeegee, a printing press, a UV exposure unit, and a conveyor dryer. Each tool plays a specific role, and a weak link in any one of them produces inconsistent prints across your run.
Choosing the right method for your job
With screen printing explained in full, the next question is whether it’s the right choice for your specific project. No single printing method suits every job, and making the wrong call early costs you money and time. The decision comes down to four main factors: order quantity, colour complexity, fabric type, and budget.
When screen printing is the right call
Screen printing delivers the best results when you need 50 or more pieces carrying a design with a defined number of solid colours. If your logo uses two or three spot colours on a standard cotton or cotton-blend garment, screen printing gives you crisp edges, consistent coverage, and a print that survives heavy use. It also works well when you need prints that cover large surface areas uniformly, such as full-front graphics on hoodies or back prints on work shirts.
If your order runs to 50 or more pieces with a clean, defined logo, screen printing almost always beats every other method on cost per unit and print durability.
When to consider other methods
Short runs of fewer than 24 pieces shift the economics away from screen printing because the setup cost per unit becomes harder to justify. For those jobs, direct-to-garment printing removes the screen setup entirely and handles each piece individually, making it practical for small quantities or one-off items. Photographic artwork with gradients and dozens of colours also suits DTG better, since screen printing requires a separate screen for each colour and complex separations drive costs up quickly.
Embroidery is worth considering when your design calls for a raised, textured finish on hats, polo shirts, or jackets. It holds up extremely well over time, but it suits simpler artwork with clean lines rather than designs with fine detail or large filled areas. Knowing these trade-offs upfront saves you from ordering the wrong method for your specific need.
Common mistakes and how to avoid them
Even with screen printing explained thoroughly, problems still happen when details get rushed or overlooked. Most failed prints and wasted orders trace back to the same recurring errors, and knowing what they are lets you sidestep them before your job reaches the press.
Artwork and colour setup errors
Low-resolution or raster-based artwork is the single most common cause of delayed orders and blurry prints. Screen printing requires clean, hard edges for each colour layer, so supply your design as a vector file (AI or EPS format) wherever possible. Raster images like JPEGs lack the scalability needed for sharp stencils, and a screen burned from a blurry film positive produces poor results at any size.
If you supply high-resolution vector artwork from the start, you eliminate the most common source of print quality problems before the job ever reaches the press.
Colour count is the second issue worth addressing early. Each additional colour adds a screen, a press pass, and setup cost, which pushes your price per unit higher. Many orders request four or five colours when two or three would deliver the same visual impact at a noticeably lower price. Reviewing your colour palette before submitting saves money without reducing the quality of the finished garment.
Rushing the proof and curing stages
Digital proofs catch errors that written briefs miss entirely: placement issues, colour mismatches, and sizing problems all surface at the proof stage if you look carefully. Approving a proof too quickly without checking every element against your original brief is the most common way avoidable reprints happen.
Under-curing is the other mistake that only becomes obvious after a few washes. Insufficient heat or a belt speed set too high leaves ink under-bonded to the fabric, causing cracking and fading well before the garment should show any wear. Always confirm your dryer settings match the ink manufacturer’s recommended cure temperature before running a full job.
Ready to start printing
With screen printing explained from artwork preparation through to curing, you now have a clear picture of what separates a great print job from a disappointing one. The process rewards preparation: clean vector artwork, the right mesh count, the correct ink for your fabric, and a curing stage that bonds the ink into the fabric properly. Cut corners at any of those points and the results show up after a few washes.
Your next step is straightforward. Whether you need branded uniforms for a crew, event shirts, or custom hoodies for an upcoming campaign, bringing a clear brief and a well-prepared design file to your printer gets you faster turnaround and a better finished product. If you are ready to get a quote or want guidance on the right method for your specific job, get in touch with the Apex Workwear team and we will walk you through every option.