If you’ve ever wondered how does screen printing work on t-shirts, you’re not alone. It’s one of the most common questions we hear from business owners and team leads looking to order custom apparel. Screen printing is one of the oldest and most reliable methods for putting designs onto fabric, and understanding the process helps you make smarter decisions about your order.
At its core, screen printing uses a mesh stencil to push ink directly onto the shirt’s surface, one colour at a time. The result is a vibrant, durable print that holds up through hundreds of washes. It’s the go-to method for bulk orders, team uniforms, and branded merchandise, and it’s one of the key services we offer here at Apex Workwear for businesses across Canada.
This guide breaks down every step of the screen printing process, from artwork preparation to the final cure. You’ll also learn how it compares to other printing methods like DTG and heat transfer, so you can pick the right approach for your project. Whether you’re ordering 50 crew neck tees or 500, knowing what goes on behind the scenes helps you get exactly what you’re after.
What screen printing is and when it makes sense
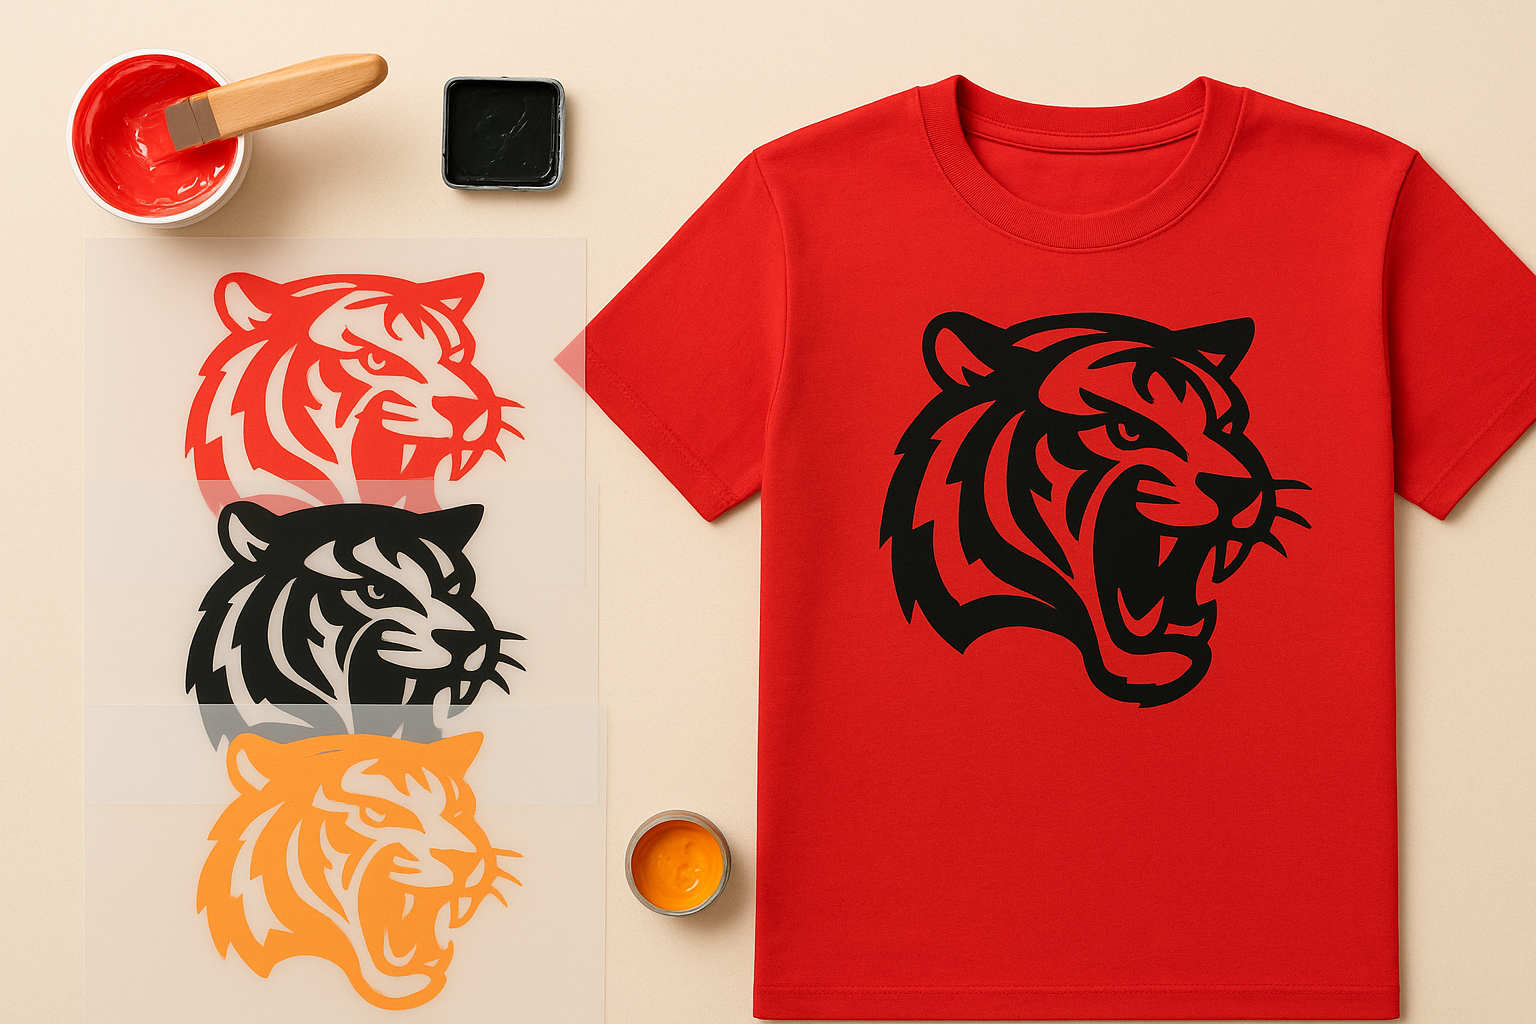
Screen printing is a stencil-based printing method where ink is pushed through a mesh screen onto the surface of a t-shirt. Each colour in your design gets its own dedicated screen, and the printer applies ink one layer at a time until the full design is built up. It’s a process built around precision and repetition, which is exactly why it produces such consistent, long-lasting results across large order runs.
Screen printing has been the industry standard for custom apparel for over a century because nothing else matches its combination of colour vibrancy, print durability, and cost-efficiency at volume.
How screen printing works at its core
When you ask how does screen printing work on t-shirts, the short answer is: controlled ink transfer through a fine mesh. The screen itself is a tightly woven polyester or nylon mesh stretched over a rigid frame, usually aluminium. A light-sensitive emulsion is applied to the mesh, and your design is burned into it using UV light. The areas where the light hits the emulsion harden and block ink. The areas that remain soft wash away, leaving open channels in the shape of your design.
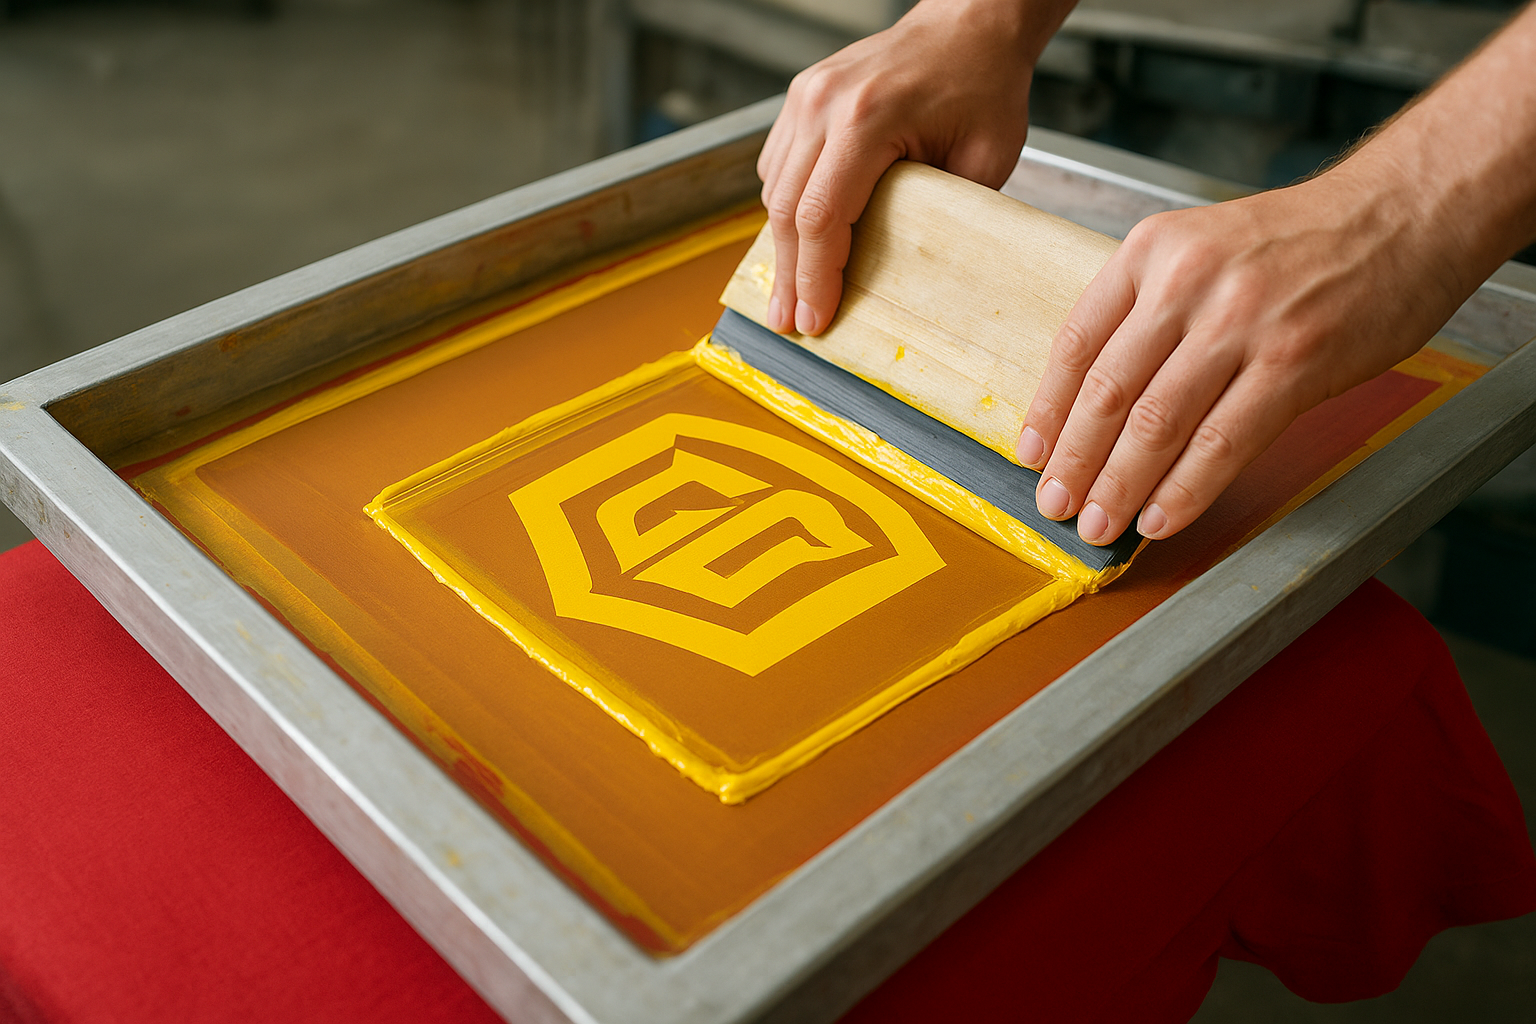
Once the screen is ready, the printer places it over the shirt on a flat press platen. A thick rubber blade called a squeegee drags ink across the screen surface, forcing it through the open mesh and onto the fabric below. The process takes just a few seconds per shirt, which is why print speeds are so fast once setup is complete. A second screen with a different emulsion pattern handles the next colour, and so on, until all the layers are printed and the design is fully formed.
When screen printing makes sense for your order
Screen printing is not the right tool for every job, and knowing where it excels helps you avoid wasted time and money. The method works best when you have a design with a limited number of solid colours, typically six or fewer, and when you’re ordering a reasonable quantity of the same design. The setup cost comes from producing the screens, so the more shirts you print, the lower your cost per unit becomes.
Here’s a quick breakdown of when screen printing is the strongest choice:
- Order quantity: Works best from around 12 pieces and up, where setup costs spread across the run
- Colour count: Solid, flat colours give the sharpest results; gradients and photographic images need specialist techniques like simulated process printing
- Fabric type: Cotton and cotton-poly blends hold screen print ink well and produce bright, clean results
- Design style: Bold graphics, logos, text-based designs, and simple illustrations are ideal
- Durability needs: If your shirts need to hold up through regular industrial washing or heavy use, screen printing outlasts most other methods
Where screen printing becomes a poor fit is small one-off orders or highly detailed photographic prints. If you need a single shirt with a full-colour photo, direct-to-garment printing is likely the better route. For team uniforms, branded workwear, or event merchandise in solid quantities, though, screen printing gives you the best combination of quality, consistency, and value.
The gear and setup you need for clean prints
Before you understand how does screen printing work on t shirts at a practical level, you need to know what equipment drives each stage of the process. The right gear makes the difference between sharp, consistent prints and blurry, washed-out results. You don’t need a commercial facility to grasp the setup, but knowing what each piece of equipment does helps you ask better questions and set realistic expectations for your order.
The essential equipment list
Each component in a screen printing setup plays a specific role, and cutting corners on any one of them introduces problems further down the line. Below is a breakdown of the core equipment required to produce clean results:
| Equipment | Purpose |
|---|---|
| Aluminium screen frame | Holds the mesh taut and registers correctly on the press |
| Mesh screen (110-160 mesh count) | Controls ink flow; higher count for fine detail, lower for thick inks |
| Photosensitive emulsion | Coats the screen and hardens under UV light to form the stencil |
| UV exposure unit | Burns the design into the emulsion at the correct light intensity |
| Squeegee | Pulls ink across the screen and forces it through the open mesh |
| Plastisol or water-based ink | Sits on or soaks into the fabric depending on the ink type chosen |
| Screen printing press | Holds the shirt flat and aligns each colour pass accurately |
| Flash cure unit | Partially cures each ink layer between colour passes to prevent smearing |
| Conveyor dryer | Applies the final full cure to lock the ink permanently into the fabric |
Setting up your workspace and press
Registration is the single most critical part of press setup. Every screen must align precisely with the others so that each colour lands in exactly the right position when stacked. On a multi-colour job, even a half-millimetre shift between screens creates a blurry, misaligned print that looks unprofessional.
Getting registration right before you run a single production shirt saves you from scrapping an entire run after the fact.
Your workspace also needs controlled temperature and humidity during emulsion coating and exposure. High humidity causes emulsion to cure unevenly, which leads to pinholes and weak stencil edges. A clean, dry room with consistent lighting conditions gives you a stable foundation for every step that follows.
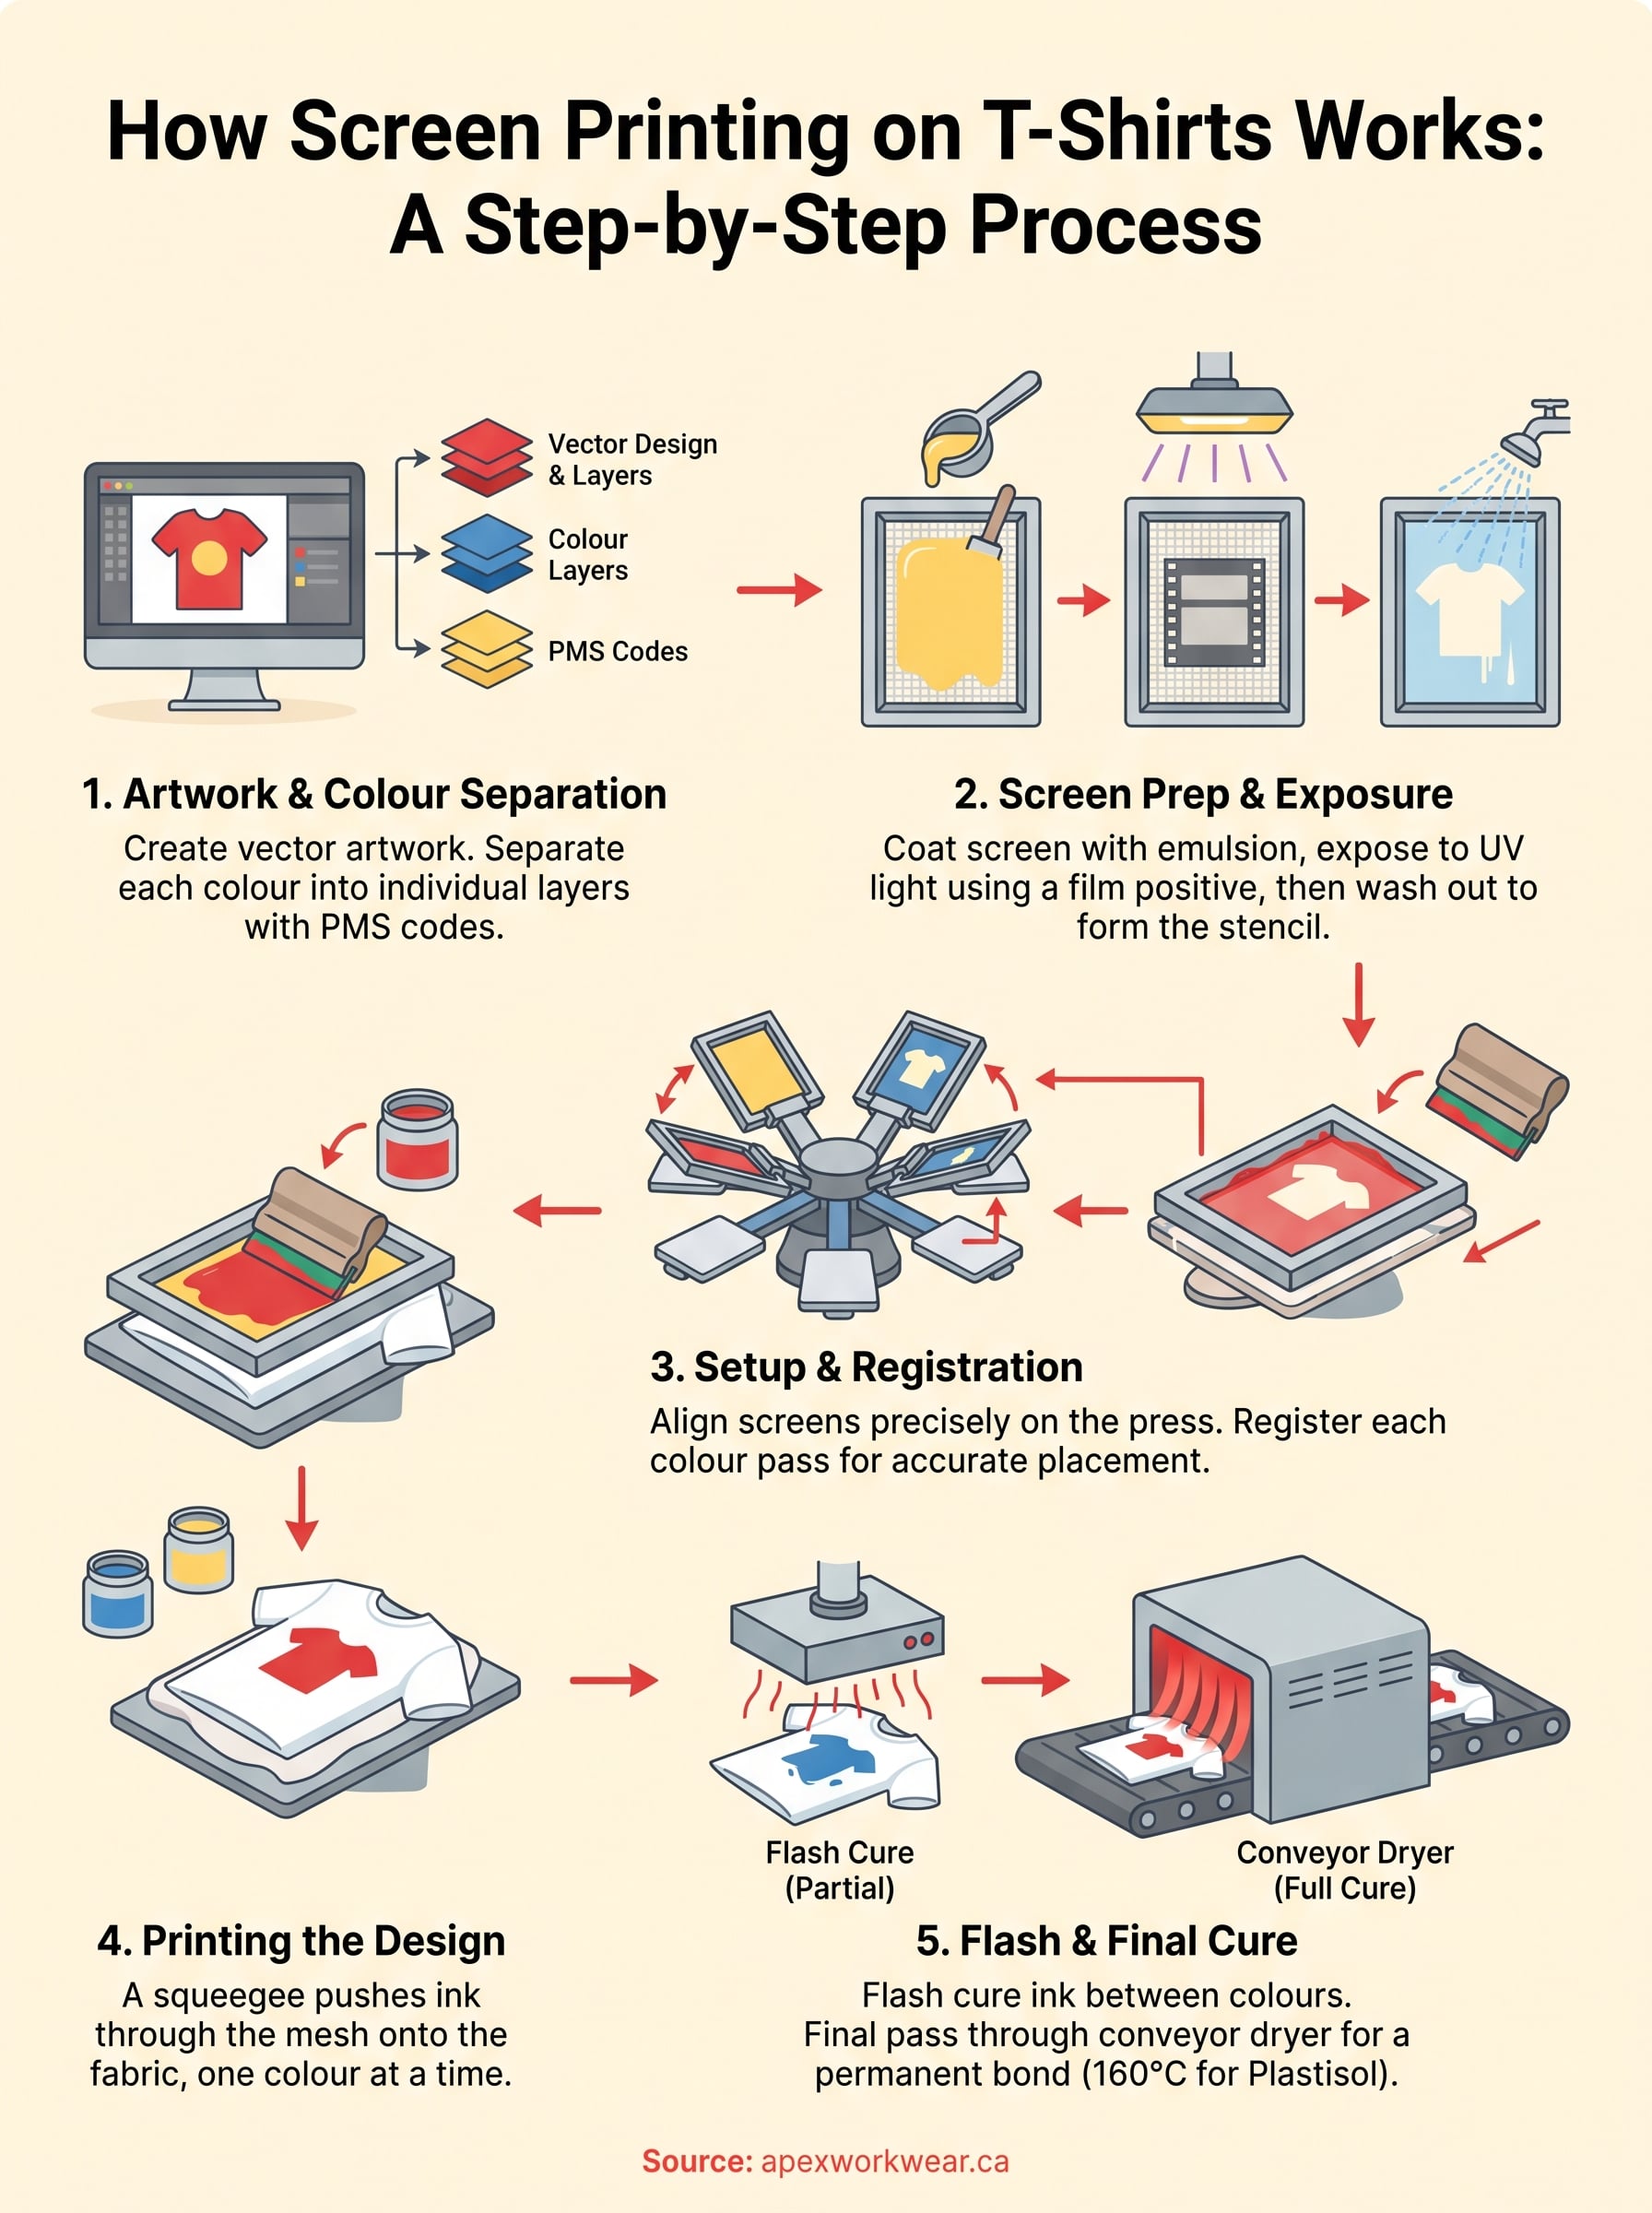
Step 1. Prepare artwork and colour separations
Good artwork preparation is what separates a clean final print from a job that needs reprinting. Before any screen gets coated or any ink gets mixed, your design file needs to be in the right format with the right colour structure. This is the foundation of how does screen printing work on t shirts, and skipping steps here creates problems that are expensive to fix later.
Set up your artwork file correctly
Your artwork file should always be submitted as a vector file, ideally in .AI or .EPS format. Vector files use mathematical paths rather than pixels, so your design scales to any size without losing sharpness. Raster files like JPEGs and PNGs lose quality when enlarged, which makes edges look jagged on the final printed garment. If you only have a raster file, a skilled designer can redraw it as a vector, but that adds time and cost to your project.
A 300 DPI minimum resolution is the standard floor for raster-based artwork, but a true vector file is always the better starting point for screen printing.
Colour values also need to be in the right format from the start. Use Pantone (PMS) colour codes rather than RGB or CMYK values, because screen printing inks are mixed to match specific Pantone references. RGB colours shift significantly when converted to physical ink on fabric, and those shifts are often impossible to correct once the screens are made. Providing exact Pantone codes gives your printer clear targets and reduces the risk of colour surprises on the finished shirt.
Separate each colour into its own layer
Colour separations are individual files or layers that isolate each colour in your design. Each separation becomes its own screen in the printing process, so a three-colour design produces three separate screens. Your artwork software, such as Adobe Illustrator, lets you assign each design element to its own layer and export them as individual spot colour channels for the printer to use directly.
Here is a checklist to confirm your artwork is separation-ready before you send it:
- All colours are on separate layers and labelled with PMS codes
- No unintended overlapping colour areas that would mix on press
- Black trapping or chokes are applied at 0.25pt to 0.5pt to prevent gaps between colours
- Text is converted to outlines so fonts do not shift between systems
- The file is saved in a print-ready vector format at the correct final output size
Step 2. Coat, expose and wash out the screen
This step is where your design physically becomes a stencil, and it’s one of the most technically demanding parts of understanding how does screen printing work on t shirts. Get the coating or exposure time wrong, and your stencil will either break down mid-run or fail to wash out cleanly, leaving you with a screen that produces blurry edges or fills in fine detail.
Apply emulsion to the screen
Photosensitive emulsion is a light-reactive liquid that you spread across both sides of your mesh screen using a metal or hard plastic scoop coater. You work in a yellow-lit or darkroom environment to prevent premature exposure, because standard white light contains UV frequencies that begin hardening the emulsion on contact. Apply one or two even coats on the print side and one coat on the squeegee side, then leave the screen to dry horizontally in a dark space at around 20 to 25 degrees Celsius. Uneven coating creates thin spots that tear during the print run, so a slow, steady pull with firm pressure gives you the most consistent coverage.
A properly coated and dried screen should feel smooth and uniform to the touch with no visible streaks or pooling at the edges.
Expose the screen under UV light
Once your screen is dry, you place your film positive flat against the emulsion side and load it into your UV exposure unit. The film positive is a printed transparency of your colour separation, and it blocks UV light from reaching the emulsion in the areas that form your design. The surrounding emulsion hardens fully under the light. Exposure times vary depending on your emulsion brand, mesh count, and the power of your UV unit, but most setups fall between 45 seconds and four minutes. Underexposure leaves soft emulsion that washes away in the wrong areas; overexposure burns in fine detail so it cannot wash out cleanly at all.
Wash out and inspect the stencil
After exposure, take your screen to a washout booth or sink and rinse both sides with a firm spray of cold water. The unexposed emulsion in your design areas softens and lifts away, leaving open mesh exactly where your artwork sits. Hold the screen up to a light source and check for clean, sharp edges with no pinholes in the hardened areas. Block any small pinholes with emulsion or screen filler before the screen goes anywhere near the press.
Step 3. Print, flash and cure the ink properly
This is the stage where understanding how does screen printing work on t shirts shifts from theory to production. Your screens are burned, your press is registered, and your shirts are loaded onto the platens. How you handle the actual print pass, the flash between colours, and the final cure determines whether your finished shirts look professional or end up in the reject pile.
Run the first colour on press
You start by flooding the screen with ink before the first shirt, which fills the open mesh and ensures consistent coverage from the very first pull. Place your shirt flat on the platen, lower the screen into contact position, and pull the squeegee across the screen in one firm, even stroke at a 45-degree angle. Apply enough downward pressure to force the ink through the mesh cleanly, but avoid excess pressure that distorts the mesh or pushes ink under the stencil edges. Two passes are sometimes needed on darker fabrics or when using a thicker ink deposit, but a well-prepared screen should print cleanly in one stroke on most jobs.
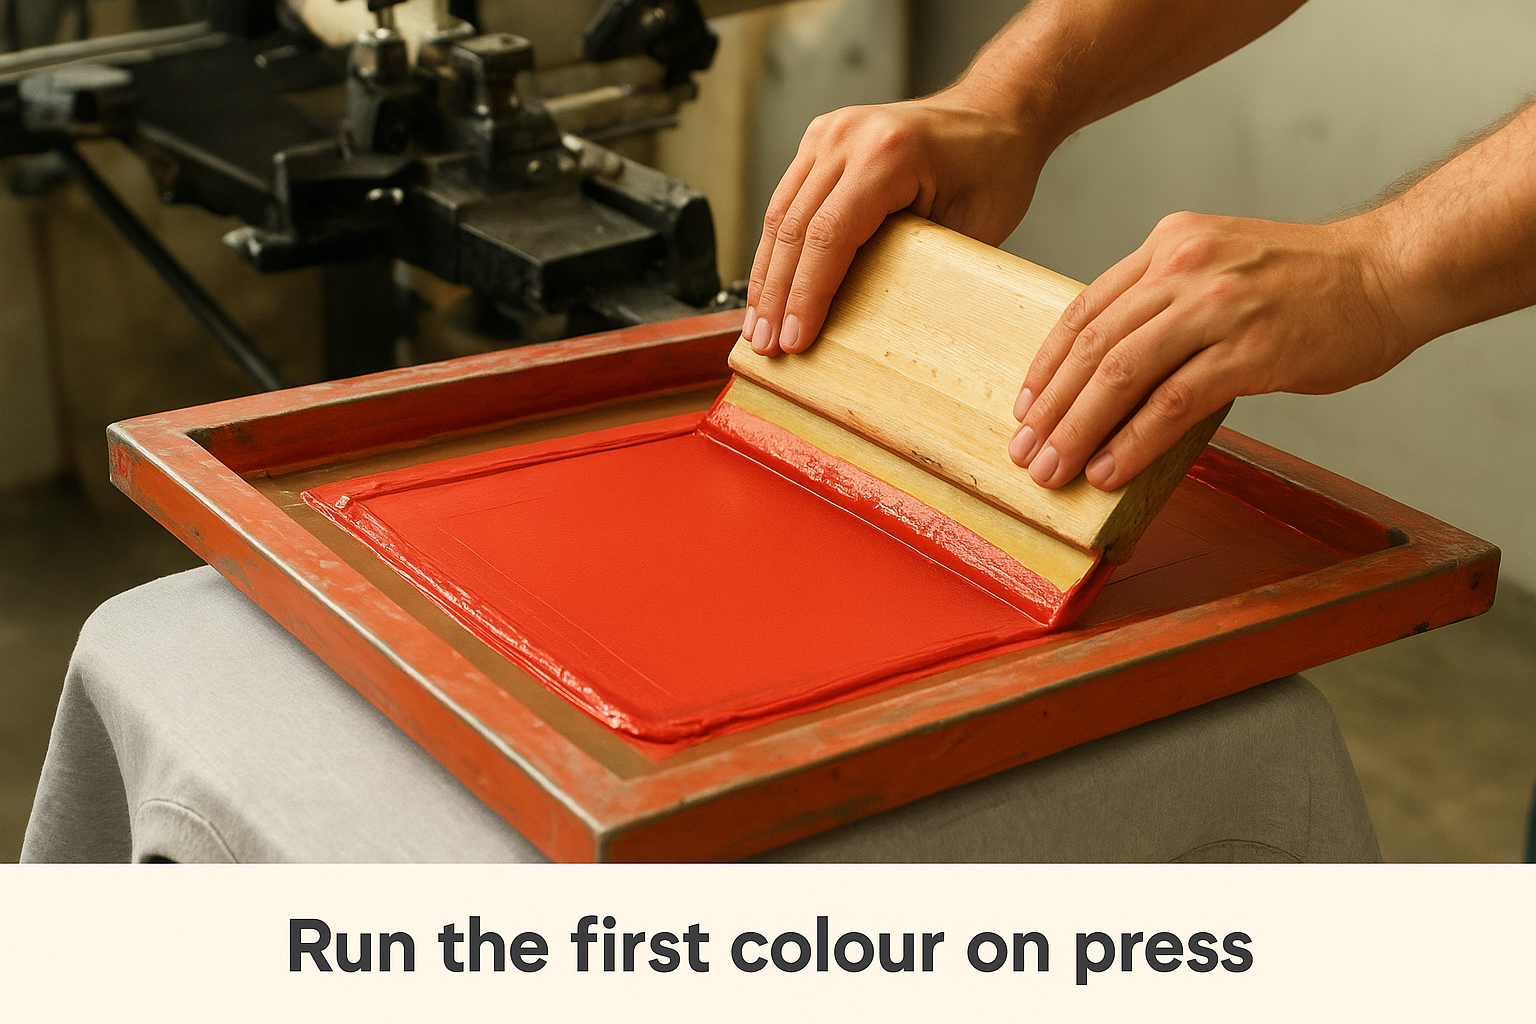
Consistent squeegee pressure and angle across every single shirt is what keeps colour density uniform from the first piece to the last.
Flash cure between colours
Flash curing is a short burst of infrared heat applied to the printed ink layer before you load the next screen. A flash cure unit sits on one of the press arms and heats the ink to roughly 120 degrees Celsius for five to ten seconds, which gels the surface without fully curing it. This partial cure prevents wet ink from transferring onto the underside of the next screen, which would contaminate subsequent colour passes and ruin registration. You need to flash between every colour layer on most multi-colour jobs, and always after printing a white underbase on dark garments.
Final cure in the conveyor dryer
Once all colour layers are printed, every shirt must pass through a conveyor dryer at a consistent temperature to achieve a full cure. Plastisol ink, the most common type used in commercial screen printing, requires the ink to reach an internal temperature of 160 degrees Celsius for the polymer particles to fully fuse with the fabric fibres. Undercured prints feel tacky and crack after the first wash. Run a wash test on a sample shirt before committing your full production run to the dryer settings to confirm the cure is holding correctly.
- Plastisol full cure temp: 160°C internal ink temperature
- Water-based ink cure temp: 150 to 165°C depending on brand
- Dwell time in dryer: typically 60 to 90 seconds at correct belt speed
- Test method: stretch the printed area firmly after washing; cracking indicates undercure
Fix common problems and choose the right method
Even when you follow every step correctly, print defects can still appear during a production run. Knowing how to identify the cause quickly and fix it on the spot prevents you from scrapping shirts and losing time. Understanding how does screen printing work on t shirts also means knowing what goes wrong and why.
Diagnose and fix the most common print defects
Most print problems trace back to one of three causes: emulsion failure, ink consistency, or press registration. The table below maps the most common defects to their likely causes and the correct fix.
| Defect | Likely Cause | Fix |
|---|---|---|
| Blurry or fuzzy edges | Screen not in firm contact with fabric | Increase off-contact distance slightly and re-register |
| Ink bleeding under design | Too much squeegee pressure | Reduce pressure and confirm mesh tension is consistent |
| Pinholes in solid areas | Emulsion coating was too thin | Recoat the screen with an additional emulsion layer |
| Colour fading after first wash | Undercured ink | Increase dryer temperature or reduce belt speed |
| Smearing between colours | Insufficient flash cure time | Add more dwell time under the flash unit before next pass |
| Cracked ink after washing | Ink deposit too thick | Reduce squeegee passes and confirm full cure temperature |
Catching a defect on the first three shirts and correcting it immediately costs far less than discovering the issue at shirt number 200.
Match the method to your actual project
Screen printing is not always the strongest choice for every job, and picking the wrong method costs you money and produces disappointing results. Use this checklist to confirm screen printing fits your specific project before you commit to it:
- Your design uses six or fewer solid spot colours
- Your order quantity is 12 pieces or more
- Your garments are cotton or cotton-poly blend
- Your design does not require photographic gradients or full-colour photography
- Your shirts need to withstand heavy, regular washing
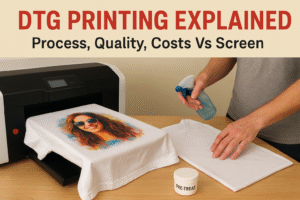
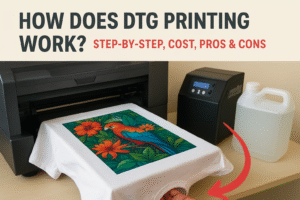
If your project includes a full-colour photograph, a single one-off shirt, or a design with fine photographic detail, direct-to-garment printing is the more practical route. DTG applies ink directly to the fabric using a modified inkjet process, so it handles colour complexity with no screen setup cost. For large runs of simple, bold designs where cost per unit and durability matter most, screen printing remains the clear winner every time.
Where to go from here
Now you know how does screen printing work on t shirts from start to finish, covering artwork prep, screen exposure, ink curing, and the most common defects you might encounter along the way. Each step builds on the one before it, and understanding the full sequence puts you in a much stronger position when you place your next order. You can now ask the right questions, submit print-ready files, and know exactly what your printer is doing with your design.
Putting that knowledge to use is the next step. Whether you need branded workwear for your team, event merchandise, or promotional shirts for your business, the process works the same way and the results speak for themselves. If you are ready to get a quote or want expert guidance on your specific project, visit Apex Workwear and get your estimate within 24 hours.